Tag: Biscuits

  • Date-Filled Sandwich Biscuits Recipe

    Date-Filled Sandwich Biscuits Recipe

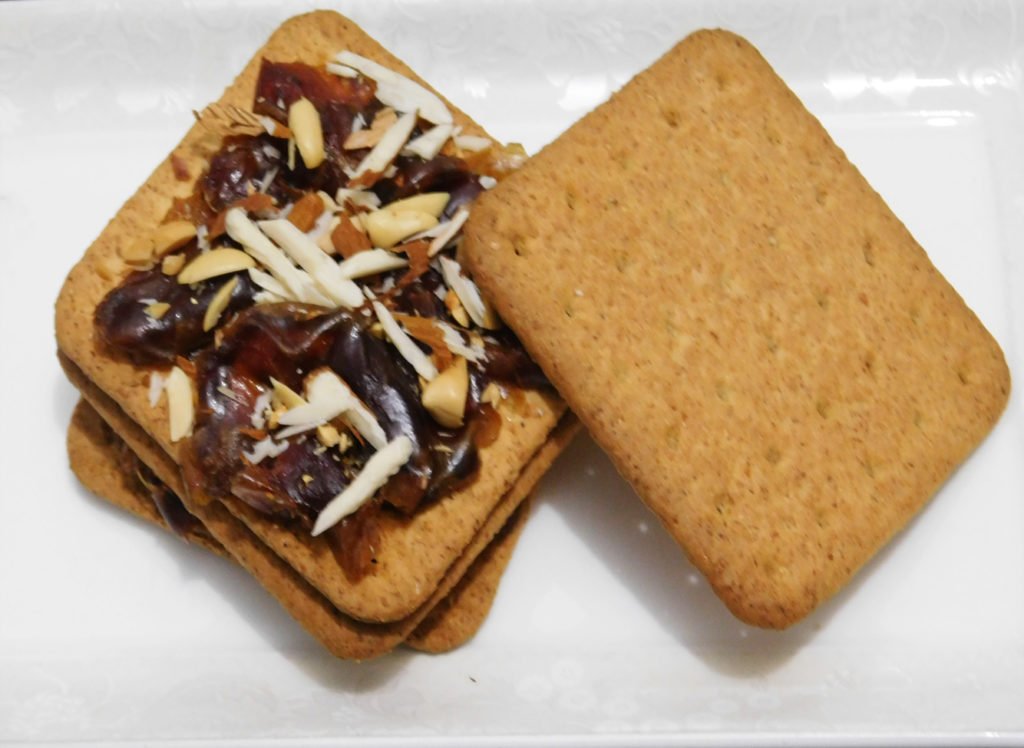
    Easy and impressive, these sandwich biscuits embellish store-bought whole wheat biscuits with a decadent three ingredient date-and-nutty spread that has a honey like sweetness and caramel overtones. Heavenly Delicious !

    A sticky and sweet date and nutty filling spread between Whole Wheat Fiber Rich Biscuits.

    Almost everyone enjoys having evening or morning tea with some light snacks. And if are a tea lover like me, cookies or biscuits would probably be your favorite tea companion. No matter which hot beverage you enjoy everyday, switching to healthy snacks is always a good idea for your health. I love digestive biscuits, but thanks to my sugar craving that persuaded me to turn these whole wheat slices into a delicious healthy treat to satisfy my sweet tooth.

    Why These Date-Filled Sandwich Biscuits are a smart choice

    • When you substitute dates for table sugar, you get a bunch of other nutrients along with your sugar! Sugar is just food that’s been stripped of all fiber, vitamins, and minerals, so why not make your treats sweet with something that actually provides all of those? Dates are high in calories, but unlike sugar, the calories obtained from dates come with a lot of nutritional properties.
    • Dates are rich in potassium, iron and other beneficial plant compounds. The high soluble fiber content helps in fighting off sugar cravings and stimulate the growth of healthy bacteria in the intestines. I prefer to use dates in dessert as a replacement for sugar.
    Date-Filled Sandwich Biscuits Recipe

    Enjoy the sweet, delicious taste of dates in these double-layered sandwich biscuits. This Date-Filled Sandwich Biscuits Recipe is very easy to follow, and the sandwich are a genuine treat that is hard to resist. These wholesome, healthy sandwich biscuits will quickly become one of your favorites. I use the word wholesome because they are made with whole wheat biscuits. Whole wheat provides more fiber. You will love the simplicity and the nutty flavor of these Hearty Date-Filled Sandwich Biscuits.

    Date-Filled Sandwich Biscuits Recipe

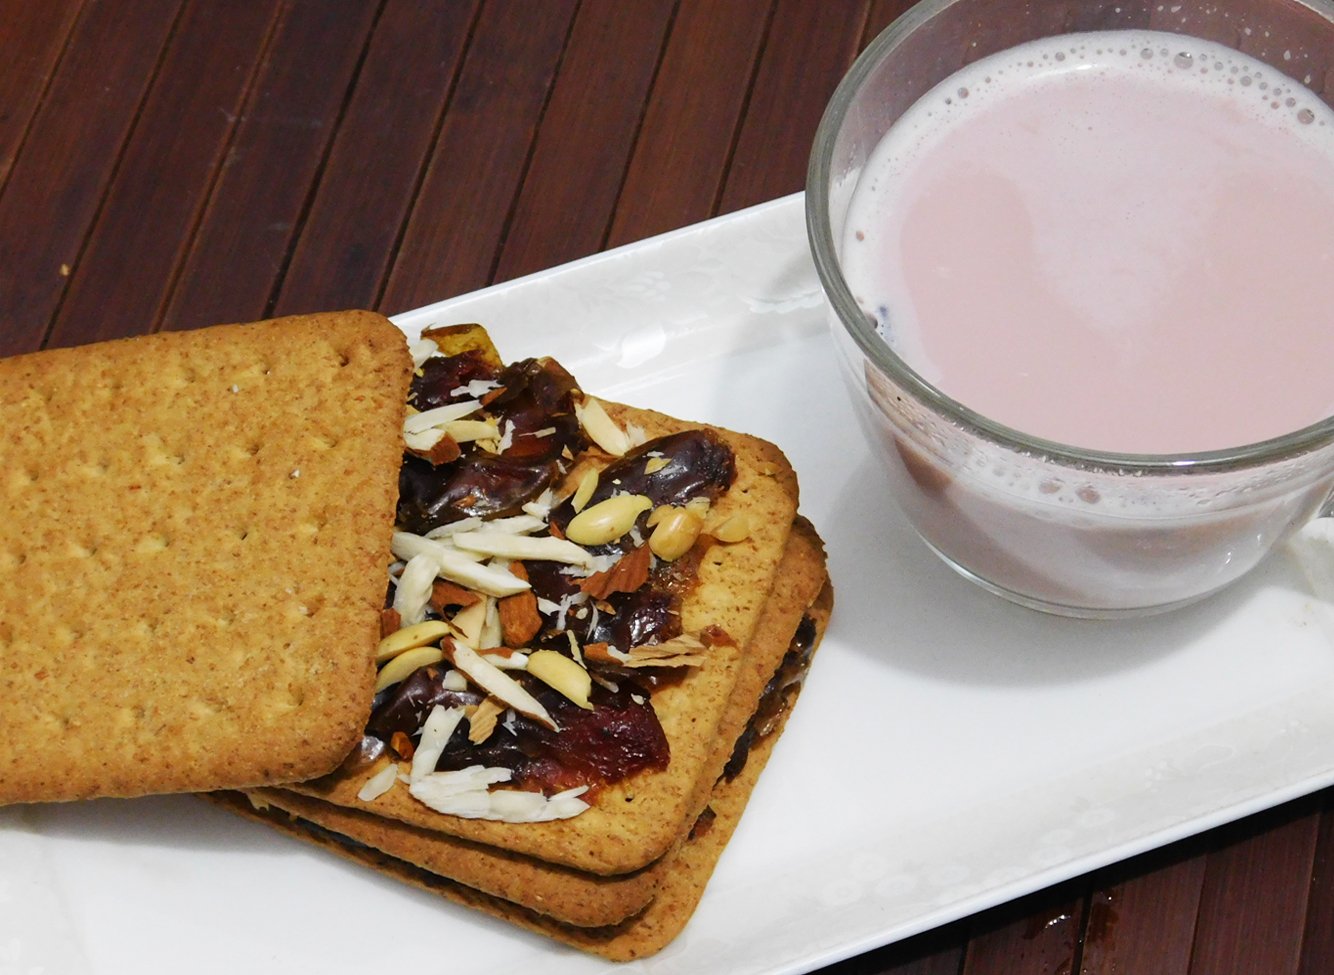
    They are perfectly sweetened with dates and make a great breakfast sandwich. As an added bonus, these healthy sandwich biscuits hold up perfectly when dunked in your hot beverage of choice. I enjoyed it with Kashmiri Green Tea. I know for sure that I’ll be experimenting more with dates in the future, but for now the best way I can think to eat them is squished between two Whole Wheat Sandwich Biscuits. Crunchy, soft, chewy and sweet. And they’re insanely good.

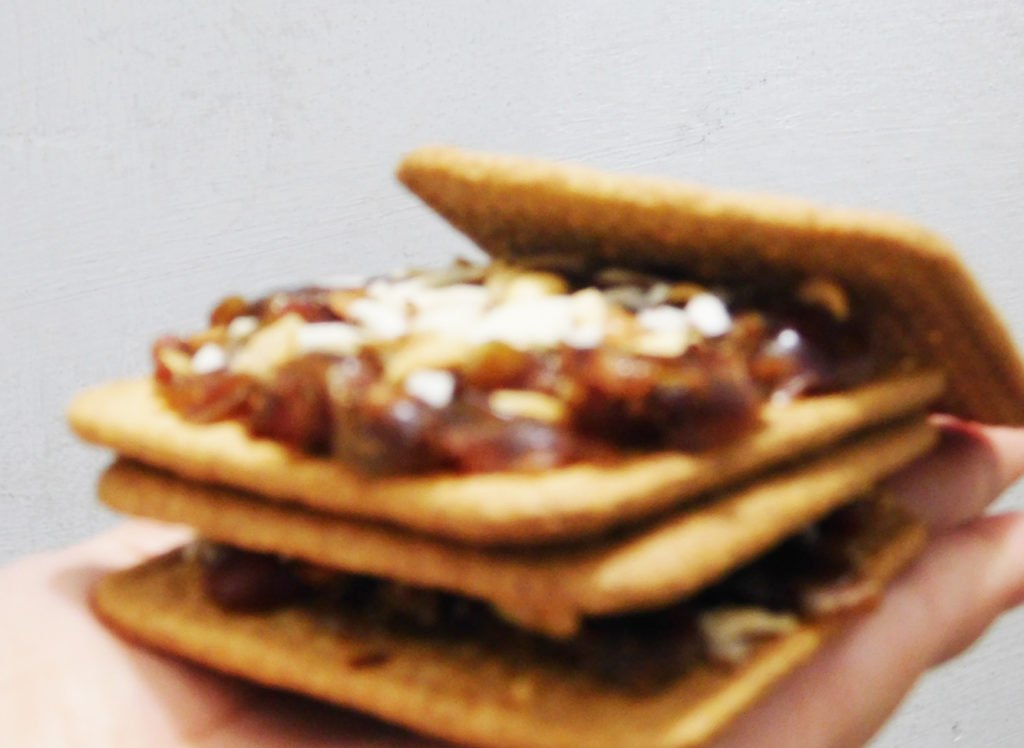
    Crunchy, soft, chewy Date-Filled Sandwich Biscuits. And they’re insanely good.

    Ingredients in Date-Filled Sandwich Biscuits Recipe?

    All you need Whole Wheat Pure Fiber Slices, pitted Medjool dates and nuts for topping. Surprisingly simple ?

    How to Make this Date-Filled Sandwich Biscuits:

    As I mentioned, these Date Filled Sandwich Biscuits are simple to make and they come together in no time at all.

    To make this sandwich biscuits, simply:

    1. First of all, smashed the dates with a fork. Medjool dates have a rich, almost caramel-like taste and a soft, chewy texture whereas regular dates and are easy to spread.
    2. Then arrange 4 whole wheat biscuits on a plate or sheet.
    3. Spread 3 smashed dates on each biscuit; sprinkle peanuts, almonds and pistachios and cover the sandwiches with remaining biscuits and enjoy 🙂
    Date-Filled Sandwich Biscuits Recipe

    Bismillah let’s get started.
    Check it out The Date-Filled Sandwich Biscuits and printable version here!!

    Date-Filled Sandwich Biscuits Recipe

    Enjoy the sweet, delicious taste of dates in these double-layered sandwich biscuits. This Date-Filled Sandwich Biscuits Recipe is very easy to follow, and the sandwich are a genuine treat that is hard to resist.
    Keyword biscuits, cookies, dates, dessert, healthy, kids friendly, Quick and Easy, Ramadan, sandwich, snack, sweet
    Prep Time 5 minutes
    Total Time 5 minutes
    Servings 4
    Author Bushra Waheed

    Ingredients

    • 8 Whole Wheat Pure Fiber Slices
    • 12 Medjool dates pitted
    • 2 tbsp chopped peanuts
    • 2 tbsp chopped almonds
    • 2 tbsp chopped pistachios

    Instructions

    • All you need to make these sandwich biscuits are dates, whole wheat slices or any cookies, nuts and a fork!
    • Smash dates with a fork.
    • Medjool dates have a rich, almost caramel-like taste and a soft, chewy texture whereas regular dates and are easy to spread.
    • Set aside.
    • Place 4 whole wheat biscuits on a plate or sheet.
    • Spread 3 smashed dates on each biscuit; sprinkle peanuts, almonds and pistachios and cover the sandwiches with remaining biscuits.
    • Serve immediately and enjoy 🙂

    Want more Healthy Snack Inspiration? 

    Here are some other healthy recipes on my blog:

    Hope that you all enjoy this one as much as I have!  Enjoy!
    Date-Filled Sandwich Biscuits Recipe

    Pin it For Later

    Enjoy the sweet, delicious taste of dates in these double-layered sandwich biscuits. This Date-Filled Sandwich Biscuits Recipe is very easy to follow, and the sandwich are a genuine treat that is hard to resist

    If you make this recipe, please let me know! Leave a comment, rate it, or snap a photo and tag it with #recipestable on Instagram!  I’d love to see your creations!
  • Upgrade Your Tea Time: Make Bakery-Style Cake Rusks!

    Cake Rusk

    A delicious double baked cake bar for breakfast or teatime. Cake Rusk are light golden brown and crispy in taste and texture. A quick but perfect breakfast with Cake Rusk, goes well with tea or coffee. Follow my Cake rusk recipe to make these cake rusk at home. Enjoy!!

    Check it out the Cake Rusk recipe here!!

    Cake Rusk recipe
    Photo: Cake Rusk Recipe

    [divider]

    [one_fourth]Prep Time: 2 hours[/one_fourth] [one_fourth]Cook Time: 30 minutes[/one_fourth] [one_fourth]Servings: 20  [/one_fourth] [one_fourth_last]Difficulty Level: Difficult [/one_fourth_last]

    [divider]

    [tabs type=”horizontal”] [tabs_head] [tab_title]Ingredients[/tab_title] [tab_title]Nutrition[/tab_title] [/tabs_head] [tab]

    • 1 cup all-purpose flour (120gm)
      1 tsp. baking powder
      pinch of salt
      1/2 cup butter or margarine, at room temperature (113gm)
      3 eggs, at room temperature
      3/4 cup finely grinded or caster sugar (150gm)
      1 tsp. vanilla essence
      a few drops of yellow color
       

    [/tab] [tab]Yield: 6 dozen

    Nutritional information is not yet available. [/tab] [/tabs]

    Directions:
    [tabs type=”horizontal”] [tabs_head] [tab_title]Step by Step Method[/tab_title] [tab_title] Expert Tip’s[/tab_title][tab_title]Serving Suggestions[/tab_title][/tabs_head] [tab]

    Step 1

    Take a glass bowl, dissolve yeast in the lukewarm water.

    Step 2

    Add 1 teaspoon of sugar in the yeast and keep aside.

    Step 3

    In another glass bowl, mix together the flour salt and cardamom seeds

    Step 4

    Then add the oil. Add the 3/4 cup sugar.

    Step 5

    Stir in the eggs. Add 1 cup of warm water

    Note: You may add a little first and then add as per need later.

    Step 6

    Add the dissolved yeast which you prepared in step 2.

    Step 7

    Knead this mixture thoroughly

    Note: Add warm water as needed to adjust the consistency of the dough)

    Step 8

    Smear the dough with some oil and keep aside in a warm place.

    Step 9

    The dough will rise in about 2 hours.

    Step 10

    Spread the dough in and cut 1 inch long , 1/2 inch wide and 1/2 inch thick pieces.

    Step 11

    Take a greased oven tray and set the pieces in the tray.

    Step 12

    Preheat an oven to 200 degree C.

    Step 13

    Bake in the preheated oven for 25-30 minutes or and until dry and light brown. Delicious Cake Rusk is ready to serve. ENJOY!!

    [/tab]

    [tab]

    1. If they still don’t feel as crispy as you would want, after they have cooled completely, turn the oven on.
    2. Let it heat to 180 degree C.
    3. Then turn it off and put the rusks on a baking sheet and put it back into the oven.
    4. Close the oven door and let them stay in there for about half an hour with the oven off.

    [/tab] [tab]

    • Serve with tea or a glass of milk.

    [/tab] [/tabs]

    If you like  Cake Rusk recipe and make it then let me know your feedback by commenting below.

  • Nankhatai Recipe (Eggless Buttery Cookies)

    Light and flaky shortbread, flavored with cardamom and vanilla will just melt away in your mouth!

    Nankhatai recipe (Eggless Buttery Cookies)
    Nankhatai (Eggless Buttery Cookies)

    Nankhatai (Eggless Buttery Cookies)

    Nan Khatai is a popular sweet snack which is equally liked by kids as well as elders. I am a huge fan of these nan khatais.  It’s the NanKhatai recipe you would want when you suddenly crave for cookies. 

    Does this recipe rings a bell? Khasta nankhatais from your favorite bakery shop – so what does Khasta mean? Khasta means light and flaky and Nankhatai is referred to as a shortbread or biscuits. This is super easy fail proof recipe that has been tested and tried many times in my kitchen.

    nankhatai2

    Nan Khatai are simple to make if you ask me.Nothing complicated and no fancy ingredients. No baking soda and baking powder added in this recipe. Does this make you walk away from the recipe? Please wait and learn the secret to these khasta nankhatai recipe. Secret to these flaky nankhatai is the amount of ghee/butter that goes in them. No water or milk is added to this recipe.

    nankhatai4

    Bake these goodies for 12- 15 minutes. Depending on the oven, cooking time may vary. Unlike other cookies, nankhatais will not brown up and when taken out of the oven they will still be soft and gooey.

    nankhatai3

    No worries, allow them to sit for 5-10 minutes on the counter and they will become firm. When completely cooled, store in an airtight container and enjoy with your evening tea!!

    nankhatai1

    This Nan khatai Cookies Recipe especially for all those who are new in baking. These cookies prepare easily and serve with afternoon tea. Do try it!!

    Check it out the Nankhatai (Eggless Buttery Cookies Recipe and printable version here!!

    Nankhatai (Eggless Buttery Cookies)

    Light and flaky Indian shortbread, flavored with cardamom and vanilla will just melt away in your mouth!
    Prep Time 20 minutes
    Cook Time 15 minutes
    Total Time 35 minutes
    Servings 18
    Author Bushrah | Recipestable

    Ingredients

    • 1-1/4 cup plain flour
    • 1/4 cup semolina fine sooji
    • 3/4 cup butter or ghee should be at room temperature not melted
    • 1/2 cup +1 tablespoon superfine Sugar
    • 1 teaspoon Vanilla
    • a pinch of Cardamom Powder
    • few almonds pistachios and cashew nuts, for sprinkling

    Instructions

    • Assemble all the ingredients.
    • Cream the butter and sugar till it turns fluffy.
    • Stir in the vanilla, flour and sooji. Make smooth dough of this mixture.
    • Stir in the vanilla and cardamom powder.
    • Knead a soft dough. Butter or ghee is the secret to light/flaky (khasta) nankhatai’s.
    • Roll the dough into a big circle.
    • Roll out medium sized balls and put a almond or cashew nut on the top of each piece.
    • (One way is to use a cookie cutter and cut out the nan khatais.
    • Other way and the original way to shape nan khatais is to take a small dough ball in your hand.)
    • Preheat oven at 150 degree C.
    • Place nankhatai cookies on a greased baking tray.
    • Bake in the preheated oven for 12-15 minutes.
    • Remove from oven and place on the counter and allow them to cool.
    • They will still be soft when you remove the tray from oven.
    • NanKhatai is ready to serve. ENJOY!!

    Notes

    Recipe Note’s:
    Once cooled store in an air tight container. These cookies stays good for about 2 weeks.
    Serving Suggestions:
    Serve with tea.
    Put your own spin on it. And lemme know how it turns out by sharing a picture  on Instagram, Facebook (Recipestable) or Twitter with this hashtag #Recipestable so I can see how lovely yours turn out.


    Happy Baking!!

    If you like this post, Please Subscribe to my blog and let me know your feedback by commenting below.. I have lots more recipes to share with you.

  • Sour Cream Biscuits Recipe

    Sour Cream has a wonderful way of helping produce tender baked goods, such as these delicious biscuits. Make these light and fluffy biscuits plain, sweet, or savory with or without a variety of toppings. These Sour Cream biscuits are some of the best you’ll ever eat. Yummy!Check it out Sour Cream Biscuits recipe here.

    [one_third] Prep Time: 20 minutes[/one_third] [one_third]Cook Time: 15 minutes[/one_third] [one_third_last] Servings: 18 [/one_third_last]

    [review]

    [tabs type=”horizontal”] [tabs_head] [tab_title]Ingredients[/tab_title] [tab_title]Nutrition[/tab_title] [/tabs_head] [tab]

    • 4 cups biscuit mix
    • 1 cup lemon-lime soda
    • 1 cup sour cream

    For Orange Honey Butter:

    • 1/2 cup honey
    • 1/2 cup butter, softened
    • 2 tsp grated orange peel

    [/tab] [tab]Yield:18 servings

    Nutritional information is not yet available. [/tab] [/tabs]

    Directions:
    [tabs type=”horizontal”] [tabs_head] [tab_title]Step by Step Method[/tab_title] [tab_title]Serving Suggestions[/tab_title][/tabs_head] [tab]

    Step 1

    In a large bowl, add biscuit mix. In a small bowl, combine together sour cream and lemon-lime soda. Stir into biscuit mix just until combined. Turn onto a floured surface; knead the dough for 4-5 times. Then roll to 1/2-inch. thickness and cut with a 2-1/2-inch. cookies cutter.

    Step 2

    Place biscuits on a greased cookie sheet. Bake at 400° for 20 minutes or until golden brown.

    Step 3

    In a small mixing bowl, combine the butter, honey and orange peel. Beat until fluffy.

    Step 4

    Pour honey mixture over the warm biscuits. Allow to cool for 15 minutes or until set. Sour Cream Biscuits are ready to serve. Enjoy!!
    [/tab] [tab]

    • Serve with tea.

    [/tab] [/tabs]

  • Mini Cheese Biscuits Recipe

    Quick and easy biscuits with biscuit mix, milk, butter and lots of cheese. Surprise your family by baking a batch of these restaurant-style biscuits! Perfect for a picnic or dinner party. Check it out Mini Cheese Biscuits recipe here:

    [one_third] Prep Time: 15 minutes[/one_third] [one_third]Cook Time: 10 minutes[/one_third] [one_third_last] Servings: 12 [/one_third_last]

    [review]

    [tabs type=”horizontal”] [tabs_head] [tab_title]Ingredients[/tab_title] [tab_title]Nutrition[/tab_title] [/tabs_head] [tab]

    • 2 cups biscuit mix
    • 1/2 cup shredded Cheddar cheese
    • 2/3 cup milk
    • 2 garlic cloves, minced
    • 2 tbsp butter or margarine, melted
    • 1/4 tsp garlic powder

    [/tab] [tab]

    Yield: 12 servings

    Nutritional information is not yet available. [/tab] [/tabs]

    Directions:
    [tabs type=”horizontal”] [tabs_head] [tab_title]Step by Step Method[/tab_title] [tab_title]Serving Suggestions[/tab_title][/tabs_head] [tab]

    Step 1

    Place biscuit mix, cheese and garlic in a large bowl. Stir in milk just until moistened.

    Step 2

    Lightly grease a baking sheet with non-stick cooking spray. Drop by a tablespoonfuls onto the baking sheet.

    Step 3

    Bake at 450° for 10 minutes or until golden brown.

    Step 4

    Meanwhile, in a small bowl, combine butter and garlic powder. Brush butter mixture over the biscuits. Mini Cheese Biscuits are ready to serve. ENJOY!!

    [/tab] [tab]

    • Serve with tea

    [/tab] [/tabs]

  • Teatime Treats: Quick & Easy Pineapple Biscuits Recipe

    This delicious pineapple biscuits has just 4 ingredients and is so easy to make. Even your children can help with this on too. Yummy! Check it out Pineapple Biscuits recipe here:

    [one_third] Prep Time: 15 minutes[/one_third] [one_third]Cook Time: 10 minutes[/one_third] [one_third_last] Servings: 10 [/one_third_last]

    • 1 (12 ounce) can refrigerated biscuit dough
    • 1 (8 ounce) can crushed pineapple, drained
    • 1/2 cup packed brown sugar
    • 1/4 cup butter or margarine, softened
    • 1 tsp ground cinnamon

    [/tab] [tab]Yield: 10  servings

    Nutritional information is not yet available. [/tab] [/tabs]

    Directions:
    [tabs type=”horizontal”] [tabs_head] [tab_title]Step by Step Method[/tab_title] [tab_title]Serving Suggestions[/tab_title][/tabs_head] [tab]

    Step 1

    In a medium bowl, cream butter with brown sugar. Stir in the cinnamon and pineapple. Spoon into 10 greased muffin cups.

    Step 2

    Place one biscuit in each prepared muffin cup. Bake at 425° F for 8-10 minutes or until golden brown. Let it cool for 5 minutes. Pineapple Biscuits are ready to serve. ENJOY!!

    [/tab] [tab]

    • Serve with tea or coffee.

    [/tab] [/tabs]