This homemade Lamb Burgers recipe is so quick and simple to make, with just few ingredients. You won’t want to buy ready-made ever again!
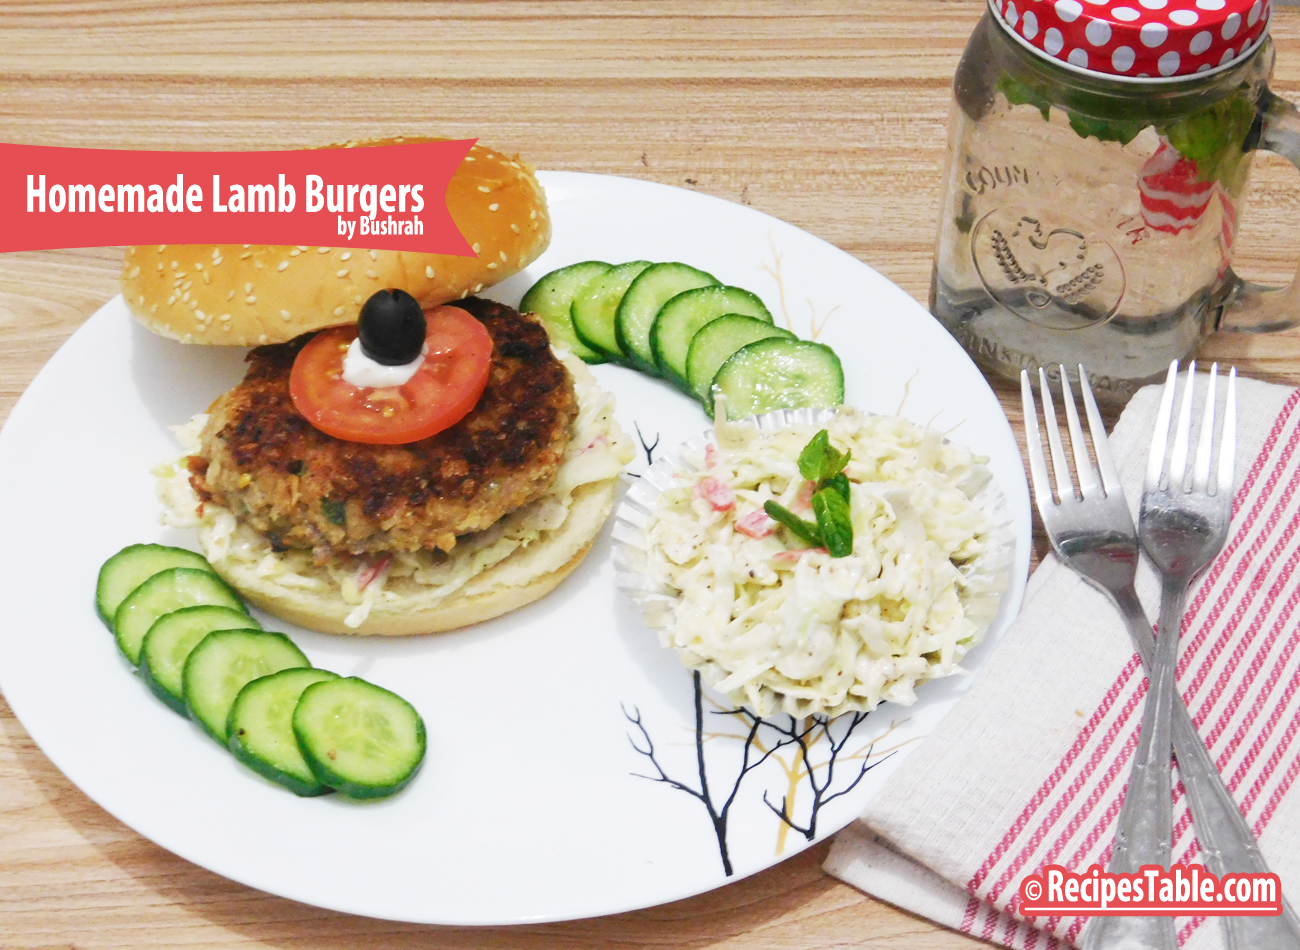
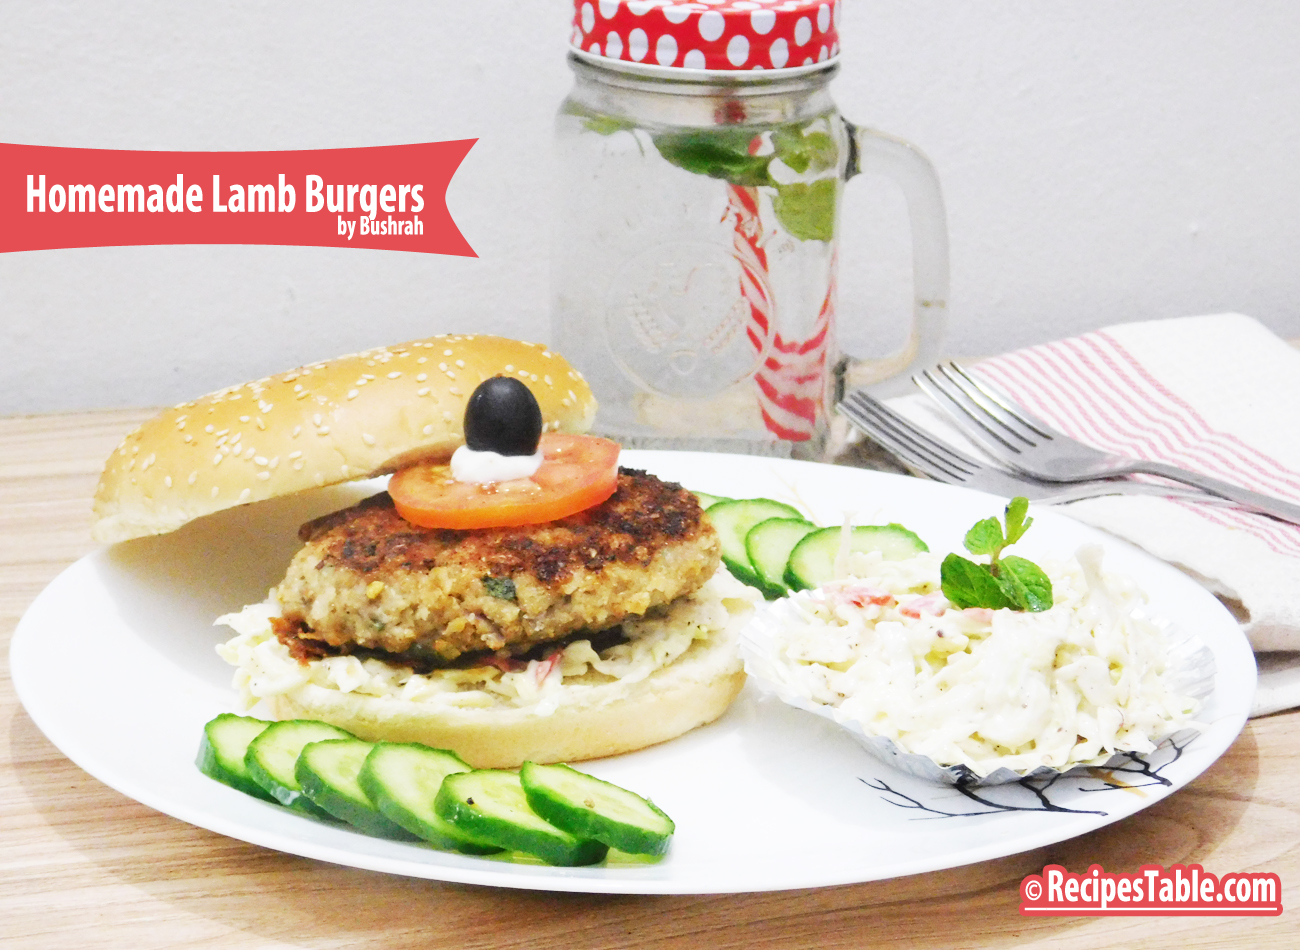
Homemade Lamb Burgers
Lamb burgers are a wonderful alternative to beef burgers and are incredibly easy to make and the spicy rub gives full-on Asian flavour. They can be served with homemade coleslaw, oven-baked Potato Wedges or with a delicious Homemade Hummus.

The lamb, however lean, is rich, packed with protein and nutrients and earthy in flavor. Lamb and herbs are both champions of spring and when combined into a burger and met with a hot grill or pan it marks the intersection of spring and summer.

The burger is simply adorned with creamy cabbage coleslaw, and a tomato seared over the grill to encourage sweetness and to create a texture that melts into the burger. This is the sort of burger that calls for a soft bun; a brioche or potato roll are both great contenders.
These burgers do not fall apart. However, if you want them more dense and hard you can use organic cornstarch. Buy organic to stay away from nasty GMOs.

This recipe is really quite simple and can easily be doubled or tripled to feed a crowd. Use whatever mix of fresh herbs you have on hand keeping to mostly the light leafy ones like mint (lamb LOVES mint) parsley, chives, dill, basil, etc. The lamb mince gives these burgers an excellent texture, but the recipe works equally well with minced beef or chicken, turkey.

It actually doubles as the perfect party food because you can prepare and cook the burgers and coleslaw in advance and just heat them up and prepare the burger buns when needed so you spend more time with guests rather than in the kitchen. IMPRESS guests at your barbecue with these succulent Homemade Lamb burgers, also perfect for simple suppers.

Some Tips to make The Tasty Homemade Lamb Burgers
I’ve added the full recipe below. However here are a few tips…
- Keep it simple – There are lots of recipes out there that add all sorts to the burgers. In my opinion it’s just not necessary. I use just few simple ingredients – lamb mince, herb seasoning (my fav seasoning), little cheese, egg and bread crumbs.
- That said, once you can make a great basic burger than why not start having a play with flavorings, you can add all sorts of herbs and spices. I even sometimes go for a hidden cheesy center!
- Don’t go too lean with your mince. There’s a bit of olive oil added to meat to tenderize and add in a bit of fat. I love the how lean lamb is but for the grill a bit of fat helps to ensure the burgers stay tender and juicy.
- In all my other recipes with mince I use extra lean so cut down on the fat. However, when you’re making something so simple a little extra fat tastes better.
- The better the mince the better the burger. These burgers are simple lamb mince with herbs to enhance the flavour. If you buy rubbish mince then there’s no disguising it with other ingredients.
- Don’t play around with it while it’s cooking. The more you play with it, the more of the juices will flow out and it’ll make your burger drier.
Check it out the Homemade Lamb Burger with Coleslaw recipe and printable version here!!

Homemade Lamb Burger Recipe
Ingredients
For The Burger Patties
- 500 gm minced lamb
- 1 small onion minced
- 1 egg lightly beaten
- 1 tablespoon tomato ketchup
- 2 tablspoon choped mint leaves
- 2 tablespoon chopped freshly parlsey
- 1/4 cup grated cheddar cheese optional
- 1/4 cup bread crumbs
- a pinch Black Pepper
- 1 teaspoon dried basil
- 1/2 teaspoon crushed red chili
- salt to taste
- 2 teaspoon olive oil
For The Burger
- 4 burger buns
- 1 cup coleslaw salad
- few tomato slices
- salad leaves
For Coleslaw
- 1 cup shredded cabbage
- 1/2 cup mayonnaise
- 1 small carrot grated
- 1 teaspoon white sugar
- a pinch of salt and pepper
Instructions
To make Coleslaw
- Make coleslaw by combining all the ingredients in a mixing bowl.
- Mix until well combined.
- Top with fresh mint leaves to add a delicious flavour to your lamb burgers.
To Make Lamb Burgers
- Preheat the oven to 200 degree C.
- Lightly grease a baking tray with olive oil.
- For the dry rub, pound all the ingredients in a pestle and mortar until combined.
- Take it out in a mixing bowl and divide the minced mixture into 4 pieces.
- Pat each piece into a ball then squash into a burger, about 1.5 cm thick.
- Place the burgers on the greased baking tray. Drizzle some olive oil over the burger patties and cook in the oven for 20 to 30 minutes, depending on how well you like your burgers done.
- You can cook burgers on your barbecue grill or in a griddle pan for 6 to 7 minutes each side, or until done to your liking.
- Don’t worry if you think they look burnt, that’s just a combination of the spices, the caramelising lamb fat and the smoke.
- When the burgers are nearly ready, toast the buns on the side of the barbecue or griddle pan.
- To serve, spread some coleslaw on the toasted buns, top with the burger patties, tomato and olives and squash them into the buns. Enjoy!!
Notes
Serve this really tasty, easy homemade burger recipe with your favorite toppings. Extra-Bonus Tips:
For the salad, place the lettuce leaves, mint and edible flowers in a bowl, dress with the lemon juice and extra virgin olive oil and tap over the pomegranate seeds to add little capsules of sweetness. Delicious!
I do hope that your plans for this holiday weekend teeter more to the side of savoring than that of to-doing.
If you make this recipe, be sure to snap a photo and hashtag it #Recipestable. I’d love to see what you cook!
Happy Cooking!!


 Go Go Restaurant is a Small restaurant hidden in a strip mall and they have a history of 50 years of hospitality.


Order
Their menu, of course, had lots of options! Chicken burgers, cheese burgers, beef burgers, Sandwiches, Drinks, Shashlik etc. Watching me clueless, their guy started suggesting me their hot sellers. So, my order was as follows: Finger Fish, French Fries and Simple Sandwich & Coleslaw Salad ~ the perfect cure for the cold weather. It was a complete meal I would say.
Food
Sandwiches were Incredibly so good. Finger Fish was flavorful and crunchy but few pieces were over burned (dark brown color was not eye appealing).French fries had a pure desi nice flavour and the crispy, yet moist inside. The Fries were tasted just like original home-made fries but the sauce was a bit less spicy.
Coleslaw Salad was so delicious. It’s cool creaminess, crunchy texture, and tangy flavor balances out the richness of fried fish and chips.