Tag: butter

  • Finger Lickin’ Butter Chicken Pasta Recipe

    Finger Lickin’ Butter Chicken Pasta Recipe

    How much do you love Butter Chicken (Murgh Makhani)? A lot, right? Then why not turn your favorite food into a magical new dish with this clever idea? Yes, Take the classic Pakistani favorite Butter Chicken (Murgh Makhani), and pair it with delicious pasta to create this ultimate weeknight meal. Sprinkle some extra chilies to add a kick and treat your family to a lip-smacking dinner that will be ready in just under 30 minutes. It is SUPER delicious, rich, creamy and addictive and is very easy to make.

    Finger Lickin Butter Chicken Pasta recipe

    BUTTER CHICKEN PASTA

    Finger Lickin Butter Chicken Pasta

    Here’s the truth. I have no idea how I came up with this recipe. A lazy saturday night lead to me cook up a quick, yet comforting, dinner where I had to use what I had on hand. I found some leftover butter chicken in my fridge and  I came up with this dish on the spur of the moment.

    butter chicken

    Butter Chicken

    I love creating recipes with what’s on hand, so I decided to use the noodles as a ‘pasta’ base, and create this Pakistani inspired spicy, creamy Butter Chicken Pasta with the remaining ingredients to go along. With a few twists, out came a perfectly balanced and super satisfying Pakistani Italian fusion that worked in every way, and came together in under 30 minutes

    butter chicken pasta2

    butter chicken pasta2

    Pasta tossed in creamy butter chicken or Murgh Makhani. The pasta noodles soaks up all the creamy buttery sauce from the butter chicken. It was a purely experimental and turned out to be one of the best pasta dishes I ever had.

    Butter Chicken Pasta

    Spicy, Rich, Buttery and creamy Butter Chicken Pasta

    If you’re looking for a way to switch up your meal-prep routine then this is a great way to do so. This Finger lickin Butter chicken pasta recipe is a yummy Italian Pakistani combo that you should try out. This one pot tasty meal will add spice and flavor to your normal dinner routine! Hope you will enjoy 🙂

    Spicy and creamy 30-minute butter chicken Pasta. 

    Bismillah let’s get started. 

    Check it out the finger lickin’ Butter Chicken Pasta recipe and printable version here!!

    Finger Lickin’ Butter Chicken Pasta Recipe

    Take the classic Pakistani favorite Butter Chicken (Murgh Makhani), and pair it with delicious pasta to create this ultimate weeknight meal. It is SUPER delicious, rich, creamy and addictive and is very easy to make. Sprinkle some extra chilies to add a kick and treat your family to a lip-smacking dinner that will be ready in just under 30 minutes.
    Keyword Butter, Chicken, Dinner, Lunch, Murgh Makhani, Noodles, Pasta, Quick and Easy
    Prep Time 5 minutes
    Cook Time 25 minutes
    Total Time 30 minutes
    Servings 4
    Author Bushra Waheed

    Ingredients

    • 2-1/2 cups Butter chicken curry for recipe click here
    • 1 packet (about 200 gm ) noodles or pasta of your choice
    • 2 green chilies thinly sliced ( optional)
    • few Coriander leaves for garnishing
    • red pepper flakes
    • salt to taste

    Instructions

    • Bring a pot of salted water to boil.
    • Add pasta and cook for 7-10 minutes or until al dente.
    • Drain and keep aside.
    • Meanwhiile, prepare butter chicken according to the recipe instructions (for reciep click here).
    • Add pasta to the prepared butter chicken(murgh makhani).
    • Toss to coat evenly.
    • Heat through.
    • Sprinkle red pepper flakes over it.
    • Garnish with green chilies and coriander leaves.
    • Dish it out.
    • Finger Linkin’ Butter Chicken is ready to serve.

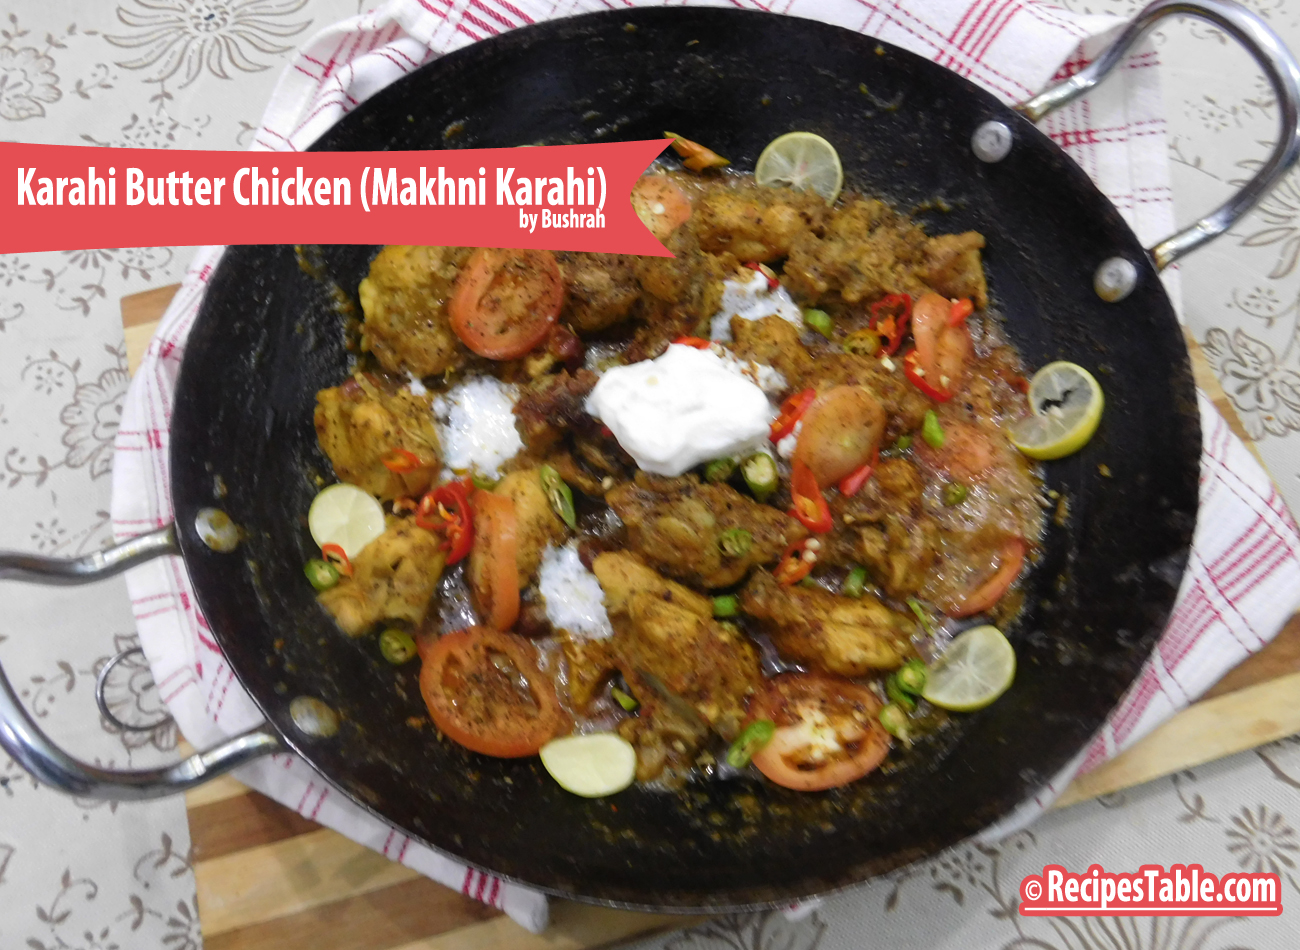
    I have also posted Karahi Butter Chicken and Chicken Tikka Masala Macaroni  which are another easiest & tastiest version of making classic dinner at home. Do check it out as well.  It’s finger lickin’ good. You’ll be coming back for more.


    Put your own spin on it. And lemme know how it turns out. Post a photo on Facebook (Recipestable) or Instagram on Twitter so I can see how lovely yours turn out.

  • Flower Shaped Buns Recipe with Step by Step Pictures

    Flower Shaped Buns Recipe with Step by Step Pictures

    Baking is an assortment of pure love, garnished with utmost care into a culmination of all the good things that life has to offer. These gorgeous Flower Shaped Buns are truly spectacular, and they taste just as amazing as they look! 

    Flower Shaped Buns recipe
    Warm, freshly baked Buns tastes very good with chicken filling.

     The Flower Shaped Buns. So elusive. So Cute. So majestic. So eye-catching

    How do you make them? Is there too hard to shape? Is there a complicated technique? Is it wizardry?

    Just a few of the thoughts I had before attempting these beauties. However, I’m elated to report that if you can master my Vegetable Stuffed Buns & Baby Chicken Bread (and you totally can), you can master the Flower Shaped Buns, too!

    These flower shaped buns are simple to make and cute to look at. 

    Flower Shaped Buns Recipe
    Flower Shaped Buns 

    It all starts with a simple dough that rises in 1 hour. To keep things a little on the healthier side, I went with a 2:1  mix of unbleached all purpose and whole wheat pastry flour for slightly-hearty-but-still-decadent buns.

    You could also go entirely all-purpose for true bakery style, all whole-wheat pastry for a healthier buns, or some other combination that I haven’t thought of! 

    So how are these simple? I’m glad you asked.

    13 ingredients including seasonings (sesame seeds being the 14th and optional ingredient)
    One true rise = less waiting
    Fool-proof methods
    No fancy techniques or equipment involved

    See? You can totally do this. Believe it.

    So what do these studs taste like? Amazing. They’re

    Soft
    Tender
    Fluffy
    Perfectly spiced
    Loaded with creamy chicken filling
    & Better with each bite

    Give it a try and You have bakery-worthy stuffed buns that will mystify your friends and family as to how you made them. Go you.

    Bismisllah Let’s Get This Started !

    Ingredients You will Need:

    For Buns Dough
    • 3 1/2 cups all-purpose flour
    • 1 cup milk
    • 2 tablespoon milk powder
    • 1/2 cup water (might use less)
    • 1 egg, lightly beaten
    • 1 tablespoon sugar
    • 4 tablespoon oil
    • 4 tablespoon melted butter
    • 1 1/2 teaspoon instant yeast
    • 1 teaspoon salt
    Chicken Filling
    • 2 cups boiled chicken, shredded
    • 1 large red onion, finel chopped
    • 2 tablespoon butter
    • 2 tablespoon plain flour
    • 1 teaspoon salt
    • 1 teaspoon black pepper
    • 1/2 teaspoon red chili, crushed
    • 4 tablespoon coriander leaves
    • 4 green chilies, finely chopped
    • 1 cup milk
    For Assembling Buns
    • white & black sesame seeds, as required
    • 1 egg yolk, beaten with 1 tsp milk, for brushing the buns before baking

    How to Make Flower Shaped Buns:

    Step 1: Sieve the flour and dry milk powder in a large mixing bowl. Make three holes in the flour, and then put sugar, yeast, and salt in each hole. Gently cover the holes with the flour. Then add the oil, melted butter and the egg, and combine together.

    Flower Shaped Buns Step 1
    Flower Shaped Buns Step 2

    Step 2: Pour lukewarm milk in the flour mix. Start kneading together and gradually add the lukewarm water a little at a time. You may not need to use all the water, so add it sparingly until your dough comes together and is nice and soft. Knead for a good 10-15 minutes.When the dough becomes smooth and elastic, it is done. (Note: The more you knead the dough, the softer the buns will be).

    Step 3: Touch a bit of oil with your fingertips and apply all over the ball of dough. Loosely cover the bowl with plastic wrap or cover with a damp cloth and set it in a warm place for 40 minutes to an hour for it to double in size.

    Flower Shaped Buns Step 3

    Step 4 :To Make Chicken Filling – Melt 2 tablespoon butter in a frying pan or wok. Saute onion in butter until transculant. Add flour, salt, pepper and red chili and cook for 2-3 minutes. Now add milk and cook for 4-5 minutes or until sauce is thickened. Add shredded chicken, green chilies, fresh coriander leaves. Stir until well combined and remove from the heat. Let it cool completely.

    Flower Shaped Buns Recipe Step 4

    Step 5: When the dough has risen into a nice big size, take the dough out of the bowl and Punch it down to remove some of the air in the dough.

    Flower Shaped Buns Recipe Step 5

    Step 6: Divide the dough into 16-18 balls, depending on the size of buns you would like.

    Flower Shaped Buns Recipe Step 6

    Step 7: Gently roll out each piece of dough and make a round ball. Flatten a ball until it is about 3 inches in diameter and place 2 tablespoon of chicken filling in the center.

    Flower Shaped Buns Recipe Step 7

    Step 8: Pull up the edges of the rolled out dough and pinch together to firmly seal the filling within.

    Flower Shaped Buns Recipe Step 8

    Step 9: Put the sealed part face down on the board and press the dough into about a 2 inch diameter. Make 8 decorative slits around the edge, equally spaced apart (either using a pizza cutter or sharp knife or even a pair of kitchen scissors).

    Flower Shaped Buns Recipe Step 9

    Step 10 : Place the prepared buns on a greased cooking sheet or tray and cover with a light cloth and let them rise for about 20 minutes to half an hour.

    Flower Shaped Buns Recipe Step 10

    Step 11: Brush each bun with beaten egg yolks and put some black and white sesame seeds in the center of the each bun.

    Flower Shaped Buns Recipe Step 11

    Step 12: Bake the buns, in the preheated oven for about 20 minutes or until golden.

    Flower Shaped Buns Recipe Step 12

    Step 13: Remove and brush the buns top with melted butter (it will give nice shiny look) and let it rest covered with a cloth for 2-3 min to soften the bread completely.. Flower Shaped Buns are ready to serve. ENJOY with your favorite dipping sauce.

    Flower Shaped Buns Recipe Step 13

    These Flower Shaped Buns are definitely a treat for weekend Tea Party. Especially when served with a luxurious garlic sauce generously topped with mayonnaise.

    Check it out the Flower Shaped Buns recipe and printable version here!!

    I believe that homemade cooking is delicious and healthy. If you love savory breads or rolls, but want to eat a little healthier, this recipe can be good to try. 🙂 Put your own spin on it. And lemme know how it turns out. Post a photo on Facebook (Recipestable) or  on Twitter so I can see how lovely yours turn out.


    Happy Baking!!

    Pin it For Later: 


    ATTENTION: All photos and content are copyright protected. Please do not use our photos without prior written permission. If you wish to republish this recipe, please rewrite the recipe in your own unique words and link back to Super Easy, Super Moist Chocolate Cupcakes on Recipestable. Thank you!

  • Chocolate Lover’s Dream Cake Recipe

    Chocolate Lover’s Dream Cake Recipe

    When I begin to think about cakes, the first ingredient that comes to mind is chocolate! And what if your chocolate cake full of chocolate chips, topped with creamy chocolate ganache and dark chocolate? Then, we are talking about one of the most decadent chocolate cakes – Chocolate Lover’s Dream Cake. 

    Chocolate in three forms, makes this cake extra chocolaty—and extra delicious.  A chocolate lover’s dream come true!!!

    Chocolate Lover's Dream Cake recipe
    Chocolate Lover’s Dream Cake

    Since I began blogging, there are a few fantastic recipes which made me say, “Wooow, I hope I will be able to make something like this some day”. Of course, after a good look and many photos of these desserts, I always gave up not having enough belief in my baking possibilities.

    But, with time, after a lot of experience and time spent in the kitchen, my confidence began to grow. And in time missions in the kitchen that looked impossible were beginning to be solved. So I began to flirt with recipes like Chocolate Mousse CakeBanana Chocolate Loaf Cake  and similar.

    Well, today it was turn for another chocolate masterpiece, Chocolate Lover’s Dream Cake. Only one look at the photos of this divine chocolate cake always made me drool. 

    Chocolate Lover's Dream Cake recipe
    Chocolate Lover’s Dream Cake

    A heavenly delicious chocolate cake you’ve been dreaming of! So good, every bite is worthy of a celebration! After all, there is never too much chocolate, right?! It’s pure decadence in every single bite!!!

    Chocolate Lover's Dream Cake
    Chocolate Lover’s Dream Cake

    I have to admit this cake is not the prettiest cake but with that chocolate ganache and grated dark chocolate on top it dresses it up and makes it look scrumptious.

    You can serve this cake warm without ganache or cold with creamy ganache on top. I can guardsmen that there will be no leftovers of this cake. If you have chocolate lovers around you better stand back because they will run you over just to get a piece of this cake. This chocolate cake is wonderful for birthdays, bake sales, tea parties or any gathering.

    If you are not a true chocoholic then move on. But if you are, then you must try this Chocolate Lover’s Dream Cake!!! 

    Check it out the Chocolate Lover’s Dream Cake recipe and printable version here!!

    Put your own spin on it. And lemme know how it turns out. Post a photo on Facebook (Recipestable) or  on Twitter so I can see how lovely yours turn out

    Happy Baking!!

    Pin it for later

    Chocolate Lover's Dream Cake Pinterest
    Chocolate Lover’s Dream Cake ~ Pin it for later


    ATTENTION: All photos and content are copyright protected. Please do not use our photos without prior written permission. If you wish to republish this recipe, please rewrite the recipe in your own unique words and link back to Chocolate Lovers Dream Cake Recipe on Recipestable. Thank you!

  • Super Easy, Super Moist Chocolate Cupcakes Recipe

    Super Easy, Super Moist Chocolate Cupcakes Recipe

    Like the title says, these are the ‘Super Easy,Super Moist Chocolate Cupcakes’. They are perfectly moist and insanely chocolaty, topped with More Chocolate Ganache & Coconut. Royal Treat ♥

    Super Moist Chocolate Cupcakes recipe
    Photo: Super Moist Chocolate Cupcakes

    Looking for the perfect recipe can be exhausting because there are just so many out there. I’ve tried countless cupcakes over the years, but this is my top favorite recipe. I know we all have different preferences when it comes to our taste buds, but I honestly don’t think you can go wrong with this.

    The absolute best recipe to make Chocolate Cupcakes that are super easy, super moist, chocolaty and really delicious. If chocolate is what makes you go weak in the knees, then these are for you. This one is a must try for all Chocolate Lovers out there.

     Super Moist Chocolate Cupcakes
    Photo: Super Moist Chocolate Cupcakes
     
    Super easy, Super Moist Chocolate Cupcakes
    Super easy, Super Moist Chocolate Cupcakes
     
    Super easy, Super Moist Chocolate Cupcakes
    Super easy, Super Moist Chocolate Cupcakes

    One of the great things about this happy little dessert is that it doesn’t take long to make and it doesn’t break the bank!  Not only is the dessert met with smiles and giggles, it’s an easy and inexpensive way to make everyone at the table happy!  And making everyone happy is what its all about.

    Super easy, Super Moist Chocolate Cupcakes
    Super easy, Super Moist Chocolate Cupcakes

    I made the Chocolate Coffee ganache with hot cream, good quality chocolate, butter and coffee extract. The higher the quality of chocolate used, the better the flavor and texture your ganache will have in the end. Coffee and coffee extract enhances the flavor of chocolate. It enhances the chocolate, and brings out the flavors in the chocolate while adding richness to the taste. I love to add coffee to all of my chocolate cakes. Some things are classics.I put chocolate cupcakes in that category. Pillows of rich chocolate cake. Top with chocolate ganache.

    Super easy, Super Moist Chocolate Cupcakes
     Pillows of rich chocolate cake. Top with chocolate ganache.

    Check it out the Super Easy, Super Moist Chocolate Cupcakes recipe and printable version here!!

    Extra Bonus Tips:

    1. If you would like to add coffee to the recipe, either add 1 teaspoon espresso powder or instant coffee granules along with the sifted dry ingredients, or replace the water with room temperature brewed coffee.
    2. Please make sure that you bake these for 20 minutes and not more. Baking timing is the most crucial thing for any cake recipe. A few minutes over and you’ll have a hard rock in the name of muffin. So keep checking!
    3. And yes..no peeking and opening the oven door for the first 15 minutes at  least.
    4. Cupcakes are best the same day they’re made, but can be kept in an airtight container at room temperature for up to 3 days.
    5. Un-frosted cupcakes can be kept in the freezer for up to 2 months. Thaw, still covered, on the counter or overnight in the fridge.

    I have also posted Vanilla Cupcakes with Chocolate Frosting recipe which is another easiest & tastiest version of making cupcakes home. Do check it out as well.  It’s finger lickin’ good. You’ll be coming back for more. 


    Put your own spin on it. And lemme know how it turns out. Post a photo on Facebook (Recipestable) or  on Twitter so I can see how lovely yours turn out.


    Happy Cupcakes Making!!

    ATTENTION: All photos and content are copyright protected. Please do not use our photos without prior written permission. If you wish to republish this recipe, please rewrite the recipe in your own unique words and link back to Super Easy, Super Moist Chocolate Cupcakes on Recipestable. Thank you!

  • Vanilla Cupcakes with Chocolate Frosting Recipe

    Vanilla Cupcakes with Chocolate Frosting Recipe

    Happy Monday everyone.

    I hope everyone has a beautiful, positive and productive week. Today starts a new chapter in my life, ‘Uni started again’. Hopefully, I’ll try to update the blog more regularly. (InshaAllah) 

    Vanilla Cupcakes with Chocolate Frosting
    Vanilla Cupcakes with Chocolate Frosting

    Do you find ways to celebrate everyday occasions like me? 

    Let’s Celebrate This Special Day with Vanilla Cupcakes!

    Cupcakes are an easy way to make an beautiful yet tasty dessert without much effort. Today I’m sharing one of my favorite Vanilla Cupcakes recipe. I love this recipe because it includes butter milk to make it lighter and fluffier. The best ever recipe that makes the moistest cupcakes and perfect chocolate on top of it! This recipe is perfect for the upcoming holiday summer season and is sure to become a favorite.

    Vanilla Cupcakes with Chocolate Frosting
    Vanilla Cupcakes with Chocolate Frosting

    I actually made these a long time back but never really got around to editing the pictures which is why I didn’t post them. They look super pretty and I wanted them to look like it in the pictures so I took my time with them.

    Vanilla Cupcakes with Chocolate Frosting
    Vanilla Cupcakes

    These cupcakes are plain vanilla flavored (which is very difficult to get right) and are so moist that they’ll actually dissolve in your mouth the minute you take a bite. Pillowy soft, these cupcakes are topped with favorite chocolate frosting made with unsalted butter and whipping cream which gives it that perfect flavour without making it heavy. 

    Vanilla Cupcakes with Chocolate Frosting
    Vanilla Cupcakes with Chocolate Frosting

    Having a staple recipe is so handy, and this one is great with other flavours added. The frosting.. well it’s a whole other thing! It is divine, and rich, and well, perfect to go with anything.

    Check it out the Vanilla Cupcakes with Chocolate Frosting recipe and printable version here!!

    Extra-Bonus Tip:

    Dark chocolate lovers, be sure to use bittersweet chocolate.


    I have also posted Extra Easy Cupcakes recipe which are another easiest & tastiest version of making cupcakes home. Do check it out as well.  It’s finger lickin’ good. You’ll be coming back for more. 


    Put your own spin on it. And lemme know how it turns out. Post a photo on Facebook (Recipestable) or  on Twitter so I can see how lovely yours turn out.


    Happy Cupcakes Making!!


  • Karahi Butter Chicken Recipe (Makhni Karahi)

    Karahi Butter Chicken Recipe (Makhni Karahi)

    Assalam-o-Alaikum, how are you? Yep, it’s been almost a month since we met. First things first…I had my mid-term exams, so I was lil busy with studying and the other stuff in my life.
    However this gap between us wasn’t planned. I was hoping to catch up with you in between, but it didn’t work out.

    My celebration “yay, exam is over!”

    Finally exams are over I’m finally free to do whatever I want (blogging, eating yummy food, spending time with my plants)😌
    Anyways, the first thing I wanted to do was to just pop in here & say a quick hi to you. I hope you roll into the weekend in a joyous mood! May your day be as fantastic as you are!

    Karahi Butter Chicken (Makhni Karahi)

    To release some exams stress, I made this butter karahi by twisting my Father’s recipe…delicious goodness. Can’t wait to share it with you. He used to make the best food. He was an expert on how to make a really good Butter Chicken. Saying that, I’m not too sure how He would feel about this Karahi Butter Chicken version that I’m currently loving.

    Karahi Butter Chicken (Makhni Karahi)
    Karahi Butter Chicken (Makhni Karahi)

    Name me one thing that doesn’t taste better with a few dollops of cream, a knob or so of butter, a splash of milk, lashings of ghee.

    I’ll bet you’re having a hard time thinking up something. It’s a truth of the culinary world that these things all enhance the eating experience of many foods, sweet and savory foods alike and curries are no exception to this.

    Karahi Butter Chicken (Makhni Karahi)
    Karahi Butter Chicken (Makhni Karahi)

    Take this Karahi Butter Chicken ( Makhni Karahi), for example. I’ve taken the traditional Chicken Karahi dish and made it the way we all love, with the very flavours we all adore and then finished it up with a hearty amount of butter. What does this do? This fills every bite with the very same flavours we desire, along with a moreish, rich bite to it. Every bite tastes like a buttery dream, I tell you. This creamy and velvety gravy will melt in your mouth. 

    Karahi Butter Chicken (Makhni Karahi)
    Karahi Butter Chicken (Makhni Karahi)


    Bismillah, let’s begin!

    Check it out the Karahi Butter Chicken (Makhni Karahi) recipe and printable version here!!

     Recipe Note’s

    My final words before I give you the recipe – my Father was an expert at Karahi’s and he always told me what with chicken Karahis, you must work fast. Have all the ingredients chopped up beforehand if you can, and cook the entire thing on high heat. Stirring constantly is imperative, otherwise you risk burning the curry or having it stick to the pan. Skimp on half the oil or butter if  you must, but I wouldn’t recommend it as a Karahi dish isn’t truly a Karahi dish without its butter or oil.


    I have also posted Restaurant Style Lahori Mutton Karahi and Kebab Karahi which are another easiest & tastiest version of making Karahi at home. Do check it out as well.  It’s finger lickin’ good. You’ll be coming back for more. 


    Put your own spin on it. And lemme know how it turns out. Post a photo on Facebook (Recipestable) or  on Twitter so I can see how lovely yours turn out.


    Happy Karahi Making!!

    If you like this post, Please Subscribe to my blog and let me know your feedback by commenting below.. I have lots more recipes to share with you.

  • The Best Creamed Peas Recipe

    The Best Creamed Peas Recipe

    Creamed Peas 

    Everything’s better with cream…especially vegetables.Vibrant green peas simmer in a simple sauce of milk, flour, and butter in this quick side dish. 

    The Best Creamed Peas
    The Best Creamed Peas

    In my search for a good creamed peas recipe, I found many, but none that quite matched what I wanted. So I took to my own creativity and came up with this absolutely fabulous and The Best Creamed Pea recipe. My family love it so much and we have this on the side quite often. And I double this every time, and not a single pea is left! Alhumdulillah 🙂

    The Best Creamed Peas
    The Best Creamed Peas

    Do try this recipe, these Creamed Peas can become your ultimate side dish.

    Bismillah, Let’s get started!

    Check it out the Creamed Peas recipe and printable version below.

    Recipe Note’s:

    Don’t over cook the peas. Soggy peas will ruin this dish. You want them tender but firm.


    Put your own spin on it. And lemme know how it turns out. Post a photo on Facebook (Recipestable) or  on Twitter so I can see how lovely yours turn out.


    Happy Cooking!!

    If you like this post, Please Subscribe to my blog and let me know your feedback by commenting below.. I have lots more recipes to share with you.

  • The Secret to Bakery-Style Jam Filled Butter Cookies (This Recipe is a Gem!)

    Jam Filled Butter Cookies

    This Jam Filled Butter Cookies Recipe is an easy thumbprint cookie with a fruit jam center. Whip up these simple jam drops in just a few minutes, they make wonderful any-time treats.

    Jam Filled Butter Cookies Recipe
    Photo: Jam Filled Butter Cookies Recipe

    Check it out the  Jam Filled Butter Cookies Recipe here!!

    Jam Filled Butter Cookies Recipe

    Prep Time 10 minutes
    Cook Time 30 minutes
    Total Time 40 minutes
    Servings 36
    Author Bushrah @ Recipestable

    Ingredients

    • 2 egg yolks
    • 3/4 cup softened butter
    • 1/2 cup white sugar
    • 1-3/4 cups all-purpose flour
    • 1/2 cup fruit preserves any flavor

    Instructions

    Method

    • Preheat the oven to 190 degrees C.
    • Take a bowl, cream together the butter, white sugar and egg yolks.
    • Stir in the flour a little bit at a time until a soft dough forms.
    • Roll dough into 1 inch balls or cut with a cookie cutter.
    • If dough is too soft, refrigerate for 15 to 20 minutes.
    • Place balls 2 inches apart onto ungreased cookie tray.
    • Use your finger or an instrument of similar size to make a well in the center of each cookie.
    • Fill the hole with 1/2 teaspoon of preserves.
    • Bake in the preheated oven for 8-10 minutes or until golden brown on the bottom.
    • Remove from cookie sheets to cool on wire racks.
    • Store in an airtight jar or container. Jam Filled Butter Cookies are ready to serve. ENJOY!

    Notes

    Serving Suggestions:
    Serve with Tea.

    I have also posted Nankhatai recipe which are another easiest & tastiest version of making cookies at home. Do check it out as well.  It’s finger lickin’ good. You’ll be coming back for more. 


    Put your own spin on it. And lemme know how it turns out. Post a photo on Facebook (Recipestable) or  on Twitter so I can see how lovely yours turn out.


    Happy Cupcakes Making!!

  • The Perfect Side Dish: Creamy Butter Mashed Potatoes Recipe!

    Butter Mashed Potatoes

    Boil potatoes then peel and mashed them properly.Now add milk, butter, fresh cream, garlic and oregano.Discover the Mouthwatering Butter Mashed Potatoes Recipe 

    Check it out the Butter Mashed Potatoes Recipe here!!

    Prep Time:10 minutes

    Cook Time:20 minutes

    Servings:4

    Ingredients

    • 500 gm potatoes
    • 1 cup milk
    • 1/2 cup fresh cream
    • 50 gm butter
    • 2 cloves garlic, chopped
    • 2 tbsp chopped parsley
    • 1/2 tsp oregano
    • 1/2 tsp black pepper
    • Salt according to taste

    Directions:

    1. Boil potatoes then peel and mashed them properly.
    2. Now add milk, butter, fresh cream, garlic and oregano.
    3. Season with salt and black pepper.
    4. Mix well.
    5. Take it out in a serving bowl.
    6. Sprinkle chopped parsley over it.
    7. Butter Mashed Potatoes are ready to serve.
    • Serve with Fried Chicken.

    If you like Butter Mashed Potatoes Recipe and make it then let me know your feedback by commenting below.And if you know more innovative ways in which we can utilize this delicious Butter Mashed Potatoes , do share with us and we would be glad to give it a try.

  • The Best Molten Lava Cakes Recipe: Easy and Delicious

    Molten Lava Cakes

    Molten Lava cakes also known as chocolate lava cakes. They are rich individual chocolate cakes with oozing molten centers. Try this Molten Lava Cakes recipe and make these rich and impressive single-serving chocolate cakes.Decadent and delicious, these are the ideal dessert for any Special Occasion.

    Molten Lava Cakes Recipe
    Photo: Molten Lava Cakes Recipe

    Check it out the Molten Lava Cakes Recipe here!!

    [divider]

    [one_fourth]Prep Time:20 minutes[/one_fourth] [one_fourth]Cook Time:14 minutes[/one_fourth] [one_fourth]Servings:6 [/one_fourth] [one_fourth_last]Difficulty Level: Easy[/one_fourth_last]

    [divider]

    [tabs type=”horizontal”] [tabs_head] [tab_title]Ingredients[/tab_title] [tab_title]Nutrition[/tab_title] [/tabs_head] [tab]

    • 1 1/2 cups confectioners’ sugar
    • 1/2 cup all purpose flour
    • 6 squares bittersweet chocolate, (about 1 ounce)
    • 2 squares semisweet chocolate, (about 1 ounce)
    • 10 tbsp butter
    • 3 large eggs
    • 3 egg yolks
    • 2 tablespoon orange juice
    • 1 teaspoon vanilla extract

    [/tab] [tab]Yield: 6 servings

    Nutritional information is not yet available. [/tab] [/tabs]

    Directions:
    [tabs type=”horizontal”] [tabs_head] [tab_title]Step by Step Method[/tab_title] [tab_title]Serving Suggestions[/tab_title][/tabs_head] [tab]

    Step 1

    Preheat oven to 425 degrees F.

    Step 2

    Lightly greased the six (6-ounce) custard cups with butter or nonstick cooking spray.

    Step 3

    Place chocolates and butter in a microsafe bowl.

    Step 4

    Microwave on high for 20 seconds or until chocolated is melted.

    Step 5

    Fold into flour and sugar.

    Step 6

    Now stir in the eggs and yolks until smooth.

    Step 7

    Stir in the vanilla and orange juice.

    Step 8

    Pour the batter equally into the prepared custard cups.

    Step 9

    Place in the preheated oven and bake for 14 minutes.

    Step 10

    The edges should be firm but the center will be runny.

    Step 11

    Run a knife around the edges to loosen.

    Step 12

    Invert onto dessert plates. Molten Lava Cakes are ready to serve. ENJOY 🙂
    [/tab] [tab]

    • Serve as a dessert after any meal.

    [/tab] [/tabs]

    If you like Molten Lava Cakes recipe and make it then let me know your feedback by commenting below.

  • Flavored Rice Recipe

    Flavored Rice

    A wonderful rice recipe to make super-of-the-moment! A blend of delicious butter and spices _ cooks beautifully in a rice cooker. Must try this Flavored rice recipe and don’t forget to share your experience with us!!

     Flavored Rice Recipe
    Photo: Flavored Rice Recipe

    Check it out the Flavored Rice Recipe here!!

    [divider]

    [one_fourth]Prep Time:10 minutes[/one_fourth] [one_fourth]Cook Time:25 minutes[/one_fourth] [one_fourth]Servings:4 [/one_fourth] [one_fourth_last]Difficulty Level: Medium[/one_fourth_last]

    [divider]

    [tabs type=”horizontal”] [tabs_head] [tab_title]Ingredients[/tab_title] [tab_title]Nutrition[/tab_title] [/tabs_head] [tab]

    • 2 cups water
    • 1 cup white rice
    • 1 chicken bouillon cubes
    • 1 tablespoon butter
    • salt to taste

    [/tab] [tab]Yield: 4 servings

    Nutritional information is not yet available. [/tab] [/tabs]

    Directions:
    [tabs type=”horizontal”] [tabs_head] [tab_title]Step by Step Method[/tab_title] [tab_title]Serving Suggestions[/tab_title][/tabs_head] [tab]

    Step 1

    Place chicken bouillon cube in a small bowl.

    Step 2

    Stir in the water.

    Step 3

    Microwave for 2 minutes or until fully dissolved.

    Step 4

    Pour this mixture into a medium pot.

    Step 5

    Add butter.

    Step 6

    Stir in the rice.

    Step 7

    Bring rice to a boil then reduce heat to medium low.

    Step 8

    Cover and simmer for 20 minutes or until rice is cooked.

    Step 9

    Fluff rice with slotted spoon. Adjust the salt according to taste.

    Step 10

    Take it out in the serving platter. Flavored Rice is ready to serve. ENJOY!

    [/tab] [tab]

    [/tab] [/tabs]

    If you like Flavored Rice Recipe and make it then let me know your feedback by commenting below.

  • Recipe: Extra Easy Cupcakes

    Recipe: Extra Easy Cupcakes

    If you’re a cupcake making newbie, then this is the perfect starter recipe.  Simple and oh-so-delicious, these Extra Easy cupcakes make a lovely.You can change the ingredients of these easy cupcakes to match the occasion.

    Extra Easy Cupcakes recipe
    Extra Easy Cupcakes

    I mentioned a couple weeks ago that I’d be bringing you some new basic favorites and I started with a Banana Chocolate Loaf cake. Today, we are talking about these Extra Easy  cupcakes and I’m pumped! One of the things that I’m always messing with is vanilla cake or simple cupcakes. It’s the never ending quest for all the best versions.There are so many ways to vary a Simple cupcake and I want the best of all of them! I’m greedy like that. Plus, I know not every has the same idea of the perfect cupcake, so I like to have options.

    Extra Easy Cupcakes recipe
    Extra Easy Cupcakes

    So let’s talk a bit about these Extra Easy cupcakes. These cupcakes use butter and are lighter and super moist. We’ve got the usual suspects in this cupcake, starting with the dry ingredients: all-purpose flour, baking powder and salt. Easy, common ingredients that you should totally have in your pantry already. Mix ’em all together and set ’em aside.

    Next are the wet ingredients:butter, sugar, milk, vanilla extract and eggs. The butter is the fat component instead of vegetable oil and in my opinion, tends to make a more moist cake that stays moist for longer. Totally true for these cupcakes. The milk  adds to the structure of the cake, in addition to adding moisture. Milk adds fluff and I love some fluff.

    I used a teaspoon of vanilla extract to make sure there’s plenty of delicious vanilla flavor. Then the eggs add more moisture, structure and flavor. I switched it up in these and went with whole eggs instead of egg whites. No more egg yolks getting wasted here!

    Once the wet and dry ingredients are combined, the milk is added.

    Extra Easy Cupcakes recipe
    Extra Easy Cupcakes

    There’s so much moisture in these cupcakes! I love them! I’m a big, big fan of their ease of making, their flavor and moisture. They use such simple ingredients that you likely already have in your pantry too – score!

    Extra Easy Cupcakes recipe
    Extra Easy Cupcakes

    When topped with my favorite buttercream frosting, these vanilla cupcakes really are a dream! They were a big hit in our house and I hope you love them as much as we did!

    Perfect for offering as a snack, at tea time or as party food or any occasion. Exercise your creative muscle by decorating these cupcakes to suit your mood.Pipe the frosting onto the cupcakes for an extra special look.

    Bismillah, let’s begin!

    Check it out the Extra Easy Cupcakes Recipe and printable version below.

    Extra Easy Cupcakes Recipe

    If you’re a cupcake making newbie, then this is the perfect starter recipe.  Simple and oh-so-delicious, these Extra Easy cupcakes make a lovely.You can change the ingredients of these easy cupcakes to match the occasion.
    Course Dessert, Snack
    Prep Time 20 minutes
    Cook Time 25 minutes
    Total Time 45 minutes
    Servings 12
    Author Bushra Waheed

    Ingredients

    • 200 gm plain flour
    • 3 eggs
    • 200 gm butter
    • 200 gm sugar
    • 1 tsp baking powder
    • 1/2 tsp vanilla essence
    • 1/2 cup milk
    • 12 cupcases

    Instructions

    • Preheat oven to 325°F (180°C) and prepare a cupcake pan with liners.
    • Add the flour, sugar, baking powder and salt to a large mixer bowl and combine. Set aside.
    • In a medium bowl, cream butter with sugar. Then add eggs and beat well.
    • Add the wet ingredients to the dry ingredients and beat until well combined. Stir vanilla in it.
    • Slowly add the milkr to the batter and mix on low speed until well combined.
    • Scrape down the sides of the bowl as needed to make sure everything is well combined. Please note that the batter will be very thin.
    • Fill the cupcake liners about half way and bake for 15-17 minutes, or until a toothpick comes out with a few moist crumbs.
    • Remove the cupcakes from oven and allow to cool for 2 minutes, then remove to a cooling rack to finish cooling.Extra Easy Cupcakes are ready to serve.

    Notes

    Serve with tea or coffee.

    I have also posted Picnic Cupcakes Recipe  which is another easiest & tastiest version of making Cupcakes. Do check it out as well.


    Put your own spin on it. And lemme know how it turns out. Post a photo on Facebook (Recipestable) or  on Twitter so I can see how lovely yours turn out.


    Happy baking!!

    If you like this post, Please Subscribe to my blog and let me know your feedback by commenting below.. I have lots more recipes to share with you.

  • Makhadi Halwa Recipe

    Makhadi Halwa Recipe

    Try very tasteful Makhandi Halwa  recipe  its really easy to make and great in taste.

    Makhani Halwa Recipe By Rida Aftab
    Photo: Makhandi Halwa 

    Check it out the Makhandi Halwa Recipe here!!

    Prep Time: 2 hours

    Cook Time: 15 minutes

    Servings:6

    Difficulty Level: Easy

    Ingredients:

    • 750 gm milk
    • 250 gm semolina
    • 250 gm clarified butter
    • 250 gm ricotta cheese, khoya
    • 4 cardamoms
    • 1-1/2 cups sugar
    • 1 tsp kewra
    • almonds and pistachios, for garnishing

    Directions:

    1. Soak semolina in milk for 2 hours.
    2. Heat clarified butter and stir semolina in it.
    3. When clarified butter comes out top, add sugar.
    4. Cook for 5 minutes or until sugar is dissolved.
    5. Add ground cardamoms, kewra essence and khoya.
    6. Stir well.
    7. Take it out in a serving bowl.
    8. Garnish with almonds and pistachios.
    9. Makhani Halwa is ready to serve.
    10. ENJOY!!.

    Serving Suggestions:

    • Serve hot as a dessert after any meal.

    If you like Makhandi Halwa Recipe and make it then let me know your feedback by commenting below.

  • Chocolate Tea Biscuit Rolls Recipe

    Chocolate Tea Biscuit Rolls

    This Chocolate Tea Biscuit Rolls recipe is a kid and adult favorite. Chocolate covered Marie biscuits that are served with tea or coffee and used as a small snack. They are so good. Must try this Chocolate and Tea Biscuit Rolls recipe and give your feedback by commenting below.

    Chocolate Tea Biscuit Rolls Recipe
    Photo: Chocolate Tea Biscuit Rolls Recipe

    Chocolate Tea Biscuit Rolls Recipe
    Photo: Chocolate Tea Biscuit Rolls Recipe

    Chocolate Tea Biscuit Rolls Recipe
    Photo: Chocolate Tea Biscuit Rolls Recipe

    [divider]

    [one_fourth]Prep Time: 20 minutes[/one_fourth] [one_fourth]Cook Time: 2 minutes[/one_fourth] [one_fourth]Servings: 6 [/one_fourth] [one_fourth_last]Difficulty Level: Easy [/one_fourth_last]

    [divider]

    [tabs type=”horizontal”] [tabs_head] [tab_title]Ingredients[/tab_title] [tab_title]Nutrition[/tab_title] [/tabs_head] [tab]

    • 450 gram Marie biscuits, broke into small pieces
    • 200 gram butter
    • 1 -1/4 cup castor sugar
    • 1 cup milk
    • 1/2 cup coca powder
    • 4 teaspoon powder milk
    • 5 teaspoon thick cream

    [/tab] [tab]Yield: 6 servings

    Nutritional information is not yet available. [/tab] [/tabs]

    Directions:
    [tabs type=”horizontal”] [tabs_head] [tab_title]Step by Step Method[/tab_title] [tab_title]Recipe Note’s[/tab_title][tab_title]Serving Suggestions[/tab_title][/tabs_head] [tab]

    Step 1

    Melt butter in a small saucepan.

    Step 2

    Stir in the coca powder until it becomes a smooth mixture.

    Step 3

    In a separate bowl, cook and stir sugar and milk for 2-3 minutes (make sure it doesn’t boil).

    Step 4

    Now mix together both the mixtures.

    Step 5

    Stir in the milk powder and thick cream. Mix well.

    Step 6

    Now add broken biscuits and stir until well combined.

    Step 7

    Pour this mixture over an aluminum foil. Roll it tightly.

    Step 8

    Place it in the freezer for 6 hours or overnight.

    Step 9

    For serving cut into slices.

    Step 10

    Sprinkle some chocolate over it. Chocolate and Tea Biscuit Rolls are ready to serve. ENJOY!!

    [/tab][tab]

    • You can added walnuts or cashew nuts along with the biscuits and it turned out great.

    [/tab] [tab]

    • Serve with tea or coffee.

    [/tab] [/tabs]

    If you like Chocolate and Tea Biscuit Rolls Recipe  and make it then let me know your feedback by commenting below.

  • Nankhatai Recipe (Eggless Buttery Cookies)

    Light and flaky shortbread, flavored with cardamom and vanilla will just melt away in your mouth!

    Nankhatai recipe (Eggless Buttery Cookies)
    Nankhatai (Eggless Buttery Cookies)

    Nankhatai (Eggless Buttery Cookies)

    Nan Khatai is a popular sweet snack which is equally liked by kids as well as elders. I am a huge fan of these nan khatais.  It’s the NanKhatai recipe you would want when you suddenly crave for cookies. 

    Does this recipe rings a bell? Khasta nankhatais from your favorite bakery shop – so what does Khasta mean? Khasta means light and flaky and Nankhatai is referred to as a shortbread or biscuits. This is super easy fail proof recipe that has been tested and tried many times in my kitchen.

    nankhatai2

    Nan Khatai are simple to make if you ask me.Nothing complicated and no fancy ingredients. No baking soda and baking powder added in this recipe. Does this make you walk away from the recipe? Please wait and learn the secret to these khasta nankhatai recipe. Secret to these flaky nankhatai is the amount of ghee/butter that goes in them. No water or milk is added to this recipe.

    nankhatai4

    Bake these goodies for 12- 15 minutes. Depending on the oven, cooking time may vary. Unlike other cookies, nankhatais will not brown up and when taken out of the oven they will still be soft and gooey.

    nankhatai3

    No worries, allow them to sit for 5-10 minutes on the counter and they will become firm. When completely cooled, store in an airtight container and enjoy with your evening tea!!

    nankhatai1

    This Nan khatai Cookies Recipe especially for all those who are new in baking. These cookies prepare easily and serve with afternoon tea. Do try it!!

    Check it out the Nankhatai (Eggless Buttery Cookies Recipe and printable version here!!

    Nankhatai (Eggless Buttery Cookies)

    Light and flaky Indian shortbread, flavored with cardamom and vanilla will just melt away in your mouth!
    Prep Time 20 minutes
    Cook Time 15 minutes
    Total Time 35 minutes
    Servings 18
    Author Bushrah | Recipestable

    Ingredients

    • 1-1/4 cup plain flour
    • 1/4 cup semolina fine sooji
    • 3/4 cup butter or ghee should be at room temperature not melted
    • 1/2 cup +1 tablespoon superfine Sugar
    • 1 teaspoon Vanilla
    • a pinch of Cardamom Powder
    • few almonds pistachios and cashew nuts, for sprinkling

    Instructions

    • Assemble all the ingredients.
    • Cream the butter and sugar till it turns fluffy.
    • Stir in the vanilla, flour and sooji. Make smooth dough of this mixture.
    • Stir in the vanilla and cardamom powder.
    • Knead a soft dough. Butter or ghee is the secret to light/flaky (khasta) nankhatai’s.
    • Roll the dough into a big circle.
    • Roll out medium sized balls and put a almond or cashew nut on the top of each piece.
    • (One way is to use a cookie cutter and cut out the nan khatais.
    • Other way and the original way to shape nan khatais is to take a small dough ball in your hand.)
    • Preheat oven at 150 degree C.
    • Place nankhatai cookies on a greased baking tray.
    • Bake in the preheated oven for 12-15 minutes.
    • Remove from oven and place on the counter and allow them to cool.
    • They will still be soft when you remove the tray from oven.
    • NanKhatai is ready to serve. ENJOY!!

    Notes

    Recipe Note’s:
    Once cooled store in an air tight container. These cookies stays good for about 2 weeks.
    Serving Suggestions:
    Serve with tea.
    Put your own spin on it. And lemme know how it turns out by sharing a picture  on Instagram, Facebook (Recipestable) or Twitter with this hashtag #Recipestable so I can see how lovely yours turn out.


    Happy Baking!!

    If you like this post, Please Subscribe to my blog and let me know your feedback by commenting below.. I have lots more recipes to share with you.

  • Buttery Cornbread Recipe

    A sweet, moist and delicious cornbread recipe for a healthy breakfast. If you like sweet cornbread then this recipe is perfect for you! It’s so simple and tasty too. Check it Buttery Cornbread recipe here!

    [one_third] Prep Time: 15 minutes[/one_third] [one_third]Cook Time: 25 minutes[/one_third] [one_third_last] Servings: 12[/one_third_last]

    [review]

    [tabs type=”horizontal”] [tabs_head] [tab_title]Ingredients[/tab_title] [tab_title]Nutrition[/tab_title] [/tabs_head] [tab]

    • 3 eggs
    • 2-1/3 cups all purpose flour
    • 2/3 cup butter or margarine, softened
    • 1-2/3 cups milk
    • 1 cup cornmeal
    • 1 cup sugar
    • 4-1/2 tsp baking powder
    • 1 tsp salt

    [/tab] [tab]Yield: 12 servings

    Amount per serving.

    • Calories: 259
    • Fat: 10 g
    • Cholesterol: 68 mg
    • Sodium: 386 mg
    • Carbohydrate: 37 g
    • Fiber: 1 g
    • Protein: 5 g

    [/tab] [/tabs]

    Directions:
    [tabs type=”horizontal”] [tabs_head] [tab_title]Step by Step Method[/tab_title] [tab_title]Serving Suggestions[/tab_title][/tabs_head] [tab]

    Step 1

    Preheat oven to 400 degree F. Lightly grease a 13-in. x 9-in. x 2-in. baking pan with cooking spray. Set aside.

    Step 2

    In a large mixing bowl, cream butter with sugar. In a small bowl, whisk eggs with milk. In a separate bowl, combine flour, cornmeal, baking powder and salt. Fold flour mixture to the creamed mixture alternately with egg mixture.

    Step 3

    Pour this batter into the prepared baking pan. Bake for 25 minutes or until a toothpick inserted near the center comes out clean. Cool on a wire rack for 10 minutes then cut into squares. Buttery Corn Bread is ready to serve. Enjoy!!

    [/tab] [tab]

    • Serve with butter or syrup.

    [/tab] [/tabs]