Tag: lunch box

  • Chocolate Banana Filled Pancake Rolls Recipe

    Chocolate Banana Filled Pancake Rolls Recipe

    Aslam-o-Alakaum !!

    In the Name of Allah, Most Gracious, Most Merciful

    Its been a long time since I’ve posted something here, its has been a busy month.Actually I was really busy in my studies…..Sorry, I didnt get time to post anything.

    Chocolate Banana Filled Pancake Rolls

    Looking for a nice relaxing breakfast or dessert. Pancake Rolls? Today, I’ll share another pancake rolls recipe ~ “Chocolate and Banana Filled Pancake Rolls”,I made this a while back, clicked pictures but never got around to posting it. The recipes are piling up ! I’ll post a lot more soon, InshAllah.

    Chocolate and Banana Filled Pancake Rolls Recipe
    Photo: Chocolate and Banana Filled Pancake Rolls

    I made plain pancakes and spread generously with choco bliss and topped further with honey but it really is like a plain canvas for your imagination to run wild with flavours! So I decided to give my simple pancakes a new twist. Roll-up in banana slices and topped with chocolate curls.

    Chocolate and Banana Filled Pancake Rolls recipe
    Photo: Chocolate and Banana Filled Pancake Rolls

    You can add strawberries, apples, dried fruits and berry compote in the mixture! It’s up to you take pleasure in feeling like a domestic queen. A perfect way to start a day.

    Chocolate and Banana Filled Pancake Rolls
    Photo: Chocolate and Banana Filled Pancake Rolls

    Check it out the Chocolate and Banana Filled Pancake Rolls recipe and printable version below!!

    Recipe Note’s:

    In this recipe,  I made the batter a little thin because I wanted the pancakes to thin, more like crepes. For more traditional pancakes, use only about 1/2 cup milk.

    Put your own spin on it. And lemme know how it turns out. Post a photo on Facebook (Recipestable) or  on Twitter so I can see how lovely yours turn out.


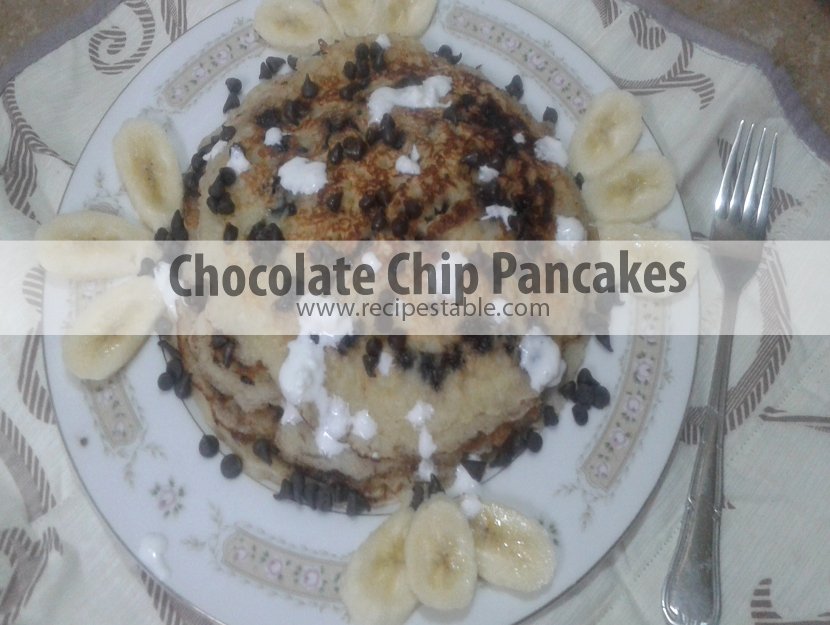
    I have also posted Chocolate Chip Pancakes which is another easiest version of making tea time snack or lunch box item . Do check it out as well.


    Happy Pancakes making!!

    If you like this Chocolate and Banana Filled Pancake Rolls, Please Subscribe to my blog. I have lots more recipes to share with you. And If you make it then let me know your feedback by commenting below.

  • Hearty Mince Lettuce Cups Recipe

    Hearty Mince Lettuce Cups Recipe

    Aslam-o-Alakaum My Lovelies !!

     In the Name of Allah, Most Gracious, Most Merciful

    Good Morning all, I hope you are all having a fantastic Winter so far & enjoying the same great weather we’re having here! A little wintery spring chill. Brrrrrrrrr!! Finally we are getting proper winter feeling. I’m doing good too! Haha, I’ve been trying to warm my toes up too, so cold here! 😛

    If you read my blog with any regularity, you probably know that I’ve started my journey towards a healthier lifestyle.
    Glad to have started my journey towards healthy eating and a healthy lifestyle. Already seeing results ♥ This new way of eating has been quite the adventure for me.

    So many people think healthy and clean eating is boring & bland? …hmm… I think not. Just Follow my journey, I will make it interesting for you.

    Clean Eating Mince Lettuce Cups 

    Clean eating is great. Healthy eating is giving your body what it needs! Nothing else.No one needs to be hungry or bored. Today I have come up with a very interesting recipe: Clean Eating Mince Lettuce Cups!! 

    clean eating Mince Lettuce Cups
    Photo: Clean Eating Mince Lettuce Cups

    Well don’t droll on my pic of my lettuce cups. lol

    It’s quick, easy to make, cheap and low in fat and carbs– the perfect combo!These clean eating mince lettuce cups are absolutely delicious with some amazing Asian flavours.This is one of those meals that will make you forget you’re eating healthy. Dinner on the table in just over 30 minutes that is loaded with fragrance, a hit of spice and full of freshness.

     Clean Eating Mince Lettuce Cups
    Photo: Clean Eating Mince Lettuce Cups

    This is the easiest, quickest meal you could ever make. And if you’re quick in the kitchen, you could even get this on the dinner table in less than 30 minutes. Plus, it’s budget-friendly and you can easily double or triple the recipe as needed. What more could you ask for?

     Clean Eating Mince Lettuce Cups
    Photo: Clean Eating Mince Lettuce Cups

    So Let’s get started!!

    Ingredients You will Need:

    1. mince 
    2. ginger _ garlic 
    3. lettuce leaves
    4. herb Seasoning 
    5. few veggies (green pepper, green onion)
    6. hot sauce 
    7. tomato paste
    8. lemon
    9. olive oil

    Tools You needed to make this recipe are:

    1. A pan
    2. A wooden spoon
    3. A plate to serve
    4. A knife to cut veggies
    5. Cutting board 

    Check it out the Clean Eating Mince Lettuce Cups recipe and printable version below!!

    Recipe Note’s 

     Eat it with your hands like a wrap (I do!) or be more civil and eat witha a spoon!

    Put your own spin on it. And lemme know how it turns out. Post a photo on Facebook (Recipestable) or  on Twitter so I can see how lovely yours turn out.

    Happy Clean Eating!!

    If you like this Clean Eating Mince Lettuce Cups recipe, Please Subscribe to my blog. I have lots more recipes to share with you. And If you make it then let me know your feedback by commenting below.

  • Chocolate Chip Pancakes Recipe

    Chocolate Chip Pancakes Recipe

    Aslam-o-Alakaum My Lovelies !!

     In the Name of Allah, Most Gracious, Most Merciful

    Hope, you are doing splendidly and enjoying the season. Well I’m in the middle of work, and anxiety has begun to sink its sharp little claws into my brain. It’s almost the final month of my training and I’m already drowning under a sea of coding assignments and project.

    Ahhh I love to code even though it makes me want to tear my eyes out every 10 minutes. Crying Out Loud ;(  I have constant fears that I’ve forgotten the code, functions, or left something somewhere blah blah blah. Problem is I love it but I have too much code to write though… ugh. This assignment is really doing my nut in! 

    code

    I’ m carving chocolate soo bad while coding up my project and backing up files. Every time I write a code, I delete it again. Almost time for a pancake break 😛  Anyhow before going back to coding, I decided to update you guys with this short post. 

    If there’s one thing you should know about me right up front it’s that I love Chocolate and pancakes, always have. Chocolate chips, Pancakes, foggy weather and coding are the reasons I love life.  Sounds super yummy! 

    chocolate-chips
    Pancakes are probably in my Top 10 favorite foods. But they need chocolate chips. 🙂

    Time for a Chocolate Chip Pancakes Break.

    No matter how difficult  life gets, just remember, there’s always time for a Pancakes break. 😀 These Chocolate Chip Pancakes have been a blessing while trying to write my final coding project. lol. They simple to make, so comforting, and lightened up with a few delicious tweaks. 

    Chocolate Chip Pancakes
    Photo: Chocolate Chip Pancakes

    This Chocolate Chip Pancakes recipe is a favorite of mine to make for special occasions or holidays. Eat while hot so the chocolate is all gooey. If you want to make it extra special, serve the pancakes with berries and whipped cream

    Chocolate Chip Pancakes Recipe
    Photo: Chocolate Chip Pancakes

    It was love at first bite, I’m telling you. The texture is fluffy but hearty and slightly dense, and plenty moist from the butter. They’re perfectly sweet even without any additional sugar – the chocolate chips provide a touch of decadence.

     Chocolate Chip Pancakes Recipe
    Photo: Chocolate Chip Pancakes

    They’re super tasty, easy to make, and use regular everyday ingredients. 

    Ingredients You will Need to Make These Pancakes
    Ingredients You will Need to Make These Pancakes

    Ingredients You will Need:

    1. Flour
    2. Sugar
    3. Baking Powder
    4. Cinnamon Powder
    5. Salt
    6. Eggs
    7. Milk
    8. Butter
    9. Vanilla Essence
    10. Chocolate Chips

    Tools You needed to make this recipe are:

    1. A pan or griddle
    2. A Spatula
    3. A Mixing Bowl
    4. Hand Beater

    Check it out the Chocolate Chip Pancakes Recipe and printable version below!!

    Tips For Diet Version Pancakes (Clean Eating):

    1. You can make gluten free Pancakes by using gluten-free oats and flour.
    2. For Sweeting: Add 1 Tablespoons of honey, apple syrup, or nectar is optional for extra sweetening, but I didn’t find it necessary.
    3. Don’t add butter. Mash very ripe banana with baking powder. It gives
    4. them a moist and fluffy texture.
    5. Serve plain or with a small drizzle of honey and a few additional chocolate chips for melting.

    Put your own spin on it. And lemme know how it turns out. Post a photo on Facebook (Recipestable) or  on Twitter so I can see how lovely yours turn out.

    Happy Chocolate Pancakes making!

    If you like this Chocolate Chip Pancakes Recipe, Please Subscribe to my blog. I have lots more recipes to share with you. And If you make it then let me know your feedback by commenting below.

  • Chocolate Date Bars Recipe

    Chocolate Date Bars Recipe

    Assalamu alaikum wa rahmatullahi wa barakatuhu!

    In the Name of Allah, Most Gracious, Most Merciful

    GOOD MORNING MY LOVELY READERS!!

     Good morning my fellow readers
    Good morning my fellow readers

    I hope you are well and happy today. The sun is shining brightly here this morning and the air is crisp. I need a little sun today and wireless signals are surprisingly good :P. So right Now, sitting in my roof top garden with my lappy writing today’s blog post and enjoying my morning tea. And beautiful pairs of sparrows and pigeons are also enjoying the morning sun with me. I love to hear the birds chirping in the morning – sweet songs of nature ♥☺

    Great start to the day.

    Trying to decide what to make for Quick Breakfast or Brunch, OR Snack? No worries, I’ve got you covered in today’s all new post.

    Today’s Recipe: Chocolate Date Bars

    SUPER healthy, naturally sweetened Chocolate Date Bars!! Just 7 ingredients to a snack that tastes more like a candy bar!! YUM YUM. The result is a simple, naturally-sweetened, healthy Date bars that is a little on the decadent side – just the way I like it.

    Chocolate date bars recipe
    Photo: Chocolate Date Bars Recipe

    They taste like Supreme awesomeness. They’re rich, dense, moist, super chocolaty, nutty, slightly crunchy and perfectly sweet and very filling.

    Chocolate Date Bars Recipe
    Photo: Chocolate Date Bars Recipe

    These Chocolate Date Bars DO indeed taste like a raw brownie. 😛

    1. They require just 7 ingredients.
    2. They’re no bake, aside from toasting your nuts (an optional step).
    3. They’re loaded with antioxidants, protein and healthy fats.
    4. They’re incredibly satisfying.
    5. They’re perfect for breakfast, dessert or a quick snack.
    6. They’re freezer-friendly.
    7. They’re uber chocolatey.
    8. They’re really just kind of perfect.

    I did have one for breakfast and found it quite filling. But for the most part I ate these as a healthy dessert. I’d go to the freezer, break off 1/3 and snack. Then repeat for the next 30 minutes until it was gone. Self control comes in waves, people, especially with these bars. 😛 ☺

    Really I should stop praising and tell you the recipe. So Let’s get started !

    Tools You needed to make this recipe are:

    1. A cookie sheet
    2. A frying pan
    3. A Spatula

    Check it out the Chocolate Date Bars Recipe and printable version below!!

    You MUST try these Date bars and let me know what you think! Post a photo on Facebook (Recipestable) or  on Twitter so I can see how lovely yours turn out.

    Happy Chocolate Date Bars making!

    If you like this Chocolate Date Bars Recipe, Please Subscribe to my blog. I have lots more recipes to share with you. And If you make it then let me know your feedback by commenting below.

  • Chicken Shawarma Wraps Recipe

    Chicken Shawarma Wraps Recipe

    Assalamu alaikum wa rahmatullahi wa barakatuhu!

    In the Name of Allah, Most Gracious, Most Merciful

    Shawarma is eaten in Arab countries, Pakistan, South Africa and the United Kingdom, and the meats, toppings and sauce vary depending on the country. Traditionally, Shawarma is made with chicken, lamb, beef, or goat that has been marinated, and is wrapped and cooked on a vertical rotisserie (similar to Greek gyro meat). When an order is placed, meat is shaved off and served as a wrapped sandwich (using pita bread) with fresh pickles and sauce.

    Chicken Shawarma Wraps
    Photo: Chicken Shawarma Wraps Recipe

    Chicken Shawarma Wraps

    So today, I’m going to share this awesome Chicken Shawarma Wraps recipe with my fans. This dish is not hard to make, it just requires a little bit of planning ahead. Well worth the effort!

    Chicken Shawarma Wraps Recipe
    Photo: Chicken Shawarma Wraps Recipe

    This Chicken Shawarma Wraps recipe is bursting with middle eastern flavors. Simple to make. Think of your favorite gyro place where they are slicing meats from a spit, and placing it inside of warm pita or flat-bread, along with sauces and vegetables. That’s shawarma, and this is my take on it. Did I mention my entire family was totally in love with this??

    Chicken Shawarma Wraps Recipe
    Photo: Chicken Shawarma Wraps Recipe

    It is really difficult to recreate the taste of shawarma at home, but this recipe I think, does it justice. The key is to leave the chicken marinading overnight for maximum flavour, and to have the grill smoking hot when cooking. And I made the Shawarma Pickles two days before and made a batch of sour cream as well as hummus sauce.

    Chicken Shawarma Wraps Recipe
    Photo: Chicken Shawarma Wraps Recipe

    Sorry I din’t get step by step picture as I was in a bit hurry to assemble the wraps. But I will try to upload step by step pictures later. InshaAllah !!

    Let’s get started !

    Check it out the Chicken Shawarma Wraps Recipe and printable version below!!

    Important Tips:

    1. Try not to pile the pitas on top of each other until after they have cooled. This keeps them nice and plump for filling.
    2. To store pita breads, you can wrap them in cling film and freeze for up to 3 weeks.
    3. For the filling you can use any mixture of your choice with salad, just slit the pitas and stuff them with your favorite ingredients.
    4. You can also make pita breads on a frying pan or hot griddle or even it a bread-maker.

    If you like this Chicken Shawarma Wraps Recipe, Please Subscribe to my blog. I have lots more recipes to share with you. And If you make it then let me know your feedback by commenting below.

  • Almond French Toast Hearts Recipe

    Almond French Toast Hearts Recipe

    Assalamu alaikum wa rahmatullahi wa barakatuhu!

    In the Name of Allah, Most Gracious, Most Merciful

    Almond French Toast Hearts

    These Almond French Toast Hearts are easy to make and so delicious. Confectioners’ sugar, and almond butter tastefully top off each bite. Do try it, Your kids will probably get a kick out of heart-shaped french toast.

    Almond French Toast Hearts Recipe
    Photo: Almond French Toast Hearts Recipe

    Heart shaped cookie cutters can do more than just make cookies, use them to make a special breakfast for the ones you love most. My brother was not in good mood and lil bit annoyed with me. So when I made these Almond French Toast hearts for breakfast yesterday it completely changed the overall of his mood. 

    Almond French Toast Hearts Recipe
    Photo: Almond French Toast Hearts Recipe

    Almond French Toast Hearts with Flavored Butter —- A perfect way to say” I Love You Brother ♥♥♥.”

    Almond French Toast Hearts Recipe
    Photo: Almond French Toast Hearts Recipe

    Let me tell you a little secret that it’s a really lovely thing, because if you are anything like me, you could eat golden french toast smothered in almond flavored butter every day of the week.

    Tools You needed to make this recipe:

    1. A large heart-shaped cookie cutter
    2. A frying pan
    3. A spatula
    4. A Hand- Beater 

    Let’s get started !

    Check it out the Almond French Toast Hearts Recipe and printable version below!!

    Recipe Tip’s:

    1. If you do not have a heart-shaped cookie cutter, use a heart-shaped template and sharp knife to cut heart shapes.
    2. Oh yeah, DON’T throw away the extra bread pieces left over from the heart cut-outs. I’ve got something you can do with them. Something tasty. More details later in the week…

    If you like this Almond French Toast Hearts Recipe, Please Subscribe to my blog. I have lots more recipes to share with you. And If you make it then let me know your feedback by commenting below.

  • Baked Vegetable Spring Rolls Recipe

    Assalamu alaikum wa rahmatullahi wa barakatuhu!

    In the Name of Allah, Most Gracious, Most Merciful

    I hope you’re well and have had a good start to the week.   I’m sorry to let you worry about me, but these days I’m a bit busy.  As you know study study study. lol 😀 I am madly busy with my assignments. Sorry for this post being late.

    My class got cancelled today. Glad I get a chance to breathe. So I decide to write a post for my lovely reader’s. Last week, I made these Veggie rolls ( Baked Version) to give myself a break from ‎assignment work. They are very easy to prepare and tastes absolutely delicious! I had too much fun making this. 

    baked veggie rolls
    Take a Break and bake Some Veggie Rolls 🙂

    These yummlicious veggie rolls are healthy and very filling. And they smell amazing when they’re baking. They crisped up fine in the oven. The only problem is that three wrappers have 180 calories! What!???? That’s a lot. I ate 3 rolls anyway. 😛 😉 They are ready in only 35 minutes and you can use your favorite veggies.

    Baked Veggie Rolls Recipe
    Photo: Baked Veggie Rolls Recipe

    You could fry these, too, but I was trying to keep them healthy. I hope you all give this Baked Veggie Rolls recipe a try and let me know how they turn out!

    Baked Veggie Rolls 

    So let the fun begin!

    1. First Prepare Veggie Filling: Heat a small amount of oil in a wok over medium heat. Add giner and garlic. Saute until fragrant. Might you think, it’s a stupid instruction, isn’t it? Tell you what, just cook your garlic few seconds until they’re soft-ish.
    2. Now add green peas, red beans and corns. Cook for 2-3 minutes or until they are soft.Add remaining veggies and add a splash of vingear. Stir fry for few minutes. You can add soy sauce or any store bought sauce etc. But I didn’t add it. As I try to avoid artifical ingredients to follow my journey towards clean eating. 🙂
      Sprinkle black pepper, red chili, and maybe a little salt if you need it. If you want to use fresh herbs then I think that would be lovely.
    3. Stir well and Let everything simmer for a couple of minutes, but don’t let everything get overly soft because you still have to stuff and bake your rolls.
    4. Take the mixture into a bowl and let it cool for few minutes. Once everything is cool, you can either proceed to stuffing the rolls, or cover your bowl and put everything in the fridge overnight. If you do refrigerate the veggie mixture, be sure to bring it room temperature before stuffing your rolls.
    5. When you’re ready to stuff your rolls, be sure your stuffing mixture and wrappers are at room temperature. You’ll want a clean work surface for this part and a bowl of water nearby.
    6. Don’t be intimidated by this part. You just want the rolls to hold the yummy stuffing in. They don’t need to be perfect. And, frankly, if someone is going to judge you on how pretty your spring rolls are, then you probably shouldn’t be feeding them. lol 😛
    7. Preheat an oven for 200 degree C and brush a baking sheet with oil.
    8. Place a wrapper out in a diamond shape on your work surface.Put a tablespoons of filling in the center of the wrapper. I under-stuffed these rolls, so they turned out chewier that I would have liked. However, you don’t want to stuff them so full that they split open. It’s a delicate balance.
    9. Bring the bottom point of your wrapper up over the filling and tuck it under as tight as you can. Fold the sides over and shape into a roll.
    10. Moisten the edges of the top flap slightly with water and roll the roll over, pressing the point on the underside of the roll to seal it.
    11. Put on a lightly oiled baking sheet and repeat this method the rest of your rolls.
    12. Lightly brush the tops of the rolls with egg-wash and sprinkle sesame seeds over them.
    13. Bake in the preheated oven for 20 minutes or until they turn golden brown. This took my oven around 22-25 minutes.
    14. You can eat these veggie rolls with tamari or soy sauce, but we prefer sweet and sour sauce.
      Ready !!
    Baked Veggie Rolls Recipe
    Photo: Baked Veggie Rolls Recipe

    Sorry I din’t get step by step picture as I was hungry and on in a hurry to eat 😛

    Check it out the Baked Veggie Rolls Recipe and printable version below!!

    Keep me in your duas please, and have a lovely week,

    Wasalaam!

    If you like this Baked Veggie Rolls Recipe, Please Subscribe to my blog. I have lots more recipes to share with you. And If you make it then let me know your feedback by commenting below.

  • Chicken Pita Sandwiches Recipe

    Chicken Pita Sandwiches Recipe

    Chicken Pita Sandwiches 

    Need a quick and delicious lunch option? or If you’re looking for fast, easy dishes to bring to a picnic, an Asian twist. Then this Pita Chicken Sandwiches recipe is sure to please you and your family.

    Chicken Pita Sandwiches Recipe
    Photo: Chicken Pita Sandwiches Recipe

    Say goodbye to your boring sandwiches. This Chicken Pita Sandwiches recipe is so easy to make and sure to spice up your lunch routine. Twenty minutes is all you need to whip up these simple yet satisfying Chicken Pita Sandwiches. Perfect to pack for school or work!!

    Chicken Pita Sandwiches Recipe
    Photo: Chicken Pita Sandwiches Recipe

    This mouthwatering sandwiches stuffed with a delicious chicken veggie filling will make mealtime exciting.Ah ___Sounds delish !! This simple Chicken Pita Sandwiches packs a lot of flavor and nutrition, which makes it ideal for an easy weekday meal. They may be tiny in size, but made this way, the lunch or dinner favorite is big on flavor!

    Chicken Pita Sandwiches Recipe
    Photo: Chicken Pita Sandwiches Recipe

    These Pita Chicken Sandwiches will help you enjoy every minute of these glorious warm days. When the weather is beautiful there is nothing better than a picnic. It’s the best appetizer recipe to bring to a picnic that are sure to be a hit!  I put Different veggies with roasted chicken, olives and cheese.You Can also stuff Pita Sandwiches with leftover ingredients from previous meals. Simple, fast and satisfying. Who has time for much more? The options truly are endless. Must try it,  I hope you enjoy it as much as I did!

    Check it out the Chicken Pita Sandwiches Recipe and printable version below!!


    If you like this Chicken Pita Sandwiches Recipe, Please Subscribe to my blog. I have lots more recipes to share with you. And If you make it then let me know your feedback by commenting below.

  • Potato Scotch Eggs Recipe

    Potato Scotch Eggs Recipe

    A delicious and easy tea time snack for your friends and family. Fresh Parsley makes this traditional Potato Scotch egg recipe extra special. 

    Potato Scotch Eggs recipe
    Photo: Potato Scotch Eggs

    Scotch eggs are one of those foods that have never gone out of favorite.I really love Scotch Eggs. Believe me this homemade potato scotch eggs are a world away from shop bought versions. They’re worth the effort for a special picnic treat. Packed with protein power, this summer fair favorite is easy to make in your home kitchen. Ready to eat in just 30 minutes, it makes a great start to the day, or a satisfying snack.

    Potato Scotch Eggs Recipe
    Photo: Potato Scotch Eggs Recipe

    I have always been fascinated by Scotch eggs. I think they bring a little “wow” factor to any table. Scotch eggs are traditionally made with sausage meat wrapped around a hard boiled egg then breaded and deep fried. I wanted to shake up this UK savory treat with some Asian spices and do my own take on it. I decided instead of using a raw sausage meat, I would make a potato filling to wrap around the egg then bread it and deep fry it. I loved how these came out and they go perfectly with zeera rice and curry meal.

    Potato Scotch Eggs recipe
    Photo: Potato Scotch Eggs

    They also go well with a salad, bread, naan, etc… I think these beautiful eggs dress up any Asian or European table. If you are little worried about the size of the larger scotch eggs, I did make make a smaller version of this fun dish. I think the smaller version is actually a little more manageable to make and serve, although it doesn’t have the show-stopper look as the whole egg version when you cut them. Of course, both are equally tasty and fun and you will love to see them once they sit prettily on your table.  Do try it, your kids will love it. Perfect for lunch box. 

    Note: Make sure you cut the larger scotch eggs in half or quarters before serving so the guests can see the inside because that’s the “wow” factor to the dish. Enjoy.  

    Check it out the Potato Scotch Eggs Recipe and printable version below!!

    If you like this Potato Scotch Eggs recipe, Please Subscribe to my blog. I have lots more recipes to share with you. And If you make it then let me know your feedback by commenting below.

  • Super Crispy French Fries Pakora Recipe

    Super Crispy French Fries Pakora Recipe

    French Fries Pakora

    Here is a Pakistani twist on the everyday french fries. Super simple to make and very tasty and crispy. You can eat them any time with cold drinks or tea. Would go great with a veggie burger or any type of burger. Or even just as a snack.

    It’s a perfect recipe for a quick and easy desi snack, consider making a spicy potato chips please guests who love spicy foods. delicious!!! I serve it with Homemade Tomato Ketchup. You can serve with any kind of dip or sauce you want.

    French Fries Pakora Recipe
    Photo: French Fries Pakora Recipe

    You should always use old potatoes to make french fries. New ones are moist and are extremely raw, that do not make french fries crispy.

    Step by Step ~ French Fries Pakora Recipe

    Step 1 ~ First Peel the potatoes with the help of a peeler and wash them.

     French Fries Pakora
    Step 1 ~ French Fries Pakora

    Step 2 ~ Now cut them into long pieces. You can use french fries cutter that can be easily bought from the market also. You will be able to cut the pieces quickly and in equal shapes.

    french Fries Pakora
    Step 2 ~ French Fries Pakora

    Step 3 ~ In a large bowl, add potatoes, chickpea flour, rice flour and cornflour. Season with salt, chili powder, cumin and garlic powder.

    French Fries Pakora
    Step 3 ~ French Fries Pakora

    Step 4 ~ Add little water and mix well to coat evenly.

    French Fries Pakora
    Step 4 ~ French Fries Pakora

    Step 5 ~ Heat oil in a pan over medium heat.

    French Fries Pakora
    Step 5 ~ French Fries Pakora

    Step 6 ~ Put the french fries pakora into it to fry. Make sure that the oil is not extremely heated.

     French Fries Pakora
    Step 6 ~ French Fries Pakora

    Step 7 ~ Fry them till they turn golden brown and crispy.

    French Fries Pakora
    Step 7 ~ French Fries Pakora

    Step 8 ~ Remove on a kitchen paper to drain excess oil.

    French Fries Pakora
    Step 8 ~ French Fries Pakora

    Step 9 ~ sprinkle chaat masala over them. Delicious French Fries Pakoras are ready serve. ENJOYY!!

     French Fries Pakora
    Step 9 ~ French Fries Pakora

    Check it out the French Fries Pakora recipe and printable version below!!

    If you like French Fries Pakora Recipe and make it then let me know your feedback by commenting below.

  • The Perfect Brunch Option: Crispy Potato Toast Recipe!

    Crispy Potato Toast

    This is an open faced sandwich recipe. Spicy Potato and chicken mixture topped on bread slices and then shallow fried to form a crispy delight. An easy and quick tea time delicacy.Great for Iftar Parties.

    Crispy Potato toast Recipe
    Photo: Crispy Potato toast Recipe

    Choosing menu especially a new one for Iftar is a cumbersome task. I like to  experiment so, I always hunt for new recipes.Yesterday, I made these Open Faced Sandwiches for my family. It was one such delicious and tempting. Try this Crispy Potato Toast Recipe, even you and your family would love it. Every bite of these toasts will make you happy and you will want to have more of it.

    Crispy Potato toast Recipe
    Photo: Crispy Potato toast Recipe

    I have used white bread to make it but you can also use brown bread for a healthier version. Try this in today’s Iftar and I am sure you will be loaded with appreciations from your family.

    Check it out the Crispy Potato toast Recipe here!!

    If you like Crispy Potato Toast Recipe and make it then let me know your feedback by commenting below. And if you know more innovative ways in which we can utilize this mouth watering Crispy Potato Toast, do share with us and we would be glad to give it a try.

  • The Best Ever Chicken Nuggets Recipe

    Chicken Nuggets

     What can we say about Chicken Nuggets?   Perfectly delightful titbits, enjoyable as finger food or as part of a snack/meal with fries or potato wedges, or even enclosed in a wrap with some salad and sauce. Try this copycat Chicken Nuggets recipe at home, tastes just like store bought.They are tender and juicy on the inside and crispy on the outside. Give it a try!

    Chicken Nuggets Recipe
    Photo: Chicken Nuggets Recipe

    Bismillah, let’s begin!

    Check it out the Chicken Nuggets Recipe and printable version below.

    I have also posted Chicken Chilli Nuggets Recipe which is another easiest & tastiest version of making Chicken Nuggets. Do check it out as well.


    Put your own spin on it. And lemme know how it turns out. Post a photo on Facebook (Recipestable) or  on Twitter so I can see how lovely yours turn out.


    Happy Cooking!!

    Keep remember me in your Dua’s and Stay tuned for new content on the blog 🙂

    If you like this post, Please Subscribe to my blog and let me know your feedback by commenting below.. I have lots more recipes to share with you.

  • Pocket Bread Sandwich Recipe

    Pocket Bread Sandwich Recipe

    Pocket Bread Sandwich

    Arrival of the holy month of Ramadan disrupts ones routine. From eating to sleeping to socializing, everything changes for Muslims. So In today’s Iftar, I made Pocket Bread Sandwich for my family. A great break from the usual toasted chicken veggie sandwich. Very Easy to make and yummy to eat. Do try it.

     Pocket Bread Sandwich Recipe
    Photo: Pocket Bread Sandwich Recipe

    You’ll never buy sandwiches from market again once you’ve learned how to make these quick and easy Pocket Bread Sandwich in your own kitchen.This Pocket Bread Sandwich recipe is ideal for Iftar parties, Picnics and Tea time chit chats.

    Bismillah, let’s begin!

    Check it out the Pocket Bread Sandwich Recipe and printable version below.

    I have also posted Chicken Pita Pockets Recipe which is another easiest & tastiest version of making sandwiches. Do check it out as well.


    Put your own spin on it. And lemme know how it turns out. Post a photo on Facebook (Recipestable) or  on Twitter so I can see how lovely yours turn out.


    Happy Cooking!!

    If you like this post, Please Subscribe to my blog and let me know your feedback by commenting below.. I have lots more recipes to share with you.


  • Chicken Vegetable Rolls Recipe

    Chicken Vegetable Rolls

    Who doesn’t love a hot, fried spring rolls? Making them yourself ensures a maximum freshness of flavour. This chicken vegetable rolls recipe is easy to follow and makes a perfect treat for your toddler.

    Chicken Vegetable Rolls Recipe
    Photo: Chicken Vegetable Rolls Recipe

    Bismillah, let’s begin!

    Check it out the Chicken Vegetable Rolls Recipe and printable version below.

     Recipe Note’s:

    Freeze remaining rolls in an airtight container between sheets of baking paper for up to 1 month.


    I have also posted Rainbow Bread Rolls Recipe which is another easiest & tastiest version of making rolls. Do check it out as well.


    Put your own spin on it. And lemme know how it turns out. Post a photo on Facebook (Recipestable) or  on Twitter so I can see how lovely yours turn out.


    Happy Cooking!!

    Keep remember me in your Dua’s and Stay tuned for new content on the blog 🙂

    If you like this post, Please Subscribe to my blog and let me know your feedback by commenting below.. I have lots more recipes to share with you.

  • Crispy & Delicious: The Perfect Egg Paratha Recipe (Everyone Will Love!)

    Egg Paratha

    There is no limit to stuffed paratha. You can stuff the parathas with almost anything, but I’m sure you have never tried boiled eggs stuffed parathas before.Great recipe for Suhoor!They taste simply superb.

    Egg Paratha Recipe
    Photo: How to make Egg Paratha 

    This Egg Paratha recipe is easy, simple and takes less time, especially if you have leftover wheat dough.It’s protein rich, healthy and tasty. You can make it for your kids as a after school snack.

    Egg Paratha Recipe
    Photo: Egg Paratha Recipe

    How to make Egg Paratha 

    Learn how to make egg Paratha by following the step by step instructions as shown in  pictures. The recipe is simple and very easy to follow. You would successfully cook it in first attempt. (InshaAllah)

    Bismillah Let’s Begin!

    Step 1 : Mix the wheat flour with salt, water and knead to a smooth dough. Keep it aside for 30 minutes.

    Step 2: Then make small balls from the dough and keep it aside.

    Step 3: Take a mixing bowl, add mashed eggs add salt, pepper, chili powder, coriander and little bit of oil. Mix thoroughly.

     Egg Paratha Recipe
    Step 3 ~ Egg Paratha

    Step 4:Take the dough balls and roll out each ball into a thin disc or a chapati.

     Egg Paratha recipe
    Step 4 ~ Egg Paratha

    Step 5:In the middle, place the filling mixture on one round chapati and cover with a another round chapati and seal the edges.

    Egg Paratha Recipe
    Step 5 ~ Egg Paratha

    Step 6:Now sprinkle a little dry flour on top, then roll the paratha to a thin round shape chapati. Take care it should not break while rolling it out.

     Egg Paratha Recipe
    Step 6 ~ Egg Paratha

    Step 7:Grease your tava OR griddle with Ghee (clarified butter) and place the paratha over it and when the base turns slightly golden color, apply Ghee (clarified butter) on the top and turn the paratha on the other side.

    Egg Paratha Recipe
    Step 7 ~ Egg Paratha

    Step 8:Fry these parathas on both sides, pressing gently and keep turning the paratha until it turns golden brown.

    Egg Paratha Recipe
    Step 8 ~ Egg Paratha

    Check it out the Egg Paratha recipe and printable version below:

    If you like this Egg Paratha Recipe, Please Subscribe to my blog. I have lots more recipes to share with you. And If you make it then let me know your feedback by commenting below.

  • Healthy Breakfast Option: Spinach and Cheese Omelet Recipe (Packed with Nutrients!)

    Spinach and Cheese Omelet

    Add extra nutrients to your breakfast by stirring in chopped fresh spinach, fresh herbs and shredded cheese into your protein-packed omelet. A carb-cutter’s perfect start for the day. Healthy and Nutritious Omelet made with home grown spinach from My Kitchen Garden.

    Spinach and Cheese Omelet Recipe
    Photo: Spinach and Cheese Omelet Recipe

    Freshly picked home grown spinach leaves turn into mouthwatering Omelet. Yes, this Spinach omelet is better than your omelet. Oragnic Eggs, fresh spinach, and CHEESE!!!! Please no drooling on my photo.

    This organic spinach and cheese omelet is full of flavors, it makes a perfect healthy breakfast. Enjoy it!

    Spinach and Cheese Omelette Recipe
    Photo: Spinach and Cheese Omelette Recipe

    Growing your own food isn’t just about saving money, it’s about so much more.I truly believe that as humans we posses an innate desire or need to take a hand-on role in the production of the food we consume. Whether through growing your own, foraging in the wild, hunting or even going to a local farm, knowing exactly where your food comes from provides a deep sense of appreciation for what you eat.

    Spinach and Cheese Omelette Recipe
    Spinach and Cheese Omelette made with Home grown Spinach

    Check it out the Spinach and Cheese Omelette Recipe here!!

    Spinach and Cheese Omelet Recipe

    This organic spinach and cheese omelet is full of flavors, it makes a perfect healthy breakfast. Enjoy it!
    Course Breakfast
    Cuisine American, Pakistani
    Keyword breakfast, cheese, eggs, kids friendly, omelet, Quick and Easy, spinach
    Prep Time 5 minutes
    Cook Time 8 minutes
    Total Time 13 minutes
    Servings 2
    Author Bushra Waheed

    Ingredients

    • 4 organic eggs
    • 1 cup baby spinach leaves chopped
    • 4 tablespoon grated cheddar cheese
    • 2 teaspoon butter or olive oil
    • 1/4 teaspoon pepper
    • salt to taste

    Instructions

    • Beat eggs in a bowl.
    • Stir in the baby spinach.
    • Season with salt and pepper. Mix well.
    • Melt butter in a pan over medium heat.Pour the egg mixture it it. As egg mixture starts to cook, gently lift edges of omelet with a spatula and tilt pan so uncooked egg mixture flows underneath.Cook for 2 minute or until almost set.
    • Sprinkle cheese over the omelet.
    • Fold omelet in half, allowing cheese to melt.
    • Slide cooked omelet onto a serving plate. Delicious Spinach and Cheese Omelet is ready to serve.

    Notes

    Serve with buttered toast and green smoothie.


    If you like Spinach and Cheese Omelet Recipe and make it then let me know your feedback by commenting below.And if you know more innovative ways in which we can utilize this mouth watering Spinach and Cheese Omelet, do share with us and we would be glad to give it a try.