Tag: bread

  • The Best Stuffed Chicken Buns Recipe You Will Ever Make

    The Best Stuffed Chicken Buns Recipe You Will Ever Make

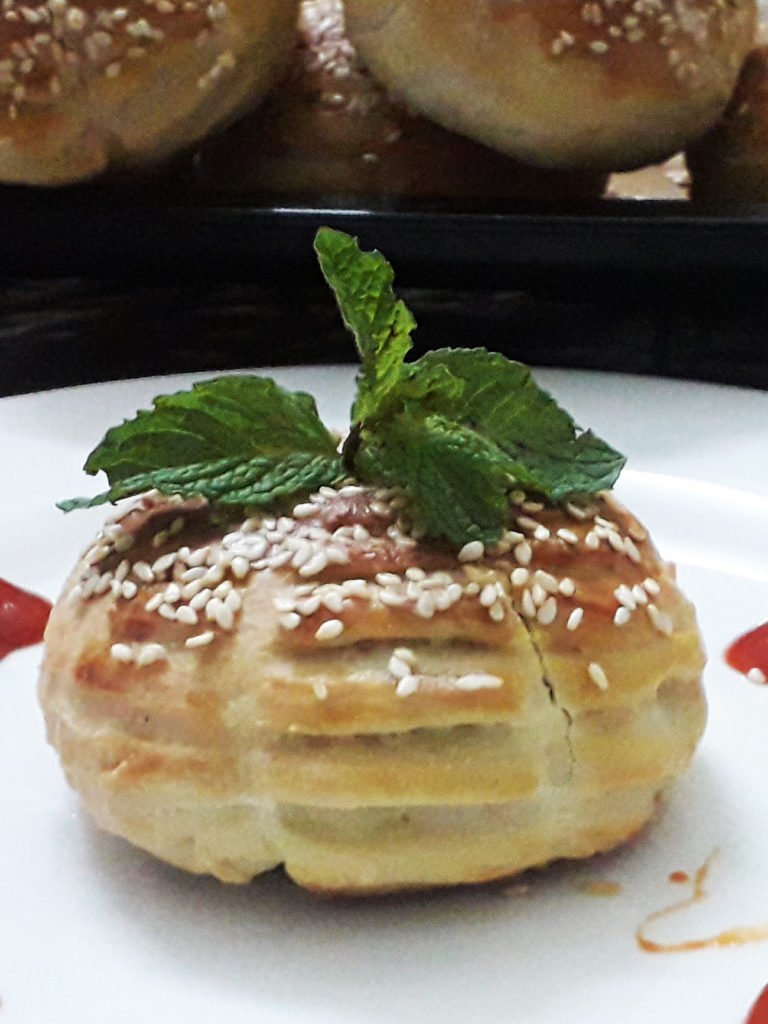
    There’s nothing like Stuffed Chicken Buns: perfectly baked ,soft, warm buns stuffed with hot savory chicken filling. You’ll amaze your family and friends with my easy to make “stuffed chicken buns recipe”.

    Stuffed Chicken Buns

    Breads & Buns are one of my favorite things to make and with this Stuffed Chicken Buns recipe it’s really simple to make that you cannot go wrong with this and tastes delicious. They’re so easy to make, and the possibilities are endless! You can stuffed with ground beef, mutton, chicken, cheese or mushrooms for a healthier option. Even if you don’t eat meat, you can make a great-tasting veggie buns! Whatever it is you’re craving, you can satisfy it with it a stuffed bun!

    Stuffed Chicken Buns

    Why I like these Stuffed Chicken Buns?

    I love all breads but I have a special soft corner for stuffed buns and bread rolls. It makes for sumptuous snacks and the possibilities are endless. Stuffed buns are my favorite gateway to finish up leftovers and clear out the refrigerator. Though I did not use leftovers for this one since I had guests over but feel free to go where your imagination takes you.

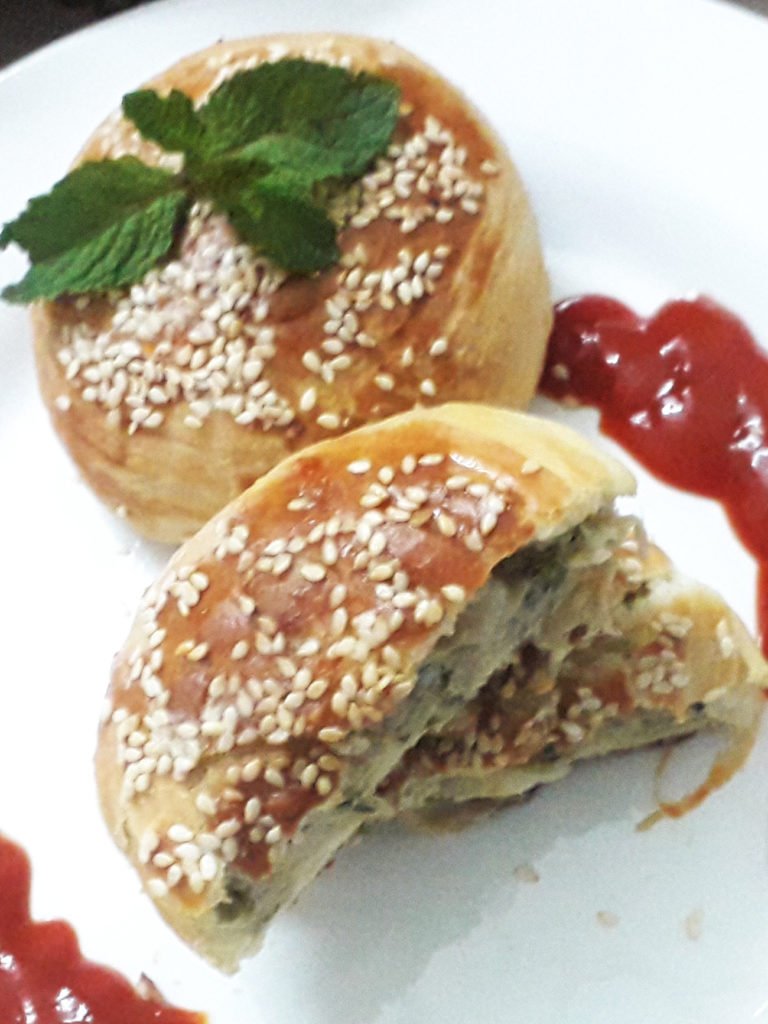
    On the outside, these golden buns resemble ordinary dinner rolls. But one bite reveals the tasty filling inside! You know that saying: It’s not what is outside but its what is inside that counts? Yeah, well its kind of the case here. Only that the outside is just as good. Soft and fluffy Stuffed Chicken buns with the most unexpected surprise ever!
    Most scrumptious Cheesy Chicken filing!

    I just love it when something looks so innocent and unassuming and then when you bite into it! Hits you with an unexpected but most pleasant burst of flavor.

    Stuffed Chicken Buns Recipe
    Stuffed Chicken Buns Recipe

    Ingredients in Stuffed Chicken Buns Recipe?

    • For Dough:  flour, dry milk powder, sugar, yeast, salt, egg, oil, warm milk
    • Creamy Chicken Filling: boiled chicken shredded, butter, onion, plain flour, milk, Cheddar Cheese, black pepper, red pepper, salt , few coriander and mint leaves.
    • For Buns Topping: Egg white, sesame seeds for sprinkling, melted butter for brushing
    Stuffed Chicken Buns

    How to Bake Perfect Stuffed Chicken Buns every time!

    Stuffed Chicken Buns
    1. Dough: These stuffed buns are an easy bake with only a single rise needed for the dough. That makes it a comparatively quicker snack. When making anything with yeast, including these buns, let the dough rise to the point the recipe says it should, e.g., “Let the dough rise till it’s doubled in bulk.” Rising times are only a guide; there are so many variables in yeast baking (how you knead the dough; what kind of yeast you use) that it’s impossible to say that bread dough will ALWAYS double in bulk in a specific amount of time.
    2. Stuffing: They prepared a cheesy chicken filling and stuff into these soft buns and life will be so much simpler for you. You can fill up your buns with lots of different things. I like to add some mushrooms and olives to mine, but you can use any kind of vegetables, meat stuffing you prefer! Pizza sauce would be another great addition. Or throw in some fresh herbs. Oh, the possibilities are endless!
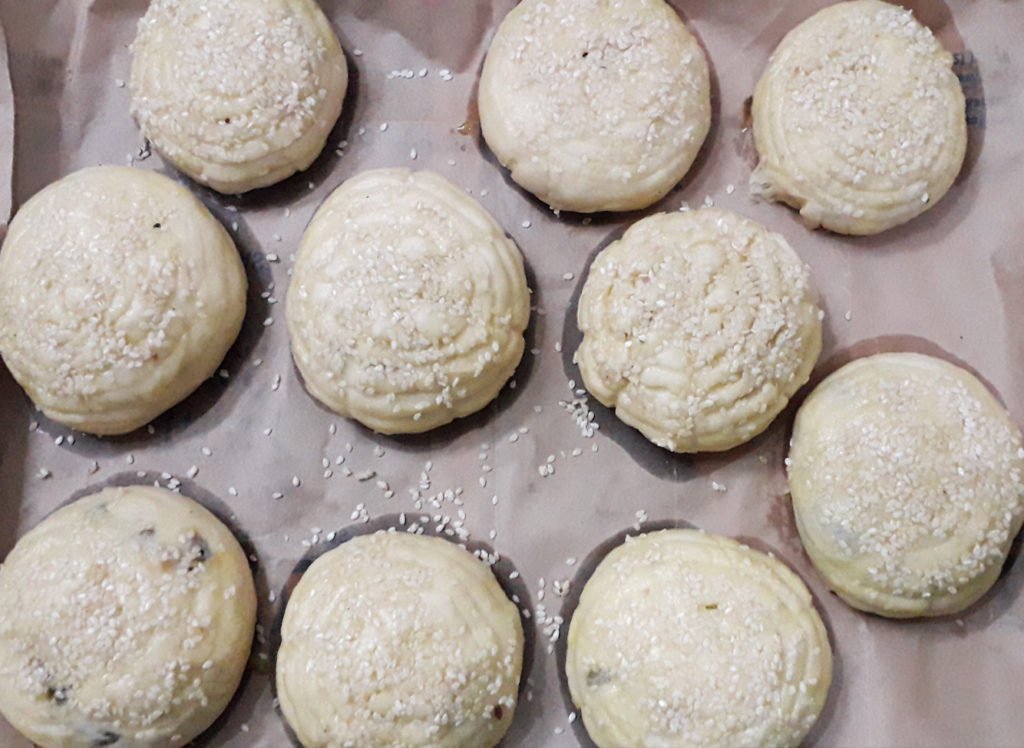
    3. Shaping: Shape them as per your liking and bake. For slightly smaller buns, divide the dough into 12 pieces instead of 10. Bake the buns for 12 to 15 minutes, instead of 15 to 18 minutes. And how about “slider buns” — about 3″ in diameter? Divide the dough into 24 pieces, and bake for 12 to 15 minutes. Proceed with the recipe as written.
    4. Alternative way of Shaping: What’s another easy way to shape buns, besides rolling them into balls and flattening? Gently deflate the dough, and form it into a smooth 8″ log. Slice the log as though you were slicing cinnamon buns. Gently pull each slice into a circle.
    5. Brushing: Brushing buns with melted butter will give them a soft, light golden crust. Brushing with an egg-white wash (1 egg white beaten with 1/4 cup water) will give them a shinier, darker crust. For seeded buns, brush with the egg wash; it’ll make the seeds adhere. And, feel free to add the extra yolk to the dough, reserving the white for the wash.
    stuffed chicken buns recipe
    stuffed chicken buns recipe

    And serve with your favorite dips and sauces.

    Stuffed Chicken Buns

    Double Up and Freeze a Batch:

    I highly recommended freezing a batch of these after they’ve cooled so you can pop them into the oven for a fast, warm breakfast or as side for dinner that will delight your fellow tablemates.

    Stuffed Chicken Buns

    Bismillah let’s get started.
    Check it out The Stuffed Chicken Buns Recipe and printable version here!!

    Other versions of this Stuffed Buns:

    I’ve shared some of the tastiest buns recipes out there for you to enjoy…check them out!

    Want more Bread Inspiration? 

    Here are some other Bread or Buns recipes on my blog:

    Pin it For Later

    Pin it for Later ~ Stuffed Chicken Buns

    Put your own spin on it. And lemme know how it turns out and do take a few seconds to rate it! I would love to see your recreations so tag me on instagram @recipestable or Facebook (Recipestable) or on Twitter so I can see how lovely yours turn out.

  • The Low-Carb Solution to Egg in a Hole Recipe

    The Low-Carb Solution to Egg in a Hole Recipe

    Can’t decide whether to make a grilled kabab or an egg in a hole? Make both!
    Two of my favorite food groups—eggs and toast—unite in this take on the playful dish also known as egg in a hole, Egg in a Basket or Egg in a Boat or, more simply, egg in toast. I fancy it up by filling the bread center with mince crust and topping with basil or chili flakes. And It came out so delicious!

    Egg in-a-hole – Look at that perfect texture !!

    For this recipe, I used a normal mince kabab mixture for filling the bread , to keep it low carb. The outside was crunchy and crispy and inside was so juicy and tasted so good with the egg in the middle. A nice way to add some more protein to a sandwich, while also providing something of a sauce from the egg yolk (depending on how you cook your egg). It’s adds just a little oomph of flavor to the sandwich.

    Watch carefully as you cook the mince crust, and don’t raise the heat higher than medium: The goal is for the mince crust to brown and the egg to set simultaneously. Save the crust center for making breadcrumbs.

    Also how well the eggs must be cooked is a personal choice. Some like over easy, sunnyside up or completely cooked through. No matter how you make it, this will remain a favorite breakfast option passed on for many generations to come. When you make this cute breakfast-for-dinner recipe, you can vary it by using cheese, vegetables or sauteed Spinach in place of the mince filling.

    This Low-Carb Solution to Egg in a Hole Recipe can be an excellent addition to a healthy weight loss diet. They’re not only low-carb and low in calories but also high in protein and fiber that keep you feeling full.

    I’m really excited to share this recipe with you.
    So, Bismillah let’s get started and Check it out Low Carb Egg in a Hole Recipe and printable version here!!

    I have also posted Chocolate Date Bars recipe  and Vegetable Fried Brown Rice recipe which are another easiest & tastiest version of Healthy Eating. Do check it out as well.

    Put your own spin on it. And lemme know how it turns out. Post a photo on Facebook (Recipestable) or Instagram on Twitter so I can see how lovely yours turn out.

    Happy Healthy Eating!!
    Do you have another name for this classic breakfast? Please leave a comment below, and let me know!

  • Baby Chicken Bread Recipe

    Baby Chicken Bread Recipe

    The recipe I am sharing today is a Family FAVORITE. All families have certain dishes they love to cook and eat. Mine goes gaga for these baby Chicken Breads! Put 12 dozen in front of them and they’ll still demand more. I am sure you will face the same situation with your siblings, cousins, random guests when you try these magical Baby Chicken Bread. (unless they are gluten intolerant. Oops)

    I thought, I would share this FAMILY FAVORITE with everyone since so many Friends nd ClassFellows have asked for this recipe. Enjoy!

    Baby Chicken Bread
    Photo: Baby Chicken Bread

    Baby Chicken Bread

    Chicken bread is a classic of Pakistani bakeries and we served it at most of the tea parties as a staple here. This simple yet delicious bread is easy to make and full of flavor.

    All you really need is a few basic ingredients: salt, flour, baking soda and yeast etc. The “trick” to achieving a perfect texture is not to over knead the dough and don’t over bake, as this will make it tough & hard, ugh not good! Brush with egg wash. Sprinkle a few sesame seeds. And voila! It’s ready to go in the oven for 25 minutes. 

    Baby Chicken Bread recipe
    Photo: Baby Chicken Bread

    On weekend night, I decided to bake chicken bread from scratch and Just for a twist I made  them in baby sizes.

    Don’t ask me why I do these things. I’m not quite sure myself.

    But you have to admit….they’re pretty darn cute.

     Baby Chicken Bread
    Photo: Baby Chicken Bread

    So now that my kitchen is covered with Baby Chicken Breads, what should I do with them?
    Of course, slathering them with hot pepper sauce and taking a big bite doesn’t count. I already did that. Twice.

    Baby Chicken Bread
    Photo: Baby Chicken Bread

    This recipe is especially handy because it makes A LOT of Baby Chicken Breads (1-1/2 dozen to be exact). So they are the perfect, fuss-free party food. Easy to make, fun to eat.

    Bismillah, Let’s get started!

    Check it out the Baby Chicken Bread recipe and printable version below.


    Baby Chicken Bread Recipe

    Chicken bread is a classic of Pakistani bakeries and we served it at most of the tea parties as a staple here. This simple yet delicious bread is easy to make and full of flavor.
    Prep Time 20 minutes
    Cook Time 25 minutes
    Total Time 45 minutes
    Servings 16
    Author Bushra Waheed

    Ingredients

    For Baby Chicken Bread Dough

    • 4 cups plain flour
    • 1 tablespoon instant yeast
    • 2 tablespoon dry powdered milk
    • 1 teaspoon salt
    • 1 teaspoon castor sugar
    • 4 tablespoon oil
    • 1 egg plus one for glazing

    For Baby Chicken Bread Filling

    • 2-1/2 cups boiled chicken shredded
    • 1 large onion finely chopped
    • 1 teaspoon salt
    • 1 teaspoon black pepper
    • 1 teaspoon garam masala powder
    • 1/2 cup coriander leaves
    • 4 green chilies finely chopped
    • 1 cup milk
    • 2 tablespoon plain flour
    • 2 tablespoon butter
    • sesame seeds & flax seeds as required

    Instructions

    To Make the Baby Chicken Bread Dough

    • In a large mixing bowl combine the plain flour, salt, castor sugar, dry milk powder, instant yeast, oil and egg.
    • Slowly mix in the lukewarm water with your hands till all the ingredients are mixed well and dough starts to form.
    • Knead the dough for 5-7 minutes on a floured surface till the dough becomes smooth and is no longer sticky.
    • Bang the dough on the floured surface 7-8 times for elasticity.
    • Shape the dough in a large ball add place in a greased bowl.
    • Brush the top lightly with some oil.
    • Cover with a kitchen cloth and let the dough to rise somewhere warm until doubled in size, around 1 hour.

    To make the Chicken Filling

    • Meanwhile, Melt butter in a frying pan over medium heat.
    • Fry onion till soft and translucent.
    • Now add 2 tablespoon plain flour and stir well.
    • Season with salt , black pepper and garam masala powder.
    • Stir in the milk and cook for 2-3 minutes or until thickened.
    • Stir in the shredded chicken add chopped green chillies and coriander leaves.
    • Remove from the heat and let it cool completely.
    • Punch the dough to release air.
    • Preheat oven at 200 degree C.
    • Now divide the dough into 14-16 parts depending on how small you want the baby chicken bread to be.
    • Roll each piece of dough to a rectangular shape.
    • Snip the sides with a sharp knife and put chicken filling in the center.
    • Fold each side so they overlap each other (like a braid) the filling will show slightly but that’s ok.
    • Brush top with beaten egg.
    • Sprinkle sesame seeds and flex seeds.
    • Bake, in the preheated oven, for 25-30 minutes or until its turn golden brown.
    • Right after taking out of the oven apply butter well on whole bread and let it rest covered with a cloth for 2-3 minutes to soften the bread completely.
    • Delicious Baby Chicken Breads are ready to serve.

    Notes

    Serving Suggestions:
    Voila! Enjoy your delicious bread with hot tea to the loving and deserving.


     Recipe Tip’s:

    1. I always make big batches of chicken bread at a go and then wrap them well in foil, then put them in some sort of a cellophane bag and tie it up tight and freeze.
    2. They can keep up to 4 weeks! When you need one, you just thaw it out overnight in the fridge or keep it out on the counter until it’s thawed out, then unwrap and then splash a little bit of water using your fingertips on it and put it in the oven for about 5 minutes to freshen it back up. Becomes as good as new! 

    Put your own spin on it. And lemme know how it turns out by sharing a picture  on Instagram, Facebook (Recipestable) or Twitter with this hashtag #Recipestable so I can see how lovely yours turn out.


    Happy Baking!!

    If you like this post, Please Subscribe to my blog and let me know your feedback by commenting below.. I have lots more recipes to share with you.

  • Kashmiri Naan Recipe

    Kashmiri Naan

    Kashmiri Naan is nutty and tasty, liked for breakfasts and served best in tea parties.  This Kashmiri naan stuffed with a sweet cashew, almond and cherry paste. This Kashmiri blend of taste can be easily made at home.

    kashmiri Naan Recipe
    Photo: kashmiri Naan Recipe

    Check it out the  kashmiri Naan Recipe here!!

    [divider]

    [one_fourth]Prep Time:40 minutes[/one_fourth] [one_fourth]Cook Time:30 minutes [/one_fourth] [one_fourth]Servings: 14[/one_fourth] [one_fourth_last]Difficulty Level: Medium[/one_fourth_last]

    [divider]

    [tabs type=”horizontal”] [tabs_head] [tab_title]Ingredients[/tab_title] [tab_title]Nutrition[/tab_title] [/tabs_head] [tab]

    For Naan Dough:

    • 6 cups white flour
    • 2 cups whole milk
    • 1 cup vegetable oil
    • 1 egg, lightly beaten
    • 2 tsp granulated sugar
    • 1/2 tsp baking powder
    • 1/2 tsp salt

    For Naan Stuffing:

    • 1 cup granulated sugar
    • 1/2 cup cashews
    • 1/4 cup almonds
    • 1 cup maraschino cherry, well drained

    [/tab] [tab]Yield: 14 servings

    Amount Per Serving:( 1 serving = 1 each)

    • Calories: 500.3
    • Total Fat: 21.2 g (Saturated Fat 3.4 g)
    • Cholesterol: 18.5 mg
    • Sodium: 155.9 mg
    • Carbohydrate: 68.0 g22
    • Dietary Fiber: 2.1 g
    • Sugars: 17.2 g
    • Protein: 9.5 g

    [/tab] [/tabs]

    Directions:
    [tabs type=”horizontal”] [tabs_head] [tab_title]Step by Step Method[/tab_title] [tab_title]Recipe Note’s[/tab_title][tab_title]Serving Suggestions[/tab_title][/tabs_head] [tab]

    Step 1

    To Make Dough:

    Place flour, 2 tsp sugar, baking powder and salt in a large bowl.

    Step 2

    Add milk, egg and vegetable oil. Mix well

    Step 3

    Knead a soft dough by usinf 2-3 tablespoo water ( if required).

    Step 4

    Cover the dough with a wet cloth, and keep aside in a warm place for a few hours.

    Step 5

    To Make Stuffing:

    Place 1 cup sugar, cashew nuts, almonds and maracshino cherry in a food processor.

    Step 6

    Process ingredients to a fine paste.

    Step 7

    To Make Kashmiri Naan:

    Divide dough into fourteen equal portions.

    Step 8

    Shape into balls.

    Step 9

    Roll into a round shape, approximately 6 inches in diameter.

    Step 10

    Put 1 tablespoon of the stuffing in the center of it.

    Step 11

    Fold the edges of the dough up over the stuffing and pinch it together to enclose the stuffing.

    Step 12

    Press with your hands to flatten the dough into a large 9-inch diameter circle.

    Step 13

    Preheat broiler in oven to the highest possible temperature.

    Step 14

    Heat a cast iron skillet over very high heat until very hot.

    Step 15

    Slap the naan onto the skillet.

    Step 16

    Immediately place the skillet under the broiler; it will puff up.

    Step 17

    Cook for 5 minutes, or until the naan turned golden brown.

    Step 18

    Remove from the oven, wrap in clean napkin and make the other naan’s with the same way. Kashmiri Naan is ready to serve.

    [/tab][tab]

    • Dough should be smooth and pliable, not sticky.
    • Also feel free to bake the naan plain or stuff it with whatever filling you like.

    [/tab] [tab]

    • Serve hot.

    [/tab] [/tabs]
    If you like Kashmiri Naan Recipe and make it then let me know your feedback by commenting below.And if you know more innovative ways in which we can utilize this sweet and mouth watering Kashmiri Naan, do share with us and we would be glad to give it a try.

  • Ramadan Delight: Easy Bread Cutlets Recipe (Perfect Iftar Snack!)

    Bread Cutlets

    A delicious and hearty snack which can be served as a starter, appetizer or simply evening snack. This easy bread cutlets recipe uses bread, potatoes, boiled green peas and few veggies and uses shallow fry technique to make them stomach filling and healthy. Whether you serve it with tea or green chutney, you are going love every bite of it.

    Bread Cutlets Recipe
    Photo: Bread Cutlets Recipe

    Very easy to make and spicy in taste.These Bread Cutlets taste great on a Rainy day.

    Bismillah, let’s begin!

    Check it out the Bread Cutlets Recipe and printable version below.

    Bread Cutlets Recipe

    Very easy to make and spicy in taste.These Bread Cutlets taste great on a Rainy day.
    Prep Time 10 minutes
    Cook Time 15 minutes
    Total Time 25 minutes
    Servings 8
    Author Bushrah | Recipestable

    Ingredients

    • 4 Bread Slices
    • 1 egg lightly beaten
    • 1 green Chilli finely chopped
    • 1/2 cup boiled potatoes mashed
    • 1/2 cup Carrot grated
    • 1/2 cup green peas boiled and mashed
    • 2 teaspoon fresh coriander Leaves chopped
    • 1/2 teaspoon cumin seeds
    • 1/2 teaspoon red chili crushed
    • 1/4 teaspoon black pepper
    • salt to taste
    • oil for shallow frying

    Instructions

    Method

    • Heat 2 tablespoon oil in a frying pan over medium heat.
    • Add all the vegetables.
    • Stir fry it for 5 minutes; sprinkle salt and continue frying until they become tender.
    • Dip bread in water and remove it immediately.
    • Squeeze out the excess water and add it with the fried vegetables and spice powders.
    • Mix until well combined.
    • Make equal balls and shape them into small cutlets.
    • Dip in egg then shallow fry in oil till they turn golden in color.
    • Transfer into a serving platter. Bread Cutlet is ready to serve. ENJOY!!

    Notes

    Serve hot with your favorite dipping sauce.
     

    I have also posted Mince Stuffed Cutlets Recipe which is another easiest & tastiest version of making cutlets. Do check it out as well.


    Put your own spin on it. And lemme know how it turns out. Post a photo on Facebook (Recipestable) or  on Twitter so I can see how lovely yours turn out.


    Happy Cooking!!

    If you like this post, Please Subscribe to my blog and let me know your feedback by commenting below.. I have lots more recipes to share with you.

  • The Best Naan Recipe: Easy & Delicious Flatbread

    Naan

    Looking for a delicious easy alternative to everyday bread, try this simple Homemade Naan Recipe!!.

    Naan Recipe
    Photo: Naan Recipe

    Check it out the Naan Recipe here !!

    [divider]

    [one_fourth]Prep Time:1 hour + 15 minutes[/one_fourth] [one_fourth]Cook Time:10 minutes[/one_fourth] [one_fourth]Servings:4 [/one_fourth] [one_fourth_last]Difficulty Level: Medium[/one_fourth_last]

    [divider]

    [tabs type=”horizontal”] [tabs_head] [tab_title]Ingredients[/tab_title] [tab_title]Nutrition[/tab_title] [/tabs_head] [tab]

    • 15 gm fresh yeast or 7 g dried
    • 300-350 ml warm water
    • 500 gm plain white flour
    • 15 gm fine salt
    • 1 tbsp plain yogurt
    • 2 tbsp vegetable oil

    [/tab] [tab]Yield: 4 servings

    Nutritional information is not yet available. [/tab] [/tabs]

    Directions:
    [tabs type=”horizontal”] [tabs_head] [tab_title]Step by Step Method[/tab_title] [tab_title]Serving Suggestions[/tab_title][/tabs_head] [tab]

    Step 1

    Put the yeast in a jug with about 100 ml of the water.

    Step 2

    Stir and leave for 10-15 minutes or until nice and foamy.

    Step 3

    Put the flour in a large bowl, stir in the salt, then make a well in the center.

    Step 4

    Pour in the yeast liquid, the yogurt and oil and another 200ml of the water.

    Step 5

    Mix to a rough dough, adding more water if necessary – it should be soft and slightly sticky.

    Step 6

    Turn out on to a lightly floured surface and knead the dough for 5-10 minutes, until smooth.

    Step 7

    Put it in a lightly oiled bowl, cover and leave for about 1 hour, or until doubled in size.

    Step 8

    Knock the gas out of the dough and give another brief kneading.

    Step 9

    Then cut it into four pieces and roll each out until about 5mm thick.

    Step 10

    Leave to rest for 5 minutes while you heat a heavy-based pan over a medium-high heat.

    Step 11

    Put one of the pieces of dough into the hot pan and cook for 5 minutes or so until its underside has formed a crust and is golden and patched with brown.

    Step 12

    Turn it over and continue cooking until the other side is golden brown.

    Step 13

    Repeat with the other pieces of dough. Delicious Naan are ready to serve.

    [/tab] [tab]

    • Serve warm with kebab, tikka, nihari or any other curry.

    [/tab] [/tabs]
    If you like Naan Recipe and make it then let me know your feedback by commenting below.And if you know more innovative ways in which we can utilize this mouth watering Naan, do share with us and we would be glad to give it a try.

  • The Best Buttery Garlic Naan Bread Recipe

    Garlic Naan is a Pakistani baked flat bread. If you do not try this delicious Garlic Naan recipe then you shall surely miss out, these garlic naan’s that one often orders in restaurants with their barbecue’s, karahi’s, or handi’s are simply irresistible and not that difficult to make.

    Check it out the garlic naan recipe here!!

    Garlic Naan Recipe Ingredients:

    • 1 tsp  active dry yeast
    • 4 tbsp  white sugar
    • 1 cup   warm water
    • 1 beaten egg
    • 3 tbsp   milk
    • 2 tsp salt
    • 4 cup bread flour
    • 2 tsp minced garlic
    • 1/4 cup    melted butter

    How to make garlic Naan:

    • In a large bowl, dissolve yeast in warm water.
    • Proof until frothy.
    • Stir in sugar, milk, egg, salt, and enough flour to make a soft dough. Knead for 6 to 8 minutes on a lightly floured surface, or until smooth. Place dough in a well oiled bowl, cover with a damp cloth, and set aside to rise.
    • Let it rise until the dough has doubled in volume.
    • Punch down dough, and knead in garlic.
    • Pinch off small amounts of dough to make 12 to 14 pieces.
    • Roll into balls, and allow to rise again.
    • While the dough is rising, preheat grill to high.
    • At grill side, roll one ball of dough out into a thin circle.
    • Lightly oil grill. Place dough on grill, and cook for 2 to 3 minutes, or until puffy and lightly browned.
    • Brush uncooked side with butter, and turn over.
    • Brush cooked side with butter, and cook until done, another 2 to 4 minutes.
    • Remove from grill, and continue cooking until all the naan has been prepared.
    • You can lightly sprinkle some more garlic on top for garnish
    • Garlic Naan is ready to serve.
    • Serve hot!
  • Ultimate Cheesy Potato Bread: Bakery-Style Goodness at Home!

    Cheesy Potato Bread

    This delicious cheesy bread is stuffed with cheese and potatoes. It’s the perfect accompaniment to a bowl of soup and a crisp salad.try this Cheesy Potato Bread Recipe 

    Cheesy Potato Bread Recipe by Rida Aftab
    Photo: Cheesy Potato Bread Recipe

    Check it out the Cheesy Potato Bread Recipe here!!

    Prep Time:1 hour

    Bake Time: 30 minutes

    Servings: 6

    Ingredients

    For Dough:

    • 1 egg
    • 1-1/2 cups flour
    • 4 tbsp dry milk
    • 4 tbsp oil
    • 1 tsp sugar
    • 1 tsp yeast
    • 1/4 tsp salt

    For Filling:

    • 1 cup cheddar cheese, grated
    • 2 boiled potatoes
    • 1 raw potato, finely chopped
    • 2 spring onions, thinly sliced
    • 2 tbsp butter
    • 1 tsp crushed garlic
    • 1 tsp red chili flakes
    • 1/2 tsp black pepper
    • 1/2 tsp oregano


    Directions:

    To Make Dough:

    1. In a bowl, combine plain flour with yeast, dry milk, half beaten egg, sugar, salt and oil.
    2. Knead a soft dough.
    3. Then covered with a wet cloth.
    4. Leave it for an hour.
    5. Then again knead the dough.
    6. Roll into a 6 inches long and 4 inches thick bread.

    To Make Filling:

    1. Place boiled potatoes in a bowl.
    2. Mash them properly.
    3. Add spring onions, black pepper, salt, butter, cheese and red chili flakes.
    4. Mix well.

    To Proceed:

    1. Put this mixture on bread and roll over.
    2. Brush with beaten egg on top of it.
    3. Top with raw potato, remaining cheese, garlic and oregano.
    4. Cover with a plastic bag and leave it for 30 minutes.
    5. Preheat the oven to 180 degree C.
    6. When dough has risen to double the size bake it for 30 minutes.
    7. Delicious Cheesy Potato Bread is ready to serve.


    • Serve with Red Chilli Sauce.


    If you like Cheesy Potato Bread Recipe and make it then let me know your feedback by commenting below.

  • The Power of Mint: Make Healthy & Delicious Mint Roti (Pudina Roti)!

    Mint Roti (Pudina Roti)

    Mint is a magic ingredient, which adds zing to any preparation, however simple. Here is a simple process of dry roasting and crushing the leaves boosts the aroma of mint extraordinarily, adding a flavourful punch to the whole wheat flour rotis.

    Pudina roti is such a healthy dish with a wonderful aroma. Its a healthy treat for your taste buds. This is my most favourite style of eating roti. Its a lighter version of roti and I just love it. Check it out the Pudina Roti Recipe here!!

    Check it out the Mint Roti  recipe here!!

    Ingredients:

    • 2-1/2 cups flour
    • 1 cup mint,finely chopped
    • 2 tbsp oil or butter
    • Oil for shallow frying
    • Salt to taste

    How to make Mint Roti:

    • Sift the flour and salt in a bowl.
    • Add 2 tbsp of oil and mint and knead a stiff but non-sticky dough..
    • Cover with a damp cloth and leave aside for 30 minutes.
    • Divide the dough into 15 parts.
    • Shape like balls and press flat with the palm of your hand.
    • Roll out the roti into a round disc about 5″ diameter.
    • Put roti on a preheated griddle, dry roast both sides first then spread oil on both sides and shallow fry until well browned.
    • Mint Roti is ready to serve.
    • Serve with any pickle or raita.
    • Enjoy!
  • The BEST White Milky Bread Recipe Ever!

    White Milky Bread

    This is a White Milky bread recipe with a light texture which is made with plain flour, yeast, milk, baking powder and butter. It goes with anything and is good at calming an unsettled tummy. Make your own with this easy recipe. Spread with butter and jam or toast it.

    If you have any question about this White Milky Bread Recipe then you can ask by using comment box and we will clarify your confusion.

    White Milky Bread Recipe
    Photo: White Milky Bread Recipe

    Check it out the White Milky Bread Recipe here!!

    [divider]

    [one_fourth]Prep Time:2 hours[/one_fourth] [one_fourth]Cook Time:30 minutes[/one_fourth] [one_fourth]Servings:8 [/one_fourth] [one_fourth_last]Difficulty Level: Medium [/one_fourth_last]

    [divider]

    [tabs type=”horizontal”] [tabs_head] [tab_title]Ingredients[/tab_title] [tab_title]Nutrition[/tab_title] [/tabs_head] [tab]

    • 3 cups all purpose flour(maida)
    • 1-1/2 tbsp sugar
    • 1-1/2 tbsp Yeast
    • 1 teaspoons salt
    • 1-1/2 cups water( or as required)
    • 1/4 cup milk
    • 1 tbsp butter

    [/tab] [tab]Yield: 1 – 1 1/2 pound loaf

    Amount Per Serving ( 1 serving = 2 slices)

    • Calories: 111 kcal
    • Carbohydrates: 22.6 g
    • Cholesterol: 1 mg
    • Fat: 0.6 g
    • Fiber: 0.8 g
    • Protein: 3.3 g
    • Sodium: 163 mg

    [/tab] [/tabs]

    Directions:
    [tabs type=”horizontal”] [tabs_head] [tab_title]Step by Step Method[/tab_title] [tab_title]Serving Suggestions[/tab_title][/tabs_head] [tab]

    Step 1

    In large bowl, combine 1 cups flour, sugar, undissolved yeast, and salt.

    Step 2

    Heat water, milk, and butter until very warm (120 to 130oF); stir into dry ingredients.

    Step 3

    Beat 2 minutes at medium speed of electric mixer scraping bowl occasionally or use hands to mix it.

    Step 4

    Stir in 1 cup flour; beat at high speed for 2 minutes scraping bowl occasionally or knead well with hands.

    Step 5

    Stir in remaining flour to make soft dough.

    Step 6

    Knead on lightly floured surface until smooth and elastic.

    Step 7

    Roll dough on a flat surface to 12 x 7inch rectangle.

    Step 8

    Beginning at one end of rectangle, roll up tightly as for jelly roll or as we roll during paratha making.

    Step 9

    Pinch seams and ends to seal.

    Step 10

    Place, seam sides down, in greased 8 x 4 inch loaf pans.

    Step 11

    Cover; let rise in warm, draft free place until doubled in size for about 1hr.

    Step 12

    Beat one egg and brush a little over the dough top just before baking

    Step 13

    Bake at 400 degree F for 25 to 30 minutes or until done.

    Step 14

    Remove from pans; cool on wire rack.

    Step 15

    Slice when bread is cooled down and store in shopper closed tightly so that its moisture is not wasted. White Milky Bread is ready to eat. Enjoy!

    [/tab][tab]

    • Directions must b followed strictly other wise the desired results don’t come out.

    [/tab] [tab]

    • Serve with jam, fruit spread, butter or margarine.

    [/tab] [/tabs]

    Here are some of the Bread Recipes I’ve shared (click on the Recipe Name to get the recipe):

    If you like White Milky Bread Recipe and make it then let me know your feedback by commenting below.

  • RECIPE: Cauliflower Paratha (Gobhi Paratha)

    Ingredients:
    For Dough:

    • 4 cups whole wheat flour
    • 3 cups cold water
    • 3/4 cup ghee or clarified butter

    For Filling:

    • 2 tbsp ghee or clarified butter
    • 1 tbsp ginger,finely chopped
    • 1 tsp garlic,finely chopped
    • 1/2 cup onions,finely chopped
    • 1/4 tsp turmeric powder
    • 1/8 tsp hot chili peppers
    • 1 medium cauliflower florets trimmed, and coarsely chopped
    • 1 tbsp hot green peppers, finely chopped
    • 1 tsp ground cumin
    • 1 tsp salt
    • 8 tbsp ghee or clarified butter

    How to make Cauliflower Paratha :

    For Dough:

    • In a small bowl, combine the whole-wheat flour and 1/4 cup of the ghee.
    • With your fingertips rub the flour and fat together until they look like flakes of coarse meal.
    • Pour 1 cup of water over the mixture all at once, knead together vigorously, and gather the dough into a compact ball.
    • If the dough crumbles, add up to 2 cups more water, 1/4 cup at a time, until the particles adhere.
    • On a lightly floured surface, knead the dough by folding it end to end, then pressing it down and pushing it forward several times with the heel of  your hand.
    • Repeat for 7 or 8 minutes, until the dough is smooth and elastic.
    • Again gather it into a ball.
    • Place the dough in a bowl, drape a kitchen towel over the top, and let it rest at room temperature for at least 30 minutes before rolling it.

    For Filling:

    • Meanwhile, in a heavy 10 to 12-inch skillet, heat 2 tbsp of ghee over high heat until a drop of water flicked into it splutters instantly.
    • Stir in the ginger and garlic, then the onions.
    • Lower the heat to moderate and, stirring constantly, fry the mixture for 7 or 8 minutes, until the onions are soft and golden brown.
    • Stir in the turmeric, red pepper, cauliflower, chili, cumin and salt.
    • Reduce the heat to low, cover tightly and cook for 10 minutes, or until the cauliflower is tender but still slightly resistant to the bite.

    To make the parathas:

    • Divide the cauliflower mixture into 9 equal portions.
    • Divide the dough also into 9 portions and drape a dampened kitchen towel over them to keep the dough moist.
    • One at a time, on a lightly floured surface, roll a ball of dough into a round about 5 inches in diameter.
    • Place a portion of the filling mixture in the
    • center of the round and fold the edges over it,
    • pressing them together to enclose the filling
    • securely.
    • Pat the filled paratha flat with your hands, then
    • gently roll it again to make a round about 5
    • inches in diameter.
    • As you shape and fill the parathas, set them
    • aside, covered with a dampened kitchen towel to
    • keep them from drying out.
    • Heat an ungreased 10 to 12-inch skillet with a non
    • stick finish or a well-seasoned cast-iron skillet
    • or griddle until it is hot enough for a drop of
    • water flicked into it to splutter instantly.
    • Place one of the parathas in the pan and, moving
    • it about constantly with your fingers or the edge
    • of a metal spatula, cook for a minute or so.
    • With a wide spatula, turn the paratha over and
    • brush about a tsp of the ghee on the top.
    • Cook for 2 minutes, then turn it over, spread with
    • another teaspoon of ghee and cook for 1 minute.
    • Turning frequently, continue to cook until the
    • paratha is brown on both sides.
    • Serve hot with mint chutney or fresh curd.
  • How to Make Easy & Delicious Sheermal at Home!

    Sheermal

    Homemade Sheermal, sweet bread goes with qorma on weddings. Its great to have with tea in breakfast also. Enjoy this easy Sheermal recipe on your lunch or dinner. .

    Check it out the Sheermal Recipe here!!

    Prep Time: 25 minutes

    Cook Time: 30 minutes

    Servings:6

    Ingredients:

    • 1/2 kg flour
    • 1 egg
    • 1/2 cup ghee
    • 1/2 cup castor sugar
    • 1 tbsp yeast
    • 1/4 tsp salt
    • milk to knead dough

    Directions:

    1. Soak yeast in lukewarm water for 10 minutes.
    2. Place all ingredients in a large bowl.
    3. Mix well and knead a soft dough with milk.
    4. Leave it for 20 minutes.
    5. Preheat oven to 150 degree C.
    6. Make sugar syrup by dissolving a little sugar in water.
    7. Make small balls out of the dough.
    8. Roll into shape of roti.
    9. Brush top with sugar syrup.
    10. Prick top by using fork.
    11. Bake in the preheated oven for 10 minutes or until golden.
    12. Take it out from the oven.
    13. Sheermal is ready to serve.
    14. Enjoy!
    • Serve with qorma.

    If you like Sheermal Recipe and make it then let me know your feedback by commenting below.

  • Breakfast, Lunch, or Dinner: Versatile Triangle Paratha Recipe!

    Triangle Paratha

    This is an Easy version of  triangle paratha!  Learn how to make layered triangle paratha by following this easy Recipe. 

    triangle paratha recipe
    Photo: triangle paratha recipe

    Check it out the triangle paratha recipe here!!

    Prep Time: 25 minutes

    Cook Time: 20 minutes

    Servings: 8

    Difficulty Level: Easy

    Ingredients

    • 2 cups whole wheat flour
    • 3/4 cup warm water
    • 1 tablespoon olive oil
    • 1/2 teaspoon sea salt
    • olive oil cooking spray
    • additional flour for dusting the parathas


    Directions:

    Step 1

    In a large mixing bowl, combine the ingredients for the dough.

    Step 2

    Knead on a floured counter top for about 5 minutes or until the dough is smooth and elastic.

    Step 3

    Divide into 8 balls, cover with a damp kitchen towel and let them rest for 30 minutes.

    Step 4

    Roll out a piece of dough to about 6″ in diameter on your floured counter top.

    Step 5

    Fold the dough in half onto itself to create a semi-circle.

    Step 6

    Fold the semi-circle in half to create a triangle shape & then roll out the triangle just a bit.

    Step 7

    Heat a little olive oil cooking spray in the large skillet on medium heat.

    Step 8

    Cook paratha until brown on the bottom – then flip & cook until browned on both sides.

    Step 9

    Remove from heat and repeat with the remaining dough. Triangle Paratha is ready to serve. Enjoy!

    • Serve with curry, dal or any vegetable.

    If you like Triangle Paratha  recipe and make it then let me know your feedback by commenting below.

  • Appetizer Artichoke Bread Recipe

    Appetizer Artichoke Bread is an easy to make Italian Appetizer. French bread coated with a creamy artichoke spread and baked until hot and bubbling. This bread can be served as an appetizer or alongside soup. Everyone will enjoy. Check it out the Appetizer Artichoke Bread Recipe here!!

    [one_third] Prep Time: 25 minutes[/one_third] [one_third]Cook Time: 25 minutes[/one_third] [one_third_last] Servings: 12[/one_third_last]

    [review]

    [tabs type=”horizontal”] [tabs_head] [tab_title]Ingredients[/tab_title] [tab_title]Nutrition[/tab_title] [/tabs_head] [tab]

    • 1 loaf french bread, unsliced
    • 1 jar (6-1/2 oz) marinated artichoke hearts, drained and chopped
    • 4 garlic cloves, minced
    • 2 cups shredded Monterey Jack cheese
    • 1 cup shredded cheddar cheese
    • 1-1/2 cups sour cream
    • 1/2 cup butter, melted
    • 1/4 cup grated Parmesan cheese
    • 2 tbsp sesame seeds
    • 2 tbsp minced fresh parsley
    • 2 tsp lemon-pepper seasoning

    [/tab] [tab]Yield: 12 servings

    Amount Per Serving: ( 1 serving = 1 slice)

    • Calories: 321
    • Fat: 22 g (13 g saturated fat)
    • Cholesterol: 59 mg
    • Sodium: 550 mg
    • Carbohydrate: 20 g
    • Fiber: 1 g
    • Protein: 10 g

    [/tab] [/tabs]

    Directions:
    [tabs type=”horizontal”] [tabs_head] [tab_title]Step by Step Method[/tab_title] [tab_title]Serving Suggestions[/tab_title][/tabs_head] [tab]

    Step 1

    Cut french bread in half lengthwise.

    Step 2

    Hollow out and leaving 1/2-inch shells. Keep aside.

    Step 3

    In a food processor, add removed bread. Cover and process until crumbly.

    Step 4

    Take a large bowl, mix together the bread crumbs, sour cream, butter and sesame seeds.

    Step 5

    Spread this mixture onto a baking sheet.

    Step 6

    Broil 4 inch. from the heat for 8 minutes or until lightly browned.

    Step 7

    Place crumb mixture, cheeses and artichokes in a large bowl.

    Step 8

    Sprinkle with garlic and parsley. Season with lemon-pepper.  Mix until well combined.

    Step 9

    Spoon cheese mixture into the bread shells.

    Step 10

    Arrange bread slices on a baking sheet. Bake at 350 degree F, for 25 minutes or until golden brown.

    Step 11

    Cut into slices. Appetizer Artichoke Bread is ready to serve. ENJOY!!

    [/tab] [tab]

    • Serve warm with grilled meat.

    [/tab] [/tabs]

  • Antipasto Bread Recipe

    A flavorful Italian bread that makes an excellent “finger-food” appetizer. Easy to make and tasty too. Check it out the Antipasto Bread recipe here!!

    [one_third] Prep Time: 10 minutes[/one_third] [one_third]Cook Time: 20 minutes[/one_third] [one_third_last] Servings:8[/one_third_last]

    [review]

    [tabs type=”horizontal”] [tabs_head] [tab_title]Ingredients[/tab_title] [tab_title]Nutrition[/tab_title] [/tabs_head] [tab]

    • 1 loaf (1 pound) Italian bread, unsliced
    • 8 thin slices hard salami
    • 4 plum tomatoes, thinly sliced
    • 1 carrot, finely chopped
    • 1 green pepper, finely chopped
    • 1 celery rib, finely chopped
    • 1 onion, finely chopped
    • 2 cups shredded Italian cheese blend
    • 1/2 cup chopped pitted green olives
    • 1/2 cup prepared pesto
    • 3 tbsp olive oil, divided
    • 1 tsp minced garlic

    [/tab] [tab]Yield: 8 servings

    Amount per serving.

    • Calories:389
    • Fat: 22 g (7 g saturated fat)
    • Cholesterol: 25 mg
    • Sodium: 838 mg
    • Carbohydrate: 35 g
    • Fiber: 3 g
    • Protein: 14 g

    [/tab] [/tabs]

    Directions:
    [tabs type=”horizontal”] [tabs_head] [tab_title]Step by Step Method[/tab_title] [tab_title]Serving Suggestions[/tab_title][/tabs_head] [tab]

    Step 1

    Cut bread in half lengthwise then cut in half width wise.

    Step 2

    Place cut side up in a foil-lined baking dish. Brush with 2 tbsp olive oil. Bake at 450 degree F, for 8 minutes or until lightly browned.

    Step 3

    Meanwhile, heat remaining oil in a small skillet. Add carrot, green pepper, celery, onion and garlic. Saute for 5 minutes or until crisp-tender. Spread pesto over the bread.

    Step 4

    Arrange salami, tomatoes, carrot mixture and olives over the bread. Sprinkle with cheese.

    Step 5

    Bake for 10 minutes or until cheese is melted. Cut each piece of bread in half. Antipasto Bread is ready now. Serve warm.

    [/tab] [tab]

    • Serve with with tomato relish and cold shrimp salad.

    [/tab] [/tabs]

  • Crispy Comfort: Easy Bread Pakora Recipe (The Perfect Snack!)

    Crispy and delicious Bread Pakora, the perfect quick snack or finger-food. Try the easy recipe of bread pakora shown below!!

    [one_third] Prep Time: 10 minutes[/one_third] [one_third]Cook Time: 10 minutes[/one_third] [one_third_last] Servings: 4

    [/one_third_last]

    [review]

    [tabs type=”horizontal”] [tabs_head] [tab_title]Ingredients[/tab_title] [tab_title]Nutrition[/tab_title] [/tabs_head] [tab]

    • 4 bread slices, remove the crust
    • 2 green chilies, finely chopped
    • 1 cup gram flour (besan)
    • 1/4 cup fresh coriander leaves, chopped
    • 2 tbsp rice flour
    • 1 tsp cumin seeds
    • 1/2 tsp red pepper
    • 1/4 tsp garam masala powder
    • Salt to taste
    • water as required
    • oil for frying

    [/tab] [tab]Yield: 4 servings

    Nutritional information is not yet available. [/tab] [/tabs]

    Directions:

    [tabs type=”horizontal”] [tabs_head] [tab_title]Step by Step Method [/tab_title] [tab_title]Recipe Note’s[/tab_title] [tab_title]Serving Suggestions[/tab_title] [/tabs_head] [tab]

    Step 1

    Cut bread slices into triangle or rectangle shape. Keep aside.

    Step 2

    In a small bowl, combine the gram flour cumin seeds, green chilies, coriander, salt, chili powder, red pepper and garam masala. Add little water at a time and make a smooth batter.[/tab] [tab]

    Expert Tip’s:

    If oil is too hot then bread pakoras will cook too fast and will not be crispy and if oil is not hot enough Pakoras will be greasy.

    Variations:

    You can use chopped spinach or dried fenugreek as a substitute for the coriander. Also you can add chopped onion.

    [/tab] [tab]

    1. Bread pakoras can be served both warm but taste delicious cold too.
    2. Bread pakoras are taste better when served with green chutney, tomato sauce or tamarind chutney.
    3. You can be made these pakoras one day in advance but do not refrigerate. Before serving, place them on a baking sheet and heat in the preheated oven on 300 degrees F.

    [/tab] [/tabs]