Tag: Chicken

Looking for chicken recipes? Find chicken recipes including appetizers, main dishes, and soups made with chicken.

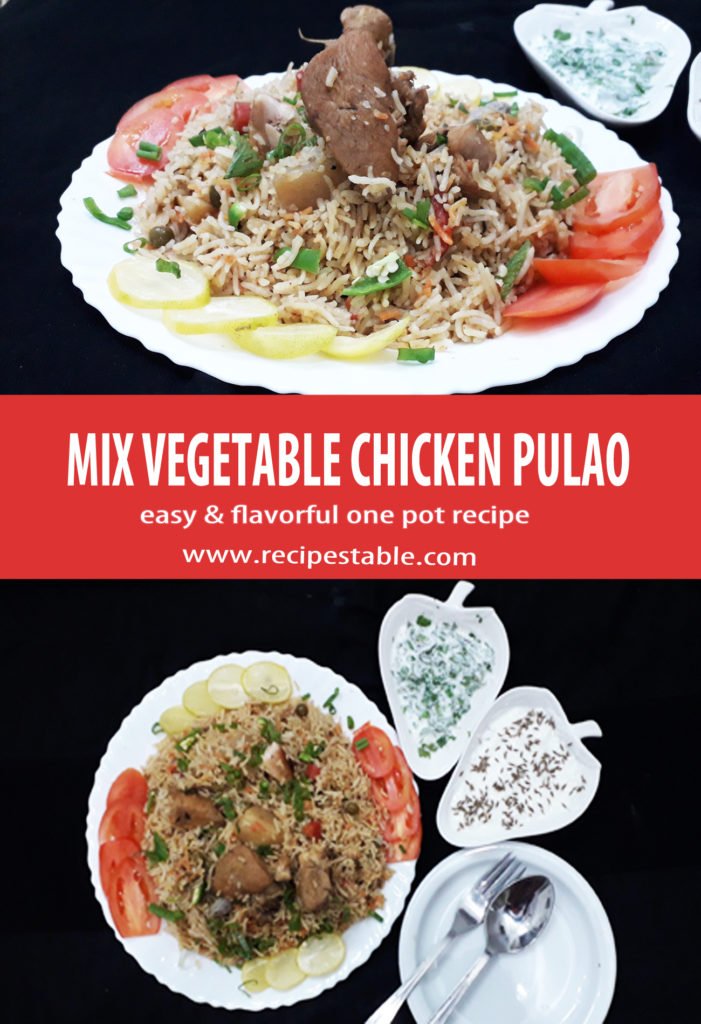
  • The Flavorful Mix Vegetable Chicken Pulao Recipe

    The Flavorful Mix Vegetable Chicken Pulao Recipe

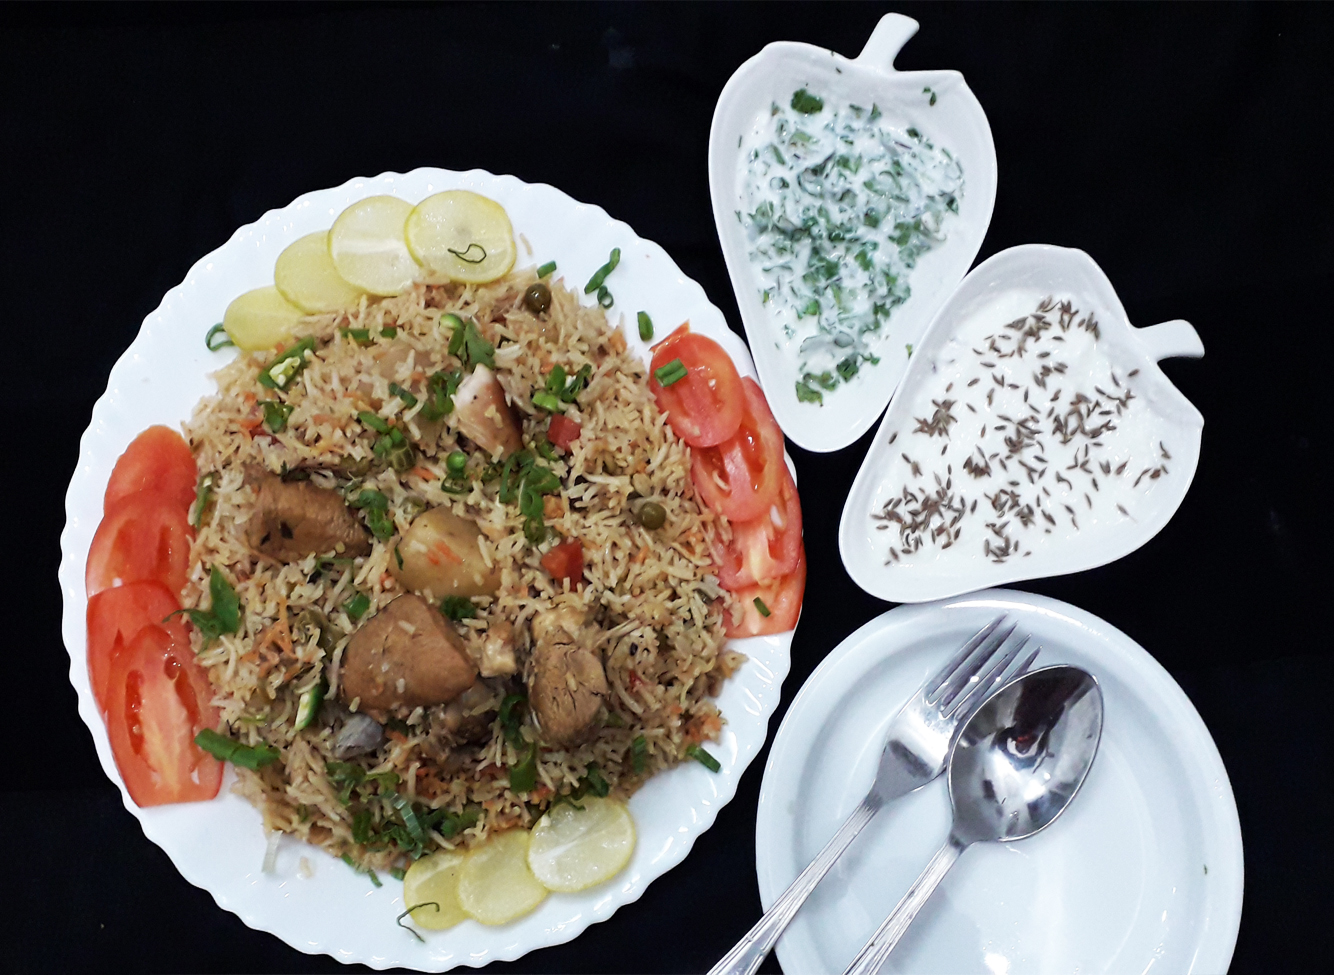
    Loaded with veggies and flavorful chicken, warm spices like cumin, cinnamon, nutmeg and mace and the heat of green chilies this Mix Vegetable Chicken Pulao is a delight to the taste buds in every bite!

    The Flavorful Mix Vegetable Chicken Pulao Recipe
    The Flavorful Mix Vegetable Chicken Pulao Recipe

    Chicken broth and seasonings are added to give it lots of flavor and moisture. It’s a one-pot meal to prepare and cook in a pot that comes together quickly for a hearty and hot week-night dinner.

    There are some Rice Pulao that are overly packed with gorgeous spices flavors, but this isn’t one of those. This Chicken pulao is a medley of rice, chicken, spices, and vegetables. I just add a tiny sprinkle of green onion as a garnish, just to add a little more color when serving. Pairs perfectly with any raita or curry of your choice.

    The Flavorful Mix Vegetable Chicken Pulao Recipe
    The Flavorful Mix Vegetable Chicken Pulao Recipe

    What goes in Mix Vegetable Chicken Pulao

    The ingredients you need to make this Mix Vegetable Chicken Pulao are:

    • Best rice for pulao – basmati rice is the best for both flavor and fluffiness. Basmati is a type of long grain rice – the longer the grain, the fluffier the rice. It also has a lovely subtle fragrance that really compliments the flavors in this rice pilaf; You can use brown rice as well for this pulao recipe.
    • Chicken: The juicy thighs or chicken breast are the ideal meat choices for making pulao. You can use either the boneless pieces or the bone-in ones like leg pieces. I personally, like pulao with boneless chicken pieces.
    • Fat – Ideally desi ghee (clarifying butter) is the best choice for making the pulao. I choose the clarified butter (desi ghee) for flavor, but if the aroma and taste of ghee are too over-powering for you, use unsalted butter, coconut oil, or any other cooking oil.
    • Flavor Base – sautéed ginger and onion, to add savouriness;
    • Pulao Spices – I’ve used a combination of cinnamon, cloves, nutmeg, mace, bay leaves and cumin in this Mix Vegetable Chicken Pulao. It’s reminiscent of traditional Middle Eastern flavors but also a festive combination. Feel free to customize this to your own taste;
    • Broth OR water – For extra flavor, I almost always make my pulao with broth. However, water will work just fine as well, though I’d add an extra pinch of each of the spices;
    • Vegetables – Use any vegetables you like here. I like using carrot and green peas for a vibrant color, and potatoes because the flavor melds in nicely with the rice. Cabbage and Capsicum also work well but be aware that they provide a sharper pop of flavor. Broccoli would also be great.
    • Garnishing – I’ve used green onions in this mix vegetable chicken pulao recipe. I adore both the flavor and fresh green color that green onion bring to this pulao. Fresh Coriander and Mint Leaves are also great!

    How to make Mix Vegetable Chicken Pulao:

    Mix Vegetable Chicken Pulao is straight forward to make.

    1. Soak the rice for 30 minutes then drain.
    2. Sauté onion and whole spices in butter, then add the ginger and chicken along with seasoning. Cook for 20 minutes or until chicken is no longer pink and all juices run clear.
    3. Then add carrots, green peas and potatoes cook 5-7 minutes or until vegetables crisp-tender then add chicken broth and bring it to boil. Then add rice cover the pot and let it simmer on medium low flame or until the rice is tender and the liquid has been absorbed. This takes roughly 10 minutes.
    4. Now give a dum for a further 15 minutes. Fluff the rice and dish it out.

    But here are my tips for how to make the best Pulao every time!

    • Soaking Rice or not: Soaking white rice for about half an hour before cooking allows moisture to get to the middle of the kernel. During cooking, the heat transfers quicker to the middle and the rice will be done in about eight minutes, causing less damage to the outside of the kernel. Thus, it’s more evenly cooked, and easier to separate than the non-soaked rice.
    • Right liquid to rice ratio – 1 1/2 Cups of liquid to 1 cup of rice will yield perfectly cooked fluffy rice. Adding too much liquid to cook rice always results in a mushy and sticky pulao
    • Do not peek while rice is cooking! Escaped heat compromises the cooking of the rice;
    • Rest undisturbed – this is the most important step for cooking rice. This is when the rice finishes cooking and becomes fluffy!

    What To Serve With Mix Vegetable Chicken Pulao?

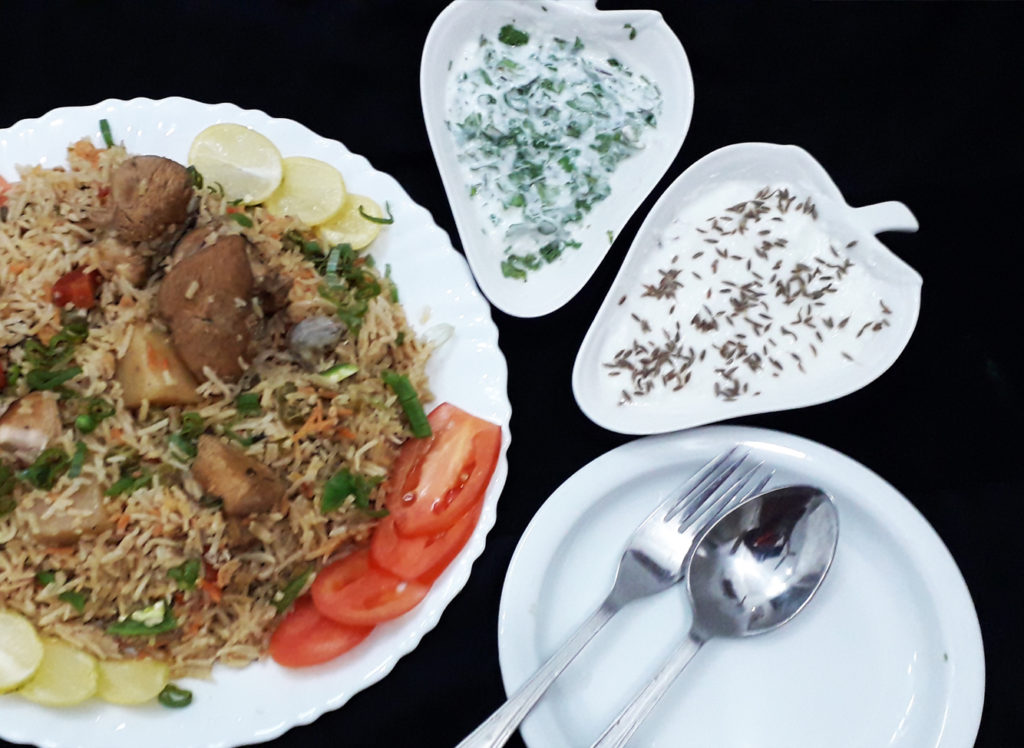
    This is home-style, hearty chicken pulao with delicious flavors full of spices and aroma. I suggest, serve it hot right after dum (steaming) with zeera raita, or mint raita and kachumber salad for best taste. It would also go really well with my Chicken Shorba– a mild flavored desi style chicken stew with a great combination of Oriental spices. 
    The Flavorful Mix Vegetable Chicken Pulao Recipe
    The Flavorful Mix Vegetable Chicken Pulao Recipe

    Bismillah let’s get started.
    Check it out The Flavorful Mix Vegetable Chicken Pulao Recipe and printable version here!!

    The Flavorful Mix Vegetable Chicken Pulao Recipe

    Nothing like a good plate of aromatic pulao! This Flavorful Mix Vegetable Chicken Pulao hits all the right spots with its wonderful aroma and exotic flavors! Spice up your week with this flavorful Pulao!
    Keyword Chicken, Chicken Pulao, Dinner, Iftar Recipes, Pulao, Quick and Easy, Ramadan, Rice, vegetables, Veggie Pulao
    Prep Time 20 minutes
    Cook Time 40 minutes
    Total Time 1 hour
    Servings 4
    Author Bushra Waheed

    Ingredients

    • 2 pounds Boneless Chicken
    • 3 cups long gran rice basmati rice
    • 1/2 cup clarified butter/ desi ghee or oil
    • 1 onion thinly sliced
    • 4 inch Ginger piece thinly sliced
    • 4 carrots peeled and cubed
    • 3 potatoes peel and cubed
    • 2 cups Green Peas
    • 2 green onions thinly sliced( only green part)
    • 4 Green Chilies thinly sliced
    • 1 large Cinnamon Stick daarcheeni
    • 2 Black Cardamom bari elachi
    • 5-6 Cloves (loong)
    • 2 Bay Leaves tezpaat
    • 1 tsp Cumin Seeds (zeera)
    • 1 tsp nutmeg and mace powder
    • 1/2 tsp Black Peppercorns (kali mirch)
    • 2 tsp Red Chili Flakes
    • 1 tsp all spice powder garam Masala powder
    • 2 tsp salt or according to your taste
    • 6 cups Chicken Broth Yakhni

    Instructions

    • Rinse the basmati rice till the water becomes clear. Then soak it in water for 20 minutes. After soaking, drain the rice and keep it ready.
    • Take a heavy bottom skillet or pot and melt clarified butter in it.
    • Add the onions and sauté until they are a deep golden brown. This can take up to 5-7 minutes over a low heat. You will need to check and stir a couple of times. Don’t be tempted to rush this stage because this adds a lot of flavor to the finished dish.
    • Add the cumin seeds, cinnamon stick, black cardamom, black peppercorns and cloves. Sauté for 2 minutes or until popping and fragrant.
    • Now add the ginger slices and Chicken, cook for 15-20 minutes or till chicken turns golden brown before adding the vegetables.
    • Now add Carrot, Potatoes and green Peas. Sauté and cook for 10 minutes or until vegetables are just tender-crisp.
    • Season with salt, red pepper flakes and some garam masala.
    • Next, add green chilies and sauté for a second and adjust the seasoning and add more salt if needed.
    • Add Chicken Stock and once the it starts boiling add the soaked basmati rice and mix it gently.
    • Now, wait for it to boil again, then cover and simmer on medium low flame or until the rice is tender and the liquid has been absorbed. This takes roughly 10 minutes.
    • Put the pot covered (give a dum) for a further 15 minutes.
    • Now, uncover the pot sprinkle green onion (only green part)and fluff the rice gently from the corners
    • Remove from the heat and dish it out.
    • Enjoy flavorful Mix Vegetable Chicken Pulao!!

    I can’t wait to hear what you think of this Mix Vegetable Chicken pulao. If you’ve tried both my chicken biryani and my chicken pulao you really have to let me know what you think!

    Want more Pulao Inspiration? 

    Here are some of the other Pulao Recipes that I love to make for my weekday meals.

    Pin it For Later:

    Like this recipe? Pin it to your favorite Pinterest board now so you will remember to make it later!
    HUNGRY FOR MORE? Subscribe to my newsletter and follow along on FacebookPinterest and Instagram for all of the latest updates.
  • Hot and Sour Noodles Recipe – Just Like the Restaurants Make It

    Hot and Sour Noodles Recipe – Just Like the Restaurants Make It

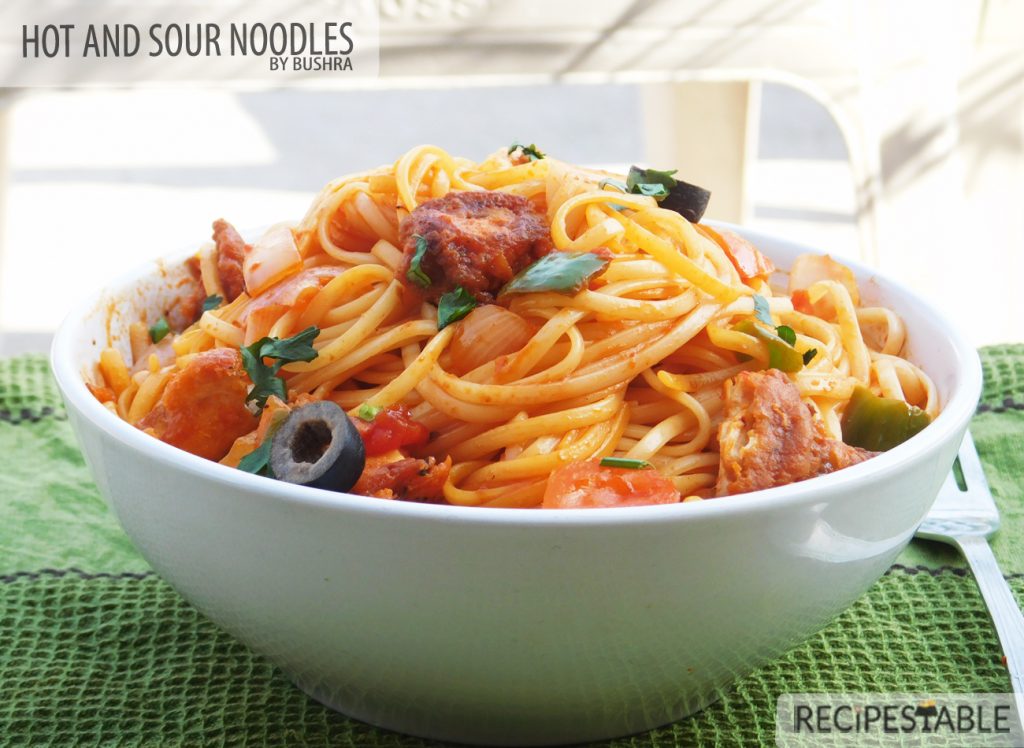
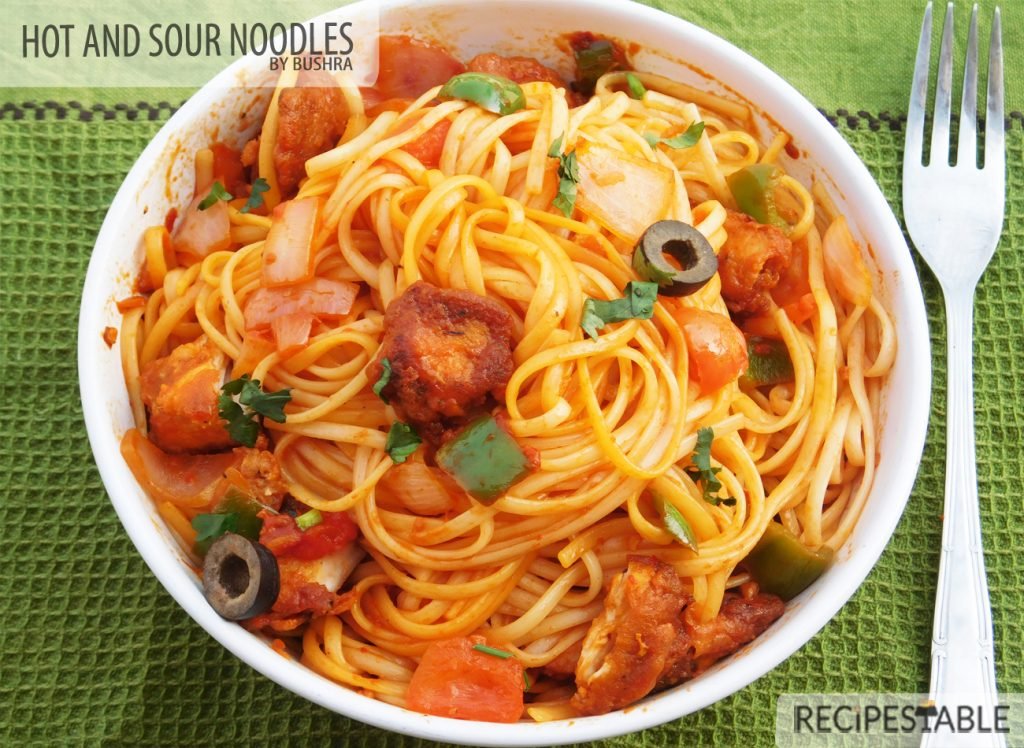
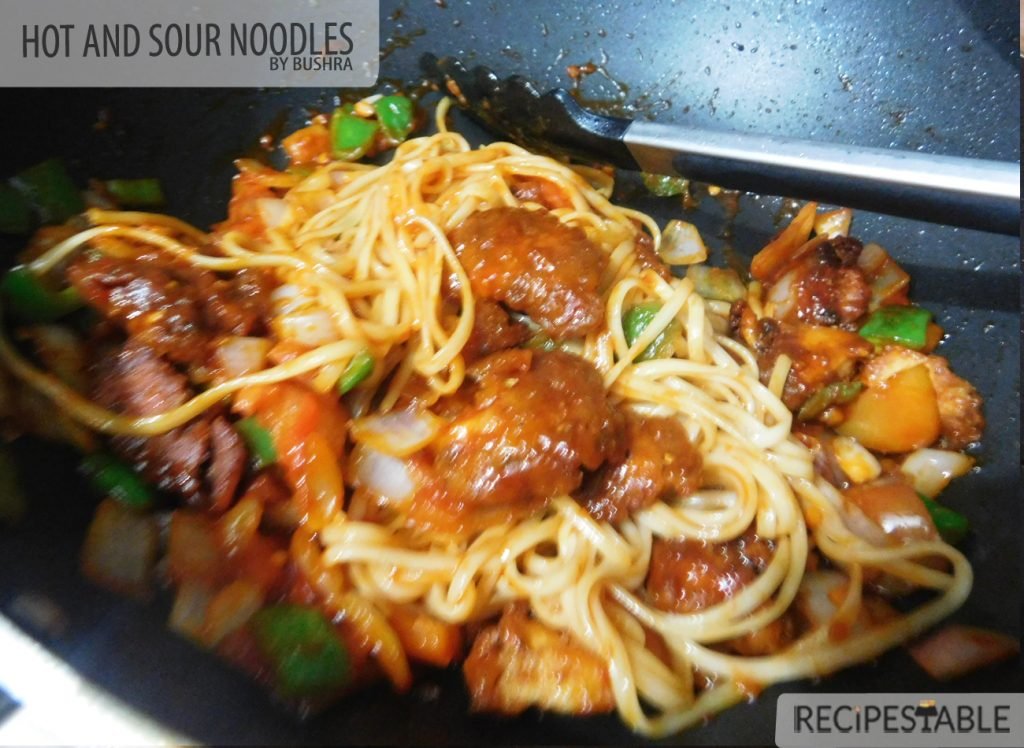
    Who needs takeout when homemade tastes better and you’re in control of the ingredients. Next time when you crave Chinese food, instead of take-out, make this quick, easy and Incredibly delicious hot and sour noodles. Perfect comfort food and a a hearty meal, full of veggies, egg noodles and fried chicken, that’s ready in under 30 minutes!

    Hot and Sour Noodles Recipe
    Hot and Sour Noodles Recipe – Just Like the Restaurants Make It

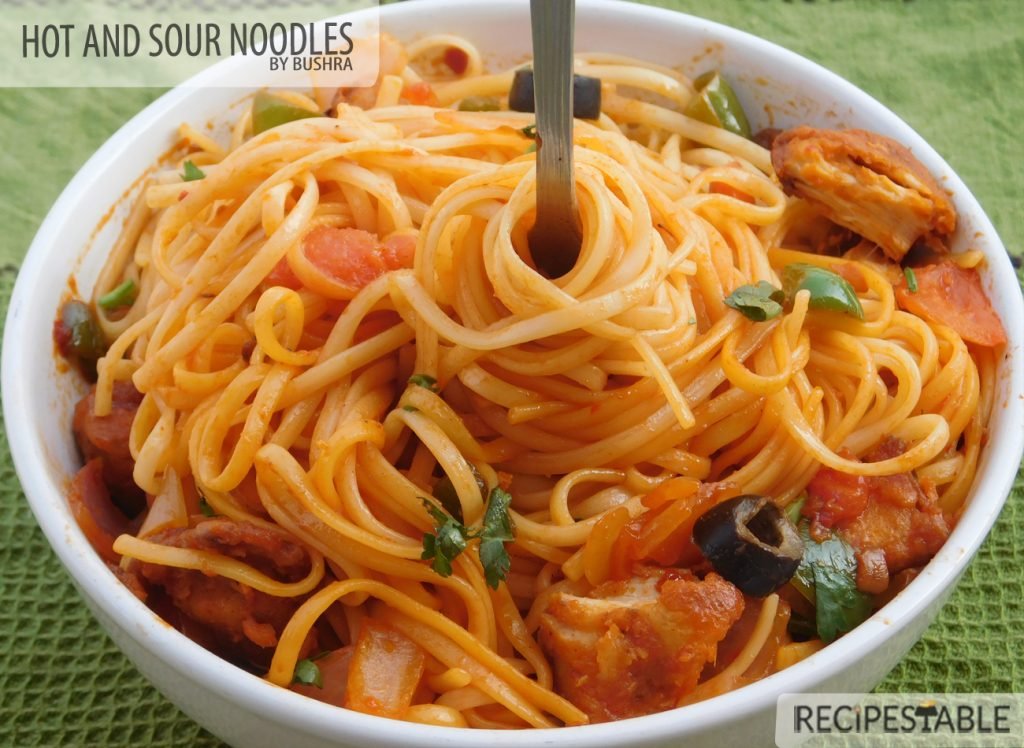
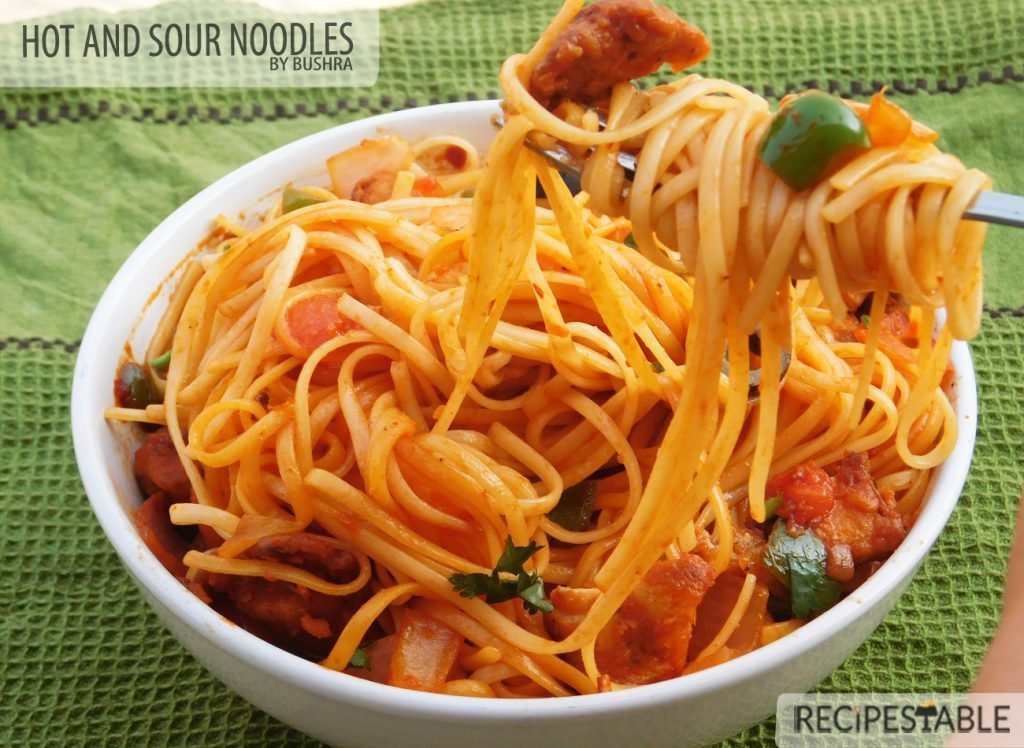
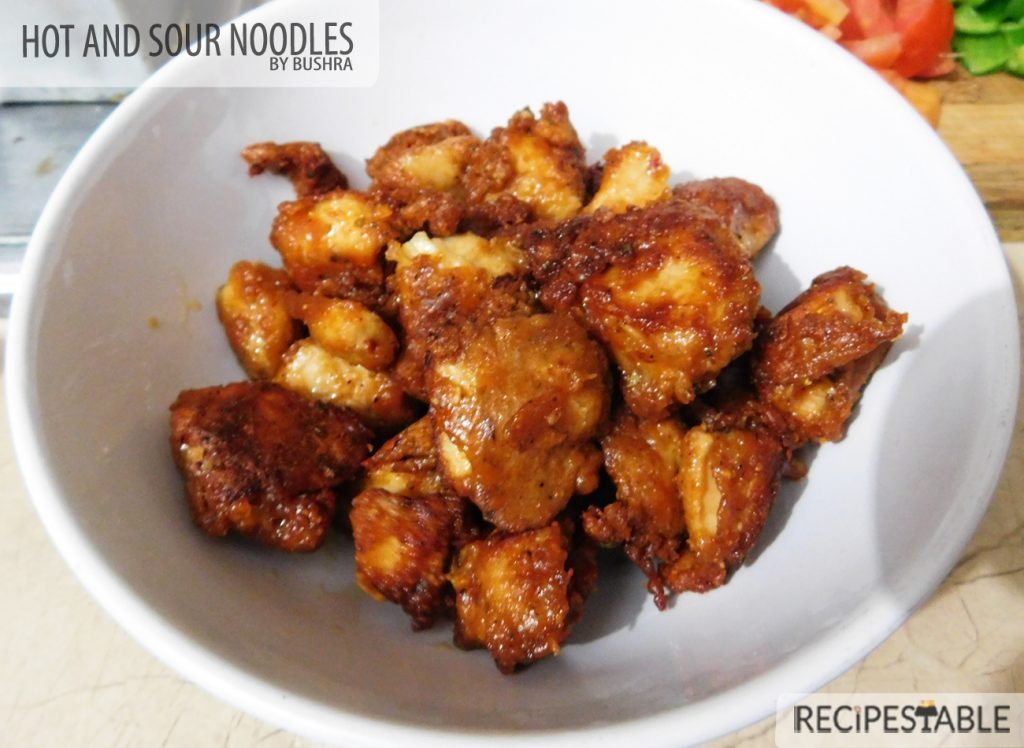
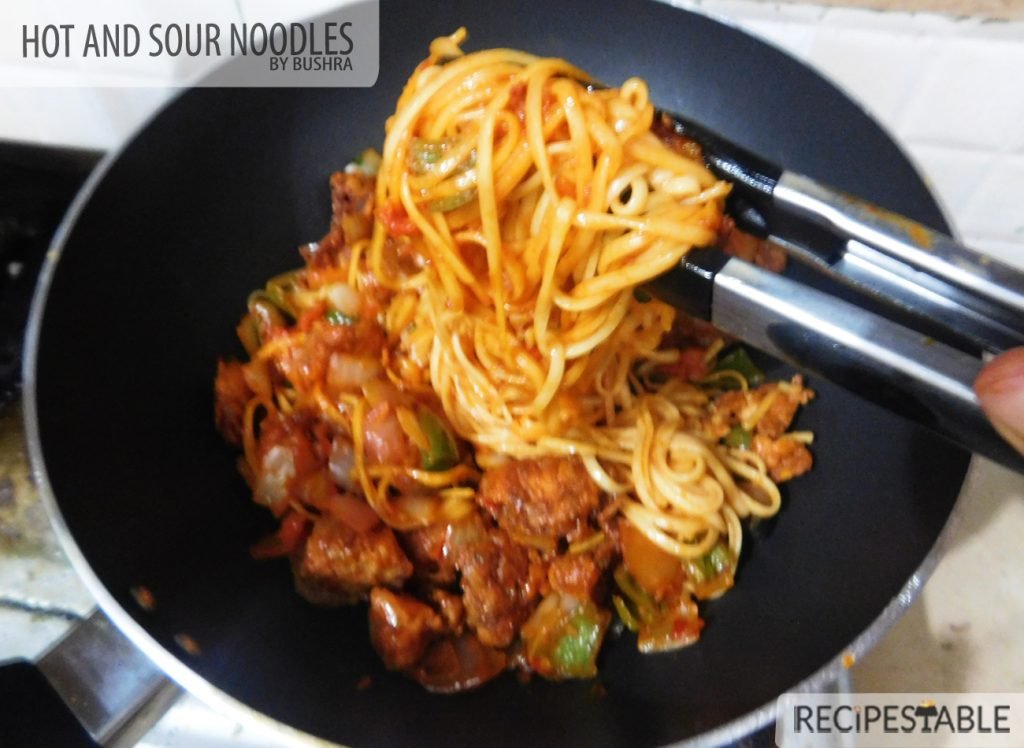
    This Hot and Sour Noodles Recipe makes a bright and healthy dinner for a small family. There are layers and layers of flavors in these easy noodles that are ready in 30 minutes. Soy sauce, hot pepper sauce, vinegar, ginger- garlic, red chili and tomato sauce coat the noodles beautifully. They’re hot and sour with a very subtle heat from the ginger and hot pepper sauce. Fried Chicken, Onion, Capsicum add texture and crunch. Olives and tomato add bright color.
    I love the hot, spicy, salty, savory, garlicky and the slippery noodles. It’s all about the combination of textures and flavors — there’s tangy sauces, crispy fried Chicken, zesty vegetables, salty Egg noodles and chili flakes for heat.

    A bowl of hot and sour slurping goodness. _ Just Like the Restaurants Make It!
    These noodle bowls are a lightning fast dinner that the whole family is sure to enjoy. They are surprisingly easy to make from scratch, and you don’t need to worry about the questionable sodium ingredients that are listed in the store bought version.

    What makes hot and sour Noodles HOT?

    The heat in this hot and sour noodles comes from red pepper flakes and hot pepper sauce. The noodles has to be on the hotter side. The sourness comes from adding vinegar right at the end. If you add the vinegar in the beginning or towards the middle, the vinegar will evaporate during cooking. Which is why we add the vinegar right at the end.

    These noodles will be your new go-to. Take it to work for lunch, take it to cookouts, make it for your family dinner. Trust me – you’ll knock their socks off with this one.

    Bismillah let’s get started. 

    Ingredients in Hot and Sour Noodles?

    This Hot and Sour Noodles recipe is quick, requires few ingredients and is great for those days when you don’t have a lot of time to cook. The list of ingredients is so simple – red chilli flakes, ginger, garlic, onion, capsicum, tomato, chicken, soy sauce, hot pepper sauce, vinegar and egg noodles of course. These are things that are probably already in your pantry so its a quick and easy dinner to make which is ready in under 30 minutes. Perfect for last minute dinners!

    How to make the Restaurant Style Hot and Sour Noodles (step by step instructions):

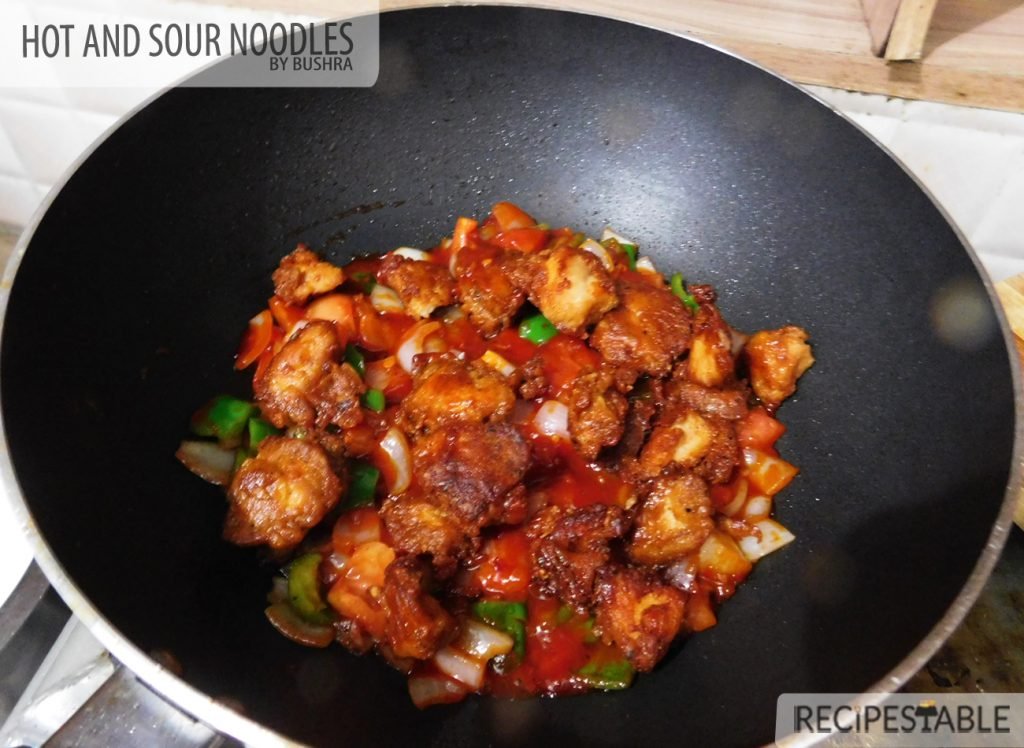
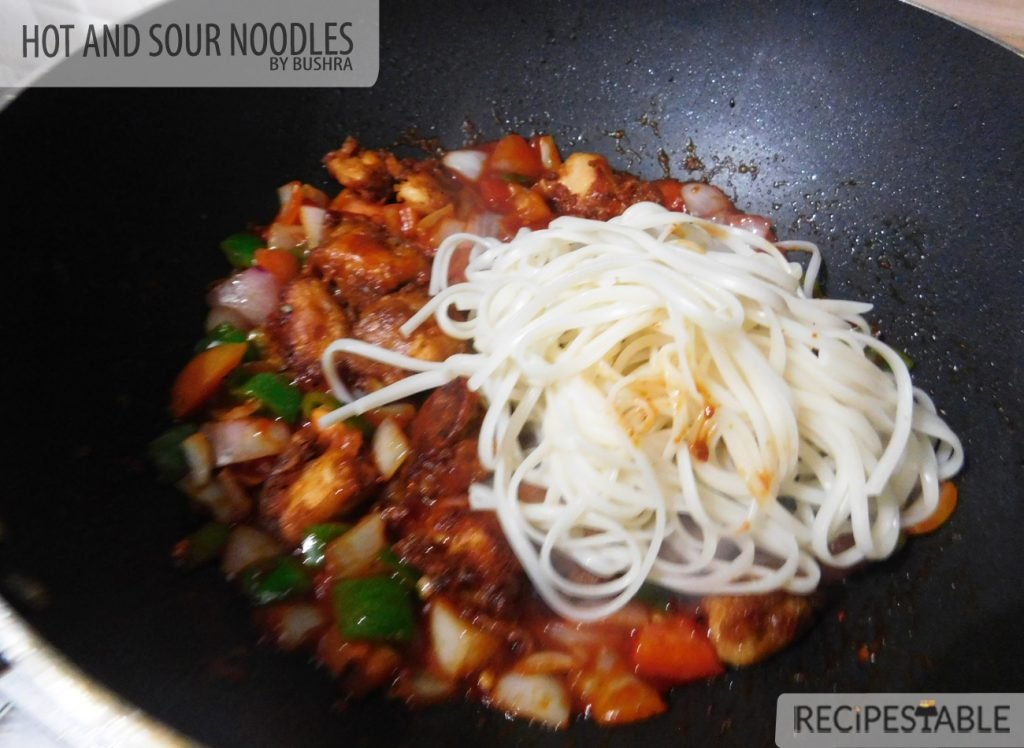
    However, in order to get the restaurant like taste and texture it needs to be cooked in a certain way and this step by step recipe of Hot and Sour noodles explains it with photos and detailed instructions. The tips and serving ideas given after directions will also help you avoid some common mistakes which can ruin the dish.

    Hot and Sour Noodles Recipe
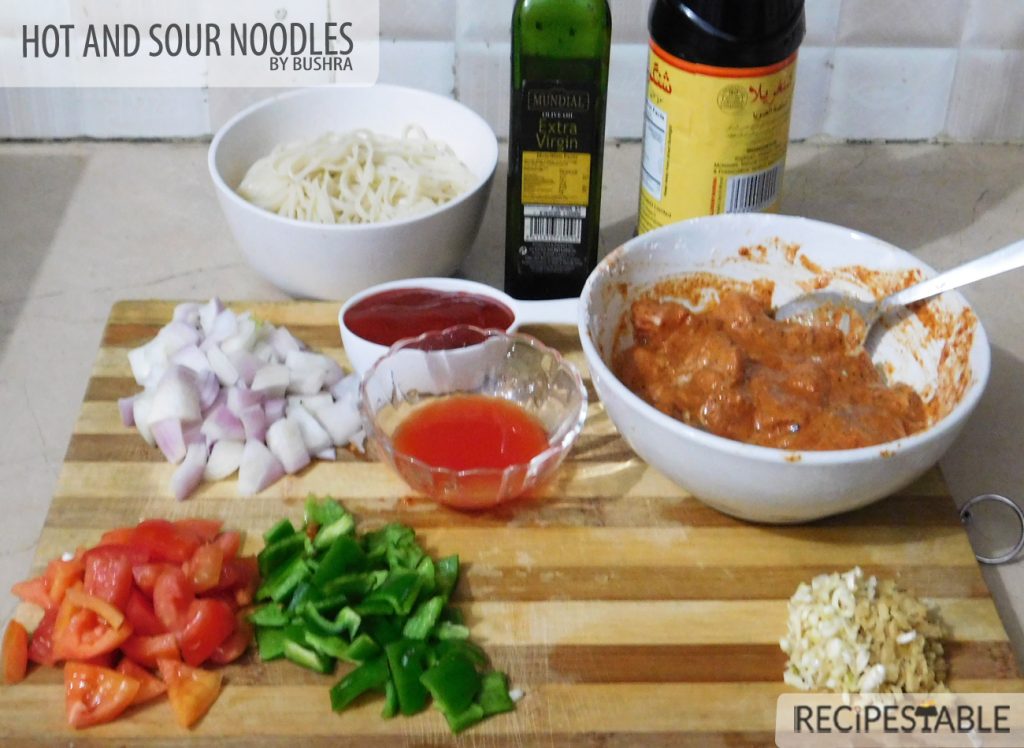
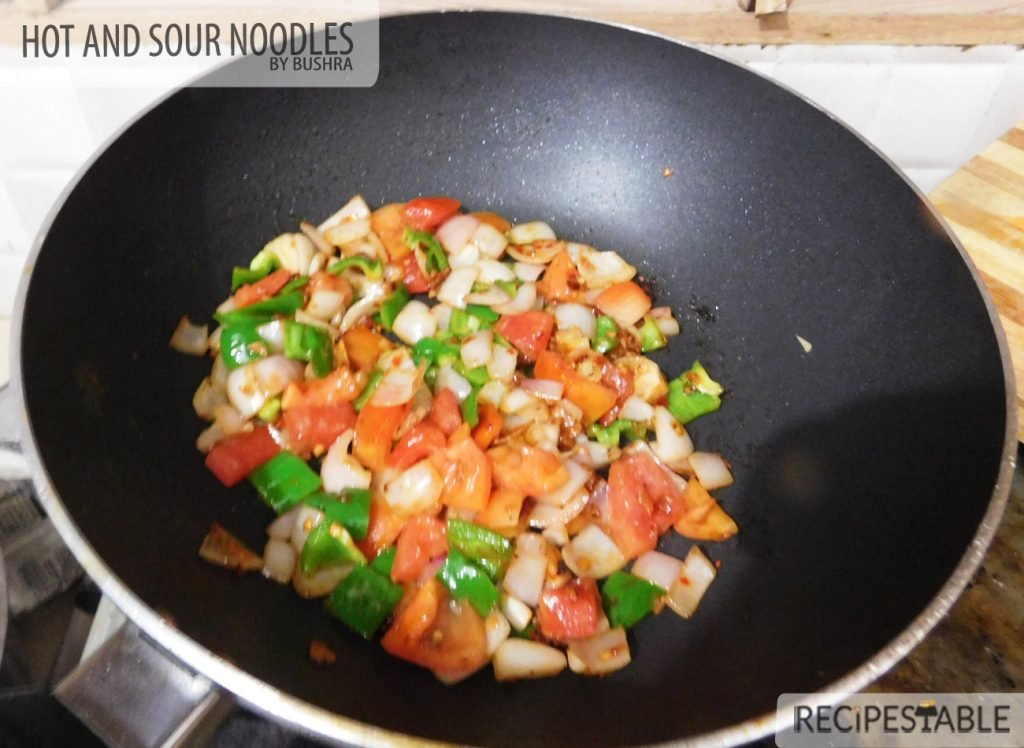
    1. Prepare the ingredients (this is the most time-consuming part of the recipe, but then it goes very quickly):
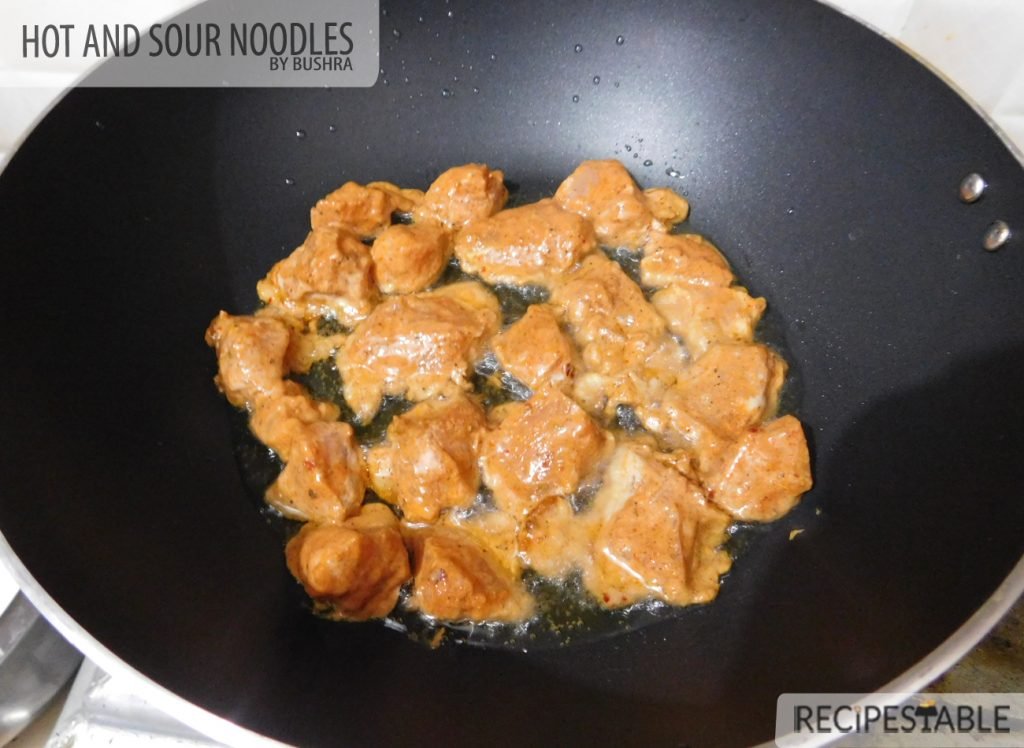
    Chicken: Cut chicken breast into 1-inch cubes, mix with ginger garlic paste, egg white, Cornflour, soy sauce, chili sauce, vinegar, red pepper and salt to taste.  You can cook right away or leave to marinate for 30 minutes to blend flavors.
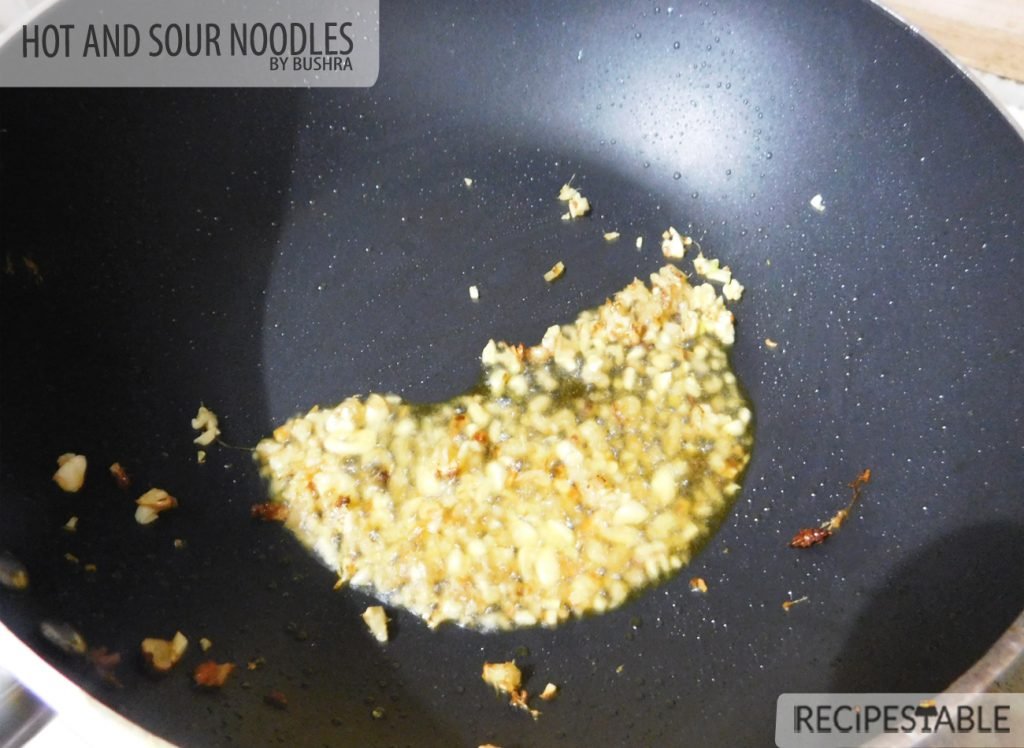
    Vegetables: Chopped ginger and garlic and cut onion, capsicum, and Tomato in ¼ inch cubes and keep aside.
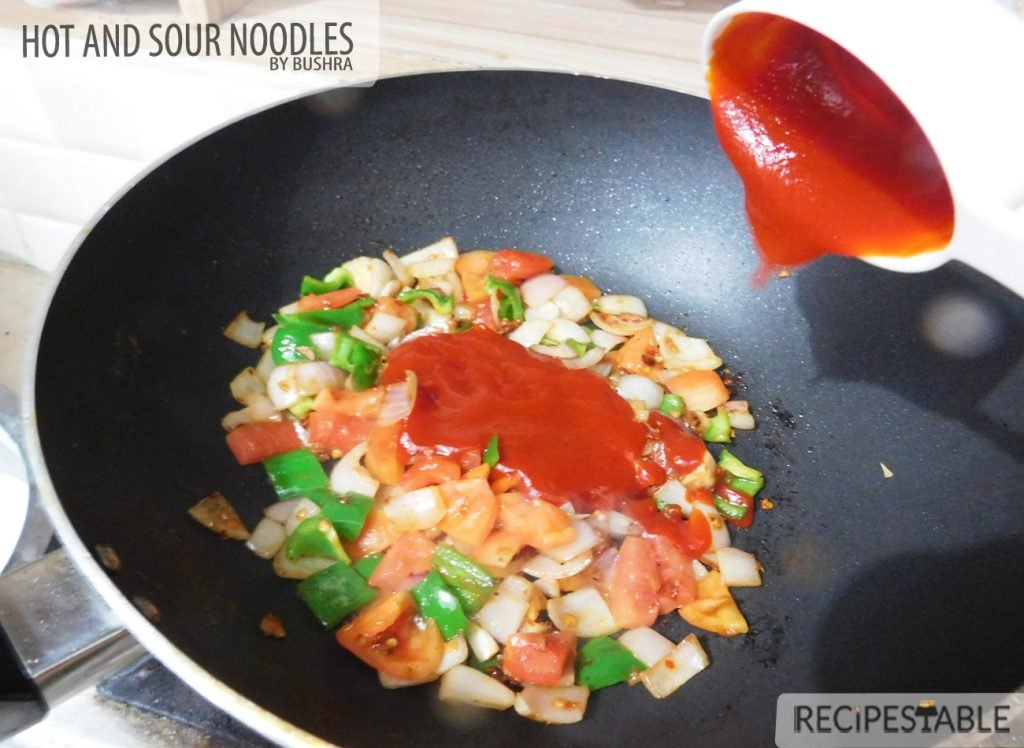
    Hot and Sour Sauce: In a small bowl, whisk all the sauce ingredients, 1/2 cup water, 1/2 cup tomato ketchup, 2 tablespoon hot pepper Sauce, 1 tablespoon soy sauce, 1 tablespoon Vinegar, salt and Pepper to taste, chili flakes. Set aside.
    Egg Noodles: Cook the egg noodles in boiling water, add a little salt, cook for 5-7 minutes, then strain.

    Check it out Hot and Sour Noodles Recipe and printable version here!!

    Other versions of this dish:

    Put your own spin on it. And lemme know how it turns out and do take a few seconds to rate it! I would love to see your recreations so tag me on instagram @recipestable or Facebook (Recipestable) or on Twitter so I can see how lovely yours turn out.

  • The Flavorful Mint Chicken Curry Recipe

    The Flavorful Mint Chicken Curry Recipe

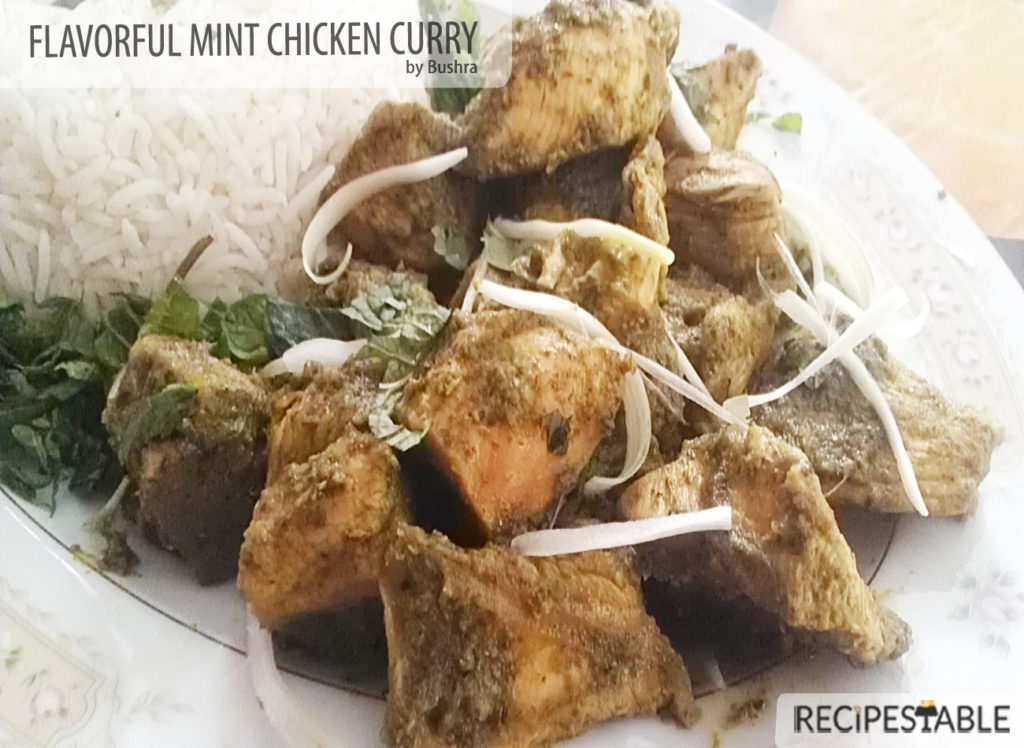
    Spice up your next dinner party with this Flavorful Mint Chicken Curry. Simple, Mild yet Flavorful Chicken curry with fresh mint and yogurt to shake up your weeknights! This Flavorful Mint Chicken Curry Recipe is ultra-easy to whip up on a weeknight, and completely customizable with your favorite seasonings. A nice change from the usual red curries, perfect with naan or rice.

    Flavorful Mint Chicken curry recipe
    The Flavorful Mint Chicken curry Recipe

    Truth be told – the curry and rice thing is probably my favorite type of food. Coriander, Basil, & Mint Leaves are hands down my favorite herbs of all time. If I could have the herb garden of my dreams, I would plant Mint and Basil everywhere!!

    While most of the Pakistani dishes that I cook require coriander as garnish, for this dish, the mint herb paste forms the backbone of the sauce. The combination of fresh coriander and mint makes the dish light and fragrant and gently simmering the chicken in the creamy yogurt ensures that you end up with juicy morsels of meat. 
    Please make sure that you use the tender , young leaves of Mint in this dish – the harder, older leaves will most probably end up making the dish taste bitter.

    The Flavorful Mint Chicken curry Recipe
    The Flavorful Mint Chicken curry Recipe

    This chicken curry bursts with flavors of mint and creamy yogurt and is bound to make you and your guests happy. The spice level of this dish will vary depending on your taste. I used just 2 green chilies and a pinch of cayenne pepper in this curry to make a mild, family-friendly dish. For more heat,  you can add a drizzle of red pepper, some of the seeds of the jalapeño, or some crushed green chilies.

    This is a quick and simple recipe to prepare using ingredients that I always have on hand. Less is more – focus on the true tastes by using fewer ingredients. Flavorful and very easy to prepare, this recipes will make your weeknight dinners stress-free . Do try it!

    Bismillah let’s get started. 
    First, You will need some boneless chicken. I prefer the breast because you get some super fine chunks out of it. But you can make both curries with bone-in pieces or boneless pieces of chicken. Obviously, boneless chicken will cook faster, and is my choice when I want to cook a quick curry. BUT, a GOOD chicken curry uses bone-in chicken pieces because the bones flavor the gravy/sauce.

    In a blender, pour 1/2 cup of yogurt yogurt, 1 small bunch of mint leaves, coriander leaves, green pepper, garlic ginger paste, cumin powder, a pinch of cayenne pepper, salt and squeezed lemon. Blend until well combined and put in the chicken; Cover and let it marinate for 30 minutes to blend flavors.

    You can marinade the chicken for a few hours or even overnight. If you really are in a rush, you can even cook the chicken straight away.

    The Flavorful Mint Chicken curry Recipe
    The Flavorful Mint Chicken curry Recipe

    Heat the oil over medium-low heat in a large nonstick pan.

    The Flavorful Mint Chicken curry  Recipe
    The Flavorful Mint Chicken curry Recipe

    Then add the marinated chicken along with the marination. Cook and stir for 10 minutes on medium flame. Then cover and let it simmer for 10-15 minutes or until chicken becomes soft .

    The Flavorful Mint Chicken curry Recipe

    Remove the lid and cook on high flame for just few minutes or until sauce is thickened or all water dries up. ( Make sure to not over cook it will ruined the mint taste).

    The Flavorful Mint Chicken Curry  Recipe
    The Flavorful Mint Chicken curry Recipe

    Taste and adjust seasoning with more lemon, green chili or pepper, if necessary. This Flaovrful Mint Chicken Curry is delicious with anything. We ate it with boiled rice but it is just as good with really soft naan bread.

    The Flavorful Mint Chicken curry Recipe
    The Flavorful Mint Chicken curry Recipe

    Check it out The Flavorful Mint Chicken curry Recipe and printable version here!!

    Consider serving this with:

    More Chicken Curry inspiration:

    Put your own spin on it. And lemme know how it turns out. Post a photo on Facebook (Recipestable) or Instagram on Twitter  with hashtag #Recipestable so I can see how lovely yours turn out.

  • Unbelievably Awesome BBQ Chicken Pizza Recipe

    Unbelievably Awesome BBQ Chicken Pizza Recipe

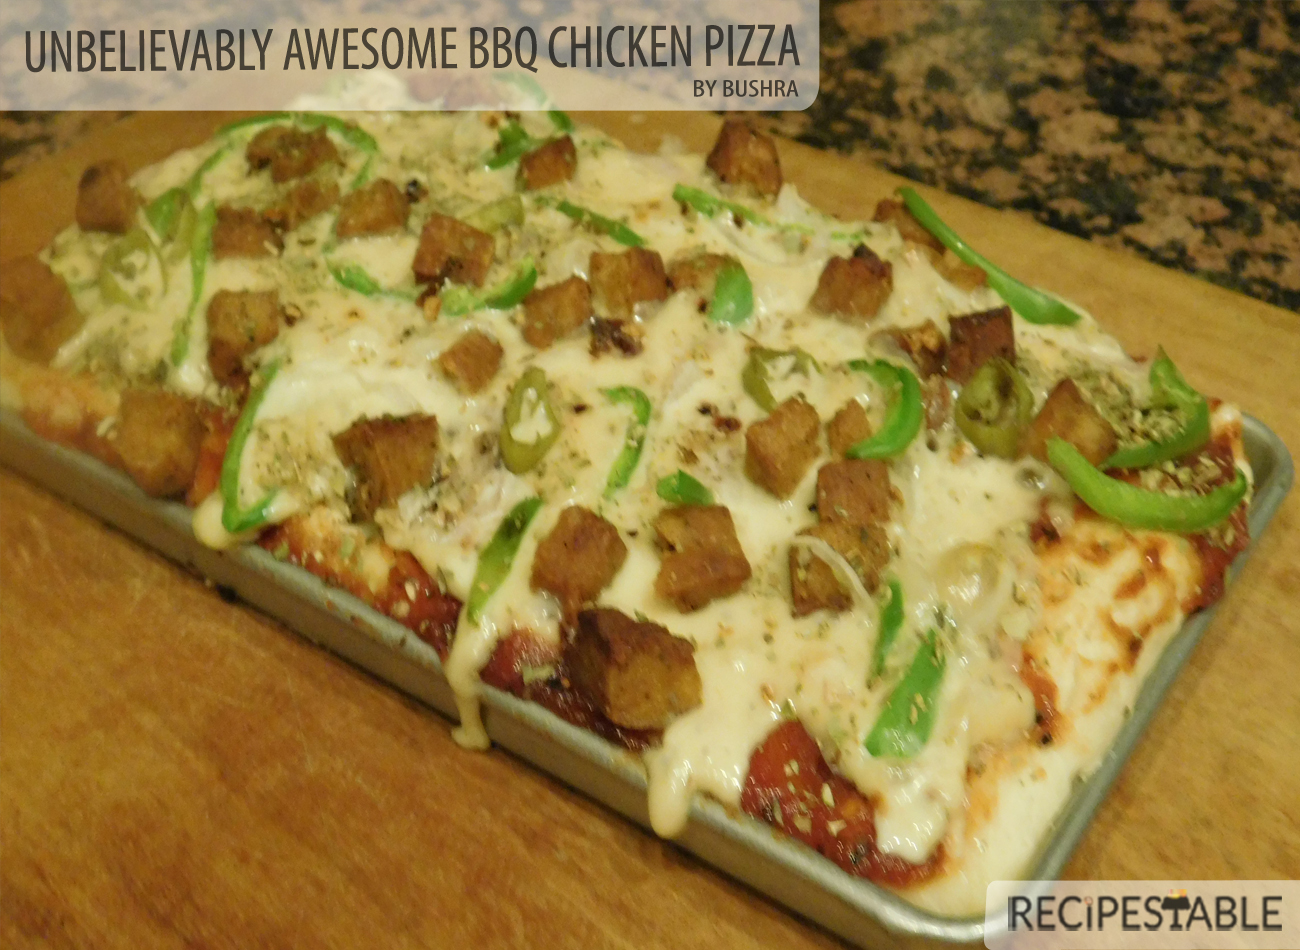
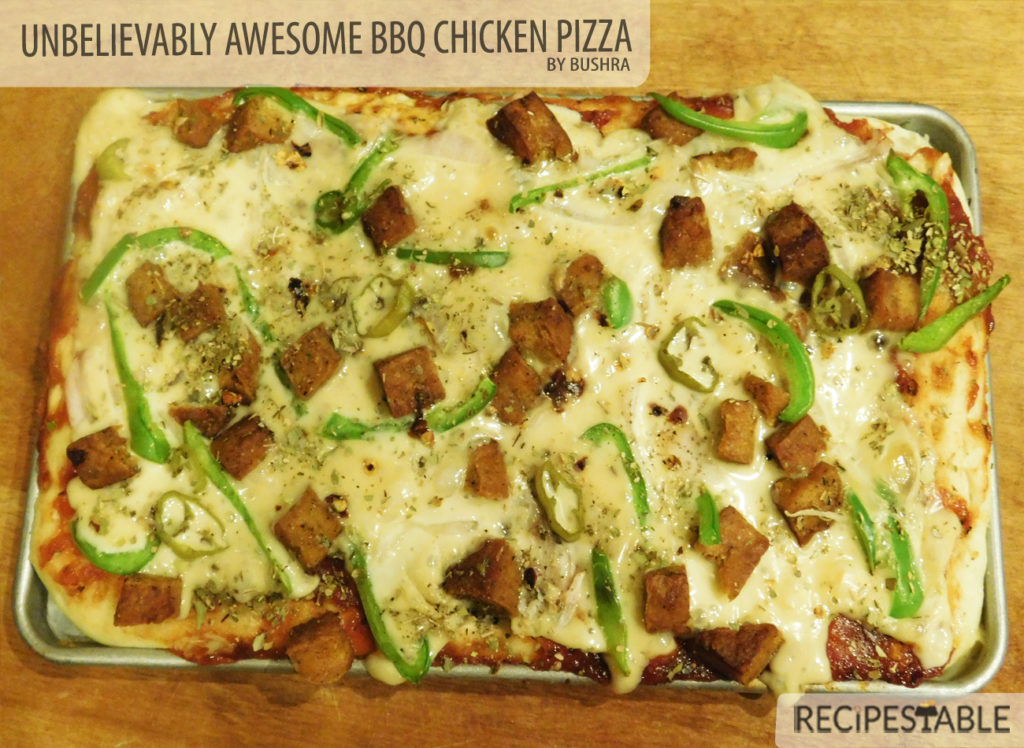
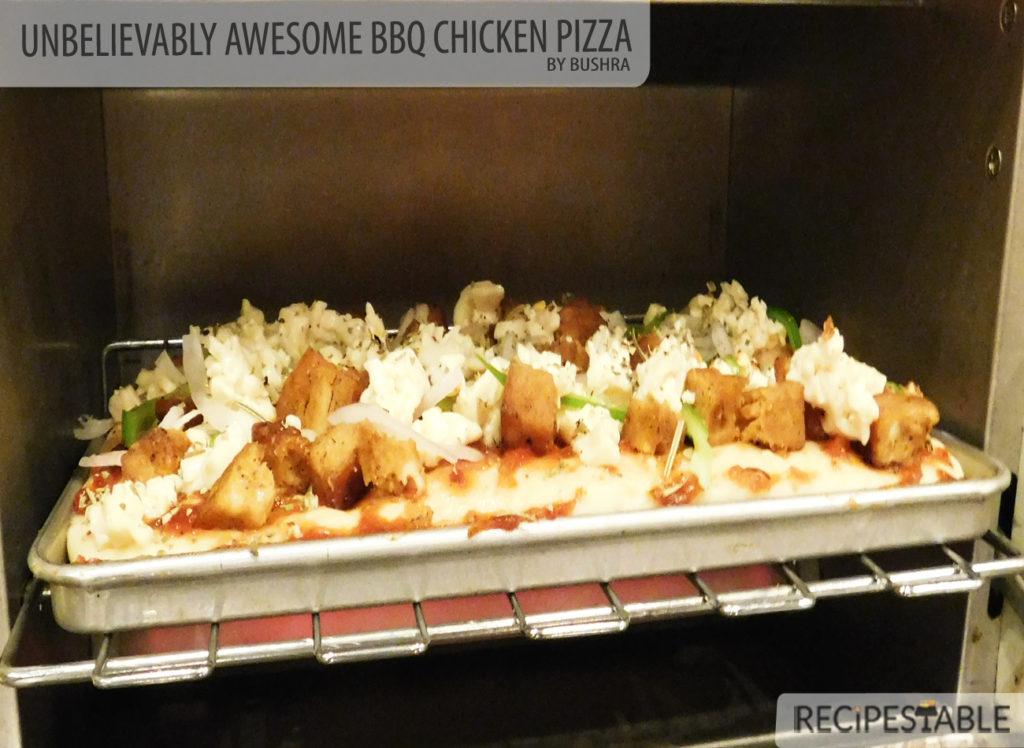
    Let’s take a quick break from dessert and talk about pizza. Thick style homemade pizza crust topped with BBQ sauce, Barbecue flavored Chicken Chunks, onions, capsicum, jalapeno, and tons of cheese. Your soon-to-be favorite pizza!

    It’s Cheesy, doughy, crispy on the edges, soft in the middle, loaded, homemade pizza. All you need is 35 minutes and a few fresh ingredients for this Unbelievably Awesome BBQ Chicken Pizza recipe.

    Unbelievably Awesome BBQ Chicken Pizza

    What’s your favorite kind? For me, nothing beats my Italian Herb Crusted Cheese Pizza. But this BBQ chicken pizza is in close 2nd place! Sweet BBQ sauce, chicken chunks, red onions, a dash of jalapeno, and tons of cheese.

    My version of savory heaven, right here.

    Unbelievably Awesome BBQ Chicken Pizza

    Unbelievably Awesome BBQ Chicken Pizza

    When I make homemade pizza, I like to get the cheese extra melted and bubbly. I love the sides to get a little brown and the bottom to be extra crispy. To obtain all this goodness, I switch my oven to broil for a quick minute as the pizza is finishing up. I suggest you try it! What I don’t suggest you try is walking out of the kitchen to answer your phone, only to come back finding your pizza burnt to a black crisp with the oven still on broil.

    Whoops! Yeah, I make mistakes too.

    UNBELIEVABLY AWESOME BBQ CHICKEN PIZZA

    UNBELIEVABLY AWESOME BBQ CHICKEN PIZZA

    My love affair with barbecue chicken pizza began long, long ago. The flavors and textures in this pizza are incredible! You have the sweet tang from the BBQ sauce, the meaty chicken, the zesty red onion, fresh green pepper, smoky jalapeno, soft crust, crispy edges, and ultra cheesy mozzarella covering it all. Does anything sound better?

    Ditch the delivery guy, you’re eating homemade tonight! It’s easy, cheesy, and fun, especially on the weekends!  While you can never go wrong with traditional cheese and pepperoni, give BBQ chicken chunks a chance and you wont be disappointed!  You can cook your own chicken and shred it for this recipe, or use a rotisserie chicken, which gives great flavor and cuts the prep time in half!  This is the easiest recipe and tastes super delicious!

    Bismillah let’s get started. 

    UNBELIEVABLY AWESOME BBQ CHICKEN PIZZA

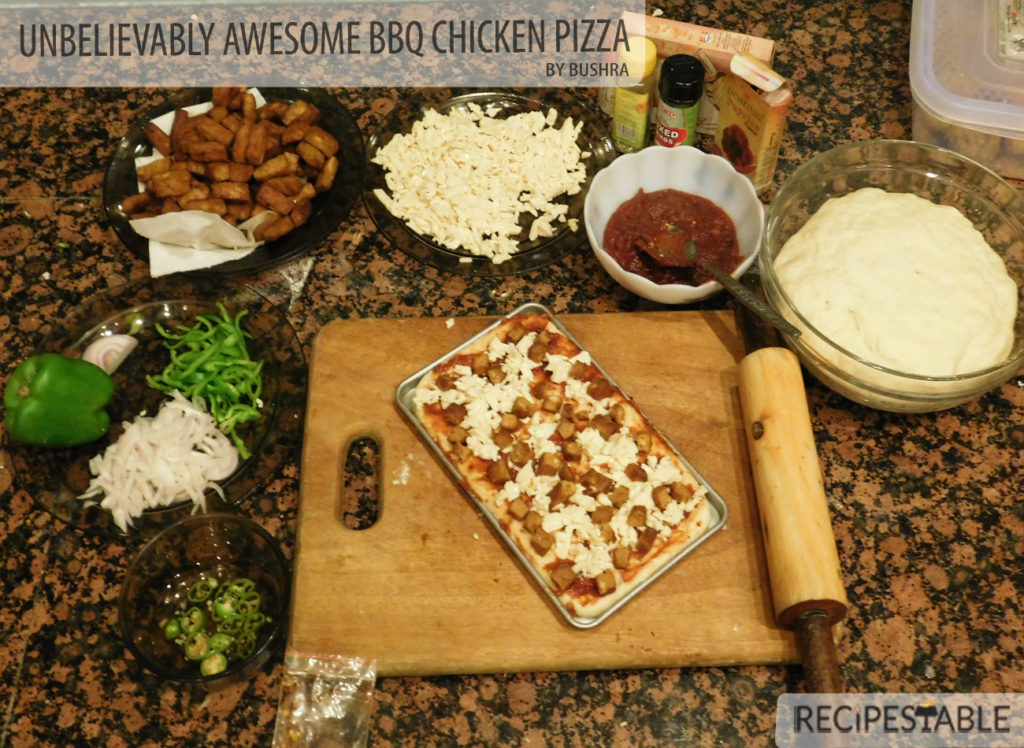
    First, get your oven heated up to Gas Mark 180 degrees C.  Then, grab some pizza dough. You can use a ready made pizza base which would make dinner appear a lot faster. I used one batch of my Fresh Pizza Dough. 

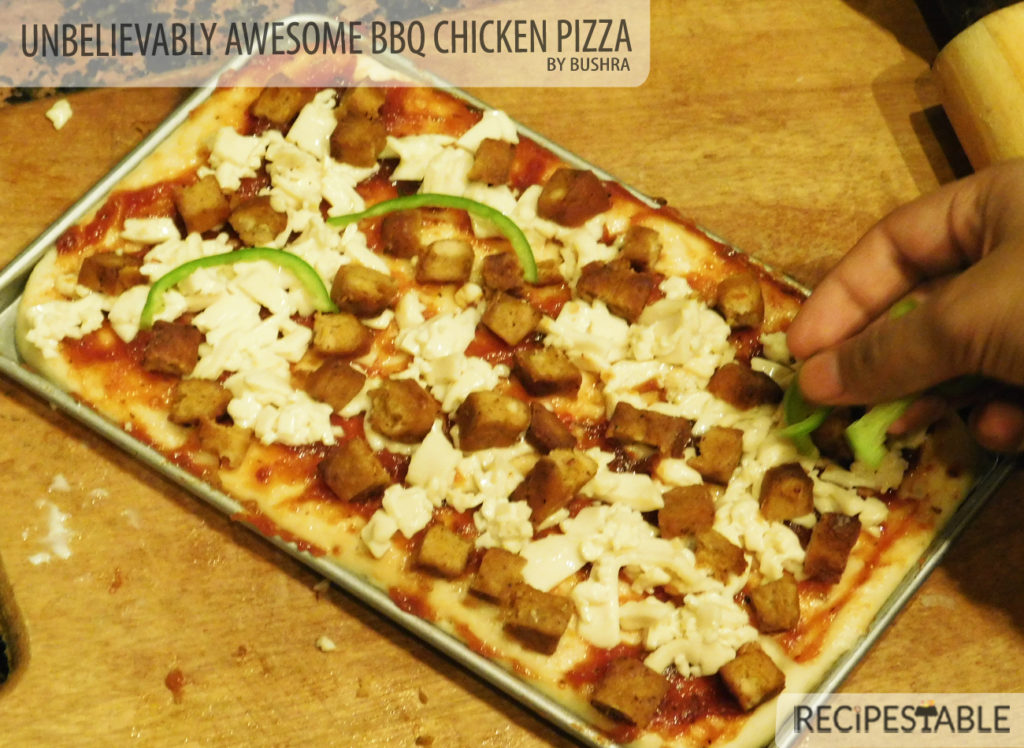
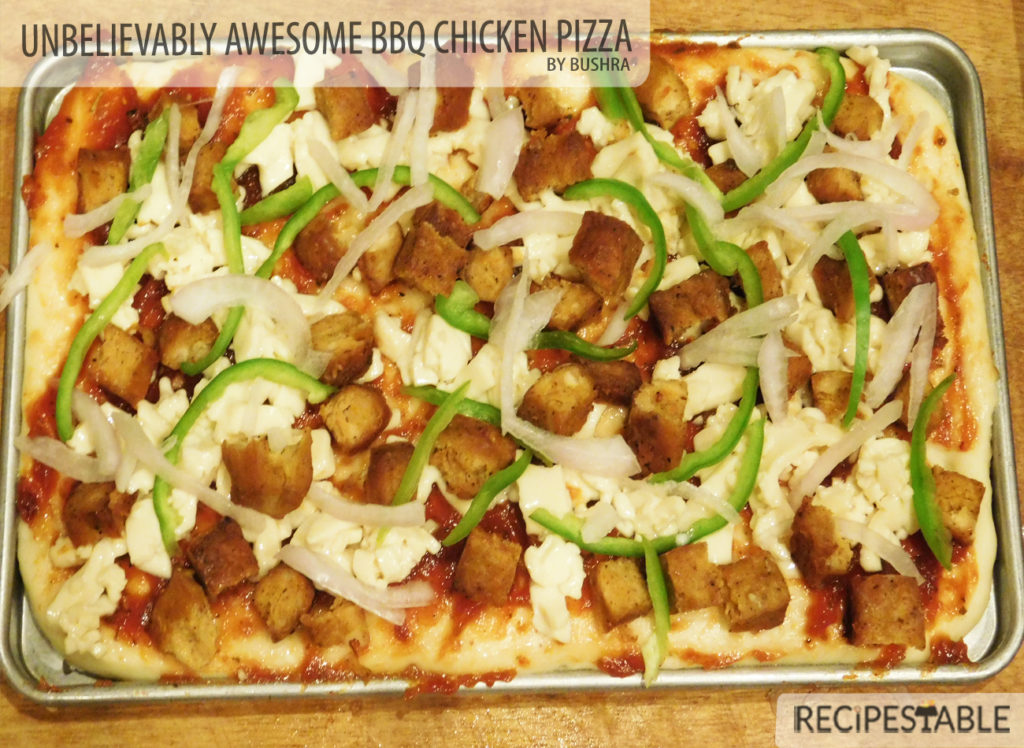
    Place it onto a floured surface. And, roll and shape the dough into a 9-inch triangle. Roll out to fit your pizza tray. Next, You need barbecue sauce. Use shop bought or make it homemade which I did using this Homemade Barbecue Sauce recipe.  It’s really easy and uses ingredients that I bet you already have in the cupboard. Now, grab the rest of your ingredients. Top with chicken chunks and play with your favorite toppings.  

    UNBELIEVABLY AWESOME BBQ CHICKEN PIZZA

    UNBELIEVABLY AWESOME BBQ CHICKEN PIZZA

    Finally, take some Grated Mozzarella. And, then the jalapeno slices. 

    UNBELIEVABLY AWESOME BBQ CHICKEN PIZZA

    UNBELIEVABLY AWESOME BBQ CHICKEN PIZZA

    Place the pizza into the hot oven to bake .. for about 20 minutes or until golden brown and bubbling.

    UNBELIEVABLY AWESOME BBQ CHICKEN PIZZA

    UNBELIEVABLY AWESOME BBQ CHICKEN PIZZA

    Slice and serve immediately! Try not to burn yourself when eating!
    Btw, feel free to add anything else to the pizza that you like.
    UNBELIEVABLY AWESOME BBQ CHICKEN PIZZA

    Check it out the Unbelievably Awesome BBQ Chicken Pizza and printable version here!!

    Consider serving this with:

    More pizza inspiration:

    Put your own spin on it. And lemme know how it turns out. Post a photo on Facebook (Recipestable) or Instagram on Twitter so I can see how lovely yours turn out.

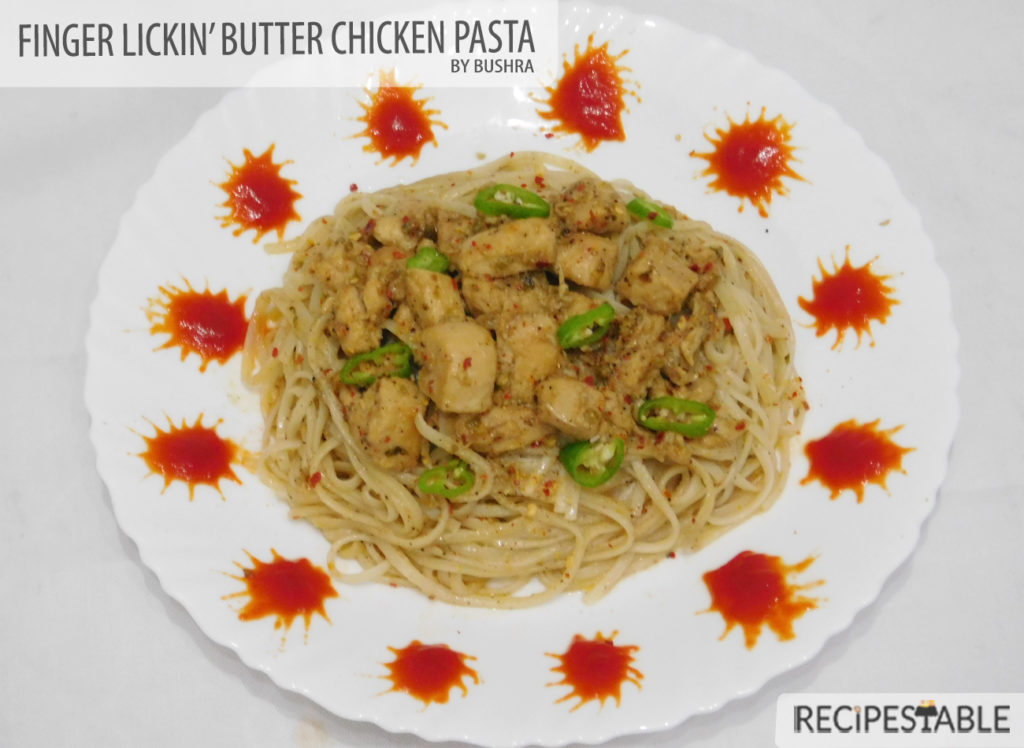
  • Finger Lickin’ Butter Chicken Pasta Recipe

    Finger Lickin’ Butter Chicken Pasta Recipe

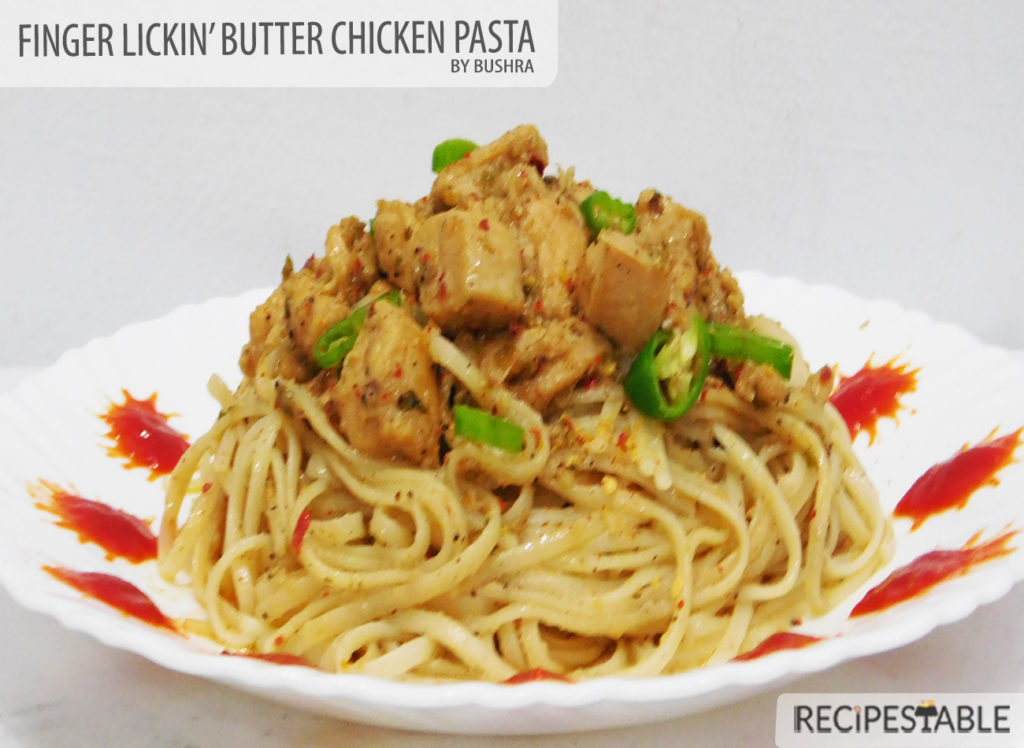
    How much do you love Butter Chicken (Murgh Makhani)? A lot, right? Then why not turn your favorite food into a magical new dish with this clever idea? Yes, Take the classic Pakistani favorite Butter Chicken (Murgh Makhani), and pair it with delicious pasta to create this ultimate weeknight meal. Sprinkle some extra chilies to add a kick and treat your family to a lip-smacking dinner that will be ready in just under 30 minutes. It is SUPER delicious, rich, creamy and addictive and is very easy to make.

    Finger Lickin Butter Chicken Pasta recipe

    BUTTER CHICKEN PASTA

    Finger Lickin Butter Chicken Pasta

    Here’s the truth. I have no idea how I came up with this recipe. A lazy saturday night lead to me cook up a quick, yet comforting, dinner where I had to use what I had on hand. I found some leftover butter chicken in my fridge and  I came up with this dish on the spur of the moment.

    butter chicken

    Butter Chicken

    I love creating recipes with what’s on hand, so I decided to use the noodles as a ‘pasta’ base, and create this Pakistani inspired spicy, creamy Butter Chicken Pasta with the remaining ingredients to go along. With a few twists, out came a perfectly balanced and super satisfying Pakistani Italian fusion that worked in every way, and came together in under 30 minutes

    butter chicken pasta2

    butter chicken pasta2

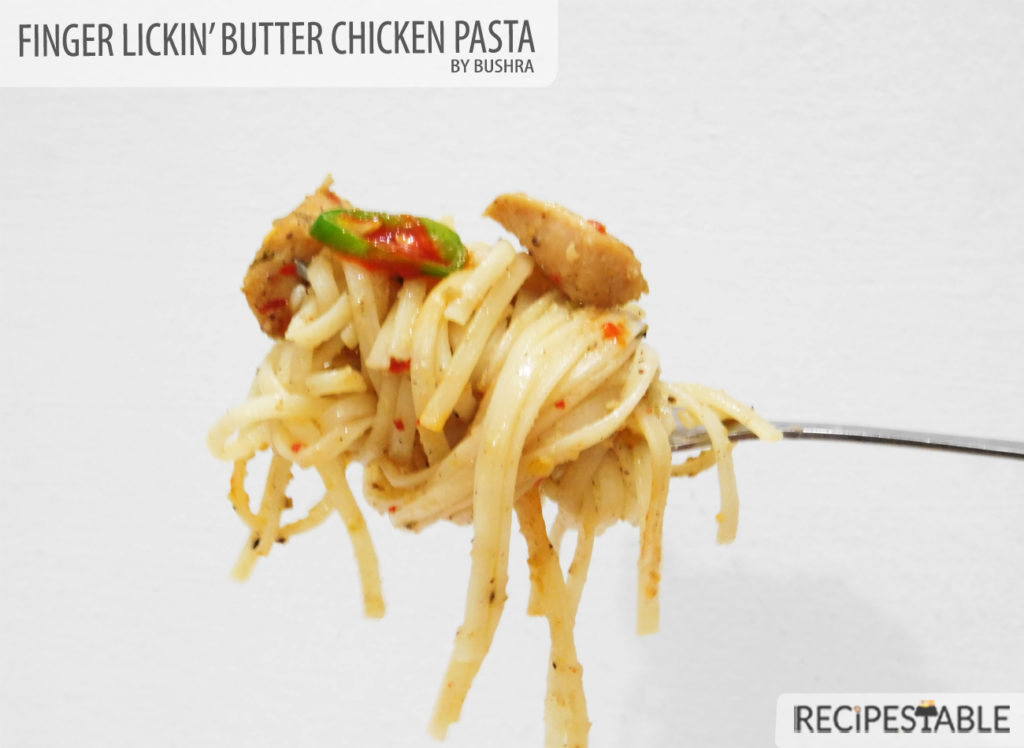
    Pasta tossed in creamy butter chicken or Murgh Makhani. The pasta noodles soaks up all the creamy buttery sauce from the butter chicken. It was a purely experimental and turned out to be one of the best pasta dishes I ever had.

    Butter Chicken Pasta

    Spicy, Rich, Buttery and creamy Butter Chicken Pasta

    If you’re looking for a way to switch up your meal-prep routine then this is a great way to do so. This Finger lickin Butter chicken pasta recipe is a yummy Italian Pakistani combo that you should try out. This one pot tasty meal will add spice and flavor to your normal dinner routine! Hope you will enjoy 🙂

    Spicy and creamy 30-minute butter chicken Pasta. 

    Bismillah let’s get started. 

    Check it out the finger lickin’ Butter Chicken Pasta recipe and printable version here!!

    Finger Lickin’ Butter Chicken Pasta Recipe

    Take the classic Pakistani favorite Butter Chicken (Murgh Makhani), and pair it with delicious pasta to create this ultimate weeknight meal. It is SUPER delicious, rich, creamy and addictive and is very easy to make. Sprinkle some extra chilies to add a kick and treat your family to a lip-smacking dinner that will be ready in just under 30 minutes.
    Keyword Butter, Chicken, Dinner, Lunch, Murgh Makhani, Noodles, Pasta, Quick and Easy
    Prep Time 5 minutes
    Cook Time 25 minutes
    Total Time 30 minutes
    Servings 4
    Author Bushra Waheed

    Ingredients

    • 2-1/2 cups Butter chicken curry for recipe click here
    • 1 packet (about 200 gm ) noodles or pasta of your choice
    • 2 green chilies thinly sliced ( optional)
    • few Coriander leaves for garnishing
    • red pepper flakes
    • salt to taste

    Instructions

    • Bring a pot of salted water to boil.
    • Add pasta and cook for 7-10 minutes or until al dente.
    • Drain and keep aside.
    • Meanwhiile, prepare butter chicken according to the recipe instructions (for reciep click here).
    • Add pasta to the prepared butter chicken(murgh makhani).
    • Toss to coat evenly.
    • Heat through.
    • Sprinkle red pepper flakes over it.
    • Garnish with green chilies and coriander leaves.
    • Dish it out.
    • Finger Linkin’ Butter Chicken is ready to serve.

    I have also posted Karahi Butter Chicken and Chicken Tikka Masala Macaroni  which are another easiest & tastiest version of making classic dinner at home. Do check it out as well.  It’s finger lickin’ good. You’ll be coming back for more.


    Put your own spin on it. And lemme know how it turns out. Post a photo on Facebook (Recipestable) or Instagram on Twitter so I can see how lovely yours turn out.

  • Bakery Style Chicken Mayo Sandwiches Recipe

    Bakery Style Chicken Mayo Sandwiches Recipe

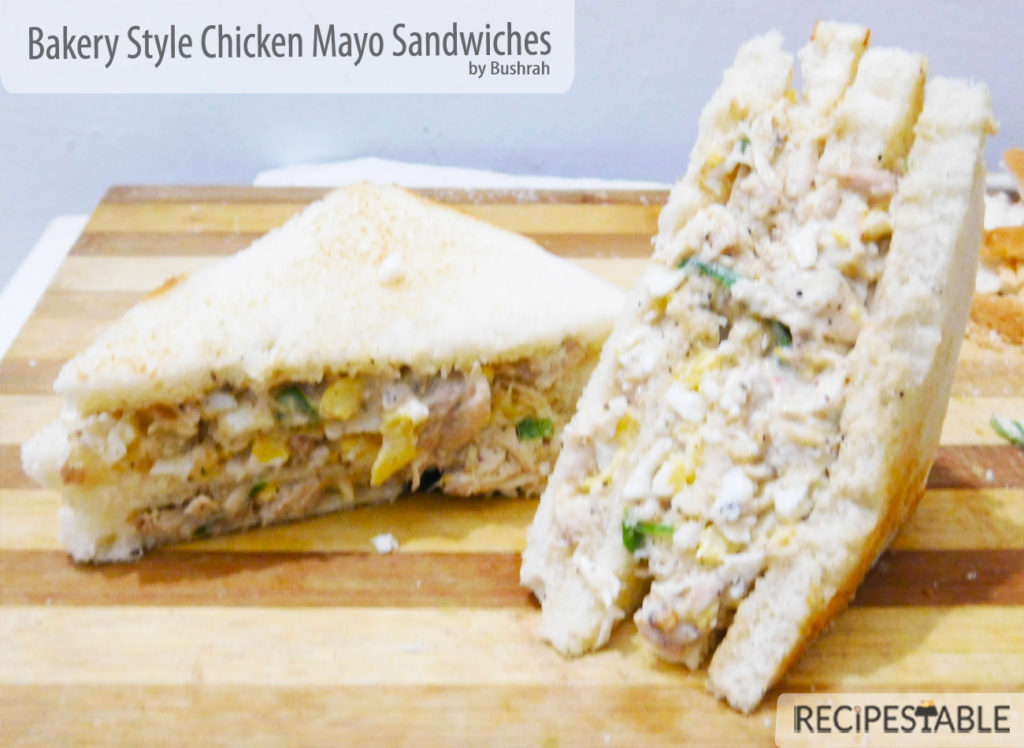
    Looking for an amazing, delicious and cheap Tea Party recipe for a busy day? Then look no further, these Bakery Style Chicken Mayo sandwiches takes about 15 minutes prep work and it’s flavor is phenomenal.

    Bakery Style Chicken Mayo Sandwiches Recipe

    Bakery Style Chicken Mayo Sandwiches

    Just 4 ingredients and 15 minutes is all it takes to make these Bakery Style Chicken Mayonnaise Sandwiches. The crowd will go crazy over them at your next get together!

    Bakery Style Chicken Mayo Sandwiches

    Bakery Style Chicken Mayo Sandwiches

    These Bakery Style Chicken Mayo sandwiches are loaded with shredded chicken, mayonnaise, lettuce and simple seasoning. Lettuce leaves are optional but I’d say it’s a must, it perfectly compliments all the flavors of the chicken.

    Serve this sandwich with a side of french fries, roasted potatoes and you’ve get a dinner that couldn’t get any simpler. Enjoy!

    Bakery Style Chicken Mayo Sandwiches recipe

    Bakery Style Chicken Mayo Sandwiches

    Chicken sandwiches are eternally popular and often the first item to disappear when handed around. The key is well-toasted bread, which prevents any filling from soaking in and making the bread soggy. 

    Bakery Style Chicken Mayo Sandwiches recipe

    Bakery Style Chicken Mayo Sandwiches

    Very handy and easy to make, these sandwiches are just perfect for picnic, tea time snack, lunch box etc. If you have a tea party at your home and your friends are invited. You can make quick and easy bakery style sandwiches by following this recipe.

    Make it, enjoy the deliciousness and 
    serve it to your family with love

    Bismisllah Let’s Get This Started !

    Bakery Style Chicken Mayo Sandwiches Recipe with Step by Step Pictures

    Ingredients You will Need:

    • 4 bread slices
    • 1/2 cup boiled Chicken, (shredded)
    • 2 lettuce leaves, (optional)
    • 4 tablespoon mayonnaise
    • salt and pepper to taste

    How to make Bakery Style Chicken Mayo Sandwiches

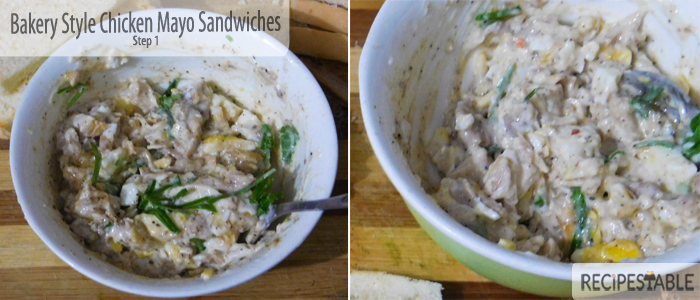
    Step 1: Place shredded chicken in a large bowl. Now add the mayonnaise bit by bit, depending on the consistency you like. Add the lettuce leaves (if using) and season with salt and pepper. Stuffing is ready.

    Bakery Style Chicken Mayo Sandwiches Recipe: Step 1

    Step 2: Toast bread slices and cut out their edges if you want otherwise you can use as it is.

    Bakery Style Chicken Mayo Sandwiches Recipe: Step 2

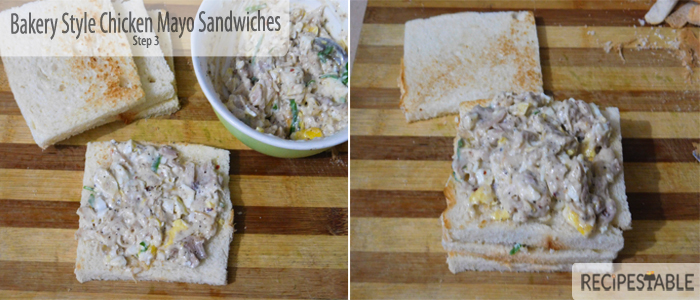
    Step 3:Place a slice bread in a clean-surface and spread the chicken mayo filling on it. Cover the Bread with another piece of the toasted Bread and repeat three layers. Lightly press to complete the sandwich.

    Bakery Style Chicken Mayo Sandwiches Recipe: Step 3

    Step 4:  Now cut the sandwich diagonally and following the same process prepare rest of the Sandwiches.

    Bakery Style Chicken Mayo Sandwiches Recipe: Step 4

    Give it a try and You have bakery-style Chicken mayo sandwiches that will mystify your friends and family as to how you made them. Go you.

    Check it out the Bakery Style Chicken Mayo Sandwiches recipe and printable version here!!

    Bakery Style Chicken Mayo Sandwiches

    Prep Time 10 minutes
    Cook Time 2 minutes
    Total Time 12 minutes
    Servings 2
    Author Bushra Waheed

    Ingredients

    • 4 bread slices
    • 1/2 cup boiled Chicken (shredded)
    • 2 lettuce leaves
    • 4 tablespoon mayonnaise
    • salt and pepper to taste

    Instructions

    • In a large bowl, combine together the shredded chicken and mayonnaise.
    • Now add lettuce leaves.
    • Season with salt and pepper.
    • Mix until well combined.
    • Toast bread slices and cut out their edges if you want otherwise you can use as it is.
    • Place a slice bread in a clean-surface and spread the chicken mayo filling on it.
    • After filling, take another bread slice and put it on the above of filling.
    • Repeat again and make three layers withit.
    • After that, put the forth one slice of bread on the third layer of filling and lightly press to complete the sandwich.
    • Now Secure with wooden picks and cut the sandwich diagonally and following the same process prepare rest of the Sandwiches.
    • Your Bakery Style Chicken Mayonnaise sandwiches are ready to serve. ENJOY!!

    Notes

    Serving Suggestions:
    You can serve with french fries and your favorite dipping sauce.

    Extra Bonus Tips :

    1. This is a good recipe to use the left over Rotisserie or boiled chicken.
    2. It’s very good for outdoor entertaining and picnics.
    3. You can make the filling hours or even a day before and assemble it when needed.
    4.  If making ahead of time, cover with a damp tea towel to ensure they don’t dry out. I have sprinkled a mint leaves over the sandwiches, but this is only for garnish(you can skip it).

    Put your own spin on it. And lemme know how it turns out. Post a photo on Facebook (Recipestable) or  on Twitter so I can see how lovely yours turn out.

    Happy Cooking

    Pin it for Later:

    Bakery Style Chicken Mayo Sandwiches Pinterest
    Pin it for Later

    ATTENTION: All photos and content are copyright protected. Please do not use our photos without prior written permission. If you wish to republish this recipe, please rewrite the recipe in your own unique words and link back to Bakery Style Chicken Sandwiches Recipe on Recipestable. Thank you!

  • Flower Shaped Buns Recipe with Step by Step Pictures

    Flower Shaped Buns Recipe with Step by Step Pictures

    Baking is an assortment of pure love, garnished with utmost care into a culmination of all the good things that life has to offer. These gorgeous Flower Shaped Buns are truly spectacular, and they taste just as amazing as they look! 

    Flower Shaped Buns recipe
    Warm, freshly baked Buns tastes very good with chicken filling.

     The Flower Shaped Buns. So elusive. So Cute. So majestic. So eye-catching

    How do you make them? Is there too hard to shape? Is there a complicated technique? Is it wizardry?

    Just a few of the thoughts I had before attempting these beauties. However, I’m elated to report that if you can master my Vegetable Stuffed Buns & Baby Chicken Bread (and you totally can), you can master the Flower Shaped Buns, too!

    These flower shaped buns are simple to make and cute to look at. 

    Flower Shaped Buns Recipe
    Flower Shaped Buns 

    It all starts with a simple dough that rises in 1 hour. To keep things a little on the healthier side, I went with a 2:1  mix of unbleached all purpose and whole wheat pastry flour for slightly-hearty-but-still-decadent buns.

    You could also go entirely all-purpose for true bakery style, all whole-wheat pastry for a healthier buns, or some other combination that I haven’t thought of! 

    So how are these simple? I’m glad you asked.

    13 ingredients including seasonings (sesame seeds being the 14th and optional ingredient)
    One true rise = less waiting
    Fool-proof methods
    No fancy techniques or equipment involved

    See? You can totally do this. Believe it.

    So what do these studs taste like? Amazing. They’re

    Soft
    Tender
    Fluffy
    Perfectly spiced
    Loaded with creamy chicken filling
    & Better with each bite

    Give it a try and You have bakery-worthy stuffed buns that will mystify your friends and family as to how you made them. Go you.

    Bismisllah Let’s Get This Started !

    Ingredients You will Need:

    For Buns Dough
    • 3 1/2 cups all-purpose flour
    • 1 cup milk
    • 2 tablespoon milk powder
    • 1/2 cup water (might use less)
    • 1 egg, lightly beaten
    • 1 tablespoon sugar
    • 4 tablespoon oil
    • 4 tablespoon melted butter
    • 1 1/2 teaspoon instant yeast
    • 1 teaspoon salt
    Chicken Filling
    • 2 cups boiled chicken, shredded
    • 1 large red onion, finel chopped
    • 2 tablespoon butter
    • 2 tablespoon plain flour
    • 1 teaspoon salt
    • 1 teaspoon black pepper
    • 1/2 teaspoon red chili, crushed
    • 4 tablespoon coriander leaves
    • 4 green chilies, finely chopped
    • 1 cup milk
    For Assembling Buns
    • white & black sesame seeds, as required
    • 1 egg yolk, beaten with 1 tsp milk, for brushing the buns before baking

    How to Make Flower Shaped Buns:

    Step 1: Sieve the flour and dry milk powder in a large mixing bowl. Make three holes in the flour, and then put sugar, yeast, and salt in each hole. Gently cover the holes with the flour. Then add the oil, melted butter and the egg, and combine together.

    Flower Shaped Buns Step 1
    Flower Shaped Buns Step 2

    Step 2: Pour lukewarm milk in the flour mix. Start kneading together and gradually add the lukewarm water a little at a time. You may not need to use all the water, so add it sparingly until your dough comes together and is nice and soft. Knead for a good 10-15 minutes.When the dough becomes smooth and elastic, it is done. (Note: The more you knead the dough, the softer the buns will be).

    Step 3: Touch a bit of oil with your fingertips and apply all over the ball of dough. Loosely cover the bowl with plastic wrap or cover with a damp cloth and set it in a warm place for 40 minutes to an hour for it to double in size.

    Flower Shaped Buns Step 3

    Step 4 :To Make Chicken Filling – Melt 2 tablespoon butter in a frying pan or wok. Saute onion in butter until transculant. Add flour, salt, pepper and red chili and cook for 2-3 minutes. Now add milk and cook for 4-5 minutes or until sauce is thickened. Add shredded chicken, green chilies, fresh coriander leaves. Stir until well combined and remove from the heat. Let it cool completely.

    Flower Shaped Buns Recipe Step 4

    Step 5: When the dough has risen into a nice big size, take the dough out of the bowl and Punch it down to remove some of the air in the dough.

    Flower Shaped Buns Recipe Step 5

    Step 6: Divide the dough into 16-18 balls, depending on the size of buns you would like.

    Flower Shaped Buns Recipe Step 6

    Step 7: Gently roll out each piece of dough and make a round ball. Flatten a ball until it is about 3 inches in diameter and place 2 tablespoon of chicken filling in the center.

    Flower Shaped Buns Recipe Step 7

    Step 8: Pull up the edges of the rolled out dough and pinch together to firmly seal the filling within.

    Flower Shaped Buns Recipe Step 8

    Step 9: Put the sealed part face down on the board and press the dough into about a 2 inch diameter. Make 8 decorative slits around the edge, equally spaced apart (either using a pizza cutter or sharp knife or even a pair of kitchen scissors).

    Flower Shaped Buns Recipe Step 9

    Step 10 : Place the prepared buns on a greased cooking sheet or tray and cover with a light cloth and let them rise for about 20 minutes to half an hour.

    Flower Shaped Buns Recipe Step 10

    Step 11: Brush each bun with beaten egg yolks and put some black and white sesame seeds in the center of the each bun.

    Flower Shaped Buns Recipe Step 11

    Step 12: Bake the buns, in the preheated oven for about 20 minutes or until golden.

    Flower Shaped Buns Recipe Step 12

    Step 13: Remove and brush the buns top with melted butter (it will give nice shiny look) and let it rest covered with a cloth for 2-3 min to soften the bread completely.. Flower Shaped Buns are ready to serve. ENJOY with your favorite dipping sauce.

    Flower Shaped Buns Recipe Step 13

    These Flower Shaped Buns are definitely a treat for weekend Tea Party. Especially when served with a luxurious garlic sauce generously topped with mayonnaise.

    Check it out the Flower Shaped Buns recipe and printable version here!!

    I believe that homemade cooking is delicious and healthy. If you love savory breads or rolls, but want to eat a little healthier, this recipe can be good to try. 🙂 Put your own spin on it. And lemme know how it turns out. Post a photo on Facebook (Recipestable) or  on Twitter so I can see how lovely yours turn out.


    Happy Baking!!

    Pin it For Later: 


    ATTENTION: All photos and content are copyright protected. Please do not use our photos without prior written permission. If you wish to republish this recipe, please rewrite the recipe in your own unique words and link back to Super Easy, Super Moist Chocolate Cupcakes on Recipestable. Thank you!

  • Fat Free Chicken Karahi Recipe

    Fat Free Chicken Karahi Recipe

    Starting a healthier diet can be easier than you think. But what happens when you start to get bored with the healthy foods you are eating?  Chicken Karahi in a hurry is a winner for everyone in our house. We all get to enjoy some delicious comfort food and I don’t have to spend long in the kitchen to make it. Hurrah! 


    Today I’am going to share a Clean eating Version of Chicken Karahi. It is very delicious and easy to make. A lighter and healthier version of the Pakistani Chicken Karahi, this tomato-based curry is packed with extra fragrant spices and creamy yogurt. Yummilicious treat that will have you wanting to savor every last bite! 
    Clean Eating Chicken Karahi Recipe
    Clean Eating Chicken Karahi
     If you are following a weight loss plan then take your taste buds on an exotic ride with this Fat Free chicken karahi recipe. This delicious Clean Eating Chicken Karahi recipe will keep you satisfied and still help you lose weight. This recipe is low fat, low sodium, and a good source of protein. 

    I have also posted Salmon Fish Fry recipe  which is another easiest & tastiest Clean Eating version of making Fried Fish. Do check it out as well.


    Put your own spin on it. And lemme know how it turns out. Post a photo on Facebook (Recipestable) or on Twitter so I can see how lovely yours turn out.

    Happy Clean Eating!!


  • Chicken Shashlik Sticks Recipe

    Chicken Shashlik Sticks Recipe

     Delicious, tender, juicy Chicken Shashlik Sticks the whole family loves in less than 40 minutes! These Shashlik Sticks are EASY to make and so versatile.

    Chicken Shashlik Sticks Recipe
    Photo: Chicken Shashlik Sticks

    Chicken Shashlik Sticks

    When a friend blogger posted Chicken Shashlik Sticks recipe on Instagram AND I saw it pinned on Pinterest on the same day, I knew it was a sign that I had to make this. The pictures looked so good, and the recipe seemed too easy to be true (spoiler alert, it isn’t!). So I added it to my weekly meal plan. I finally got a chance to make it yesterday, and I am praising the convenience and tastiness of this dish.

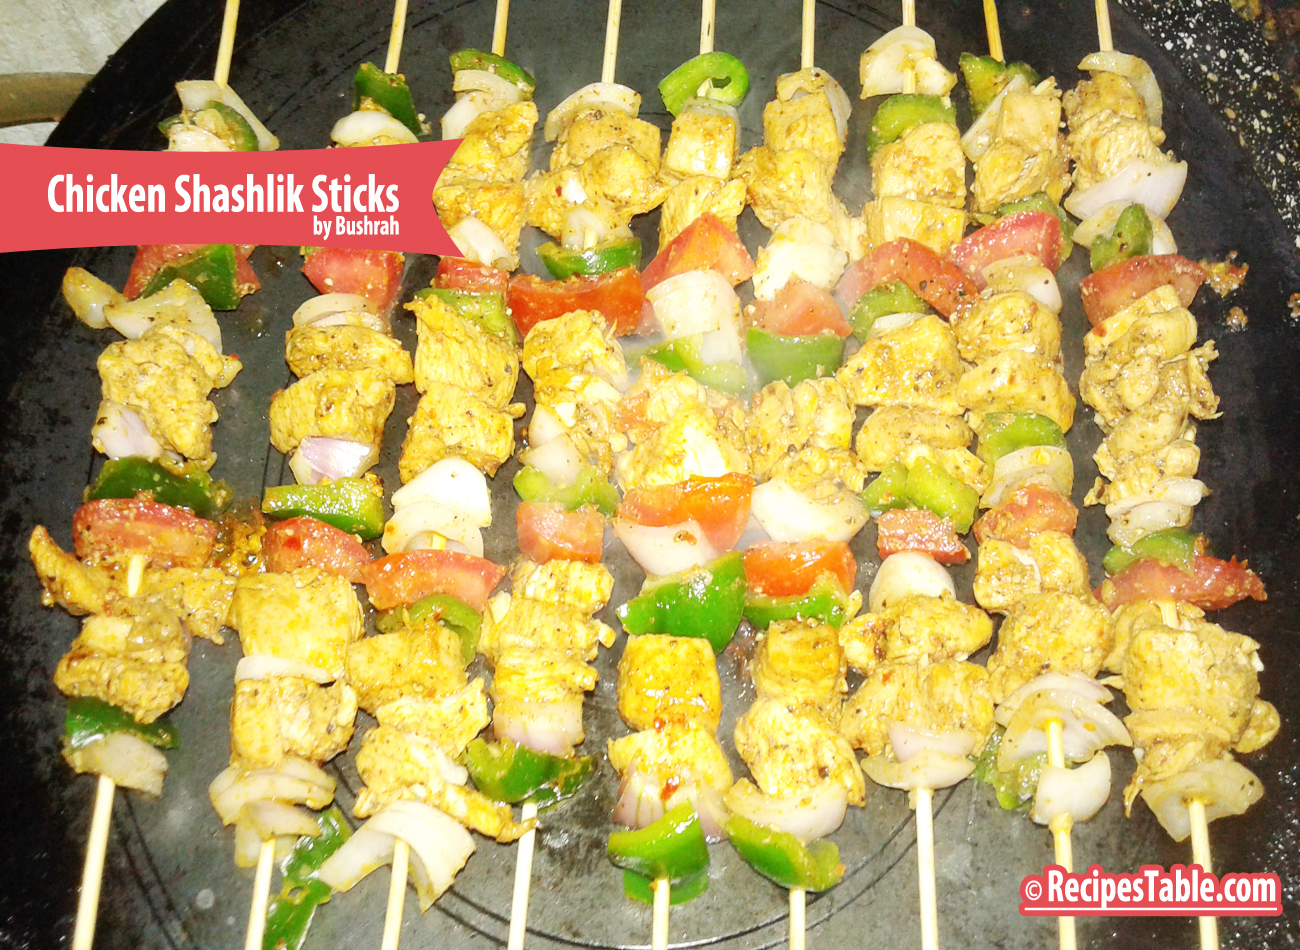
    This is an easy recipe for Tender & Juicy Chicken Shashlik Sticks. The shashlik sticks were loaded with tender pieces of chicken between juicy tomato chunks, sweet peppers and flavorful onions. The chicken was marinated in a sweet and tangy sauce before firing and the sticks were brushed with the leftover marination while they were being cooked. What a great combination of flavors!

    Chicken Shashlik Sticks recipe
    Photo: Chicken Shashlik Sticks

    Remove from the grill or griddle and serve immediately. The combination of the juicy chicken bites and colorful veggies with the Shashlik sauce is fantastic! I loved how juicy they turned out.

    Check it out the Chicken Shashlik Sticks recipe and printable version here!!

    Extra-Bonus Tip: 

    Make sure you don’t use too big of pieces of chicken because you want everything to cook evenly. I have had one too many (okay, two total- but still that is more than necessary) meals ruined because my chicken wasn’t all the way cooked. 


    I have also posted Pineapple Chicken Tenders and Light Chicken Kabobs recipes which are another easiest & tastiest version of making Pasta home. Do check it out as well.  It’s finger lickin’ good. You’ll be coming back for more. 


    Put your own spin on it. And lemme know how it turns out. Post a photo on Facebook (Recipestable) or  on Twitter so I can see how lovely yours turn out.


    Happy Dinner Making!!

  • Karahi Butter Chicken Recipe (Makhni Karahi)

    Karahi Butter Chicken Recipe (Makhni Karahi)

    Assalam-o-Alaikum, how are you? Yep, it’s been almost a month since we met. First things first…I had my mid-term exams, so I was lil busy with studying and the other stuff in my life.
    However this gap between us wasn’t planned. I was hoping to catch up with you in between, but it didn’t work out.

    My celebration “yay, exam is over!”

    Finally exams are over I’m finally free to do whatever I want (blogging, eating yummy food, spending time with my plants)😌
    Anyways, the first thing I wanted to do was to just pop in here & say a quick hi to you. I hope you roll into the weekend in a joyous mood! May your day be as fantastic as you are!

    Karahi Butter Chicken (Makhni Karahi)

    To release some exams stress, I made this butter karahi by twisting my Father’s recipe…delicious goodness. Can’t wait to share it with you. He used to make the best food. He was an expert on how to make a really good Butter Chicken. Saying that, I’m not too sure how He would feel about this Karahi Butter Chicken version that I’m currently loving.

    Karahi Butter Chicken (Makhni Karahi)
    Karahi Butter Chicken (Makhni Karahi)

    Name me one thing that doesn’t taste better with a few dollops of cream, a knob or so of butter, a splash of milk, lashings of ghee.

    I’ll bet you’re having a hard time thinking up something. It’s a truth of the culinary world that these things all enhance the eating experience of many foods, sweet and savory foods alike and curries are no exception to this.

    Karahi Butter Chicken (Makhni Karahi)
    Karahi Butter Chicken (Makhni Karahi)

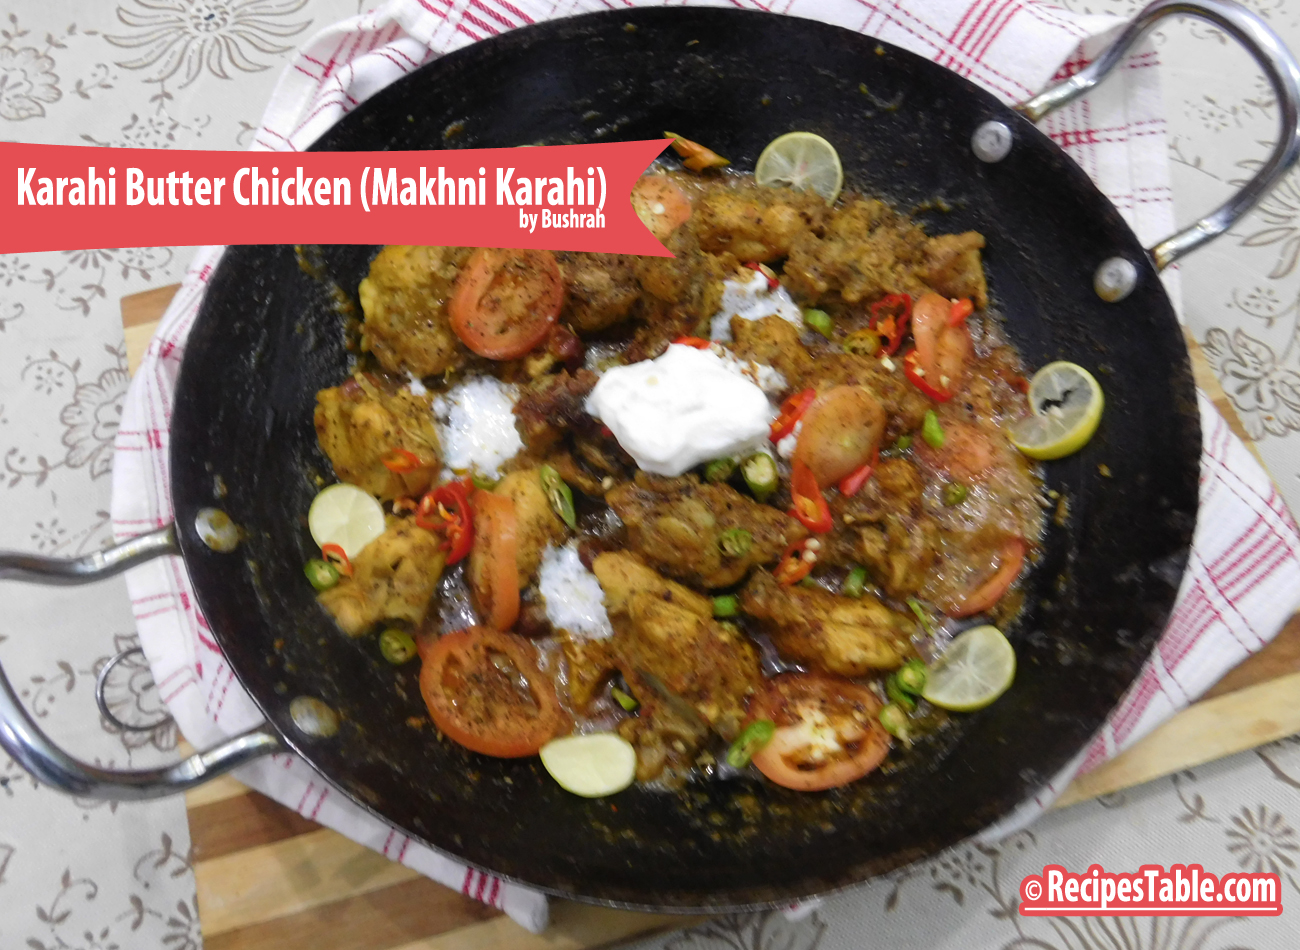
    Take this Karahi Butter Chicken ( Makhni Karahi), for example. I’ve taken the traditional Chicken Karahi dish and made it the way we all love, with the very flavours we all adore and then finished it up with a hearty amount of butter. What does this do? This fills every bite with the very same flavours we desire, along with a moreish, rich bite to it. Every bite tastes like a buttery dream, I tell you. This creamy and velvety gravy will melt in your mouth. 

    Karahi Butter Chicken (Makhni Karahi)
    Karahi Butter Chicken (Makhni Karahi)


    Bismillah, let’s begin!

    Check it out the Karahi Butter Chicken (Makhni Karahi) recipe and printable version here!!

     Recipe Note’s

    My final words before I give you the recipe – my Father was an expert at Karahi’s and he always told me what with chicken Karahis, you must work fast. Have all the ingredients chopped up beforehand if you can, and cook the entire thing on high heat. Stirring constantly is imperative, otherwise you risk burning the curry or having it stick to the pan. Skimp on half the oil or butter if  you must, but I wouldn’t recommend it as a Karahi dish isn’t truly a Karahi dish without its butter or oil.


    I have also posted Restaurant Style Lahori Mutton Karahi and Kebab Karahi which are another easiest & tastiest version of making Karahi at home. Do check it out as well.  It’s finger lickin’ good. You’ll be coming back for more. 


    Put your own spin on it. And lemme know how it turns out. Post a photo on Facebook (Recipestable) or  on Twitter so I can see how lovely yours turn out.


    Happy Karahi Making!!

    If you like this post, Please Subscribe to my blog and let me know your feedback by commenting below.. I have lots more recipes to share with you.

  • Mini Pizza Cups Recipe

    Mini Pizza Cups Recipe

    Pizza is always a crowd pleaser, but making your own can be a bit of a headache. This bite-sized alternative is easy to make and healthy (just 150 calories each!) and as much fun to make as they are to eat.

    Mini Pizza Cups
    Mini Pizza Cups

    Mini Pizza Cups

    I’m sure you’ve all heard of or made Pizza Cupcakes or  Pizza Muffins before. But as simple or obvious as this recipe seems, sometimes we need a good reminder of the un-fussy classics. Sometimes you don’t have time or the right ingredients to make an elaborate meal. When this happens, it’s good to have something simple and inexpensive to fall back on.

    Mini Pizza Cups recipe

    Healthy, Budget Friendly Mini Pizza Cups? Yes, Yes, and Yes!

    Mini Pizza Cups recipe
    Mini Pizza Cups

    If you’re crazy about pizza like me, but can’t justify eating it as much as you’d like, this is a great recipe for you. I used leftover pizza dough, chicken, lots of fresh vegetables, and a tablespoon or so of cheese on each mini pizza. Considering each pizza cup base 60 calories, the shredded chicken & cheese about 40 calories, and the rest of the ingredients were vegetables, I’m guessing each pizza had about 150 calories. This is not scientific, but it’s my best guess.

    Mini Pizza Cups
    Mini Pizza Cups

    An interesting and fun way to present your pizzas. These cute little pizza cups will delight anyone, especially kids. Have your children create their own pizzas, and get creative with the toppings. Perfectly shaped and easy to handle, they make for a great addition to lunch boxes or for picnics and road trips.

    mini-pizza-cups
    Mini Pizza Cups

    Hope you will give this a try and let me know how it turns out for you..

    Check it out the Mini Pizza Cups recipe and printable version here!!

    I have also posted My Fav French Bread Pizza Recipe and Pizza Rolls Recipe which are another easiest & tastiest version of making Pizza. Do check it out as well.  It’s finger lickin’ good. You’ll be coming back for more.


    Put your own spin on it. And lemme know how it turns out. Post a photo on Facebook (Recipestable) or  on Twitter so I can see how lovely yours turn out.

    Follow my blog with Bloglovin


    Happy Baking!!

    If you like this post, Please Subscribe to my blog and let me know your feedback by commenting below.. I have lots more recipes to share with you.

  • 25 Minute Chicken and Noodles Recipe

    25 Minute Chicken and Noodles Recipe

    I’m back with another post on Light Meal On Thursday. Last Thursday happened to be my brother’s birthday so there was definitely no light eating on that day, hence did not post a light meal.

    Quick & Light Neal – 25 Minute Chicken and Noodles 

    Today’s recipe is 25 Minute Chicken and Noodles.  It’s an ideal meal on lazy days or when one wants a light meal. Just make this and one is sorted.

    25 Minute Chicken and Noodles
    Photo: 25 Minute Chicken and Noodles

    I really hesitated on adding this recipe to the blog.  It’s really very simple and seems like something everyone already makes.  Then I remembered that my blog is not just for my readers, but also a record of recipes I make frequently.  This is one of family favorites(especially my nano _grandma)!  

    25 Minute Chicken and Noodles

    I’m not going to lie. But when I made this Chicken and Noodles for the family and grandma… they devoured it. I’m NOT KIDDING. I was SHOCKED. They were begging for me. I ended up with NO leftovers. HUH?

    And the best part? The entire recipe took 25 minutes to make. Enough yapping…Hope you enjoy!

    25 Minute Chicken and Noodles
    Photo: 25 Minute Chicken and Noodles

    A quick and delicious one pot recipe with chicken broth, chicken, noodles and healthy vegetables. This quick and easy skillet dish features all your favorite ingredients from chicken noodle soup, but without the soup. It’s a hearty meal perfect for a busy day. You can make a delicious, family-friendly dinner in just 25 minutes. 

    Bismillah, Let’s get started!!

    Check it out the 25 minute Chicken and Noodles recipe and printable version here!!

     Put your own spin on it. And lemme know how it turns out by sharing a picture  on Instagram, Facebook (Recipestable) or Twitter with this hashtag #Recipestable so I can see how lovely yours turn out.


    Happy Baking!!

    If you like this post, Please Subscribe to my blog and let me know your feedback by commenting below.. I have lots more recipes to share with you.

  • Baby Chicken Bread Recipe

    Baby Chicken Bread Recipe

    The recipe I am sharing today is a Family FAVORITE. All families have certain dishes they love to cook and eat. Mine goes gaga for these baby Chicken Breads! Put 12 dozen in front of them and they’ll still demand more. I am sure you will face the same situation with your siblings, cousins, random guests when you try these magical Baby Chicken Bread. (unless they are gluten intolerant. Oops)

    I thought, I would share this FAMILY FAVORITE with everyone since so many Friends nd ClassFellows have asked for this recipe. Enjoy!

    Baby Chicken Bread
    Photo: Baby Chicken Bread

    Baby Chicken Bread

    Chicken bread is a classic of Pakistani bakeries and we served it at most of the tea parties as a staple here. This simple yet delicious bread is easy to make and full of flavor.

    All you really need is a few basic ingredients: salt, flour, baking soda and yeast etc. The “trick” to achieving a perfect texture is not to over knead the dough and don’t over bake, as this will make it tough & hard, ugh not good! Brush with egg wash. Sprinkle a few sesame seeds. And voila! It’s ready to go in the oven for 25 minutes. 

    Baby Chicken Bread recipe
    Photo: Baby Chicken Bread

    On weekend night, I decided to bake chicken bread from scratch and Just for a twist I made  them in baby sizes.

    Don’t ask me why I do these things. I’m not quite sure myself.

    But you have to admit….they’re pretty darn cute.

     Baby Chicken Bread
    Photo: Baby Chicken Bread

    So now that my kitchen is covered with Baby Chicken Breads, what should I do with them?
    Of course, slathering them with hot pepper sauce and taking a big bite doesn’t count. I already did that. Twice.

    Baby Chicken Bread
    Photo: Baby Chicken Bread

    This recipe is especially handy because it makes A LOT of Baby Chicken Breads (1-1/2 dozen to be exact). So they are the perfect, fuss-free party food. Easy to make, fun to eat.

    Bismillah, Let’s get started!

    Check it out the Baby Chicken Bread recipe and printable version below.


    Baby Chicken Bread Recipe

    Chicken bread is a classic of Pakistani bakeries and we served it at most of the tea parties as a staple here. This simple yet delicious bread is easy to make and full of flavor.
    Prep Time 20 minutes
    Cook Time 25 minutes
    Total Time 45 minutes
    Servings 16
    Author Bushra Waheed

    Ingredients

    For Baby Chicken Bread Dough

    • 4 cups plain flour
    • 1 tablespoon instant yeast
    • 2 tablespoon dry powdered milk
    • 1 teaspoon salt
    • 1 teaspoon castor sugar
    • 4 tablespoon oil
    • 1 egg plus one for glazing

    For Baby Chicken Bread Filling

    • 2-1/2 cups boiled chicken shredded
    • 1 large onion finely chopped
    • 1 teaspoon salt
    • 1 teaspoon black pepper
    • 1 teaspoon garam masala powder
    • 1/2 cup coriander leaves
    • 4 green chilies finely chopped
    • 1 cup milk
    • 2 tablespoon plain flour
    • 2 tablespoon butter
    • sesame seeds & flax seeds as required

    Instructions

    To Make the Baby Chicken Bread Dough

    • In a large mixing bowl combine the plain flour, salt, castor sugar, dry milk powder, instant yeast, oil and egg.
    • Slowly mix in the lukewarm water with your hands till all the ingredients are mixed well and dough starts to form.
    • Knead the dough for 5-7 minutes on a floured surface till the dough becomes smooth and is no longer sticky.
    • Bang the dough on the floured surface 7-8 times for elasticity.
    • Shape the dough in a large ball add place in a greased bowl.
    • Brush the top lightly with some oil.
    • Cover with a kitchen cloth and let the dough to rise somewhere warm until doubled in size, around 1 hour.

    To make the Chicken Filling

    • Meanwhile, Melt butter in a frying pan over medium heat.
    • Fry onion till soft and translucent.
    • Now add 2 tablespoon plain flour and stir well.
    • Season with salt , black pepper and garam masala powder.
    • Stir in the milk and cook for 2-3 minutes or until thickened.
    • Stir in the shredded chicken add chopped green chillies and coriander leaves.
    • Remove from the heat and let it cool completely.
    • Punch the dough to release air.
    • Preheat oven at 200 degree C.
    • Now divide the dough into 14-16 parts depending on how small you want the baby chicken bread to be.
    • Roll each piece of dough to a rectangular shape.
    • Snip the sides with a sharp knife and put chicken filling in the center.
    • Fold each side so they overlap each other (like a braid) the filling will show slightly but that’s ok.
    • Brush top with beaten egg.
    • Sprinkle sesame seeds and flex seeds.
    • Bake, in the preheated oven, for 25-30 minutes or until its turn golden brown.
    • Right after taking out of the oven apply butter well on whole bread and let it rest covered with a cloth for 2-3 minutes to soften the bread completely.
    • Delicious Baby Chicken Breads are ready to serve.

    Notes

    Serving Suggestions:
    Voila! Enjoy your delicious bread with hot tea to the loving and deserving.


     Recipe Tip’s:

    1. I always make big batches of chicken bread at a go and then wrap them well in foil, then put them in some sort of a cellophane bag and tie it up tight and freeze.
    2. They can keep up to 4 weeks! When you need one, you just thaw it out overnight in the fridge or keep it out on the counter until it’s thawed out, then unwrap and then splash a little bit of water using your fingertips on it and put it in the oven for about 5 minutes to freshen it back up. Becomes as good as new! 

    Put your own spin on it. And lemme know how it turns out by sharing a picture  on Instagram, Facebook (Recipestable) or Twitter with this hashtag #Recipestable so I can see how lovely yours turn out.


    Happy Baking!!

    If you like this post, Please Subscribe to my blog and let me know your feedback by commenting below.. I have lots more recipes to share with you.

  • Pulled Chicken Sandwiches Recipe

    Pulled Chicken Sandwiches Recipe

    If I ask what my brother wants for dinner, more than likely he will say “sandwiches/burgers.” This recipe is a twist on the usual burgers and packs a big taste punch with the pulled chicken, cheese and barbecue sauce. If you’re anything like me then a burger needs to be covered in cheese, ice-berg leaves, and many slices of olives and tomatoes.

    Pulled Chicken Sandwiches Recipe
    Photo: Pulled Chicken Sandwiches

    Next time you’re craving a burger or sandwich, give this recipe a shot. It will become your new favorite! Your Dinner guests are guaranteed to be impressed with this deceptively easy Pulled Chicken Sandwich recipe, which includes a few-ingredient rub and a simple 15-minute sauce that comes together while the chicken oven baked. 

    Did I mention these sandwiches are braised in a special sweet and tangy sauce? Yep! It gives the chicken a deep, rich flavor that intensifies with age, so you can make the chicken a day ahead and your sandwiches will taste even better! Perfection!

    pulled Chicken Sandwiches recipe
    Photo: Pulled Chicken Sandwiches

    You can serve this chicken in many ways, but I made them in sandwich form because, honestly, what man can resist a toasty bun piled high with tender, juicy pulled chicken, oodles of caramelized onions, tangy barbecue sauce and melty cheese? I can’t think of one! You can serve this on a sandwich as I did, or you can serve on tacos, nachos and burritos, Ole! I’m already thinking of the delicious ways I plan to use this in the future.

    Photo: Pulled Chicken Sandwiches
    Photo: Pulled Chicken Sandwiches


    Bismillah, Let’s get started!

    Check it out the Pulled Chicken Sandwiches recipe and printable version below.

    Pin it For Later

    Pin it for later

    Put your own spin on it. And lemme know how it turns out. Post a photo on Facebook (Recipestable) or  on Twitter so I can see how lovely yours turn out.


    Happy Cooking!!

    If you like this post, Please Subscribe to my blog and let me know your feedback by commenting below.. I have lots more recipes to share with you.

  • Sweet and Sour Chicken with Noodles Recipe (30 Minute Meal)

    Sweet and Sour Chicken with Noodles Recipe (30 Minute Meal)

    Sweet and Sour Chicken with Noodles

    An easy and delicious weeknight meal loaded with healthy ingredients. A one-pan, 30 minute chicken stir fry recipe.This quick and easy sweet and sour chicken with noodles will be ready to eat in less than 30 minutes.

    sweet-sour-chicken-with-noodles

    Sweet and sour Chicken is one of the most popular Chinese dishes and My family is a big fan of sweet and sour chicken so I thought I would try this recipe with noodles. It was a huge hit in our house and even they ate tons of it! Definitely a keeper for a easy go to dinner meal.

    sweet-sour-chicken-with-noodles1

    This Sweet and Sour Chicken recipe is super easy to make. All you will need is one wok or a skillet, and all of the ingredients listed below. It takes about 30 minutes to make this mouthwatering dish. Delicious dinner made in no time!

    Tender, juicy pieces of chicken in a tangy sweet and sour sauce with pineapple chunks, onion and peppers, served on a Bed of Noodles.

    Bismillah, Let’s get started!

    Check it out the Sweet and Sour Chicken with Noodles recipe and printable version below.

     If you make this recipe, I’d love to see pics of your creations on Instagram, Facebook and Twitter! Hashtag them #recipestable.


    Put your own spin on it. And lemme know how it turns out. Post a photo on Facebook (Recipestable) or  on Twitter so I can see how lovely yours turn out.


    Happy Cooking!!

    If you like this post, Please Subscribe to my blog and let me know your feedback by commenting below.. I have lots more recipes to share with you.

  • Chicken Stir Fried Noodles Recipe

    Chicken Stir Fried Noodles Recipe

    Welcome back to my corner of the blogosphere!

    Where have I been you may ask?

     I was chilling with my grandparents, stuffing my tummy with yummy food, filling up my body with awesomeness. Nice relaxing day. I spent a quality time with my grandparents, did lots of cooking for them and made a full use of everything in the fridge, make them laugh, smile and collected their countless dua’s. My grandparents were happy to see me with them. I Love both of them. They puts a smile on my face and giggle in my heart.

    As much as I adore my grandparents, they do treat me like I’m still 6 years old.🤔🤔 I love staying with my grandparents they treat me like I’m royalty, but in reality they are my King & Queen😍

    The King and Queen of my Heart (My Grandparents)
    The King and Queen of my Heart (My Grandparents)

    Grandma’s Favorite Chicken Stir Fried Noodles

    Grandma's Favorite Chicken Stir Fried Noodles
    My Grandma’s Favorite Chicken Stir Fried Noodles

    Stop and wait a minute. This post is special.

    Because today I’ m sharing a family favorite recipe.{Especially, my grandma’s(nano)}. I’ve made these noodles countless times; in exchange of favors, to impress certain people. My GrandMa Loves to eat Chinese Food.  Just this weekend, I cooked it on my nano’s request. Nana abu loved it so much and he rewarded me with cash. $_$  💰 💰

    chicken-stir-fried-noodles3

    Cooking is an art ! I believe it- My favorite moments are the looks of appreciation my family and loved ones give me when they tastes my food. 

    My Grandma's Favorite Chicken Stir Fried Noodles
    Chicken Stir Fried Noodles

    A simple to make Chicken Stir Fried Noodles recipe, but big on flavors. The perfect balance of spiciness, tanginess and saltiness. The vibrant mix of fresh vegetables paired with the saltiness of the stir fry noodles, the tanginess of soy sauce, and the heat from the sesame oil and the acclaimed chili sauce; all worked out so well. These Grandma’s favorite Chicken Stir Fried Noodles will be a hit with the whole family.

    My Grandma's Favorite Chicken Stir Fried Noodles
    Vibrant mix of fresh vegetables paired with the saltiness of stir fry noodles

    Bismillah, let’s begin!

    Check it out the Chicken Stir Fried Noodles recipe and printable version below.

    Chicken Stir Fried Noodles Recipe

    A simple to make Chicken Stir Fried Noodles recipe, but big on flavors. The perfect balance of spiciness, tanginess and saltiness. The vibrant mix of fresh vegetables paired with the saltiness of the stir fry noodles, the tanginess of soy sauce, and the heat from the sesame oil and the acclaimed chili sauce; all worked out so well.
    Prep Time 10 minutes
    Cook Time 20 minutes
    Total Time 30 minutes
    Servings 6
    Author Bushra Waheed

    Ingredients

    • 2 boneless chicken breast cut into cubes
    • 2 tablespoon sesame Oil
    • 2 tablespoon vegetable oil
    • 2 clove garlic minced
    • 2 green onions cut into strips
    • 2 carrots peeled and cut into strips
    • 1/2 red bell pepper cut into strips
    • 1/2 green bell pepper cut into strips
    • 1/4 cup dark soy sauce
    • 1/4 cup chili garlic sauce
    • 1 packet spaghetti noodles or egg noodles
    • salt and pepper to taste

    Instructions

    Method

    • Cook the noodles in a large pan of boiling water for 2-3 minutes until Soft.
    • Once the noodles are cooked.
    • Drain and return to the saucepan.
    • Toss well in vegetable oil and set aside. Cover with a tea towel.
    • Heat a wok until very hot, then add remianing vegetable and sesame oil. Add 1 chopped garlic clove after 30 seconds.
    • Add the chicken and stir-fry for 3 minutes or until it loses its colour.
    • When the chicken is ready add the vegetables and stir-fry for another 30 seconds.
    • Add a splash of Soy sauce and stir fry for 1-2 minute.
    • Stir in the Soy sauce and chili garlic sauce.
    • Add noodles and cook for 30 seconds, stirring constantly and serve immediately.
    • Enjoy!

    Recipe Note’s:

    You can also add lamb, beef to this stir fry noodles, or just filled up with colorful veggies like I loved to eat. Either way, it’s finger lickin’ good. You’ll be coming back for more :’)


    I had made many yummy dishes there and in upcoming posts I’d love to share those recipes with you. So Stay tuned.


    I have also posted Keema Noodles Recipe which is another easiest & tastiest version of making noodles. Do check it out as well.


    Put your own spin on it. And lemme know how it turns out. Post a photo on Facebook (Recipestable) or  on Twitter so I can see how lovely yours turn out.


    Happy Cooking!!

    If you like this post, Please Subscribe to my blog and let me know your feedback by commenting below.. I have lots more recipes to share with you.