Author: Bushra Waheed

  • Foodies Festival “Bites and Vibes Pakistan” by FoodPanda

    Foodies Festival “Bites and Vibes Pakistan” by FoodPanda

     
    HAPPY (ALMOST) WINTER!
    Time to think about being prepared for inclement weather and other things that come with the season changing. What better way to welcome The winter than with a food festival, a gathering of love, culture and food. 🙂
    "Bites and Vibes" Pakistan's Coolest Food Festival
    “Bites and Vibes” Pakistan’s Coolest Food Festival
    Calling all fellow foodies and food bloggers!! I have been invited as a Blogger to the Pakistan’s Coolest Food Festival “Bites and Vibes” by foodpanda  and I am here to tell you about this great opportunity to network with awesome people and get your learn on. So excited to be part of the media to cover this amazing event!!

    Pakistan’s Coolest FOOD FESTIVAL is coming to Lahore!

    In case you’ve been living under a rock and haven’t heard, the coolest, craziest, most fantastical Food Festival “Bites and Vibes Pakistan” set to kick off in Lahore on Sunday, 12th of November at Royal Palm Country Golf Club. So, MARK THE DATE and MAKE PLANS to JOIN US!

    Bites and Vibes by FoodPanda
    Pakistan’s Coolest Food Market featuring your city’s
    favorite restaurants

    About Bites and Vibes:

    “Bites & Vibes Pakistan” Volume I is the part of an event-series dedicated to those who crave that good taste, fun seekers , and a cool crowd – all in one place! The Bites and Vibes Food Festival is an international, much hyped and wildly popular one-day event showcasing the city’s finest in food and dining.

    Location:  Royal Palm Golf and Country, 52 Canal Bank Road, Lahore

    Date: Nov 12, 2017

    Phone: (042) 111 602 602

    Ticket Price: 200 rupees only

    *Limited tickets available.

    Key Features of the Bites and Vibes Event:

    Food Panda Bites and Vibes Pakistan – a unique event-platform bringing together  restaurants, food-lovers & lifestyle-brands in the Heart of Pakistan (Lahore – The City Of Food Lovers).

    • The Coolest Restaurant-Food-market in Pakistan
    • Trendiest Restaurants in Town
    • Lifestyle-Oriented
    • Chance to experiment off the menu dishes from your favorite restaurants
    • Modern Food-Concepts
    • Interactive & Stylish
    • Day Event with good food
    • Culinary Variety

    So, what are you waiting for? 

    Call up your friends and family and plan ahead … each dish is no more than 200 PKR. 

    Take your first bite of unique  creations like Nutella dumplings from Spoonful and
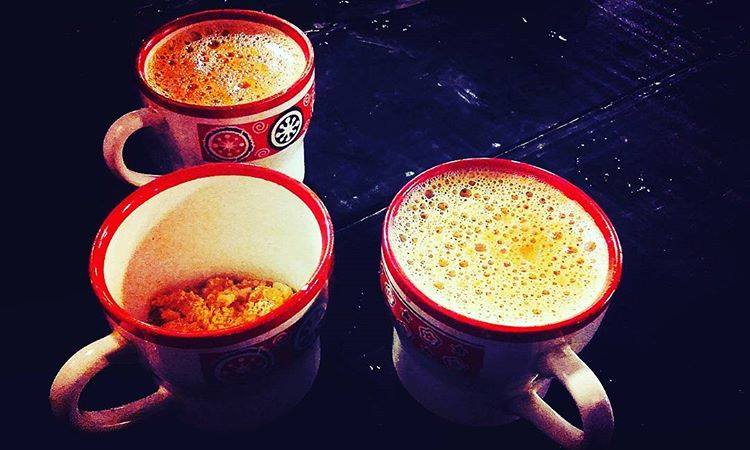
    sushi from Bamboo Union through to comfort  favourites like tacos from Gallitos, crepes from  Cravea and parathas from Sarak pe Karak. Filling the bellies of those who crave
    that good taste.

    Some of the featured restaurants in  #BitesandVibes Event:

    1. Spoonful

    Have you ever had a Nutella dumpling before? Get a taste of it with Spoonful at #BitesandVibes! They’ll also be dishing out other Mexican favourites like quesadillas and enchiladas too. Who’s hungry?

    2. Sarak Pe Karak

    3. Shut Up & Eat

    Enjoy life with shutup and eat at Bites and Vibes. 
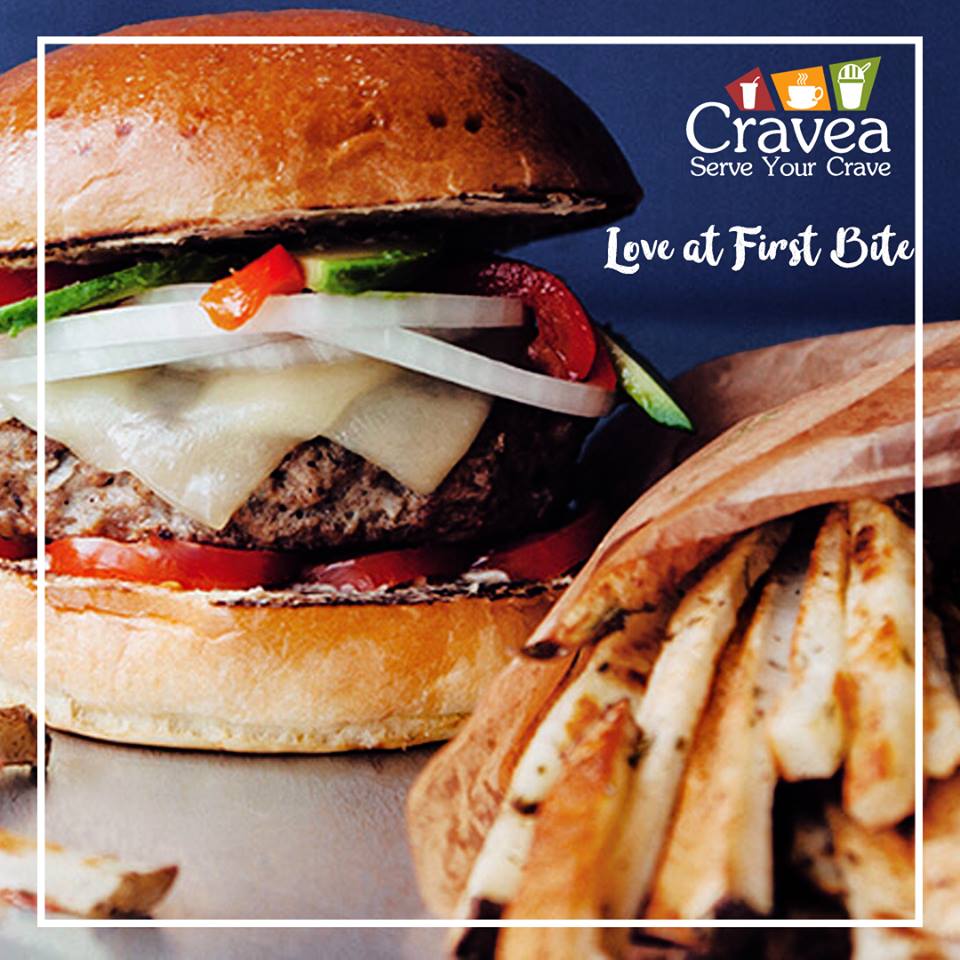
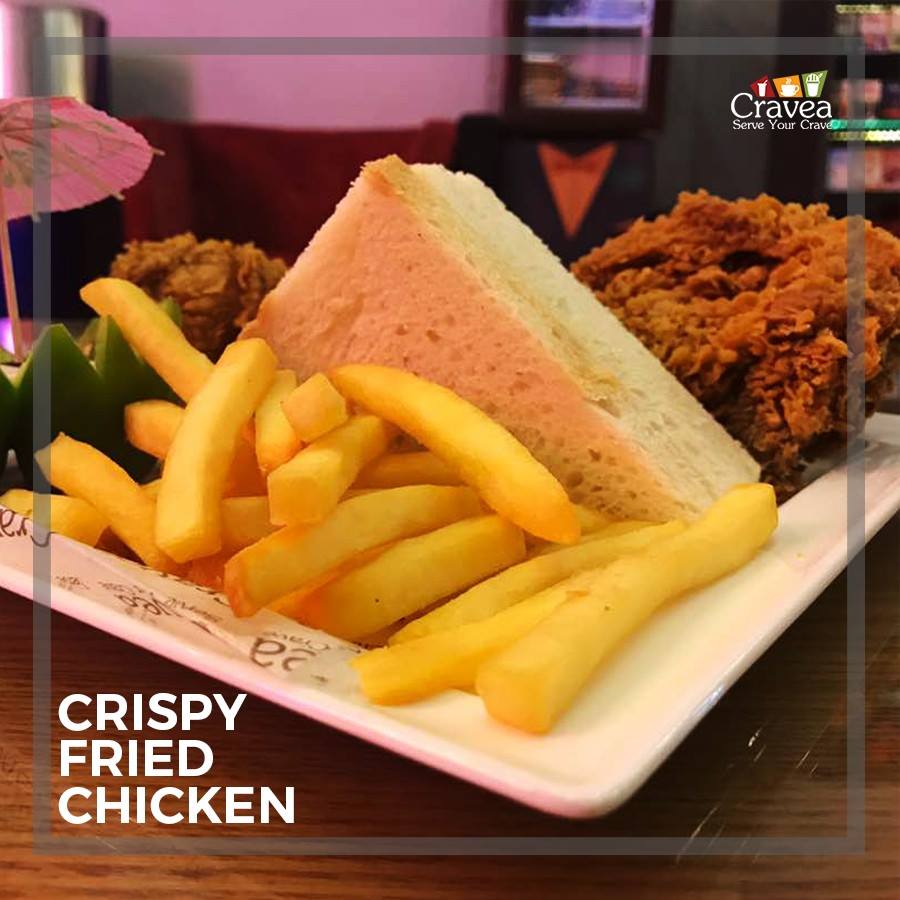
    4. Cravea

    Cravea_Pasta is waiting for you at Bites and vibes! Enjoy Healthy Life with Cravea , Perfect Choice for Family. Don’t Miss it.


    The Waffle House _ #BiteandVibes
    The Waffle House _ #BiteandVibes

    Who says waffles are only for breakfast? If you’re a waffle lover, stop by The Waffle House’s booth at Bites and Vibes and get your hands on their sweet mini waffles selection

    1. Dessert Desire

    Hands up with you love food from Dessert Desire! They’re bringing sliders, pizzas, cup cakes and much more to Bites and Vibes!


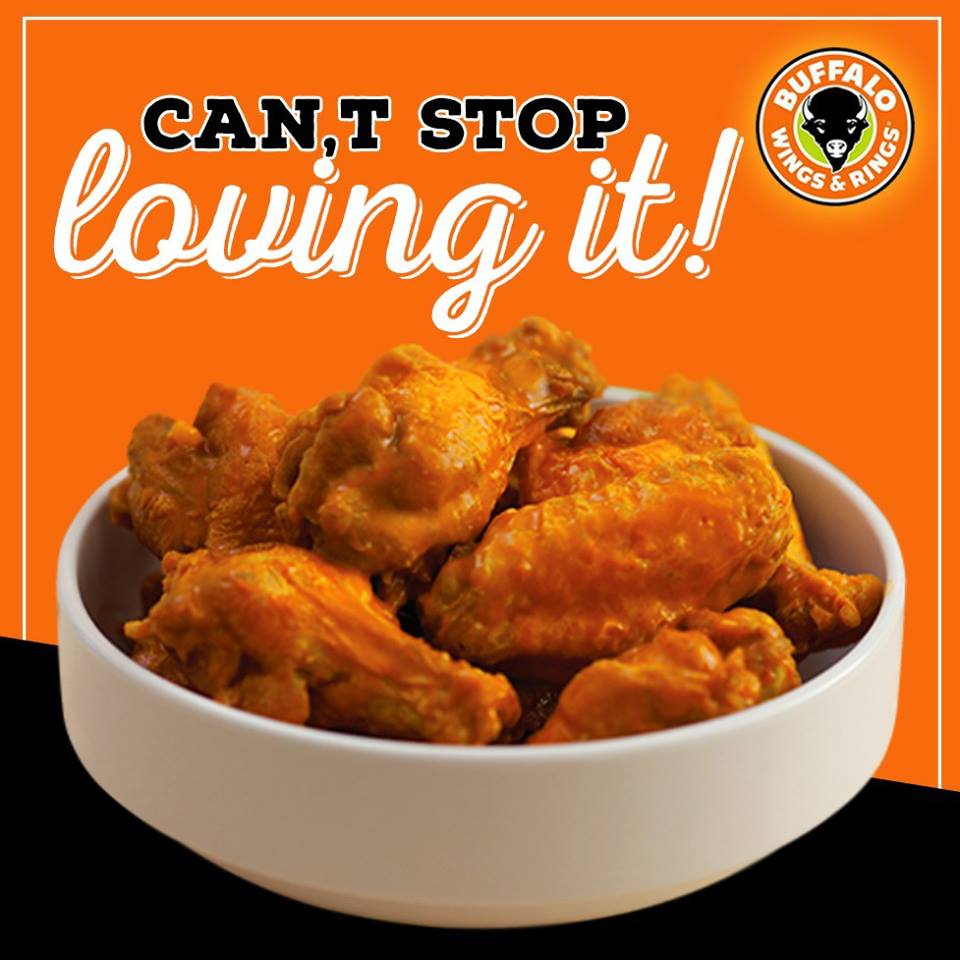
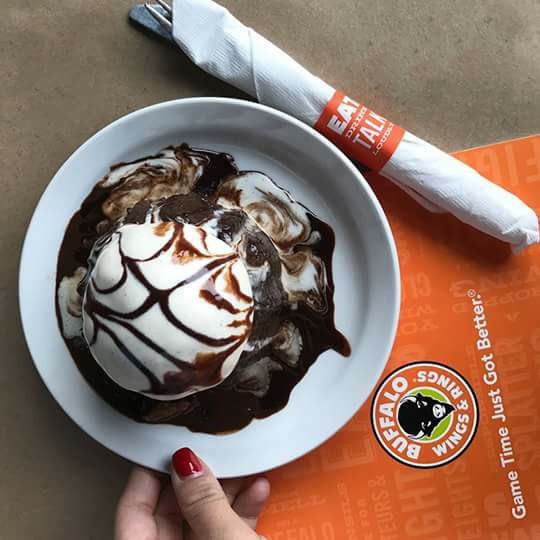
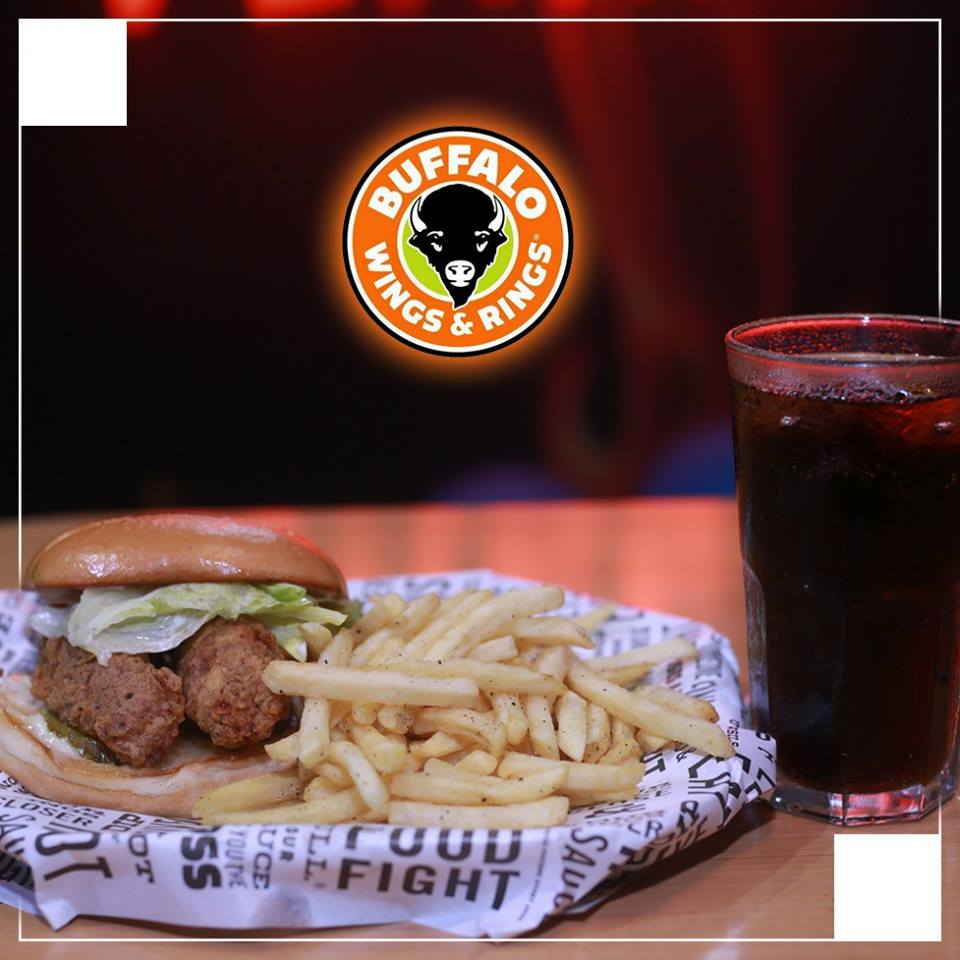
    Buffalo Wings and Rings

    Popeye’s Chicken

    Gallitos

    Maro Tandoor

    The Waffle Hous

    Bamboo Union

    Hakuna Matata

    G.Y.M

    There will be a host of activities and talks taking place throughout the day including live cooking, unique desserts and amazing local restaurants. This food festival is the perfect opportunity to try a variety of cuisines and satisfy your taste buds and wallet. (as the menu is budget friendly).

    Why not take this opportunity to enjoy and spend some outdoor time with family, you won’t find the delights here in your local supermarket! If you’ll be bringing the kids there is also lots on to keep them entertained.

    Get Location Direction on Google Map

    Stay tuned for weekly announcements about attractions & entertainment here!  and get your appetite ready, click ‘going’.  There is still a limited time available to purchase your tickets as they are limited.

    Hope to see you all there!

  • Chocolate Buzz Milkshake Recipe

    Chocolate Buzz Milkshake Recipe

    Prep Time 10 minutes
    Total Time 10 minutes
    Servings 2
    Calories 237kcal
    Author Bushra Waheed

    Ingredients

    • 5 ice cubes
    • 1 fluid ounce espresso coffee
    • 1 cup milk
    • 3/4 cup chocolate ice cream
    • 2 tbsp chocolate syrup
    • 2 tsp instant hot chocolate mix

    Instructions

    • Place milk, ice cubes and espresso in a blender. Process until smooth.
    • Stop blender. Add ice cream, chocolate powder and chocolate syrup. Process again until well blended.
    • Pour into 2 tall glasses. Top with chocolate syrup. Delicious Chocolate Buzz Milkshake is ready now. Serve immediately.

    Notes

    Serve immediately. 
  • Simple Chicken Biryani recipe

    Simple Chicken Biryani recipe

    THIS IS AN EASY BIRYANI WHICH MADE WITH CHICKEN, RICE, SPICES AND CHICKEN STOCK. PAKISTANI/INDIAN SPICES CREATES AN AWESOME AND TEMPTING FLAVOR AND AROMA IN BIRYANI. GOES WELL WITH RAITA OR SALAD.

    Simple Chicken Biryani recipe

    THIS IS AN EASY BIRYANI WHICH MADE WITH CHICKEN, RICE, SPICES AND CHICKEN STOCK. PAKISTANI/INDIAN SPICES CREATES AN AWESOME AND TEMPTING FLAVOR AND AROMA IN BIRYANI. GOES WELL WITH RAITA OR SALAD.
    Prep Time 30 minutes
    Cook Time 40 minutes
    Total Time 1 hour 10 minutes
    Servings 8
    Author Bushra Waheed

    Ingredients

    • 750 gm boneless chicken breasts, cut into large pieces
    • 3-1/2 cup chicken stock
    • 1-1/2 cups basmati rice, washed and soaked
    • 1 onion, sliced thinly
    • 2 garlic cloves crushed
    • 2 tbsp olive oil
    • 1 tbsp grated ginger
    • 1 tbsp garam masala
    • 2 tsp ground cumin
    • 1/2 tsp ground turmeric
    • fresh coriander

    Instructions

    • Place chicken in a large bowl. Add cumin, garam masala and turmeric. Toss to coat.
    • Heat 1 tablespoon olive oil in a deep skillet or dutch oven. Place chicken to the skillet.
    • Cook for 5 minutes or until lightly browned.
    • Take it out in a dish and set aside.
    • Heat remaining oil in the same skillet.
    • Saute onion, ginger and garlic in hot oil.
    • Cook for 3-4 minutes or until lightly golden.
    • Add rice and cook for 2 minutes. Return chicken to the skillet.
    • Add chicken stock and gently stir. Bring to a boil then reduce heat to low.
    • Cover with a lid and simmer for 25-30 minutes or until the rice is tender and all water dries up. Let stand for 10 minutes.
    • Sprinkle with coriander. Simple Chicken Biryani is ready to serve.

    Notes

    Serve with Cumin yogurt or salad.
  • Bean Salad with Olives and Herbs Recipe

    Bean Salad with Olives and Herbs Recipe

    This salad came to my mind right as I was falling asleep.

    Does your brain ever do crazy stuff like that? My best ideas seem to come when I’m about to doze off and don’t have a notebook or pen to write things down, so I just make a pact with my brain to remember. And the next day we both do our best to recall what we were thinking.

    Thankfully, this one made it through the pipeline! Three cheers for my old lady brain still working!

    Bean Salad with Olives and Herbs

    Bean Salad with Olives and Herbs

    I’ve made many a Bean salad before, but this one is special. This is the answer to the question, “What’s super cozy, flavorful and perfect for any BBQ Party?” It’s a great addition to any summer get together!

    This Pakistani/Italian flavor pairing came to mind, and the recipe is adapted from my all-time favorite Bean Salad.   One super easy thing you can prep ahead is beans. I love beans because you can make them so many different ways and they’re packed with protein, slow-digesting carbohydrates and fiber. Their nutritional profile makes them ideal for prepping before a workout and recovering after a workout. If you’re trying to lose weight or maintain a healthy weight, they’re great for that too since they make you feel full longer.

    One of my favorite ways to enjoy beans during the warmer months is with my Bean Salad. It’s super easy to make and it tastes really yummy too! This recipe is simple, requiring just 10 minutes to prepare! You can eat it all on its own (what I normally do) or dress it up by adding some more chopped veggies to it. It’s also great added to some greens either in a wrap or in a salad. 

    Bean Salad with Olives and Herbs

    Bean Salad with Olives and Herbs

    The dressing is SO easy (and dreamy).

    Italian herbs are blended with vinegar . Add olive oil water to thin and ‘voila!’ You have a super yummy, tangy Italian dressing ready to coat those gorgeous bean salad. Look at that salad goodness.

    Bean Salad with Olives and Herbs

    I hope you all LOVE this Bean salad! It’s:

    • Hearty
    • Flavorful
    • Vegetable-packed
    • Fiber- & Protein-rich
    • Tangy + Crunchy
    • Super healthy & Delicious

    This would make the perfect side dish for BBQ Party, or any get together, really. It yields four entrée-sized portions or 8 sides, so multiply as needed. Although it’s delicious on its own, it would pair extremely well with my Grilled Lamb Chops, and my Grilled Italian Chicken.

    Bismillah, let’s get started the recipe!!

    Check it out the Bean Salad with Olives and Herbs Recipe and printable version below!!

    Put your own spin on it. And lemme know how it turns out. Post a photo on Facebook (Recipestable) or  on Twitter so I can see how lovely yours turn out.

    Happy Salad Making!!

  • Bakery Style Chicken Mayo Sandwiches

    Bakery Style Chicken Mayo Sandwiches

    Bakery Style Chicken Mayo Sandwiches

    Prep Time 10 minutes
    Cook Time 2 minutes
    Total Time 12 minutes
    Servings 2
    Author Bushra Waheed

    Ingredients

    • 4 bread slices
    • 1/2 cup boiled Chicken (shredded)
    • 2 lettuce leaves
    • 4 tablespoon mayonnaise
    • salt and pepper to taste

    Instructions

    • In a large bowl, combine together the shredded chicken and mayonnaise.
    • Now add lettuce leaves.
    • Season with salt and pepper.
    • Mix until well combined.
    • Toast bread slices and cut out their edges if you want otherwise you can use as it is.
    • Place a slice bread in a clean-surface and spread the chicken mayo filling on it.
    • After filling, take another bread slice and put it on the above of filling.
    • Repeat again and make three layers withit.
    • After that, put the forth one slice of bread on the third layer of filling and lightly press to complete the sandwich.
    • Now Secure with wooden picks and cut the sandwich diagonally and following the same process prepare rest of the Sandwiches.
    • Your Bakery Style Chicken Mayonnaise sandwiches are ready to serve. ENJOY!!

    Notes

    Serving Suggestions:
    You can serve with french fries and your favorite dipping sauce.
  • Bakery Style Chicken Mayo Sandwiches Recipe

    Bakery Style Chicken Mayo Sandwiches Recipe

    Looking for an amazing, delicious and cheap Tea Party recipe for a busy day? Then look no further, these Bakery Style Chicken Mayo sandwiches takes about 15 minutes prep work and it’s flavor is phenomenal.

    Bakery Style Chicken Mayo Sandwiches Recipe

    Bakery Style Chicken Mayo Sandwiches

    Just 4 ingredients and 15 minutes is all it takes to make these Bakery Style Chicken Mayonnaise Sandwiches. The crowd will go crazy over them at your next get together!

    Bakery Style Chicken Mayo Sandwiches

    Bakery Style Chicken Mayo Sandwiches

    These Bakery Style Chicken Mayo sandwiches are loaded with shredded chicken, mayonnaise, lettuce and simple seasoning. Lettuce leaves are optional but I’d say it’s a must, it perfectly compliments all the flavors of the chicken.

    Serve this sandwich with a side of french fries, roasted potatoes and you’ve get a dinner that couldn’t get any simpler. Enjoy!

    Bakery Style Chicken Mayo Sandwiches recipe

    Bakery Style Chicken Mayo Sandwiches

    Chicken sandwiches are eternally popular and often the first item to disappear when handed around. The key is well-toasted bread, which prevents any filling from soaking in and making the bread soggy. 

    Bakery Style Chicken Mayo Sandwiches recipe

    Bakery Style Chicken Mayo Sandwiches

    Very handy and easy to make, these sandwiches are just perfect for picnic, tea time snack, lunch box etc. If you have a tea party at your home and your friends are invited. You can make quick and easy bakery style sandwiches by following this recipe.

    Make it, enjoy the deliciousness and 
    serve it to your family with love

    Bismisllah Let’s Get This Started !

    Bakery Style Chicken Mayo Sandwiches Recipe with Step by Step Pictures

    Ingredients You will Need:

    • 4 bread slices
    • 1/2 cup boiled Chicken, (shredded)
    • 2 lettuce leaves, (optional)
    • 4 tablespoon mayonnaise
    • salt and pepper to taste

    How to make Bakery Style Chicken Mayo Sandwiches

    Step 1: Place shredded chicken in a large bowl. Now add the mayonnaise bit by bit, depending on the consistency you like. Add the lettuce leaves (if using) and season with salt and pepper. Stuffing is ready.

    Bakery Style Chicken Mayo Sandwiches Recipe: Step 1

    Step 2: Toast bread slices and cut out their edges if you want otherwise you can use as it is.

    Bakery Style Chicken Mayo Sandwiches Recipe: Step 2

    Step 3:Place a slice bread in a clean-surface and spread the chicken mayo filling on it. Cover the Bread with another piece of the toasted Bread and repeat three layers. Lightly press to complete the sandwich.

    Bakery Style Chicken Mayo Sandwiches Recipe: Step 3

    Step 4:  Now cut the sandwich diagonally and following the same process prepare rest of the Sandwiches.

    Bakery Style Chicken Mayo Sandwiches Recipe: Step 4

    Give it a try and You have bakery-style Chicken mayo sandwiches that will mystify your friends and family as to how you made them. Go you.

    Check it out the Bakery Style Chicken Mayo Sandwiches recipe and printable version here!!

    Bakery Style Chicken Mayo Sandwiches

    Prep Time 10 minutes
    Cook Time 2 minutes
    Total Time 12 minutes
    Servings 2
    Author Bushra Waheed

    Ingredients

    • 4 bread slices
    • 1/2 cup boiled Chicken (shredded)
    • 2 lettuce leaves
    • 4 tablespoon mayonnaise
    • salt and pepper to taste

    Instructions

    • In a large bowl, combine together the shredded chicken and mayonnaise.
    • Now add lettuce leaves.
    • Season with salt and pepper.
    • Mix until well combined.
    • Toast bread slices and cut out their edges if you want otherwise you can use as it is.
    • Place a slice bread in a clean-surface and spread the chicken mayo filling on it.
    • After filling, take another bread slice and put it on the above of filling.
    • Repeat again and make three layers withit.
    • After that, put the forth one slice of bread on the third layer of filling and lightly press to complete the sandwich.
    • Now Secure with wooden picks and cut the sandwich diagonally and following the same process prepare rest of the Sandwiches.
    • Your Bakery Style Chicken Mayonnaise sandwiches are ready to serve. ENJOY!!

    Notes

    Serving Suggestions:
    You can serve with french fries and your favorite dipping sauce.

    Extra Bonus Tips :

    1. This is a good recipe to use the left over Rotisserie or boiled chicken.
    2. It’s very good for outdoor entertaining and picnics.
    3. You can make the filling hours or even a day before and assemble it when needed.
    4.  If making ahead of time, cover with a damp tea towel to ensure they don’t dry out. I have sprinkled a mint leaves over the sandwiches, but this is only for garnish(you can skip it).

    Put your own spin on it. And lemme know how it turns out. Post a photo on Facebook (Recipestable) or  on Twitter so I can see how lovely yours turn out.

    Happy Cooking

    Pin it for Later:

    Bakery Style Chicken Mayo Sandwiches Pinterest
    Pin it for Later

    ATTENTION: All photos and content are copyright protected. Please do not use our photos without prior written permission. If you wish to republish this recipe, please rewrite the recipe in your own unique words and link back to Bakery Style Chicken Sandwiches Recipe on Recipestable. Thank you!

  • The Easiest Bread Pizza Recipe

    The Easiest Bread Pizza Recipe

    No time to make your own dough? Same here. Skip the homemade crust for easy, cheesy love in 10 minutes. Use bread slices for the crust and have dinner ready in no time. Loaded with great taste and ready in under 15 minutes start-to-finish, it’s sure to become a family favorite! A fun and flexible recipe you’re sure to make over and over again!

    The Easiest Bread Pizza Recipe
    Just try saying no to that

    The Easiest Bread Pizza

    I could eat pizza all day, every day. But I don’t always have the time to make my own crust. Delivery adds up, and store bought crusts tend to be pretty low quality. That’s where this bread pizza recipe comes in. It isn’t even so much of a recipe, per se, but a guideline for happiness.

    The Easiest Bread Pizza Recipe

    I love it for many reasons.

    1. First, it fits the quick and easy bill beautifully. Simply places the bread slices, brush with butter, and give it a little broil to create that crunchy-on-the-outside but soft-and-chewy-on-the-inside texture that’s so wonderful in this easiest bread pizza. Then slather on some prepared sauce, load on the toppings, and give it all a quick 6 to 8 minute bake in the oven. Done. Add a side salad or some fresh fruit, and dinner’s served.
    2. Second, it tastes delicious. Before piling on the toppings, the bread itself is seasoned with garlic powder and oregano for a little added flavor touch. And then with the classic “supreme” combination of toppings, how could it not be tasty, right?
    3. Third, it’s versatile. Change up the toppings to suit any personal tastes. Don’t like veggies? No problem … leave them off. Want more cheese? Great! … load it up. Or hey, get totally crazy and prepare each bread toast differently … perhaps Supreme for one slice, and just pepperoni and cheese for the other. Or, if you like more unique pizza flavor combinations, give My Favorite French Bread Pizza a whirl.
    4. Fourth, it reheats well. If you don’t mind soft bread all around, a quick zap in the microwave works great. For that classic bread pizza touch-of-crunch, pop the pizza back in a preheated oven for just a couple of minutes and you’re good to go.
    5. And fifth, The Easiest Bread Pizza isn’t just great for a quick and easy dinner, it’s always fabulous for game-day {or any day} snacking, too. Bake some up and slice into fingers for a tasty treat while you’re cheering on your favorite team.
    The Easiest Bread Pizza
    The Easiest Bread Pizza

    Bread pizza is one of the quickest & easiest snacks that you can make with minimal ingredients. All you need is of course some bread slices, veggies of your choice, pizza sauce, cheese, leftover chicken, and some seasoning. Easy right?

    To make the bread pizza healthier use whole wheat breads or any bread that you fancy. Garlic bread would taste great too. 

    The Easiest Bread Pizza recipe
    The Easiest Bread Pizza

    There are a few tricks to making this bread pizza taste its best. First, you’ll want to toast the bread for about 5 minutes by itself to crisp it up a bit. Then you’ll add the pizza sauce , cheese (a good melty mozzarella) and your favorite toppings (I liked veggie version, but you can add leftover tikka, seekh kebabs,  cooked mince, mushrooms etc choices are endless ) before returning it to the oven to get the cheese melty and the pizza glistening.

    And that’s all there is to it! This is great recipe to make with your kids or better yet, let your kids make themselves.

    So easy, so yummy!

    The Easiest Bread Pizza recipe
    The Easiest Bread Pizza

    Allow to cool for a few minutes, slice and enjoy!

    For dinner, I’ll serve it alongside a big salad. For lunch, I usually put out veggies and hummus to go with it. And for an ea  snack, I cut each toast into fourths and serve it with fruit. They’re easy to make, easy to eat and easy to clean up after. YES!!

    Check it out the The Easiest Bread Pizza recipe and printable version here!!

    Happy Baking!!

    Pin it For Later: 

    The Easiest Bread Pizza Recipe
    The Easiest Bread Pizza Recipe _ Pin it For Later

    I have also posted The Easiest Naan Pizza  and Pizza Sandwiches  which are another easiest & tastiest version of making Pizza at home. Do check it out as well.  It’s finger lickin’ good. You’ll be coming back for more. 


    Put your own spin on it. And lemme know how it turns out. Post a photo on Facebook (Recipestable) or  on Twitter so I can see how lovely yours turn out.

  • The Easiest Bread Pizza Recipe

    The Easiest Bread Pizza Recipe

    The Easiest Bread Pizza -so delicious! Easy to customize with all your favorite toppings! A simple recipe that your family will love it!

    The Easiest Bread Pizza Recipe

    The Easiest Bread Pizza -so delicious! Easy to customize with all your favorite toppings! A simple recipe that your family will love it!
    Prep Time 5 minutes
    Cook Time 10 minutes
    Total Time 15 minutes
    Servings 6
    Author Bushra Waheed

    Ingredients

    • 6 bread slices white bread/whole wheat bread
    • 3 teaspoon butter
    • 6 tablespoon pizza sauce
    • 1 very small onion thinly sliced
    • 1/2 small capsicum thinly sliced
    • 1/4 cup sweet corn
    • 1/4 cup chicken chunks (optional)
    • 6 black olives thinly sliced
    • 1 cup Mozzarella cheese or pizza cheese grated
    • 1 teaspoon dried oregano
    • 1 teaspoon dried basil
    • red chili flakes for sprinkling

    Instructions

    • Position rack in top third of oven and preheat to 400°F or 200°C.
    • Spray a baking tray with nonstick cooking spray and arrange the bread slices on it.
    • Spread butter generously over the bread slices.
    • Bake the bread slices for 5 minutes or until just starting to toast.
    • Remove toasted bread from oven and spread each slice with 1 tablespoon pizza sauce.
    • Sprinkle dried oregano over it.
    • Top with veggies, chicken, and red-pepper flakes and shredded Mozarella cheese.
    • Garnish with olives, (if desired).
    • Return to oven for 5-7 minutes or until cheese is melted and golden brown.
    • Sprinkle dried basil on it.
    • Delicious and the Easiest Bread Pizza is ready to serve. ENJOY!!

    Notes

    Serving Suggestions:
    Serve with your favorite dipping sauce.
  • Flower Shaped Buns Recipe with Step by Step Pictures

    Flower Shaped Buns Recipe with Step by Step Pictures

    Baking is an assortment of pure love, garnished with utmost care into a culmination of all the good things that life has to offer. These gorgeous Flower Shaped Buns are truly spectacular, and they taste just as amazing as they look! 

    Flower Shaped Buns recipe
    Warm, freshly baked Buns tastes very good with chicken filling.

     The Flower Shaped Buns. So elusive. So Cute. So majestic. So eye-catching

    How do you make them? Is there too hard to shape? Is there a complicated technique? Is it wizardry?

    Just a few of the thoughts I had before attempting these beauties. However, I’m elated to report that if you can master my Vegetable Stuffed Buns & Baby Chicken Bread (and you totally can), you can master the Flower Shaped Buns, too!

    These flower shaped buns are simple to make and cute to look at. 

    Flower Shaped Buns Recipe
    Flower Shaped Buns 

    It all starts with a simple dough that rises in 1 hour. To keep things a little on the healthier side, I went with a 2:1  mix of unbleached all purpose and whole wheat pastry flour for slightly-hearty-but-still-decadent buns.

    You could also go entirely all-purpose for true bakery style, all whole-wheat pastry for a healthier buns, or some other combination that I haven’t thought of! 

    So how are these simple? I’m glad you asked.

    13 ingredients including seasonings (sesame seeds being the 14th and optional ingredient)
    One true rise = less waiting
    Fool-proof methods
    No fancy techniques or equipment involved

    See? You can totally do this. Believe it.

    So what do these studs taste like? Amazing. They’re

    Soft
    Tender
    Fluffy
    Perfectly spiced
    Loaded with creamy chicken filling
    & Better with each bite

    Give it a try and You have bakery-worthy stuffed buns that will mystify your friends and family as to how you made them. Go you.

    Bismisllah Let’s Get This Started !

    Ingredients You will Need:

    For Buns Dough
    • 3 1/2 cups all-purpose flour
    • 1 cup milk
    • 2 tablespoon milk powder
    • 1/2 cup water (might use less)
    • 1 egg, lightly beaten
    • 1 tablespoon sugar
    • 4 tablespoon oil
    • 4 tablespoon melted butter
    • 1 1/2 teaspoon instant yeast
    • 1 teaspoon salt
    Chicken Filling
    • 2 cups boiled chicken, shredded
    • 1 large red onion, finel chopped
    • 2 tablespoon butter
    • 2 tablespoon plain flour
    • 1 teaspoon salt
    • 1 teaspoon black pepper
    • 1/2 teaspoon red chili, crushed
    • 4 tablespoon coriander leaves
    • 4 green chilies, finely chopped
    • 1 cup milk
    For Assembling Buns
    • white & black sesame seeds, as required
    • 1 egg yolk, beaten with 1 tsp milk, for brushing the buns before baking

    How to Make Flower Shaped Buns:

    Step 1: Sieve the flour and dry milk powder in a large mixing bowl. Make three holes in the flour, and then put sugar, yeast, and salt in each hole. Gently cover the holes with the flour. Then add the oil, melted butter and the egg, and combine together.

    Flower Shaped Buns Step 1
    Flower Shaped Buns Step 2

    Step 2: Pour lukewarm milk in the flour mix. Start kneading together and gradually add the lukewarm water a little at a time. You may not need to use all the water, so add it sparingly until your dough comes together and is nice and soft. Knead for a good 10-15 minutes.When the dough becomes smooth and elastic, it is done. (Note: The more you knead the dough, the softer the buns will be).

    Step 3: Touch a bit of oil with your fingertips and apply all over the ball of dough. Loosely cover the bowl with plastic wrap or cover with a damp cloth and set it in a warm place for 40 minutes to an hour for it to double in size.

    Flower Shaped Buns Step 3

    Step 4 :To Make Chicken Filling – Melt 2 tablespoon butter in a frying pan or wok. Saute onion in butter until transculant. Add flour, salt, pepper and red chili and cook for 2-3 minutes. Now add milk and cook for 4-5 minutes or until sauce is thickened. Add shredded chicken, green chilies, fresh coriander leaves. Stir until well combined and remove from the heat. Let it cool completely.

    Flower Shaped Buns Recipe Step 4

    Step 5: When the dough has risen into a nice big size, take the dough out of the bowl and Punch it down to remove some of the air in the dough.

    Flower Shaped Buns Recipe Step 5

    Step 6: Divide the dough into 16-18 balls, depending on the size of buns you would like.

    Flower Shaped Buns Recipe Step 6

    Step 7: Gently roll out each piece of dough and make a round ball. Flatten a ball until it is about 3 inches in diameter and place 2 tablespoon of chicken filling in the center.

    Flower Shaped Buns Recipe Step 7

    Step 8: Pull up the edges of the rolled out dough and pinch together to firmly seal the filling within.

    Flower Shaped Buns Recipe Step 8

    Step 9: Put the sealed part face down on the board and press the dough into about a 2 inch diameter. Make 8 decorative slits around the edge, equally spaced apart (either using a pizza cutter or sharp knife or even a pair of kitchen scissors).

    Flower Shaped Buns Recipe Step 9

    Step 10 : Place the prepared buns on a greased cooking sheet or tray and cover with a light cloth and let them rise for about 20 minutes to half an hour.

    Flower Shaped Buns Recipe Step 10

    Step 11: Brush each bun with beaten egg yolks and put some black and white sesame seeds in the center of the each bun.

    Flower Shaped Buns Recipe Step 11

    Step 12: Bake the buns, in the preheated oven for about 20 minutes or until golden.

    Flower Shaped Buns Recipe Step 12

    Step 13: Remove and brush the buns top with melted butter (it will give nice shiny look) and let it rest covered with a cloth for 2-3 min to soften the bread completely.. Flower Shaped Buns are ready to serve. ENJOY with your favorite dipping sauce.

    Flower Shaped Buns Recipe Step 13

    These Flower Shaped Buns are definitely a treat for weekend Tea Party. Especially when served with a luxurious garlic sauce generously topped with mayonnaise.

    Check it out the Flower Shaped Buns recipe and printable version here!!

    I believe that homemade cooking is delicious and healthy. If you love savory breads or rolls, but want to eat a little healthier, this recipe can be good to try. 🙂 Put your own spin on it. And lemme know how it turns out. Post a photo on Facebook (Recipestable) or  on Twitter so I can see how lovely yours turn out.


    Happy Baking!!

    Pin it For Later: 


    ATTENTION: All photos and content are copyright protected. Please do not use our photos without prior written permission. If you wish to republish this recipe, please rewrite the recipe in your own unique words and link back to Super Easy, Super Moist Chocolate Cupcakes on Recipestable. Thank you!

  • Chocolate Lover’s Dream Cake Recipe

    Chocolate Lover’s Dream Cake Recipe

    This delicious Chocolate Lover’s Dream Cake is a dream cake for everyone that loves chocolate.

    Chocolate Lover’s Dream Cake Recipe

    This delicious Chocolate Lover’s Dream Cake is a dream cake for everyone that loves chocolate.
    Prep Time 15 minutes
    Cook Time 50 minutes
    Total Time 1 hour 5 minutes
    Servings 12
    Author Bushra Waheed

    Ingredients

    For Cake Sponge

    • 2-1/4 cups plain flour maida
    • 1/2 cup cocoa powder
    • 2 teaspoon baking powder
    • 1/2 teaspoon baking soda
    • 1/2 teaspoon salt
    • 1 cup butter or margarine at room temperature
    • 1-3/4 cups sugar
    • 5 eggs at room temperature
    • 1 cup sour cream at room temperature
    • 1/4 cup whole milk
    • 1 teaspoon instant coffee powder
    • 2 teaspoon vanilla essence
    • 1 cup semi-sweet chocolate chips

    Ingredients For Ganache

    • 200 gm semi sweet chocolate
    • 1/2 cup whipping cream
    • 2 teaspoon butter

    For Topping

    • Dark chocolate grated

    Instructions

    • Preheat oven at 170 degree C or 300 degree F.
    • Prepare bundt cake pan by greasing and flouring it generously.
    • Place chocolate chips in a small bowl. Sprinkle 2 tablespoon of the flour over them. Mix to ensure all the chocolate chips are coated. Note:(This will help prevent them from sinking to the bottom of the cake during baking).
    • Now 1st prepare the dry ingredients. Sift the remaining flour with the cocoa powder, instant coffee, baking powder, baking soda and salt and set aside.
    • Take a small jug to prepare wet ingredients. Add sour cream, whole milk and vanilla essence in it. Mix until well combined. Set aside.
    • In a large mixing bowl, cream butter and sugar until light and fluffy.
    • Now add the eggs one at a time, beating well and scraping the sides of the bowl after each addition.
    • Then start adding the dry and wet ingredients in turns. Start with adding a third of the dry ingredients, mix it in. Then add half the wet ingredients and mix. Next another third of the dry, followed by the remainder of the wet ingredients. Finally add the last third of the dry and mix.
    • Sprinkle the chocolate chips and fold the batter gently.
    • Pour the batter into the prepared cake pan and smooth the top evenly.
    • Bake in the preheated oven for about 50 minutes or until a toothpick inserted into the centre comes out clean.
    • Allow the cake to rest in the pan for about 10 minutes before turning it out on a wire rack to continue cooling completely.

    To Make the Ganache

    • Place the grated chocolate into a bowl.
    • Then add the butter and cream.
    • Melt them all together over a double boiler or in the microwave, giving it all an occasional stir to ensure no lumps form.
    • Pour this over the top of your cake and allow it to set. (Note: Before pouring ganache, make sure your cake must be completly cool).
    • Now top with grated chocolate.
    • Your Delicious Chocolate Lover’s Dream Cake is ready to enjoy! 🙂

    Notes

    Serving Suggestions:
    Serve with a cup of coffee or tea.
  • Chocolate Lover’s Dream Cake Recipe

    Chocolate Lover’s Dream Cake Recipe

    When I begin to think about cakes, the first ingredient that comes to mind is chocolate! And what if your chocolate cake full of chocolate chips, topped with creamy chocolate ganache and dark chocolate? Then, we are talking about one of the most decadent chocolate cakes – Chocolate Lover’s Dream Cake. 

    Chocolate in three forms, makes this cake extra chocolaty—and extra delicious.  A chocolate lover’s dream come true!!!

    Chocolate Lover's Dream Cake recipe
    Chocolate Lover’s Dream Cake

    Since I began blogging, there are a few fantastic recipes which made me say, “Wooow, I hope I will be able to make something like this some day”. Of course, after a good look and many photos of these desserts, I always gave up not having enough belief in my baking possibilities.

    But, with time, after a lot of experience and time spent in the kitchen, my confidence began to grow. And in time missions in the kitchen that looked impossible were beginning to be solved. So I began to flirt with recipes like Chocolate Mousse CakeBanana Chocolate Loaf Cake  and similar.

    Well, today it was turn for another chocolate masterpiece, Chocolate Lover’s Dream Cake. Only one look at the photos of this divine chocolate cake always made me drool. 

    Chocolate Lover's Dream Cake recipe
    Chocolate Lover’s Dream Cake

    A heavenly delicious chocolate cake you’ve been dreaming of! So good, every bite is worthy of a celebration! After all, there is never too much chocolate, right?! It’s pure decadence in every single bite!!!

    Chocolate Lover's Dream Cake
    Chocolate Lover’s Dream Cake

    I have to admit this cake is not the prettiest cake but with that chocolate ganache and grated dark chocolate on top it dresses it up and makes it look scrumptious.

    You can serve this cake warm without ganache or cold with creamy ganache on top. I can guardsmen that there will be no leftovers of this cake. If you have chocolate lovers around you better stand back because they will run you over just to get a piece of this cake. This chocolate cake is wonderful for birthdays, bake sales, tea parties or any gathering.

    If you are not a true chocoholic then move on. But if you are, then you must try this Chocolate Lover’s Dream Cake!!! 

    Check it out the Chocolate Lover’s Dream Cake recipe and printable version here!!

    Put your own spin on it. And lemme know how it turns out. Post a photo on Facebook (Recipestable) or  on Twitter so I can see how lovely yours turn out

    Happy Baking!!

    Pin it for later

    Chocolate Lover's Dream Cake Pinterest
    Chocolate Lover’s Dream Cake ~ Pin it for later


    ATTENTION: All photos and content are copyright protected. Please do not use our photos without prior written permission. If you wish to republish this recipe, please rewrite the recipe in your own unique words and link back to Chocolate Lovers Dream Cake Recipe on Recipestable. Thank you!

  • Fat Free Chicken Karahi Recipe

    Fat Free Chicken Karahi Recipe

    Starting a healthier diet can be easier than you think. But what happens when you start to get bored with the healthy foods you are eating?  Chicken Karahi in a hurry is a winner for everyone in our house. We all get to enjoy some delicious comfort food and I don’t have to spend long in the kitchen to make it. Hurrah! 


    Today I’am going to share a Clean eating Version of Chicken Karahi. It is very delicious and easy to make. A lighter and healthier version of the Pakistani Chicken Karahi, this tomato-based curry is packed with extra fragrant spices and creamy yogurt. Yummilicious treat that will have you wanting to savor every last bite! 
    Clean Eating Chicken Karahi Recipe
    Clean Eating Chicken Karahi
     If you are following a weight loss plan then take your taste buds on an exotic ride with this Fat Free chicken karahi recipe. This delicious Clean Eating Chicken Karahi recipe will keep you satisfied and still help you lose weight. This recipe is low fat, low sodium, and a good source of protein. 

    I have also posted Salmon Fish Fry recipe  which is another easiest & tastiest Clean Eating version of making Fried Fish. Do check it out as well.


    Put your own spin on it. And lemme know how it turns out. Post a photo on Facebook (Recipestable) or on Twitter so I can see how lovely yours turn out.

    Happy Clean Eating!!


  • Fat Free Chicken Karahi Recipe

    Fat Free Chicken Karahi Recipe

    If you are following a weight loss plan then take your taste buds on an exotic ride with this Clean Eating chicken karahi recipe. This delicious Clean Eating Chicken Karahi recipe will keep you satisfied and still help you lose weight. This recipe is low fat, low sodium, and a good source of protein. 
    Prep Time 10 minutes
    Cook Time 40 minutes
    Total Time 50 minutes
    Servings 4
    Author Bushra Waheed

    Ingredients

    • 750 gm chicken breast or thighs organic, cut into medium pieces
    • 2 teaspoon olive oil
    • 4 tablespoon onion paste
    • 1/2 cup plain yogurt
    • 1/4 cup tomato puree
    • 1 to mato chopped
    • 4 green chilies thinly sliced
    • 1 teaspoon garlic paste
    • 1 teaspoon ginger paste
    • 1 teaspoon red pepper flakes
    • 1 teaspoon cumin seeds roasted and crushed
    • 1 teaspoon coriander powder
    • 1/2 teaspoon freshly ground black pepper
    • 1/2 teaspoon garam masala powder
    • salt to taste

    For Garnishing

    • few ginger slices
    • lemon slices
    • few coriander leaves chopped

    Instructions

    • In a large bowl, mix together the chicken, yogurt, red pepper, salt, cumin powder, black pepper, coriander powder, ginger garlic paste.
    • Cover and marinate for at least 30 minutes to blend flavors.
    • Heat 2 teaspoon olive oil in a heavy bottom wok or karahi on medium heat.
    • Saute onion for 4-5 minutes or until raw aroma of onions goes away.
    • Add marinated chicken and cook on high flame for 25 minutes or until chicken is half done.
    • Now add tomato puree and chopped tomatoes. Cook and stir for few minutes.
    • Now add 1 cup water. Bring to a boil and simmer for 35 minutes or until chicken is tender.
    • Increase the flame and cook on very high heat for 5-8 minutes or until sauce is thickened.
    • Sprinkle green chilies and garam masala over it.
    • Dish it out.
    • Garnish with chopped coriander, ginger slices and lemon wedges.Delicious clean eating Chicken Karahi is ready to serve. ENJOY 🙂

    Notes

    Serving Suggestions:
    You can eat it with naan, chapati or steamed rice. But if you are on your weight loss journey, enjoy this chicken karahi with zeera raita and green salad.
  • #EatPlayLove: FoodPanda Holiday Feast Brings Upto 50% Flat Discounts For You

    #EatPlayLove: FoodPanda Holiday Feast Brings Upto 50% Flat Discounts For You

    P.S This post has been sponsored by Foodpanda.

    Happy Summer Holidays Time more Monsoon.. all the best to you. Monsoon season is in full swing and it might strand you indoors. But life is not about waiting for the storm to pass – it is about learning to dance in the rain. Stay indoors and pamper yourself and your loved ones with mouth-watering delicacies.

    And to make this happen and to make your summer more special, , your all-time favourite fun partner, foodpanda, has come up with ‘Holiday Feast’ ‘ (the motto of #EatPlayLove) offering up to a Flat 50% Discount on more than 300 restaurants across the country throughout the months of July and August to multiply the festivity of this vacation season.

    During July and August, when kids are enjoying their summer vacations after Ramadan, when grown-ups too are on vacation mode, when moms are craving for a break from cooking, this rainy season is a great time to make the most of Foodpanda’s offers.

    Therefore the company has planned to turn these months into a celebration. Get something you want to eat with up to a 50% Flat Discount, play an awesome TV show/movie/game and enjoy the time with the people you love.

    This campaign is expected to hold out the greatest flat 50% discounts this holiday season! This #EatPlayLove Holiday Feast offer is available at 300 restaurants + Pakistan’s favourite food chains including  KFC, McDonald’s, Broadway, Pizza Hut, Burger King; city heroes like ThaiChi, Zafran, Wassabi, Cone Heads, La Terrazza, Kababjees  and many more are offering huge flat discounts exclusively on foodpanda giving foodies the convenience of ordering with just a few taps on their phones on a rainy day.

    How to Order

    You can order on the foodpanda website or can order with just a few taps on their phones.  Install the Foodpanda App on your iPhone or Android smartphone, sign in to your account, scroll through your favorite restaurant and place your order in the comfort of your home or office, paying online or on delivery through foodpanda’s secure platform. The order is then carefully prepared by the restaurant and delivered to their doorstep within 45-60 minutes.

    So, what are you waiting for? Download the app and grab this yummy deal #EatPlayLove. 

    Disclaimer: This is a sponsored post but this does not influence on my opinion at all. My opinion is 100% genuine and honest to my readers. The images in this post are  taken from Food Panda’s website.

  • The Eid Special – FoodPanda Spreading Smiles Across Miles

    The Eid Special – FoodPanda Spreading Smiles Across Miles

    P.S This post has been sponsored by Foodpanda.

    Just wanted to pop in to say, “Warmest Wishes for Eid Mubarak to You and Your Family…”! I hope you enjoyed your #Eid with your loved ones! May the blessings of Ramadan last you for the year to come.

    Eid is a season and a reason to get together with your loved ones, celebrate and spread happiness! One of the most important aspects of Eid al-Fitr celebrations is distributing Eidi and sharing happiness. It is a great leveller, too, for on this day, your social standing does not matter, your money does not matter, your prejudices don’t matter – all that matters is that you spread love and happiness. After all, the word ‘Eid’ itself means happiness, among others. Who knows, you may actually end up spreading some cheer among those who genuinely need it – like people who are new to the city and are feeling lonely.

    This Eid, FoodPanda Spreading Smiles Across Miles

    This Eid, #Foodpanda customer’s are getting an unexpected eid greeting recorded call from the CEO, Nauman Sikandar Mirza, with a very cheerful voice which says:

    Asalam o Aliakum! Pehchanamujhey?

    That’s when you start to think of all the people who could be so happy to call you on Eid Day but you be like ‘Noo…’.

    Just then it turns out to be from a friend, a true savior who’s always come to the rescue when you were hungry! Yes, this is a recorded call from foodpanda. FoodPanda’s CEO gets on the line, who was really excited to personally wish their customers a very happy Eid and put a smile on their face. He also adds a bit of lively humor to the conversation by reminding them of the last time when many of the customers actually replied to him thinking as if it was a real phone call. 😀

    When you expect a EID greeting and wishes from a person and you don’t get a call ,text, or no Skype & you missed that person so badly the whole day!! But what if you got an unexpected call or card… You would loved it absolutely!

    That’s not it. food panda has gone an extra mile to amuse their customers. A large number of customers have also received an envelope from food panda enclosing a vividly colorful Eid Card with a special, humorous Eid Wish which is hidden under a silver scratch line. Here are some to tickle your funny bones:

    Upon further fact-finding, I came to know that as many as half a million people received this Eid Greeting calls. Yes! Half. A. Million. While the cards were posted to a large number of food panda customers across the country. And with all of them talking about it, the news of this unconventional way of sending Eid greetings is breaking the internet.

    People are really loving the panda for making their Eid Day a great one:


    Some fell prey to the recording and laughed at themselves:

    There is no better way to add life-to-life than by putting smiles on people’s faces on Eid Day and Foodpanda’s showed remarkable effort in this regard.

    Were you also among the food panda’s happy foodies who got the call or the card? Share your reaction with #FPEidSurprise and let everyone know!

    Disclaimer: This is a sponsored post but this does not influence on my opinion at all. My opinion is 100% genuine and honest to my readers. The images in this post are  taken from Food Panda’s website and social media i.e. FB, Twitter and Editing is done by me.

  • Vegetable Stuffed Buns Recipe

    Vegetable Stuffed Buns Recipe

     So warm, soft, Fluffy, fragrant and stuffed with fresh veggies – no can or frozen veggies, all real – totally yummy  ( + point is it contains only 200 calories). Try making these if you’re looking for the ultimate comfort food.

    Vegetable Stuffed Buns Recipe

     So warm, soft, Fluffy, fragrant and stuffed with fresh veggies – no can or frozen veggies, all real – totally yummy  ( + point is it contains only 200 calories). Try making these if you’re looking for the ultimate comfort food.
    Prep Time 1 hour
    Cook Time 20 minutes
    Total Time 1 hour 20 minutes
    Servings 18
    Author Bushra Waheed

    Ingredients

    For Buns Dough

    • 3 1/2 cups all-purpose flour
    • 1 cup warm milk
    • 2 tablespoon dry milk powder
    • 1/2 cup water might use less
    • 1 egg lightly beaten
    • 2 teaspoon sugar sugar
    • 4 tablespoon olive oil you can use simple cooking oil
    • 4 tablespoon melted butter
    • 1-1/2 teaspoon instant yeast
    • 1 teaspoon salt

    For Buns Stuffing

    • 2 boiled potatoes
    • 1 cup shredded cabbage
    • 1/2 cup sweet corns
    • 1/2 cup fresh green peas boiled
    • 2 green onion thinly sliced
    • 2 green bell pepper thinly sliced
    • 2 carrots thinly sliced
    • 1 teaspoon hot pepper sauce
    • 2 teaspoon soy sauce
    • 1 teaspoon herb seasoning optional (its my fav)
    • 1/2 teaspoon black pepper freshly ground
    • salt to taste
    • 1 teaspoon butter

    Other Ingredients

    • 2 tablespoon sesame seeds i used white + black seeds
    • 1 egg yolk beaten with a little milk for brushing the buns before baking
    • melted butter for brushing

    Instructions

    • In a small bowl, add warm milk, sugar, salt and yeast and stir until the sugar and yeast dissolves and rest for 10 minutes.
    • Sieve the flour in a large mixing bowl.
    • Then add dry milk, oil, melted butter and egg in it.
    • Mix well.
    • Add the yeast mixture in the flour and knead for few minutes.
    • Start kneading together and gradually add the water a little at a time.
    • You may not need to use all the water, so add it sparingly until your dough comes together and is nice and soft.
    • Knead for a good 8-10 minutes. The more you knead the dough, the softer the buns will be.
    • Touch a bit of oil with your fingertips and apply all over the ball of dough and trasnfer into a bowl.
    • Cover the dough with wet cloth and set aside for 1 hour for it to double in size.
    • Meanwhile, prepare your buns stuffing.
    • Peel potatoes and mash them roughly.
    • Melt 1 teaspoon butter in a frying pan over medium heat.
    • Add green peas, carrots and sweet corns. Cook and stir for few minutes until crispy-tender.
    • Now add green pepper, cabbage and green onions, cook for 2-3 minutes.
    • Add potatoes and a splash of soy sauce and hot sauce.
    • Season with salt and pepper.
    • Cook and stir for 2 more minutes or until all done.
    • Sprinkle the herb seasoning over it and turn the heat off and let it cool down completely.
    • Once dough risen, Punch it down and divide it into 18 small balls ( depending on the size of buns your would like).
    • Line the baking tray with baking sheets.
    • Roll out each ball into a circle.
    • Place vegetable stufing in the center, then ball it up and seal the edges.
    • Place it on the prepared baking tray and repeat it with remaining dough.
    • Cover the tray with a light cloth and let them rose for 30 minutes.
    • Now brush each buns with beaten egg.
    • Then sprinkle some sesame seeds all over.
    • Bake in the pre-heated (180 degree C) oven for 18-20 minutes or until buns turn golden brown.
    • Remove from the oven.
    • Brush butter on top of the buns and cover them with a cloth so they get really soft.
    • Serve warm and enjoy.

    Notes

    Serving Suggestions:
    Serve warm with coffee or tea.