Tag: Italian

  • Creamy Cucumber Pasta Salad Recipe

    Creamy Cucumber Pasta Salad Recipe

    This post may contain affiliate links. Please read my disclosure policy.

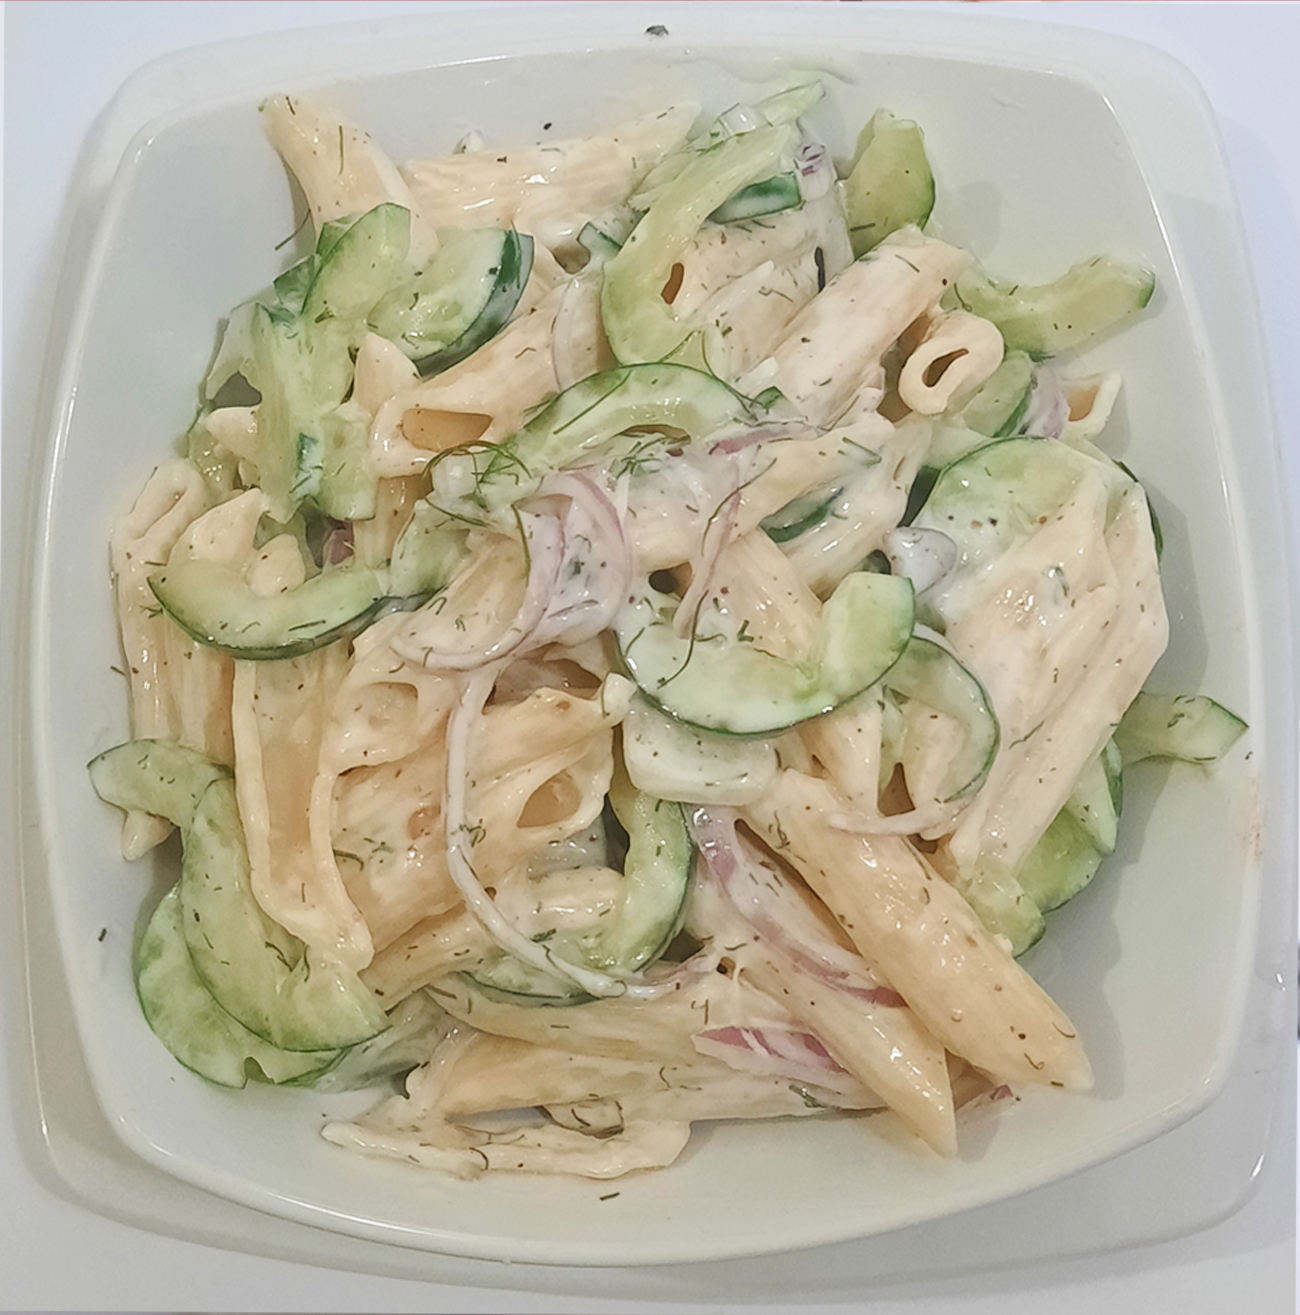
    This quick and easy Creamy Cucumber Pasta Salad combines a creamy dressing – like a mixture of Greek yogurt or sour cream – with freshly sliced cucumbers and red onions along with plenty of chopped dill! It’s the perfect unique pasta salad recipe for your next barbecue party.
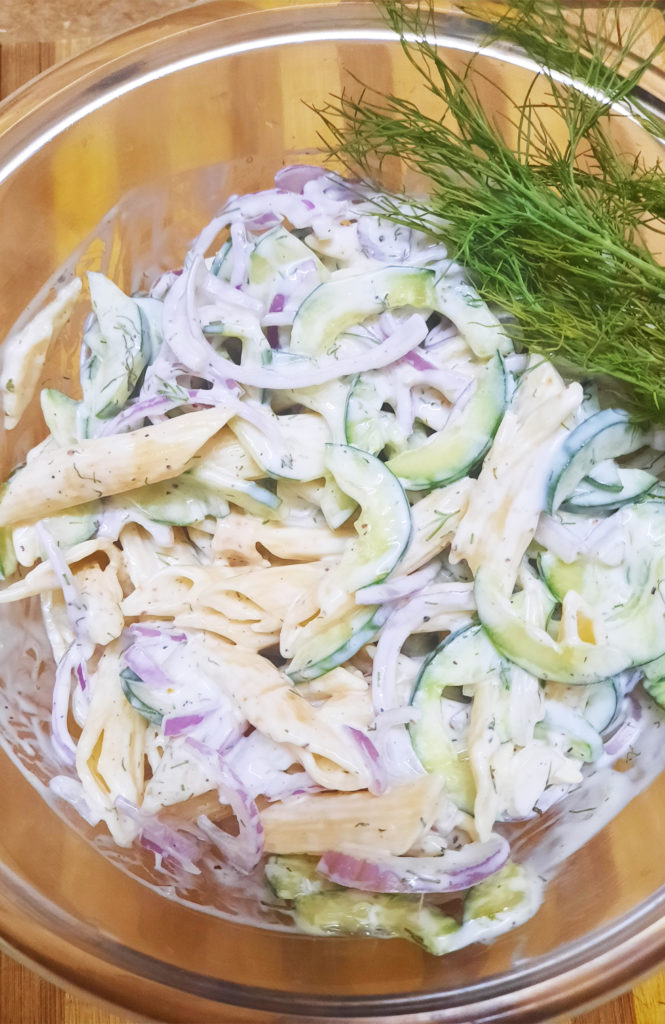
    This quick and easy Creamy Cucumber Pasta Salad combines a creamy dressing - like a mixture of Greek yogurt or sour cream - with freshly sliced cucumbers and red onions along with plenty of chopped dill! It's the perfect unique pasta salad recipe for your next backyard barbecue.
    Creamy Cucumber Pasta Salad Recipe

    Loaded with tender pasta, crisp juicy cucumbers, fresh dill and red onion, this dish will be the hit of every get together. And it comes together within just few minutes and it’s incredibly delicious! The dressing in this salad doesn’t have a lot of ingredients, but that’s really the beauty of this recipe! The fresh Greek yogurt adds a little zip to the dressing while the dill adds summery freshness complementing the cucumber and cooked pasta perfectly! 
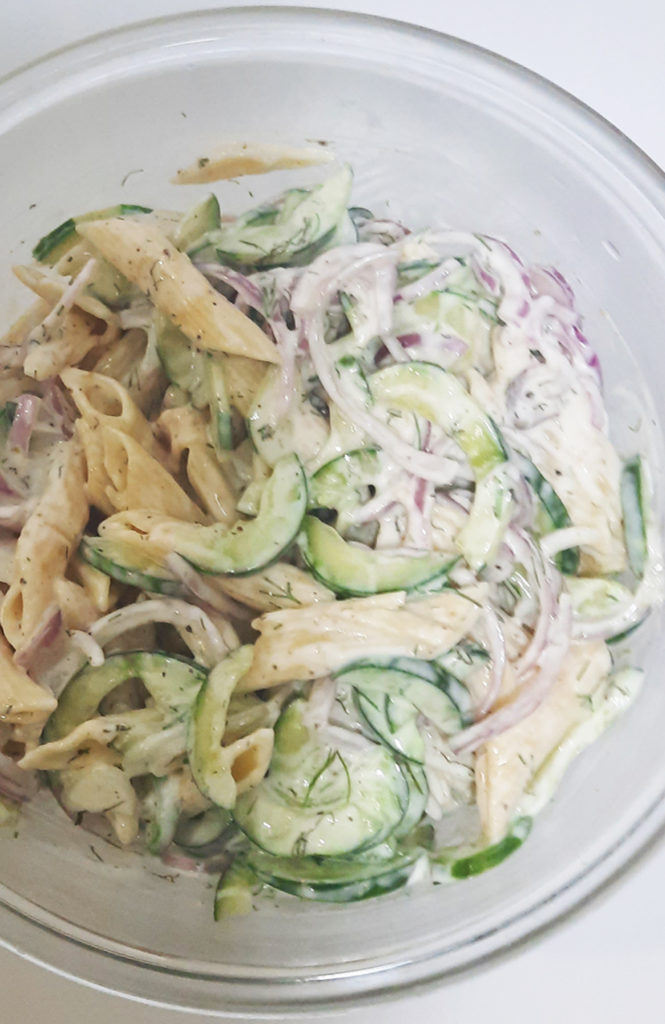
    Creamy Cucumber Pasta Salad Recipe
    Creamy Cucumber Pasta Salad Recipe

    If you have access to fresh dill, it really makes a huge difference in this salad.

    Ingredients in Creamy Cucumber Pasta Salad Recipe?

    • Pasta: penne or rotini pasta
    • Cucumbers: fresh long English cucumbers work the best for this recipe
    • Onion: red onion (can sub white for less of a “bite”)
    • Dressing: sour cream or Greek yogurt and vinegar
    • Herb: fresh dill
    • Spices: salt and pepper

    Ist Gather Your Equipment’s:

    How to Make this Creamy Cucumber Pasta Salad:

    This is such an easy recipe, y’all. Seriously. Yes to Summer recipes that don’t require hardly any effort!

    1. First, begin by cooking your pasta according to the box instructions! Make sure to salt your water and cook the pasta until al dente. Once it’s done, let it cool! If desired, rinse cold water over top to stop the cooking and speed up the cooling process.
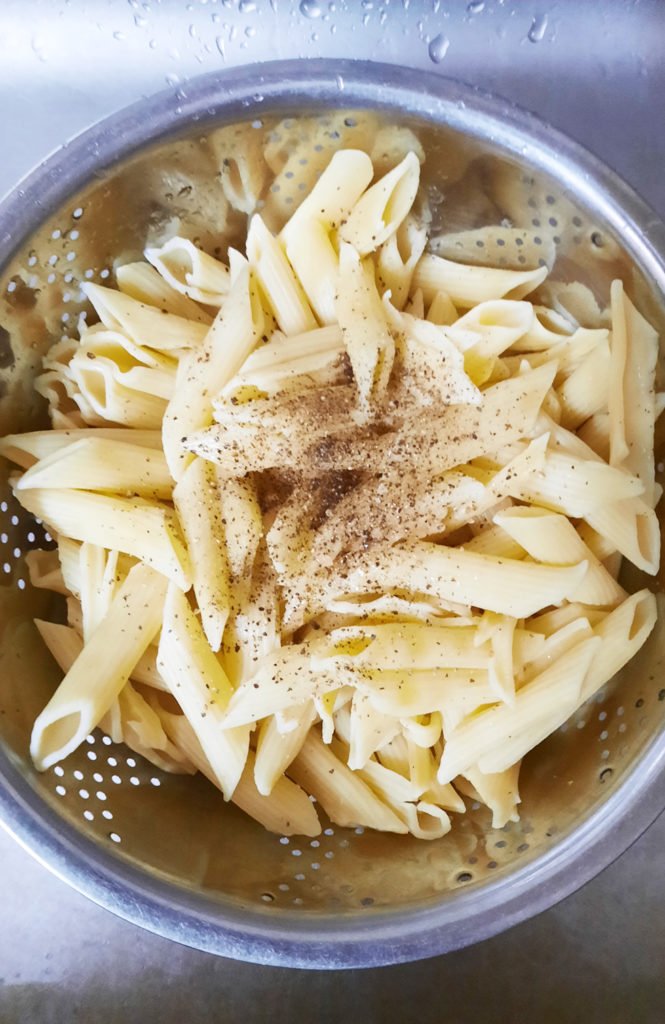
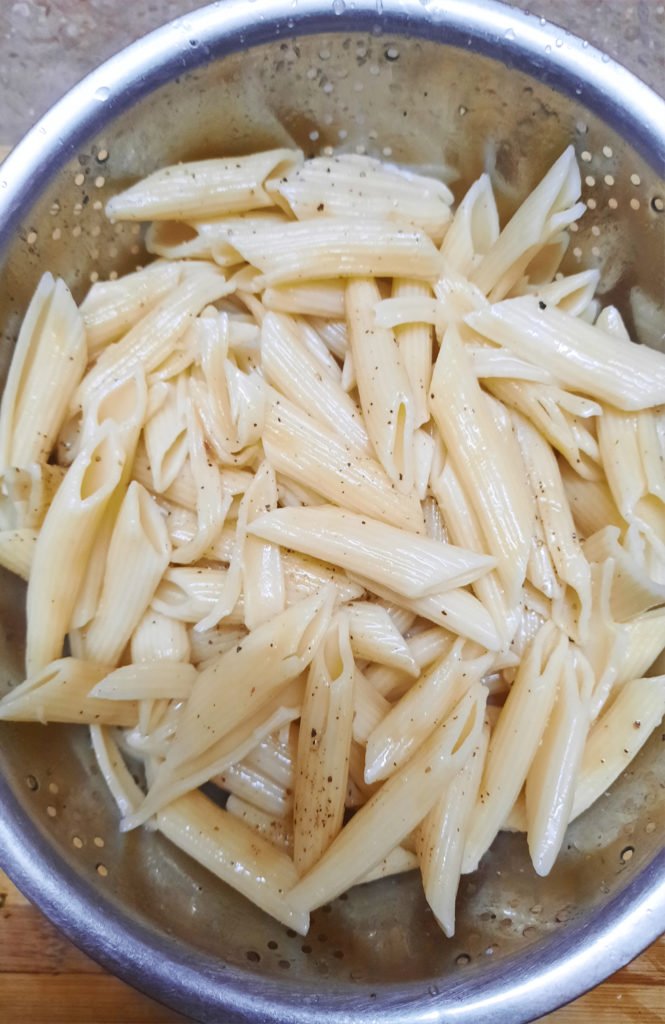
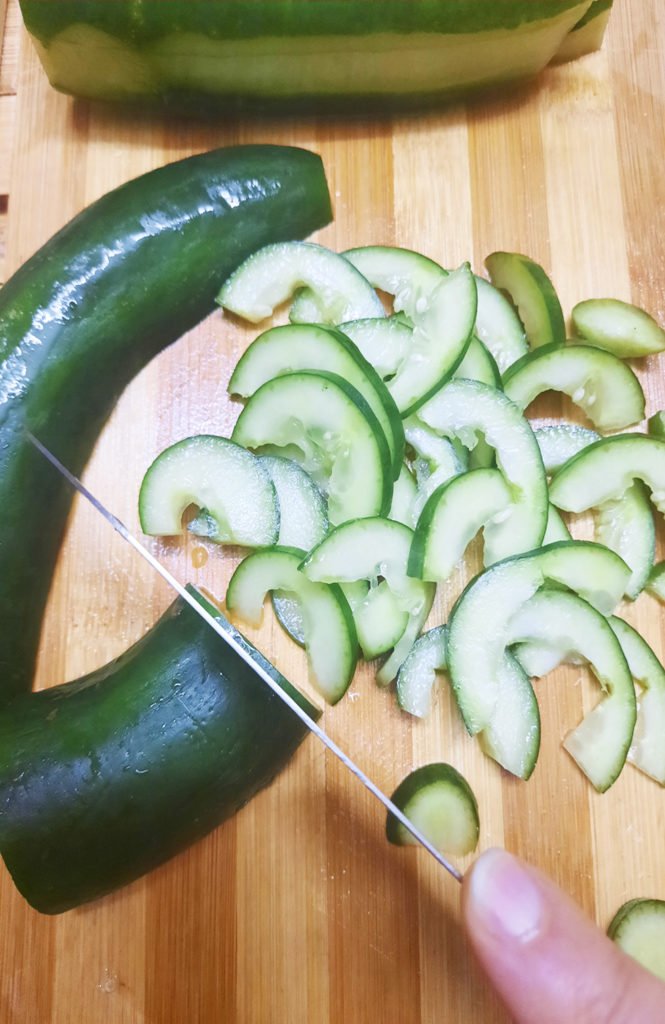
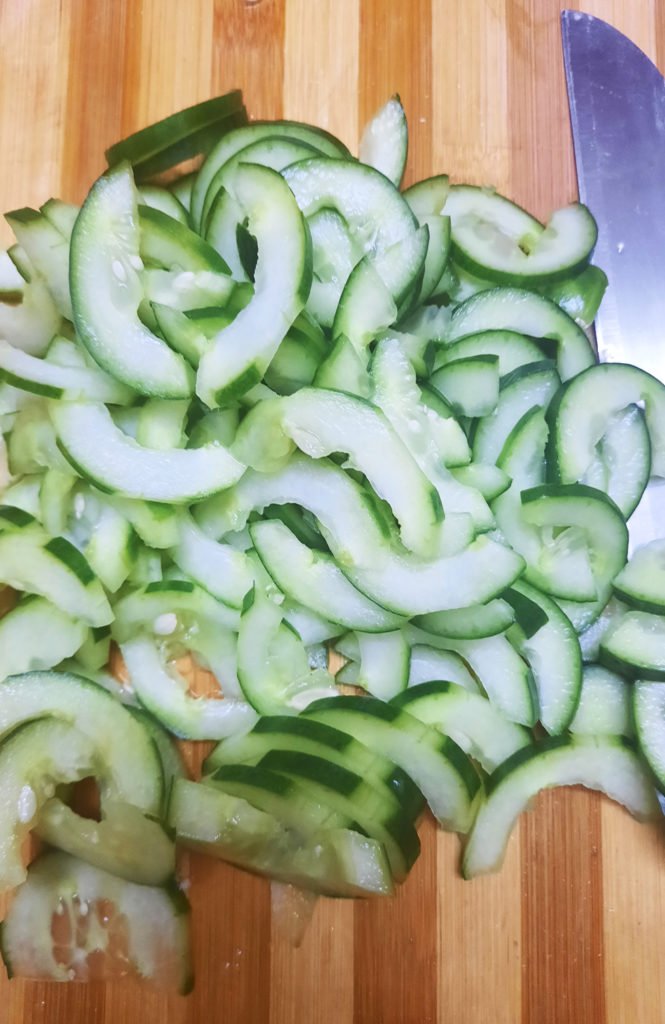
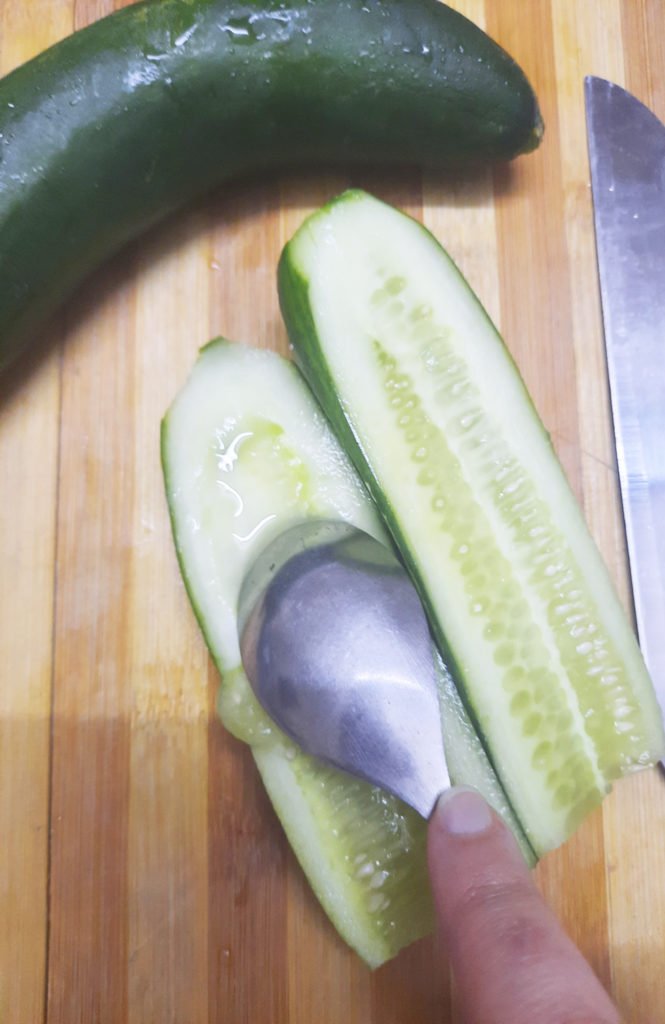
    2. While the pasta is cooling off, slice up your cucumber! Slice it in half lengthwise and then slice very thin slices of cucumber.
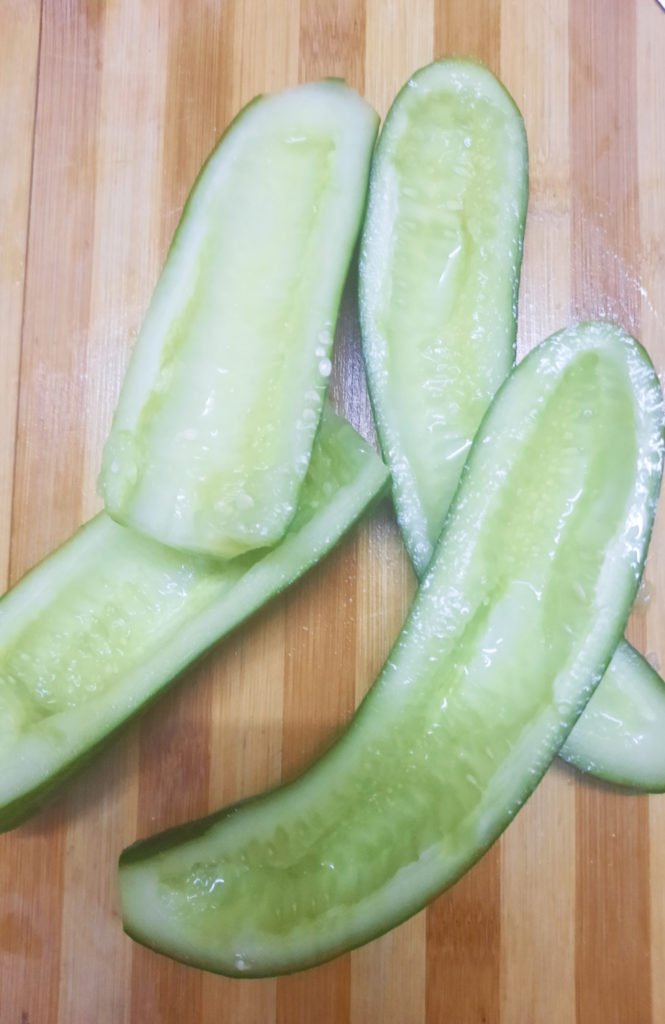
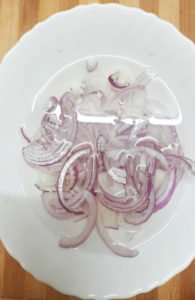
    3. Do the same thing with the red onion! Thin slices go a long way here, folks! While it’s not required, soaking the onions in cold water for a few minutes takes just a little bit of bite out of them.  .
    4. Next, mix together the delicious Greek yogurt dill dressing! Combine the Greek yogurt with the dill, vinegar, salt (i added the pink salt) and pepper. Mix until deliciously thick and creamy. Set this aside.
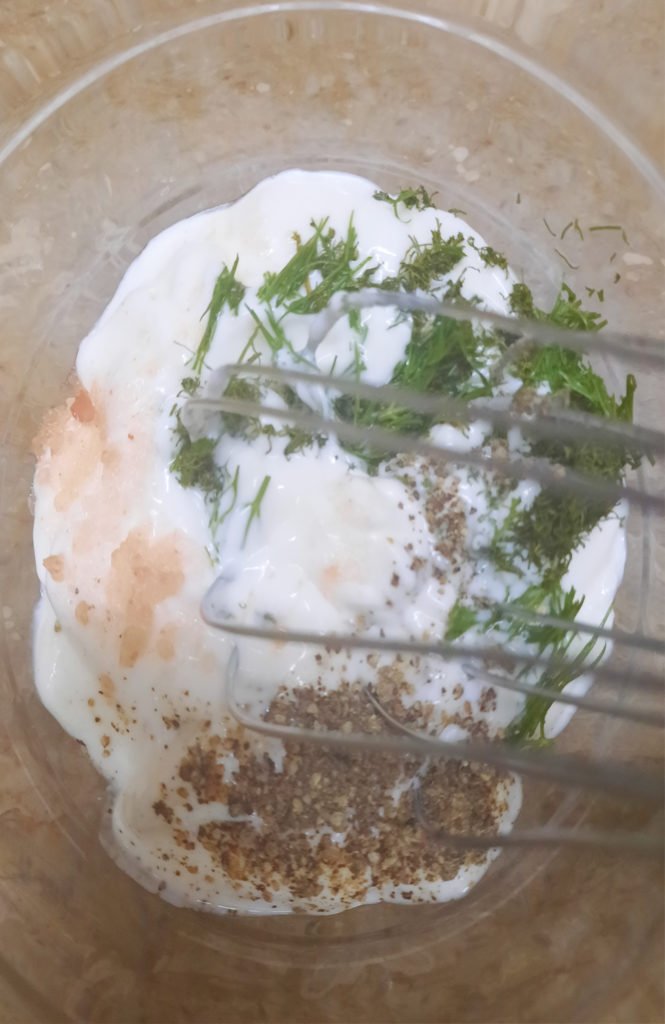
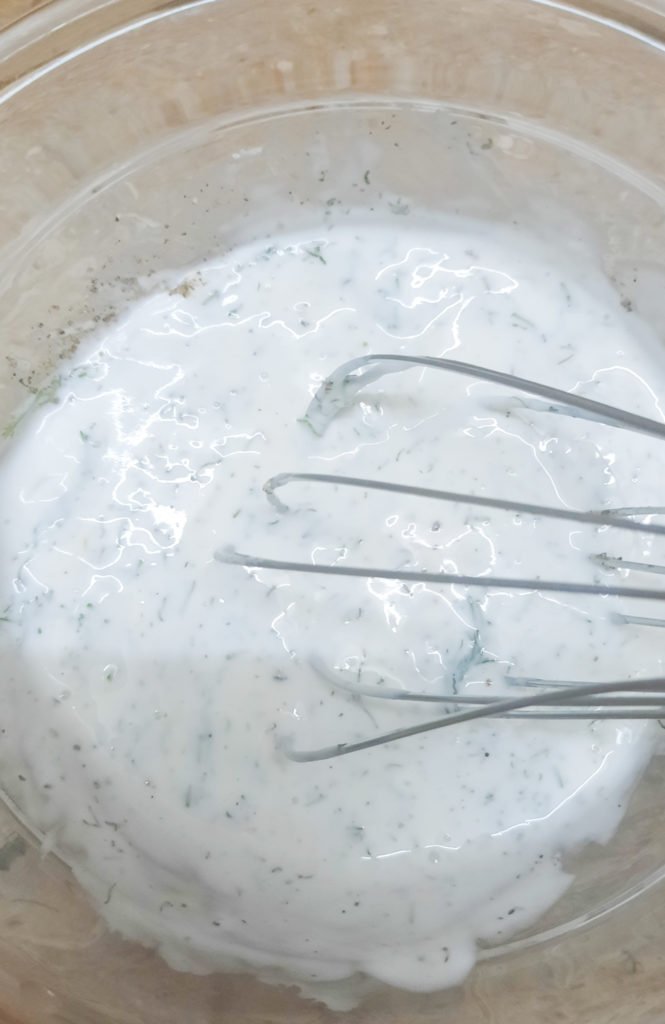
    5. In a large bowl, add your cooled off pasta. On top, add your cucumbers, onions and all of the Greek yogurt dressing! Mix together gently until fully combined.
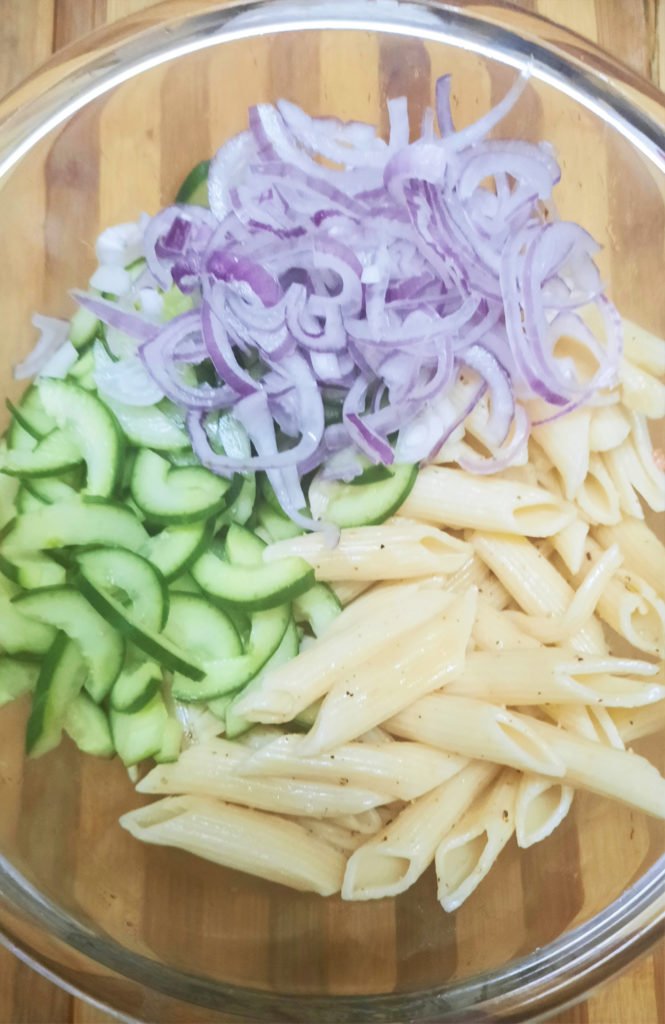
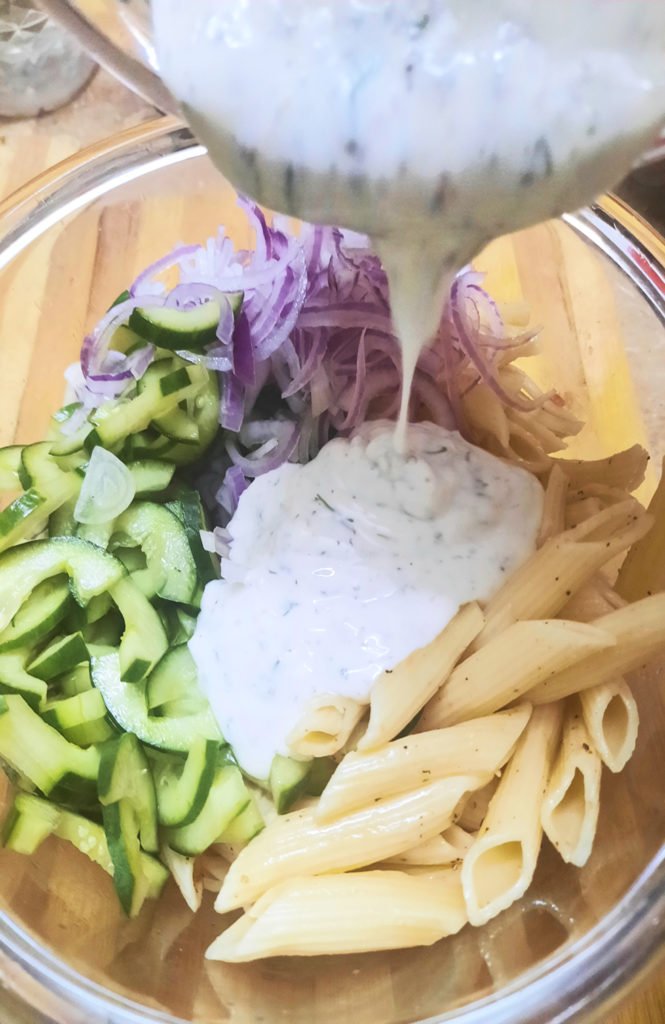
    6. Taste and adjust the seasoning if necessary. I always love garnishing with a big pinch of extra dill – it makes it taste extra fresh and adds an amazing pop of flavor.
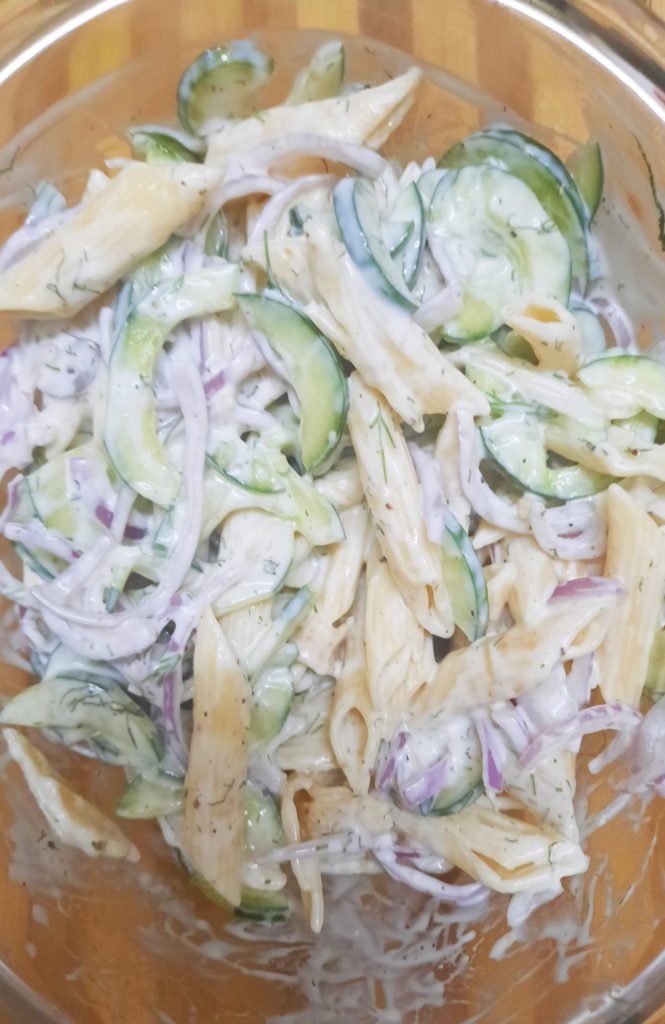
    7. Let it sit in the fridge for about 20-30 minutes to make sure all of the flavors can melt together and it can stay cold! Enjoy when chilled and eat up! 🙂


    Note: If possible try to toss this at least 1 hour before serving to allow the flavors to blend.

    Bismillah let’s get started.
    Check it out The Creamy Cucumber Pasta Salad Recipe and printable version here!!

    Creamy Cucumber Pasta Salad Recipe

    This quick and easy Creamy Cucumber Pasta Salad combines a creamy dressing – like a mixture of Greek yogurt or sour cream – with freshly sliced cucumbers and red onions along with plenty of chopped dill! It’s the perfect unique pasta salad recipe for your next backyard barbecue.
    Keyword 30 minutes meals, cucumber, greek yogurt, Pasta, pasta salad, salad, summer salad, veggie salad
    Prep Time 10 minutes
    Cook Time 10 minutes
    Total Time 20 minutes
    Servings 6
    Author Bushra Waheed

    Ingredients

    For Pasta Salad:

    • ½ pound medium sized pasta such as penne or rotini
    • 2 large English cucumber thinly sliced
    • 1 medium red onion thinly sliced

    For Salad Dressing:

    • 1 cup sour cream or whole fat plain Greek yogurt can substitute mayo if desired
    • 2 tbsp. fresh chopped dill
    • 2 tsp vinegar
    • 1/2 tsp salt
    • 1/2 tsp pepper

    For Garnishing

    • fresh dill

    Instructions

    • Cook pasta according to package directions, until al dente. Drain and drizzle with oil and sprinkle with a couple pinches of salt and pepper. Toss to coat evenly and let it cool.
    • While the pasta is cooling, Thinly slice onion and place in a bowl of cold water. (see note)
    • Slice the cucumber in half lengthwise and remove seeds using a spoon then dice it into thin slices.

    To Make The Salad Dressing:

    • In a small bowl, mix the sour cream or Greek yogurt along with the vinegar, fresh dill, salt and pepper. Mix until fully combined. Taste and adjust seasoning if needed.

    To Make The Creamy Cucumber Pasta Salad:

    • In a large bowl, add the cooled rigatoni pasta. Top with the fresh sliced cucumber and red onion.
    • Pour dressing over pasta and toss to combine.
    • Place in the refrigerator for 20-30 minutes to let the pasta salad cool off and for the flavors to meld together.
    • When serving, if desired, add a large handful of dill on top for garnish and an extra pop of flavor!
    • Delicious Creamy Cucumber Pasta Salad is ready to serve. Enjoy!

    Notes

    Soaking the onions in cold water is optional but takes a bit of the “bite” out of the onion.
    Serving Suggestions:
    Goes great with BBQ Chicken Wings.

    Want more Pasta Salad Inspiration? 

    Here are some other Pasta Salad recipes on my blog:

    Hope you guys loved this one and are having a great Summer. Let me know what your favorite garden produce is this time of year in the comments below! 

    Pin it For Later

    Put your own spin on it. And lemme know how it turns out and do take a few seconds to rate it! I would love to see your recreations so tag me on instagram @recipestable or Facebook (Recipestable) or on Twitter so I can see how lovely yours turn out.
  • Bean Salad with Olives and Herbs Recipe

    Bean Salad with Olives and Herbs Recipe

    This salad came to my mind right as I was falling asleep.

    Does your brain ever do crazy stuff like that? My best ideas seem to come when I’m about to doze off and don’t have a notebook or pen to write things down, so I just make a pact with my brain to remember. And the next day we both do our best to recall what we were thinking.

    Thankfully, this one made it through the pipeline! Three cheers for my old lady brain still working!

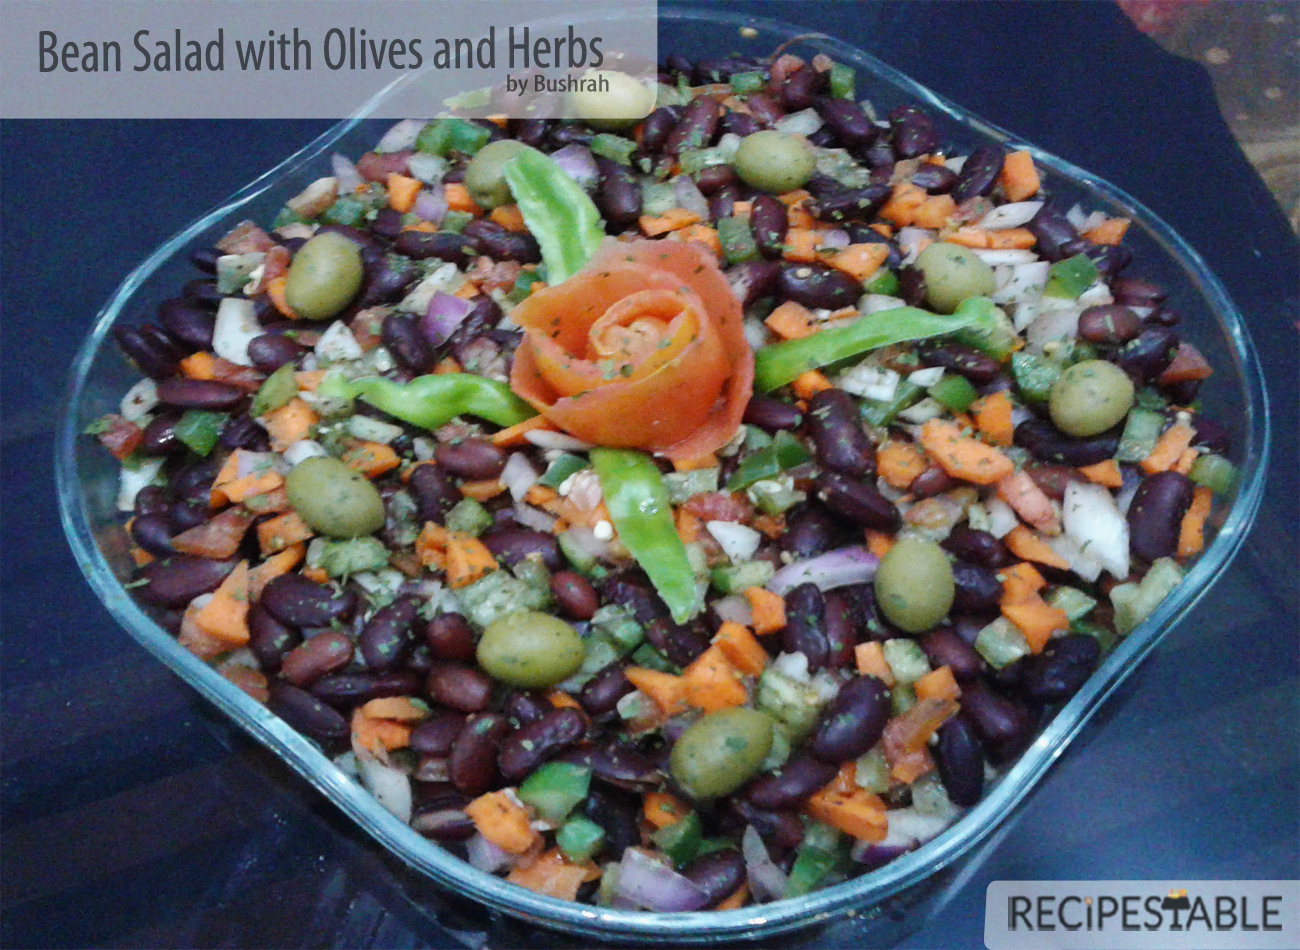
    Bean Salad with Olives and Herbs

    Bean Salad with Olives and Herbs

    I’ve made many a Bean salad before, but this one is special. This is the answer to the question, “What’s super cozy, flavorful and perfect for any BBQ Party?” It’s a great addition to any summer get together!

    This Pakistani/Italian flavor pairing came to mind, and the recipe is adapted from my all-time favorite Bean Salad.   One super easy thing you can prep ahead is beans. I love beans because you can make them so many different ways and they’re packed with protein, slow-digesting carbohydrates and fiber. Their nutritional profile makes them ideal for prepping before a workout and recovering after a workout. If you’re trying to lose weight or maintain a healthy weight, they’re great for that too since they make you feel full longer.

    One of my favorite ways to enjoy beans during the warmer months is with my Bean Salad. It’s super easy to make and it tastes really yummy too! This recipe is simple, requiring just 10 minutes to prepare! You can eat it all on its own (what I normally do) or dress it up by adding some more chopped veggies to it. It’s also great added to some greens either in a wrap or in a salad. 

    Bean Salad with Olives and Herbs

    Bean Salad with Olives and Herbs

    The dressing is SO easy (and dreamy).

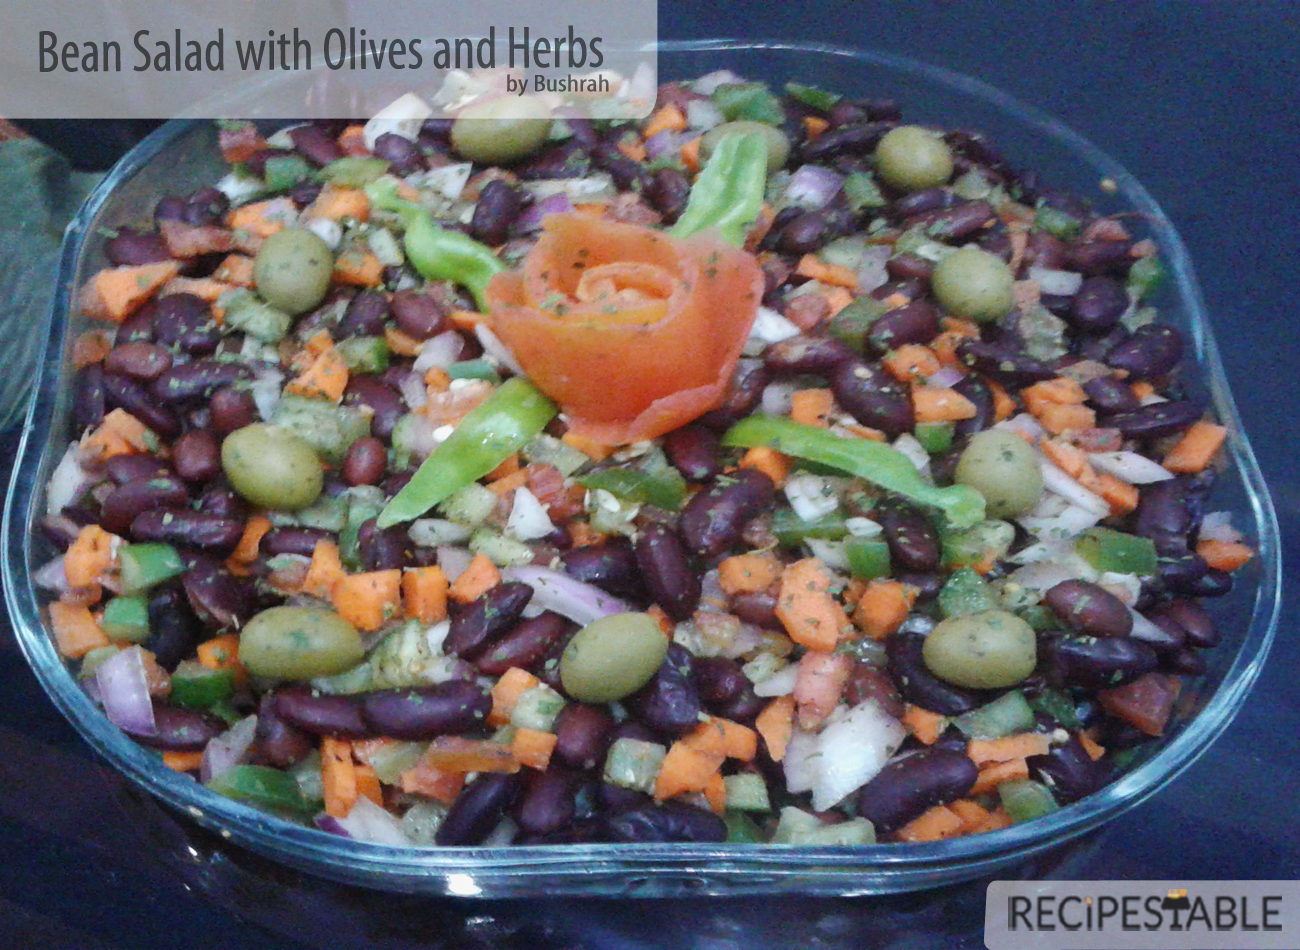
    Italian herbs are blended with vinegar . Add olive oil water to thin and ‘voila!’ You have a super yummy, tangy Italian dressing ready to coat those gorgeous bean salad. Look at that salad goodness.

    Bean Salad with Olives and Herbs

    I hope you all LOVE this Bean salad! It’s:

    • Hearty
    • Flavorful
    • Vegetable-packed
    • Fiber- & Protein-rich
    • Tangy + Crunchy
    • Super healthy & Delicious

    This would make the perfect side dish for BBQ Party, or any get together, really. It yields four entrée-sized portions or 8 sides, so multiply as needed. Although it’s delicious on its own, it would pair extremely well with my Grilled Lamb Chops, and my Grilled Italian Chicken.

    Bismillah, let’s get started the recipe!!

    Check it out the Bean Salad with Olives and Herbs Recipe and printable version below!!

    Put your own spin on it. And lemme know how it turns out. Post a photo on Facebook (Recipestable) or  on Twitter so I can see how lovely yours turn out.
    Happy Salad Making!!

  • Italian Herb Crusted Cheese Pizza Recipe

    Italian Herb Crusted Cheese Pizza Recipe

    Let’s Make Pizza Night Fun!

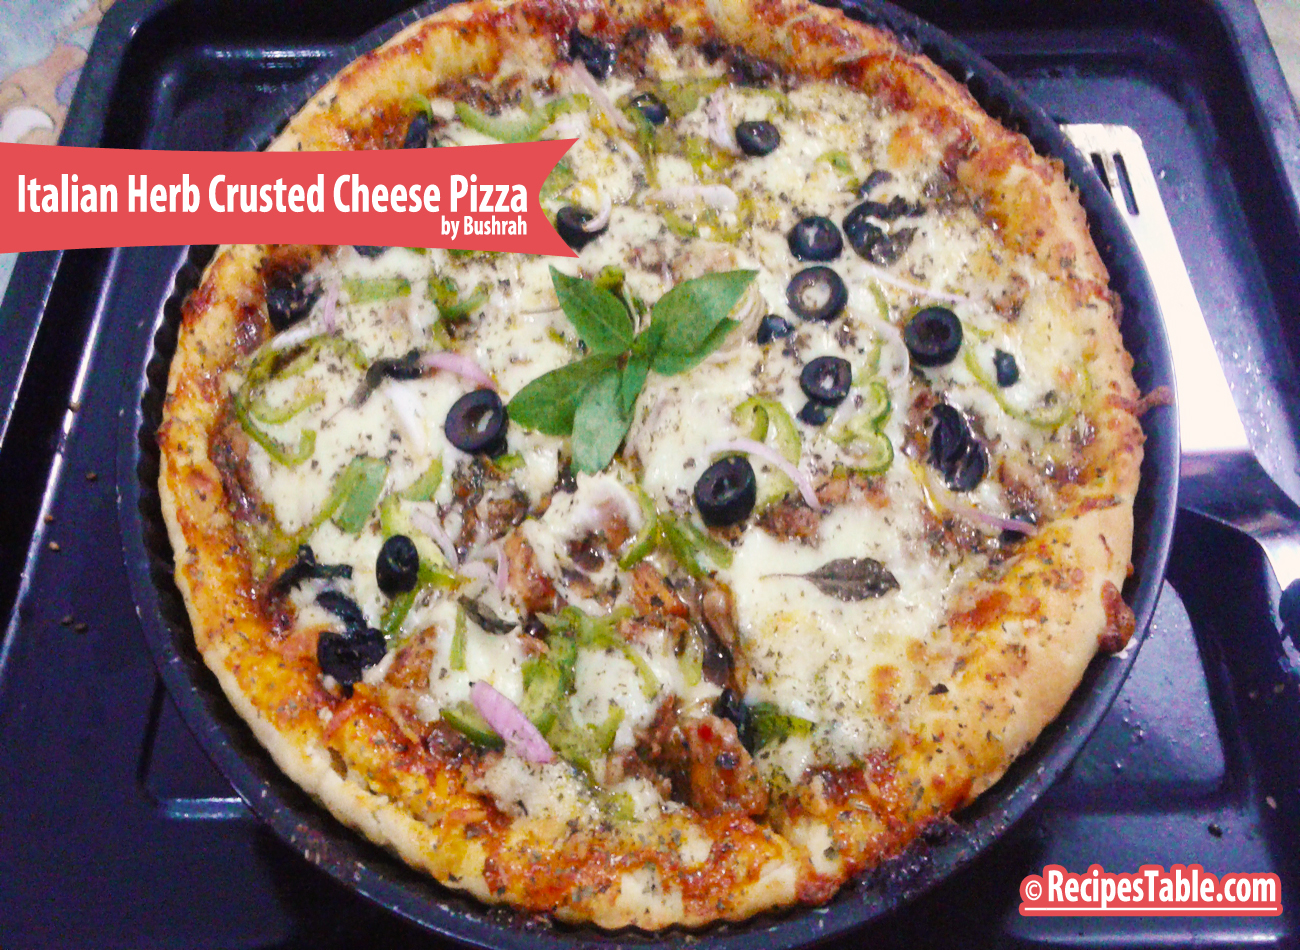
    After a whole month of no blogging, no cooking and baking I’m back in the biz with this star of a recipe – “Italian Herb Crusted Cheese Pizza!”

    I was extremely busy with my mid terms exams and eid shopping, so I couldn’t get a chance to publish new posts on my blog. Exams were taking priority sadly. But from now till eid, I’ll be try to more regular (InshaAllah)!

    I’m a lover of Italian food and fresh herbs and my family loves pizza in all forms. One of our favorite family meals is homemade pizza. We make regular Homemade pizza, Pan pizza, Pizza Cups, Pizza Rolls, Pizza sandwiches , Pizza Paratha and Pizza fries. One thing we love about it is that you can get really creative with toppings and today’s recipe is one of my recent (and favorite) creations –Italian Herb Crusted Cheese Pizza.

     Italian Herb Crusted Cheese Pizza recipe
    Photo: Italian Herb Crusted Cheese Pizza

    Can you say “Delicioso?”  OMG, this pizza did not disappoint!   This, to me, is the perfect Italian Flavored pizza. The crust is light and crispy. The sauce is thick and tomato-y. The fresh mozzarella is mild and cheesy. The basil leaves are bright and fresh and the herb aroma is amazing. When I bit in and my mouth filled with saucy, cheesy, herby goodness I’m pretty sure I had a pizzagasm.  The cheese melted perfectly into the crust , the flavors being even more dramatic where it had browned into that crunchy, cheesy topping. 

     Italian Herb Crusted Cheese Pizza
    Photo: Italian Herb Crusted Cheese Pizza

    I love eating food where in each bite you get something a little bit different, it makes it all the more interesting and enjoyable to eat and this pizza definitely delivers that… I like the basil leaves to be baked along with the pizza, but you can sprinkle them on top after baking if you prefer them uncooked. This recipe can be done with little effort, but it has a big impact on your taste buds and entire dinner experience.

    Italian Herb Crusted Cheese Pizza recipe
    Photo: Italian Herb Crusted Cheese Pizza

    For this pizza I decided to use the pre-made homemade pizza dough, but feel free to make your own from scratch. It’s very straightforward to make and if you don’t fancy making your own pizza base then you could simply add the toppings to a store bought pizza crust. I always brush my pizza dough with olive oil and herb seasoning to make it even more delicious!
    While my pizza dough was rising in the pan, I prepared the pizza toppings. The pizza crust bakes for about 10-15 minutes in a 200 degree oven (or until crispy and light brown and cheese is melted). The secret to a good Sicilian crust is a nice coating of olive oil on the pan. That helps crisp up the bottom of the crust. A very hot oven is also crucial. The hard part is waiting for this oh so delicious pizza! The wait is definitely worth it, because you are rewarded with an amazingly delicious pizza.

    Photo: Italian Herb Crusted Cheese Pizza
    Photo: Italian Herb Crusted Cheese Pizza

    I’m thinking cheesy flatbread for my next attempt!

    Bismillah, let’s get started!!

    Check it out the Chicken Shashlik Sticks recipe and printable version here!!

    If you make this recipe, be sure to snap a photo and hashtag it #Recipestable & #TastyRecipesbyBushrah. I’d love to see what you cook!

    Happy Pizza Making!!

  • The Best and Easiest Spaghetti Meatballs Recipe

    The Best and Easiest Spaghetti Meatballs Recipe

    How are you all doing? Did anything exciting happen lately? I am sorry for my absence, life has kept me, but I have a free few days a head of me to be around more.

    Let’s Start Today’s Post with some Food for the Soul  

    “Expectation is the root of all heartache”.  _William Shakespeare

    quote

    I guess I need not say much about the quote I am sharing with all of you today. I am a person of high expectations – despite trying to develop myself into a better person and having reduced my level of expectation from all around me, I have not reached the level where I would have zero expectation.

    I guess it is not human to reach that kind of a stage, but still I would love to reach a stage where my expectations are so low that it does not guarantee any heartbreaks if things don’t happen just like how I want it to be. I really don’t know whether I will ever reach that situation but yes, I am trying…

    It’s Getting Cold . Now Let’s Have Some Food Talk To Warm & Nourish Our Soul!!

    Today’s Recipe: Spaghetti Meatballs

    What’s better than a warm fire and a big bowl of comfort food on a cold winter night?  Today I want to share a recipe that feels, to me, like the closest you can get to “comfort food” during Whole 30.

    The Best and Easiest Spaghetti Meatballs
    Can’t stop, won’t stop with the Comfort Food recipes this winter. ♡

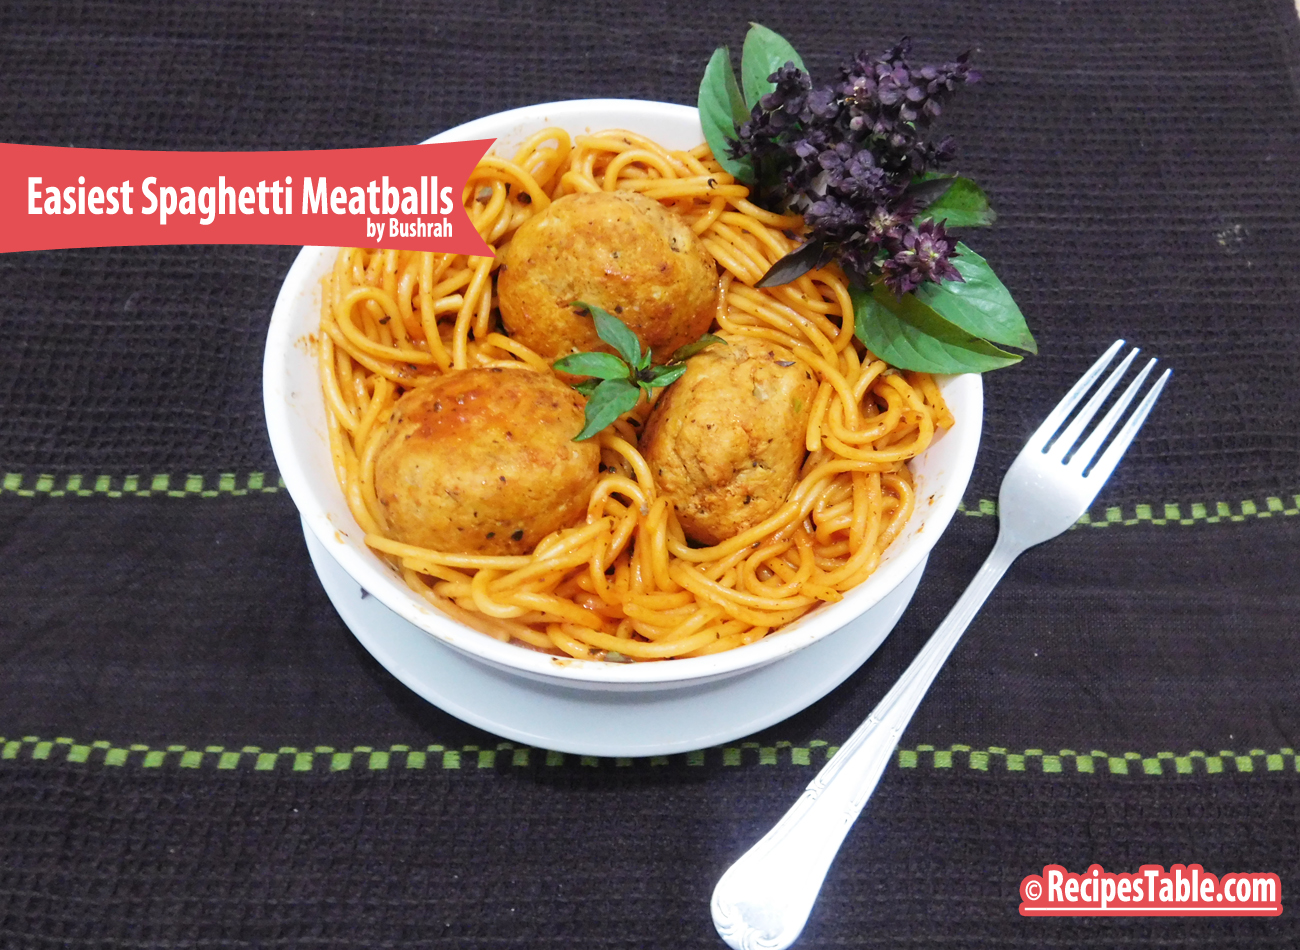
    For a bowl of Italian comfort, Make my best & Easiest Spaghetti Meatballs! It only takes 35 minutes to make this delicious family favorite, all from scratch, and I promise you will never have leftovers. While the spaghetti sauce cooks, you’ll make the meatballs and while the meatballs cook, you’ll boil your pasta. Makes 16 meatballs, two per person. I made these meatballs with chicken mince , but you can use whatever ground meat you’d like to use, actually(beef, lamb, turkey). They are super soft, tender  and juicy because they cook right in the sauce and I used fresh bread crumbs and not dried ones.The sauce is my Homemade Italian Tomato Sauce and I just add the meatballs (& spaghetti) to make this a complete meal… but don’t forget the salad.

    The Best and Easiest Spaghetti Meatballs
    The Best and Easiest Spaghetti Meatballs

    This is really a quick and easy recipe because the sauce takes 5 minutes of prep and the meatballs take 10 minutes to put together. Then it all cooks in one pot and you have the most delicious spaghetti dinner. 

    The Best and Easiest Spaghetti Meatballs
    The Best and Easiest Spaghetti Meatballs

    Whether you’re having company or a family dinner, you can’t go wrong with Easiest Spaghetti Meatballs. Try my easy recipe and you’ll see why they call it comfort food. They really just melt in your mouth. 

    Here’s your go-to, foolproof, The Easiest Spaghetti Meatballs recipe you’ll never want to be without.

    I have also posted Mince Macaroni which is another easiest & tastiest version of making Pasta home. Do check it out as well.  It’s finger lickin’ good. You’ll be coming back for more. 


    Put your own spin on it. And lemme know how it turns out. Post a photo on Facebook (Recipestable) or  on Twitter so I can see how lovely yours turn out.

    Happy Dinner Making!!

  • Keema Macaroni Recipe (Mince Macaroni)

    Keema Macaroni Recipe (Mince Macaroni)

    Keema Macaroni (Mince Macaroni)

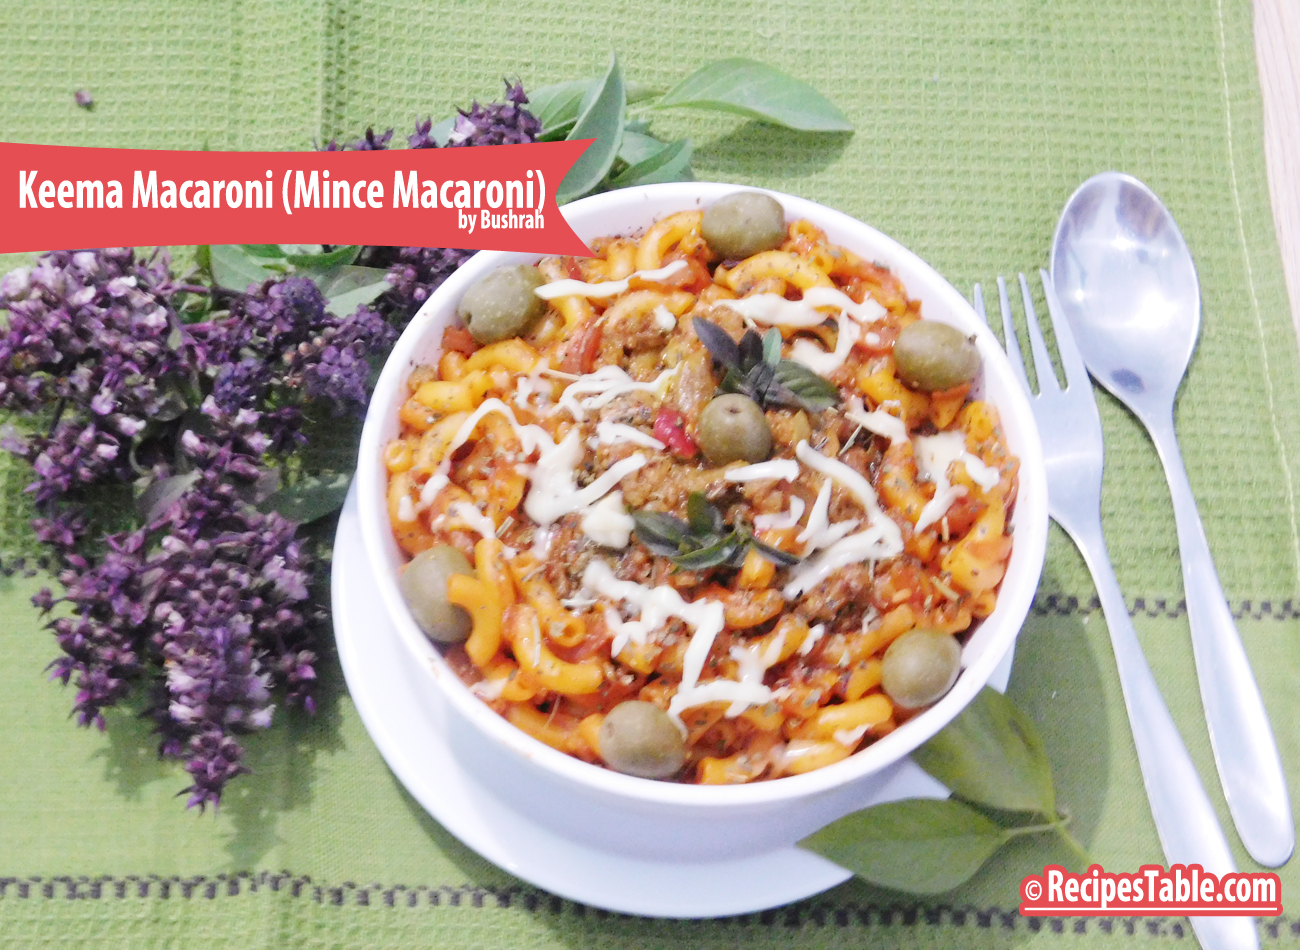
     Pasta, for me, is the ultimate comfort food.  I love anything to do with pasta or macaroni, as they are my go-to on my lazy days. Today i am sharing a super easy Keema Macaroni recipe for busy weeknight Meals. One dish I make quite frequently when I have some mince is this one. Nice and simple, full of flavors.

    Keema Macaroni ( Mince Macaroni)
    Photo: Keema Macaroni ( Mince Macaroni)

    This ain’t your ordinary pasta. With flavors bursting out from every corner, this one is delicious! To make it more unique and give a distinct flavor, I have used my ever favorite Italian Pasta Sauce

    Photo: Keema Macaroni ( Mince Macaroni)
    Photo: Keema Macaroni ( Mince Macaroni)

    You can use any macaroni for this recipe, but I totally recommend trying elbow or something that can help hold all of those tiny pieces of mince. I used my favorite whole wheat pasta. Cook it al dente according to package instructions.

    While the pasta is cooking, saute up an onion and mince until cooked.  Then add in some garlic, herb seasoning and pasta sauce.  And once the pasta is cooked, drain and add it to the saute pan. I would add a dollop cheese or mayonnaise to make it more moist and gulp it down!

    Isn’t that to easy?? Easy enough even for a weekday night? Of Course Yes!!

    Keema Macaroni ( Mince Macaroni)
    Photo: Keema Macaroni ( Mince Macaroni)

    This is a really delicious pasta dish and the taste of the basil really comes through beautifully. The minced meat balances out the starch of the macaroni really well. A perfect dance of herb and spice ensues in your mouth…That you have to experience!

    As you can see, the recipe is just as good and vibrant and delicious as ever.  🙂

    Keema Macaroni ( Mince Macaroni)
    Photo: Keema Macaroni ( Mince Macaroni)

    Some Tips for the Perfectly Cooked Keema Macaroni:

    1. Never cook your macaroni in boiling hot water, it destroys the outer layer of the macaroni however you may not realize it. So, always throw in your macaroni or whatsoever in simmering water, a stage before boiling for best results.
    2. Always add a reasonable amount of salt to water, in which you will be cooking your macaroni.
    3. Once your macaroni has been boiled, strain it, take it out of the hot water and quickly rinse them in cold or regular tap water and the set aside. This stops the macaroni from further cooking, which results in soggy, dull and bland macaroni.
    4. Once you throw macaroni into your dish, let it cook and absorb the wonderful flavours of the dish, by letting it sit in the pan for 2-3 minutes with the lid closed and on slowest flame. Macaroni is bland, has no particular flavour so this step is very critical as well as rewarding.

    Check it out the Keema Macaroni (Mince Macaroni) recipe and printable version here!!

    Recipe Note’s:

    1. You can use any pasta of choice , i like the taste of brown rice pasta compared to others.
    2. You can add veggies e.g. carrots, capsicum, green peas if you like. Everything in this recipe is optional. Go as you please. Play with flavours.

    If you make this recipe, be sure to snap a photo and hashtag it #Recipestable. I’d love to see what you cook!


    What are your holiday traditions guys? I would love to hear some from you all. Are there recipes passed down to you from your grand mom? Or the one from many generations? Share them all in comments below.

    Happy Cooking!!

  • The Best Meatballs You’ll Ever Have Recipe

    The Best Meatballs You’ll Ever Have Recipe

    Aslam-o-Alakaum My Lovelies !!

     In the Name of Allah, Most Gracious, Most Merciful

    Good Afternoon

    It is the middle of March and spring is here and in full bloom, budding flowers, chirping birds, and plenty of new activities to do.
    With spring here in full bloom, I try to get out for daily walks, which is a joy. With the earth greening, trees budding, flowers blossoming and songbirds chirping, hope and renewal fill every living thing. (inshaAllah)

    The days are getting much warmer now and my family always looks forward for light and comforting food. Dinner is the only time when everybody gets to gather around and have meal as a family. So I always plan to cook something simple and most importantly light and healthy.

    meatballs

    The Best Meatballs You’ll Ever Have

    The Best Meatballs You'll Ever Have
    The Best Meatballs You’ll Ever Have

    Last week, I made the world’s most amazing Meatballs in a tomato sauce with garlic bread on the side – where’s my invitation to go on Masterchef??  💁🏻 lol 😛

     I like to cook meatballs in sauce! These Italian flavored  meatballs in tomato sauce are my new favorite! 😀 ☺

    These meatballs are light, tender, and bursting with juicy flavor.You can just mix all the ingredients together, roll them and cook them and the best part of all, you can have these on your dinner table in less than 45 minutes.

    The Best Meatballs You'll Ever Have
    The Best Meatballs You’ll Ever Have

    They would be great over pasta, mixed with tomato sauce as an appetizer or on their own, But I served these meatballs over some veggie noodles tossed in olive oil along with garlic bread. A recipe must try! The Best Meatballs You’ll Ever Have!

    I have also posted Meatball and Pea Pulao which is another easiest & tastiest version of making Dinner. Do check it out as well.


    Put your own spin on it. And lemme know how it turns out. Post a photo on Facebook (Recipestable) or  on Twitter so I can see how lovely yours turn out.


    Happy Meatballs Making!!

    Keep remember me in your Dua’s and Stay tuned for new content on the blog 😉

    If you like this post, Please Subscribe to my blog. I have lots more recipes to share with you. And If you make it then let me know your feedback by commenting below.

  • Italian Chicken Bow Tie Pasta Recipe

    Italian Chicken Bow Tie Pasta

    This is really a good dish for only a few ingredients. Very good and modifiable to suit your own tastes. Must try this Italian Chicken Bow Tie Pasta Recipe, you’ ll love it.

    Italian Chicken Bow Tie Pasta recipe
    Photo:Italian Chicken Bow Tie Pasta

    Italian Chicken Bow Tie Pasta
    Photo:Italian Chicken Bow Tie Pasta

    Italian Chicken Bow Tie Pasta2 Italian Chicken Bow Tie Pasta3 Italian Chicken Bow Tie Pasta4 Italian Chicken Bow Tie Pasta5

    Check it out the Italian Chicken Bow Tie Pasta Recipe here!!

    [divider]

    [one_fourth]Prep Time:10 minutes[/one_fourth] [one_fourth]Cook Time:10 minutes[/one_fourth] [one_fourth]Servings:4 [/one_fourth] [one_fourth_last]Difficulty Level: Easy[/one_fourth_last]

    [divider]

    [tabs type=”horizontal”] [tabs_head] [tab_title]Ingredients[/tab_title] [tab_title]Nutrition[/tab_title] [/tabs_head] [tab]

    • 4 skinless, boneless chicken breast halves – cooked
    • 1 (16 oz) package bow tie pasta
    • 1 (8 oz) bottle Italian-style salad dressing
    • 1 tomato, finely chopped

    [/tab] [tab]

    Yield: 4 servings.

    Amount Per Serving:

    • Calories: 712 kcal
    • Carbohydrates: 88.7 g
    • Cholesterol: 73 mg
    • Fat: 21.2 g
    • Fiber: 4.2 g
    • Protein: 43 g
    • Sodium: 982 mg

    [/tab] [/tabs]

    Directions:
    [tabs type=”horizontal”] [tabs_head] [tab_title]Step by Step Method[/tab_title] [tab_title]Serving Suggestions[/tab_title][/tabs_head] [tab]

    Step 1

    Bring a large pot of lightly salted water to a boil.

    Step 2

    Add bow tie pasta; cook for 8-10 minutes or until al dente.

    Step 3

    Drain and rinse in cold water.

    Step 4

    In a medium bowl, stir together chicken and salad dressing.

    Step 5

    Add pasta; toss to coat evenly.

    Step 6

    Stir in the chopped tomato. Italian Chicken Bow Tie Pasta is ready to serve. Enjoy!!

    [/tab] [tab]

    • Serve warm.

    [/tab] [/tabs]
    If you like Italian Chicken Bow Tie Pasta Recipe and make it then let me know your feedback by commenting below.And if you know more innovative ways in which we can utilize this mouth watering Italian Chicken Bow Tie Pasta , do share with us and we would be glad to give it a try.

  • Italian Rice Balls Recipe

    Italian Rice Balls

    Arancini or rice balls are a traditional Italian recipe. Try this Italian Rice Balls Recipe and find out how to make these rice balls with cheese and Italian herbs.

    These cheesy deep fried rice balls are served with Italian dinners as a side like a bread. Goes great with sauce and pasta dishes.

    Italian Rice Balls Recipe
    Photo: Italian Rice Balls Recipe

    Check it out the Italian Rice Balls Recipe here!!

    [divider]

    [one_fourth]Prep Time:15 minutes[/one_fourth] [one_fourth]Cook Time:15 minutes[/one_fourth] [one_fourth]Servings: 12 [/one_fourth] [one_fourth_last]Difficulty Level: Easy[/one_fourth_last]

    [divider]

    [tabs type=”horizontal”] [tabs_head] [tab_title]Ingredients[/tab_title] [tab_title]Nutrition[/tab_title] [/tabs_head] [tab]

    • 2 cups cooked white rice
    • 1-1/2 cups dried bread crumbs
    • 2 eggs
    • 1/3 cup grated Parmesan cheese
    • 1 tbsp dried parsley
    • 1 teaspoon salt
    • 1/4 tsp freshly ground black pepper
    • oil for frying

    [/tab] [tab]Yield: 24 rice balls

    Amount Per Serving: ( 1 serving = 2 each)

    • Calories: 683 kcal
    • Carbohydrates: 34.7 g
    • Cholesterol: 47 mg
    • Fat: 57.8 g
    • Fiber: 1.3 g
    • Protein: 7.3 g
    • Sodium: 822 mg

     [/tab] [/tabs]

    Directions:
    [tabs type=”horizontal”] [tabs_head] [tab_title]Step by Step Method[/tab_title] [tab_title]Serving Suggestions[/tab_title][/tabs_head] [tab]

    Step 1

    Place rice in a large bowl.

    Step 2

    Add eggs, cheese, parsley, pepper, and salt.

    Step 3

    Stir until well combined.

    Step 4

    Place bread crumbs on a shallow dish or plate.

    Step 5

    Dampen hands and roll rice mixture into 1 inch balls.

    Step 6

    Then coat each ball with bread crumbs.

    Step 7

    Heat oil in a deep pan pver medium heat.

    Step 8

    Fry rice balls few at a time, for 2-3 minutes or until crispy and lightly browned.

    Step 9

    Drain on paper towels. Italian Rice Balls are ready to serve. ENJOY!!

    [/tab] [tab]

    • Serve with your favorite dipping sauce and pasta dishes.

    [/tab] [/tabs]
    If you like Italian Rice Balls Recipe and make it then let me know your feedback by commenting below.And if you know more innovative ways in which we can utilize this mouth watering Italian Rice Balls, do share with us and we would be glad to give it a try.

  • Baked Fish and rice Recipe

    Baked Fish and rice

    White fish fillets baked with veggies, Italian seasoning and rice in this quick and easy dinner. Check it out the baked Fish and Rice recipe here!!

    baked Fish and Rice recipe
    Photo: baked Fish and Rice Recipe

    [divider]

    [one_fourth]Prep Time:5 minutes[/one_fourth] [one_fourth]Cook Time: 35 minutes[/one_fourth] [one_fourth]Servings: 4[/one_fourth] [one_fourth_last]Difficulty Level: Easy[/one_fourth_last]

    [divider]

    [tabs type=”horizontal”] [tabs_head] [tab_title]Ingredients[/tab_title] [tab_title]Nutrition[/tab_title] [/tabs_head] [tab]

    • 1 pound cod fish
    • 3 cups chopped broccoli
    • 1/2 cup long grain rice, uncooked
    • 1-1/2 cups chicken stock
    • 1 can french-fried onions, divided
    • 1/2 cup shredded cheddar cheese
    • 1 tbsp Parmesan cheese, shredded
    • 1/4 tsp Italian seasoning
    • 1/4 tsp garlic powder
    • 1/4 tsp paprika

    [/tab] [tab]Yield: 4 servings

    Amount Per Serving: (1 serving = 1 cup)

    • Calories: 392
    • Fat: 16 g (6 g saturated fat)
    • Cholesterol: 81 mg
    • Sodium: 722 mg
    • Carbohydrate: 31 g
    • Fiber: 2g
    • Protein: 29 g

    [/tab] [/tabs]

    Directions:
    [tabs type=”horizontal”] [tabs_head] [tab_title]Step by Step Method[/tab_title] [tab_title]Serving Suggestions[/tab_title][/tabs_head] [tab]

    Step 1

    Take a large saucepan, add chicken stock and rice to it.

    Step 2

    Bring to a boil.

    Step 3

    Season with Italian seasoning and garlic powder. Mix well.

    Step 4

    Transfer rice to a greased 11×7-inch baking dish.

    Step 5

    Cover the dish and bake at 375 degree F for 10 minutes.

    Step 6

    Now stir in the broccoli, half of the onions and Parmesan cheese.

    Step 7

    Place fish over it.

    Step 8

    Sprinkle with paprika powder.

    Step 9

    Cover again and bake another 20 minutes or until the fish flakes easily with a fork.

    Step 10

    Uncover the dish. Top with cheddar cheese and remaining onions.

    Step 11

    Return to the oven and bake 3 minutes longer or until cheese is melted and bubbly. Baked Fish and rice is ready to serve. ENJOY!

    [/tab] [tab]

    Serve with [/tab] [/tabs]
    If you like Baked Fish and rice recipe and make it then let me know your feedback by commenting below.

  • Appetizer Artichoke Bread Recipe

    Appetizer Artichoke Bread is an easy to make Italian Appetizer. French bread coated with a creamy artichoke spread and baked until hot and bubbling. This bread can be served as an appetizer or alongside soup. Everyone will enjoy. Check it out the Appetizer Artichoke Bread Recipe here!!

    [one_third] Prep Time: 25 minutes[/one_third] [one_third]Cook Time: 25 minutes[/one_third] [one_third_last] Servings: 12[/one_third_last]

    [review]

    [tabs type=”horizontal”] [tabs_head] [tab_title]Ingredients[/tab_title] [tab_title]Nutrition[/tab_title] [/tabs_head] [tab]

    • 1 loaf french bread, unsliced
    • 1 jar (6-1/2 oz) marinated artichoke hearts, drained and chopped
    • 4 garlic cloves, minced
    • 2 cups shredded Monterey Jack cheese
    • 1 cup shredded cheddar cheese
    • 1-1/2 cups sour cream
    • 1/2 cup butter, melted
    • 1/4 cup grated Parmesan cheese
    • 2 tbsp sesame seeds
    • 2 tbsp minced fresh parsley
    • 2 tsp lemon-pepper seasoning

    [/tab] [tab]Yield: 12 servings

    Amount Per Serving: ( 1 serving = 1 slice)

    • Calories: 321
    • Fat: 22 g (13 g saturated fat)
    • Cholesterol: 59 mg
    • Sodium: 550 mg
    • Carbohydrate: 20 g
    • Fiber: 1 g
    • Protein: 10 g

    [/tab] [/tabs]

    Directions:
    [tabs type=”horizontal”] [tabs_head] [tab_title]Step by Step Method[/tab_title] [tab_title]Serving Suggestions[/tab_title][/tabs_head] [tab]

    Step 1

    Cut french bread in half lengthwise.

    Step 2

    Hollow out and leaving 1/2-inch shells. Keep aside.

    Step 3

    In a food processor, add removed bread. Cover and process until crumbly.

    Step 4

    Take a large bowl, mix together the bread crumbs, sour cream, butter and sesame seeds.

    Step 5

    Spread this mixture onto a baking sheet.

    Step 6

    Broil 4 inch. from the heat for 8 minutes or until lightly browned.

    Step 7

    Place crumb mixture, cheeses and artichokes in a large bowl.

    Step 8

    Sprinkle with garlic and parsley. Season with lemon-pepper.  Mix until well combined.

    Step 9

    Spoon cheese mixture into the bread shells.

    Step 10

    Arrange bread slices on a baking sheet. Bake at 350 degree F, for 25 minutes or until golden brown.

    Step 11

    Cut into slices. Appetizer Artichoke Bread is ready to serve. ENJOY!!

    [/tab] [tab]

    • Serve warm with grilled meat.

    [/tab] [/tabs]

  • Antipasto Bread Recipe

    A flavorful Italian bread that makes an excellent “finger-food” appetizer. Easy to make and tasty too. Check it out the Antipasto Bread recipe here!!

    [one_third] Prep Time: 10 minutes[/one_third] [one_third]Cook Time: 20 minutes[/one_third] [one_third_last] Servings:8[/one_third_last]

    [review]

    [tabs type=”horizontal”] [tabs_head] [tab_title]Ingredients[/tab_title] [tab_title]Nutrition[/tab_title] [/tabs_head] [tab]

    • 1 loaf (1 pound) Italian bread, unsliced
    • 8 thin slices hard salami
    • 4 plum tomatoes, thinly sliced
    • 1 carrot, finely chopped
    • 1 green pepper, finely chopped
    • 1 celery rib, finely chopped
    • 1 onion, finely chopped
    • 2 cups shredded Italian cheese blend
    • 1/2 cup chopped pitted green olives
    • 1/2 cup prepared pesto
    • 3 tbsp olive oil, divided
    • 1 tsp minced garlic

    [/tab] [tab]Yield: 8 servings

    Amount per serving.

    • Calories:389
    • Fat: 22 g (7 g saturated fat)
    • Cholesterol: 25 mg
    • Sodium: 838 mg
    • Carbohydrate: 35 g
    • Fiber: 3 g
    • Protein: 14 g

    [/tab] [/tabs]

    Directions:
    [tabs type=”horizontal”] [tabs_head] [tab_title]Step by Step Method[/tab_title] [tab_title]Serving Suggestions[/tab_title][/tabs_head] [tab]

    Step 1

    Cut bread in half lengthwise then cut in half width wise.

    Step 2

    Place cut side up in a foil-lined baking dish. Brush with 2 tbsp olive oil. Bake at 450 degree F, for 8 minutes or until lightly browned.

    Step 3

    Meanwhile, heat remaining oil in a small skillet. Add carrot, green pepper, celery, onion and garlic. Saute for 5 minutes or until crisp-tender. Spread pesto over the bread.

    Step 4

    Arrange salami, tomatoes, carrot mixture and olives over the bread. Sprinkle with cheese.

    Step 5

    Bake for 10 minutes or until cheese is melted. Cut each piece of bread in half. Antipasto Bread is ready now. Serve warm.

    [/tab] [tab]

    • Serve with with tomato relish and cold shrimp salad.

    [/tab] [/tabs]

  • Creamy Herbed Chicken Recipe

    [box type=”shadow”][dropcap]M [/dropcap]

    ake the best Creamy Herbed Chicken with this easy recipe. Check it out Creamy Herbed Chicken recipe here:

    [/box]

    [one_third] Prep Time: 5 minutes[/one_third] [one_third] Cook Time: 4 hours[/one_third] [one_third_last] Servings: 4[/one_third_last]

    [review]

    [tabs type=”horizontal”] [tabs_head] [tab_title]Ingredients[/tab_title] [tab_title]Nutrition[/tab_title] [/tabs_head] [tab]

    • 4 boneless skinless chicken breast halves
    • 1 can (10-3/4 ounces) condensed cream of chicken soup, undiluted
    • 1 envelope garlic and herb pasta sauce mix
    • 1 cup milk
    • 1 tsp dried thyme
    • 1 tsp dried parsley flakes
    • hot cooked fettuccine

    [/tab] [tab]Yield: 4 servings

    Nutritional information is not yet available. [/tab] [/tabs]

    Directions:
    [tabs type=”horizontal”] [tabs_head] [tab_title]Step by Step Method[/tab_title] [tab_title]Serving Suggestions[/tab_title][/tabs_head] [tab]

    Step 1

    Place chicken in a 3-qt. slow cooker.

    Step 2

    In a bowl, combine together the sauce mix, soup, milk, thyme and parsley. Pour this mixture over the chicken. Cover and cook on low for 4 hours or until chicken is tender and all juices run clear. Creamy Herbed Chicken is ready to serve. ENJOY!!
    [/tab] [tab]

    • Serve over fettuccine.[/tab] [/tabs]
  • Grilled Italian Chicken Recipe

    Grilled Italian Chicken _ This moist, tender chicken grills up in just minutes with only two ingredients. Marinate chicken in Italian-style dressing and grill. It’s simple, delicious and mouthwatering.

    Italian Grilled  Chicken
    Photo: Grilled Italian Chicken Recipe

    Check it out Grilled Italian Chicken recipe here:

    Ready In: 25 minutes
    Prep Time: 15 minutes
    Cook Time: 10 minutes

    This recipe make 8 serving(s).

    Ingredients:

    • 8 skinless, boneless chicken breast halves
    • 1 (8 ounce) bottle Italian salad dressing
    • 3 tbsp teriyaki sauce

    Method:

    • In a small bowl, mix together salad dressing and teriyaki sauce. Reserve 1/4 cup for basting. Cover and refrigerate.
    • Place chicken and remaining marinade in a large resealable bag. Seal bag and shake to coat.
    • Place in the refrigerate for 8 hours or overnight, turning occasionally. Drain and discard marinade.
    • Preheat grill over medium heat.
    • Grease the grate with cooking spray.
    • Grill chicken on each side for 3 minutes.
    • Baste with reserved marinade.
    • Grill 3-4 minutes longer on each side or until chicken is tender and all juices run clear.
    • Grilled Italian Chicken is ready to serve.
    • Enjoy!!