In this recipe, fish tikka is prepared on a hot griddle or pan _ A new style of a classic fish Tikka. This Fried Fish Tikka is a great appetizer or side dish to complement the main course. Give this recipe a try, you’ll love it!!
Photo: Fried Fish Tikka Recipe
Check it out the Fried Fish Tikka Recipe here!!
Prep Time:10 minutes + marination
Cook Time:15 minutes
Servings: 4
Difficulty Level: Easy
Ingredients:
1 kg white fish fillets, cut into 2 inch cubes
1/2 cup oil
1/2 cup plain yogurt
2 tablespoon fresh cream
2 tablespoon garlic paste
2 tablespoon ajwain
2 tablespoon garam flour (besan)
2 tablespoon lemon juice
2 tablespoon green chutney
2 teaspoon cumin powder
2 teaspoon garam masala
2 teaspoon red chili powder
Salt To Taste
Directions:
Step 1
Wash fish and pat dry.
Step 2
Cut into 2 inch cubes.
Step 3
In a small bowl, mix together the all ingredients except oil.
Step 4
Pour this mixture over the fish pieces.
Step 5
Turn to coat evenly. Cover and marinate for 4 hours to blend flavors (for better result marinate overnight).
Step 6
Heat oil in a pan over medium heat.
Step 7
Fry fish for 4 minutes on each side or until crispy and golden brown.
Step 8
Remove from the oil and transfer into a serving platter.
Step 9
Garnish with lemon wedges.Delicious Fried Fish Tikka is ready to serve. ENJOY!!
Serving Suggestions:
Serve with Ring Onion and Chutney.
If you like Fried Fish Tikka Recipe and make it then let me know your feedback by commenting below.
This gorgeous pudding has a taste of vanilla and chocolate in it. Rather then traditional pudding, hot Chocolate Pudding with Vanilla Custard can delightedly serve at the end of meal. Discover the Hot Chocolate Pudding Recipe
Photo: Hot Chocolate Pudding Recipe
Check it out the Hot Chocolate Pudding Recipe here!!
Prep Time:20 minutes
Cook Time:45 minutes
Servings: 4
Ingredients
For Chocolate Pudding:
2 cups milk
1/2 cup sugar
4 eggs
2 tbsp plain flour
2 tbsp cocoa powder
1/2 tsp vanilla essence
For Vanilla Custard:
1 cup milk
1/2 cup fresh cream
2 tbsp sugar
1 tbsp vanilla custard powder
few drops of vanilla essence
Directions:
For Chocolate Pudding:
Preheat oven to 180 degree C.
Pour milk in a saucepan.
Bring to a boil, add cocoa powder and sugar.
Stir well.
Cook for 5 minutes or until sugar has dissolved.
Remove from the heat and keep aside.
In a large bowl, beat eggs for 3-4 minutes or until fluffy.
Stir in vanilla essence.
Now add boiled milk mixture.
Beat well.
Also add flour and mix well.
Now bake in the preheated oven for 30 minutes.
For Vanilla Custard:
In a saucepan , add milk and sugar.
Bring to a boil and cook for 2-3 minutes.
Then stir in vanilla essence.
Dissolve vanilla custard in 2 tbsp milk.
Gradually pour custard mixture into the sauce.
Keep stirring.
Cook for 5 minutes or until thickened.
Remove from the heat and take it out in a serving bowl.
Hot chocolate pudding with vanilla custard is ready to serve.
Enjoy!
Serve as a dessert after any meal.
If you like Hot Chocolate Pudding Recipe and make it then let me know your feedback by commenting below.And if you know more innovative ways in which we can utilize this sweet and mouth watering Hot Chocolate Pudding , do share with us and we would be glad to give it a try.
Tasty party food or delicious Chicken Curry. This Brown Chicken with Pepper is sure to please.Serve with jasmine or brown rice and stir-fried or steamed veggies. Must Try this Brown Chicken with Pepper Recipe and don’t forget to share your experience with us!!
Photo: Brown Chicken with Pepper Recipe
Check it out the Brown Chicken with Pepper Recipe here!!
Clean and wash chicken and marinate it with salt, black pepper, and turmeric powder for 1 hour.
Step 2
Heat oil in a deep pot over moderate heat.
Step 3
Add onion, cloves and fry for one minute then add garlic to this and fry for 1 minute again.
Step 4
Now add to this coriander and tomatoes.
Step 5
Cook for 5 minutes or until oil floats on top.
Step 6
Then add chicken, curry patha and 1 cup of water cook for few minutes.
Step 7
Dish it out. Brown Chicken with Pepper is ready to serve.
[/tab] [tab]
Serve with steamed vegetables, brown rice.
[/tab] [/tabs]
If you like Brown Chicken with Pepper recipe and make it then let me know your feedback by commenting below.And if you know more innovative ways in which we can utilize this mouthwatering Brown Chicken with Pepper, do share with us and we would be glad to give it a try.
Amritsari Fish is a popular street snack and Restaurant style starter fried Fish. Fish chunks marinated in spices and then deep fried; sprinkled with chaat masala.
It’s a tasty spicy fried fish that is sure to get you drooling.You can make this Amritsari Fish Recipe for lunch box,dinner any special occasion.Highly recommended to seafood lovers so, must try out and be the first to comment on this Amritsari Fish recipe!
Clean, wash and cut fish into one and a half inch size cubes.
Step 2
Apply salt, lime juice, ginger paste, garlic paste and red chilli powder. Keep aside for 20 minutes.
Step 3
Make a batter of gram flour, curd, egg, ajwain, salt and water.
Step 4
Keep marinated fish pieces dipped in this batter for 15 minutes.
Step 5
Heat oil in a karahi (wok) and deep fry the fish till golden brown and crisp.
Step 6
Sprinkle chaat masala over it and garnish with lemon wedges. Amritsari Fish is ready to serve.
[/tab] [tab]
Serve Amritsari fish hot with Chutney.
[/tab] [/tabs]
If you like Amritsari Fish Recipe and make it then let me know your feedback by commenting below.And if you know more innovative ways in which we can utilize this spicy and tasty Amritsari Fish, do share with us and we would be glad to give it a try.
Love Chicken Kababs?? Here is super simple and mouthwatering “must-try” Reshmi Kebab Recipe. Bite size pieces of chicken are marinated in a fresh and flavourful spicy creamy sauce. You can grill the kababs on skewers in your oven or barbecue grill. In BBQ party where you make beef, mutton or lambs’ tikka, steak or kababs dishes, there You want to include minimum one white meat BBQ dish also. This reshmi kebab will be one of a flavorful addition of your BBQ party.
Don’t hold back that eager cook inside you. Just put on that apron and let me teach you how to make deliciously perfect Reshmi Kebab.
Don’t worry if you don’t have an oven or grill. You can also make these Reshmi kebab on stove by following this step by step recipe.
Eid-ul-Adha does not complete with out BBQ dishes. Especially most eaten and enjoying Mutton tikka is everyone’s favorite dish. Here is a wonderful Mutton Baked Tikka recipe for your BBQ party just check it out.
Molten Lava cakes also known as chocolate lava cakes. They are rich individual chocolate cakes with oozing molten centers. Try this Molten Lava Cakes recipe and make these rich and impressive single-serving chocolate cakes.Decadent and delicious, these are the ideal dessert for any Special Occasion.
This rich and decadent Chocolate mousse cake is the ultimate CHOCOLATY DELIGHT.Chocolate cake with chocolate moussefilling and topped off with dark chocolate ganache. Must Try this Chocolate Mousse Cake recipe; everyone will think you bought it at a bakery!
Photo: Chocolate Mousse Cake Recipe
Check it out the Chocolate Mousse Cake Recipe here!!
In a large bowl, mix together sugar, flour, cocoa powder, baking powder and salt.
Step 4
Add milk, eggs, oil and vanilla. Stir with spatula for few minutes or until the batter is smooth and no lumps remain.
Step 5
Now add baking soda and mix well.
Step 6
Stir in the boiling water.
Step 7
Pour batter equally into prepared baking pans.
Step 8
Bake in the preheated oven for 30-35 minutes or until a tooth-pick inserted in the center comes out clean.
Step 9
Let it cool for 10 minutes then remove from the pans
to wire racks.
Step 10
Allow to cool completely.Chocolate Cake Sponge is ready 🙂
To Make The Chocolate Mousse:
Meanwhile cake is oven, let’s prepare the Chocolate Mousse.
Step 1
Place heavy cream in a large bowl. Beat for 10-12
minutes or until it forms stiff peaks.
Step 2
Place in the refrigerator until set.
Step 3
Take a small bowl, add egg yolk and sugar in it. Beat 3-4 minutes or until it becomes thick and pale in color and the sugar fully dissolved.
Step 4
Keep aside.
Step 5
Take a small pan and fill it with an inch of water.
Step 6
Bring it to a simmer.
Step 7
Place a small heat-proof bowl over the saucepan.
Step 8
Add the chocolate, water, and butter. Stir and cook on very low heat for few minutes or until the chocolate is melted.
Step 9
Spoon 1/4 of the chocolate mixture into the egg yolk
mixture. Stir until well combined.
Step 10
Pour the egg yolk mixture back into the small bowl over the simmering water in the saucepan with the remaining chocolate mixture.
Step 11
Stir in the vanilla extract.
Step 12
Keep stirring and cook over low heat for 2-3 minutes or until the mixture thickens.
Step 13
Let it cool for few minutes; stirring frequently.
Step 14
Place egg whites in another small bowl. Beat until it forms stiff peaks.
Step 15
Fold the egg white in the cooled chocolate mixture.
Step 16
Now fold into the whipped heavy cream.
Note: Be careful not to over mix otherwise the heavy cream will lose its texture.
To Assemble The Cake
Step 1
Cut the top dome texture of the cake sponges. This will help you to get a flat and even surface.
Step 2
Arrange the bottom layer of the cake in the spring form pan.
Step 3
Pour the thick chocolate mousse over the cake sponge.
Step 4
Spread evenly with a spatula.
Step 5
Now cover the pan with cling wrap or any plastic covering.
Step 6
Place the pan in the refrigerator for 20 minutes or until set.
Step 7
Remove the pan and gently place the second cake sponge on top of the mousse.
Step 8
Cover again and keep in the refrigerator for 30 minutes or until firm or set.
To Make Chocolate Ganache
Step 1
Place the chocolate in a medium bowl.
Step 2
Heat the heavy cream in a small sauce pan over medium heat.
Step 3
Bring just to a boil.
Step 4
When the cream has come to a boil, immediately pour over the chopped chocolate and stir until smooth.
Step 5
Stir in the 1/2 teaspoon of vanilla essence.
Step 6
Let it cool slightly.
Step 7
When cool, pour the chocolate ganache in the the center of the cake, it will slowly spread itself.
Step 8
Finally, cover the cake and refrigerate overnight or until the cake sets.
To Decorate The Chocolate Mousse Cake:
Step 1
When the cake has set, decorate the cake with chocolate curls and hazelnuts or walnuts.
Step 2
Slide the cake out of the pan and transfer to a cake plate. Mouthwatering Chocolate Mousse Cake is ready to eat!! ENJOY 😉
[/tab]
[tab]
Tip To Assemble the Cake: You will need a spring-form pan or a cake ring to hold everything neatly as the cake sets. So that you can later easily un-mold your cake once the mousse has set without ruining the delicate layers. If you don’t have a spring-form or cake ring, you can do this in a regular pan, make sure it is the same size as your cake. Serving out of a regular pan can be a bit tricky though as it will be hard to lift out the cake neatly with that soft creamy mousse in the middle.
Tip To Make Chocolate Mousse: If you want the mousse layer to show neatly and evenly through the cake, take an offset spatula or cut out a small rectangular piece off a tetra pack or hard paper and run it over the mousse around the circumference of the cake to remove the excess mousse, and give it a smoother finish.
Tip To Decorate The Cake: You can top the cake with whipped cream, cherries any type of nuts or leave it as is.
Tip To Make Chocolate Ganache: While making Chocolate ganache,don’t over boil the cream because if it boils for a few seconds, it will boil out of the pot.
Tip To Make Thicker Ganache: If you want a thicker consistency for piping the ganache, just let it cool for a longer time.
[/tab]
[tab]
Serve as a dessert after any meal or birthday party or any other special occasion.
[/tab] [/tabs]
If you like Chocolate Mousse Cake recipe and make it then let me know your feedback by commenting below.
Here is a different taste of Gulab Jamun made with khoya(ricotta cheese) and coating with almonds and pistachios give them a delicate look.
Treat your sweet tooth with this dessert and delight everyday by just following my Gulab Jamun recipe with khoya.
Soft, spongy and melt in mouth gulab jamuns drenched in syrup is a traditional homemade sweet. This is a very easy Gulab Jamun Recipe with Khoya. You just need few ingredients and within 30 minutes you can make super easy and dooper delicious Gulab Jamuns.
Photo: Gulab Jamun Recipe with Khoya
If you have any question about this Gulab Jamun recipe with Khoyathen you can ask by using comment box and we will clarify your confusion.
Check it out the Gulab Jamun recipe with Khoya here!!
In a large bowl add khoya, plain flour , baking powder and cardamom powder and mix well.
Step 2
Knead to a firm dough without using any water.
Step 3
Divide into 25 equal portions and shape into small balls.
Step 4
These should have no cracks on the surface as otherwise the gulab jamuns will crack while frying.Keep aside.
Step 5
Heat oil or ghee in a deep pan over medium low heat.
Step 6
Deep fry prepared balls on a low flame for 10-12 minutes or until golden brown.
Step 7
As the balls turn golden brown, remove them from the oil and immerse in the warm sugar syrup for 30 minutes.
Step 8
After that transfer into the serving dish.
Step 9
Sprinkle chopped almonds and pistachio over the top. Gulab Jamun with khoya is ready to serve.
[/tab][tab]
No doubt, frying these gulab jamuns is an art in itself, stove flame should be sufficiently low so that the sweets get completely cooked till the inside!
[/tab][tab]
Serve as a dessert after any meal.
[/tab] [/tabs]
Here are some of the Gulab Jamun Recipes We’ve shared (click on the Recipe Name to get the recipe) !
Boneless Chicken Handi is a rich, luscious creamy chicken curry. Boneless chicken in creamy gravy is fabulous in itself but when you make this is a traditional clay pot it literally takes the recipe to a next level. It is best enjoyed on a chilly winter night with hot and crispy tandoori rotis, butter naan or roghani paratha.
Photo: Boneless Chicken Handi Recipe
Check it out the Boneless Chicken Handi Recipe here !!
Murgh Musallam is a specialty of Pakistani cuisine. You can try this Chatkhara Murgh Musallam Recipe without any hesitation to get perfect result. Goes great with French fries and mint dip.
Bismillah, let’s begin!
Check it out the Chatkhara Murgh Musallam Recipe and printable version below!
Murgh Musallam is a specialty of Pakistani cuisine. You can try this Chatkhara Murgh Musallam Recipe without any hesitation to get perfect result.
Prep Time 10 minutesminutes
Cook Time 50 minutesminutes
Total Time 2 hourshours
Servings 5
Author Bushrah | Recipestable
Ingredients
1whole chicken
1ground onion
250gm yogurt
1/2cupoil
1/2cuplemon juice
10green chilies
2tspcarom seedsroasted & crushed
2tspcumin seedsroasted & crushed
2tspred chili powder
1tspgarlic powder
1tspginger powder
1/2tspground nutmeg
1/2tspground mace
salt according to taste
Instructions
In a small bowl, combine together carom seeds, cumin seeds, ginger powder, garlic powder, salt, nutmeg, mace, chili powder and lemon juice.
Apply this paste over the whole chicken.
Marinate for 1 hour.
Heat oil in deep pan.
Add copped green chilies and fry for 1 minute.
Now add marinated chicken and fry well from both sides for 10 minutes or until its change colour.
Add yogurt and ground onion.
Stir well.
Reduce heat to low and cook for 30 minutes or until chicken is tender
Cook on high flame for 5 minutes or until all water dries up.
Transfer into a serving dish.
Chatkhara Murgh Musallam is ready to serve. ENJOY 🙂
Notes
Serving Suggestions: Serve with fried chips and dipping sauce.
I have also posted Steam Chicken Chargha which is another easiest & tastiest version of making Chicken Roast. Do check it out as well.
[divide icon=”circle”]
Put your own spin on it. And lemme know how it turns out. Post a photo on Facebook (Recipestable) or on Twitter so I can see how lovely yours turn out.
[divide icon=”circle”]
Happy Cooking!!
If you like this post, Please Subscribe to my blog and let me know your feedback by commenting below.. I have lots more recipes to share with you.
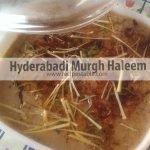
Haleem is a world famous food prepared during Ramadan or Eid Season. This is a slow cooked stew made with meat and lentils.
Did you know? Hyderabadi Murgh Haleem is a distinct variant of Haleem originating in Hyderabad in South India.It is a popular dish during the Ramadan. It is a tradition to break the daily fast (roza) at Iftar with a plateful of haleem.
Photo: Hyderabadi Murgh Haleem Recipe
Lentils and chicken are the star ingredients of this flavorful dish. I wouldn’t say its the most authentic way of making haleem. But its as close as it can. Very mouth-watering dish which is served with fried onion, chat masala, coriander, mint, ginger, green chili and lemon.
Photo: Hyderabadi Murgh Haleem Recipe
Try out this classic Hyderabad Murgh Haleem recipe.Very lips smacking recipe must try on Eid. If you have any question about this recipe then you can ask by using comment box and we will clarify your confusion.
Check it out the Hyderabadi Murgh Haleem Recipe and printable version below!!
Try out this classic Hyderabad Murgh Haleem recipe.Very lips smacking recipe must try on Eid.
Prep Time 2 hourshours
Cook Time 3 hourshours
Total Time 5 hourshours
Servings 8
Author Bushrah | Recipestable
Ingredients
1kgchicken bonelesscut into cubes
1kgcracked wheatsoaked in water for 2-3 hour then drained
1cupvegetable oil or ghee
1cupplain yogurt
2onionsfinely chopped
1tbspginger paste
1tbspgarlic paste
2tspgreen chili paste
2tspgreen coriander paste
2tbspLemon juice
3black cardamoms-seeds
1/2tspcinnamon powder
1tspred chili powder
1tbspsalt
1tspchat masala
For Garnishing
4-5green chiliesthinly sliced
1/2cupmint leaves
1-inchpiece of gingerthinly sliced
3-4lemon wedges
Instructions
Directions
In a bowl,add yogurt, lemon juice, green chili and coriander paste, cardamom and cinnamon powder, red chili powder, ginger-garlic paste &salt. Mix well and make a smooth paste.
Marinate the chicken in this mixture and leave 3-4 hours.
Add enough water to the wheat and cook till tender.
When cool enough to handle, blend to a paste in a blender.
Heat the oil and add the meat chicken mixture.
Turn around over high heat, till opaque.
Add 1 cup water in it,cook and covered over low heat till tender.
Add the wheat paste and continue to cook another 20 minutes.
Transfer into a serving bowl, sprinkle chat masala over the top.
Garnish with mint leaves,green chilies and ginger slices. Hyderabadi Murgh Haleem is ready to serve. ENJOY!
Notes
Serving Suggestions: Serve hot with naan.
If you like this Hyderabadi Murgh Haleem Recipe, Please Subscribe to my blog. I have lots more recipes to share with you. And If you make it then let me know your feedback by commenting below.
This is very easy and quick chicken recipe. Chicken Shashlik sticks always looks fancy on your table and believe me after chicken marinating it hardly takes 15 min
Bismillah, let’s begin!
Check it out the Chicken Shashlik Recipe and printable version below!
Chicken Shashlik sticks always looks fancy on your table and believe me after chicken marinating it hardly takes 15 min
Prep Time 20 minutesminutes
Cook Time 20 minutesminutes
Total Time 40 minutesminutes
Servings 4
Author Bushrah | Recipestable
Ingredients
500gm boneless chicken
4tbspoil
2green bell pepperscut into small cubes
2 tomatoescut into cubes
2onionscut into cubes
2tbsplemon juice
1tspgarlic powder
1tspmustard paste
1/2tspblack pepper
1/2tspsalt
6shashlik sticks
For Sauce
2clovesgarliccrushed
2cupschicken stock
1/2cuptomato ketchup
1tspred chili flakescrushed
1tspsugar
2green chilies
1tbspcorn flour
2tbspvinegar
salt to taste
2tbspoil
Instructions
Method
For Shashlik Sticks
Wash chicken and pat dry.
Cut chicken into bite size pieces.
Place chicken into a bowl, add green bell pepper, tomatoes, onions, garlic powder, mustard paste, black pepper, lemon juice and salt.
Mix well.
Thread equal proportion of chicken and vegetables into shashlik sticks.
Greased a grill pan with oil.
Grill Shashlik sticks on low heat for 8-10 minutes or meat is tender.
Shashlik Sticks are ready to serve
For Sauce
In a deep pan, add 2 tbsp oil and chopped garlic.
Cook for 1 minute or until brown.
Then add 2 cups of chicken stock, red chili flakes, green chilies, vinegar, sugar and tomato ketchup.
Bring to a boil and simmer for 2 minutes.
Then add corn flour dissolved in some water and stir together.
Remove from the heat and pour sauce over Chicken Shashlik.
Chicken Shashlik is ready to serve. ENJOY!
Notes
Serving Suggestions: Serve with Fried Rice.
I have also posted Shashlik Macaroniwhich is another easiest & tastiest version of making Shashlik. Do check it out as well.
[divide icon=”circle”]
Put your own spin on it. And lemme know how it turns out. Post a photo on Facebook (Recipestable) or on Twitter so I can see how lovely yours turn out.
[divide icon=”circle”]
Happy Cooking!!
If you like this post, Please Subscribe to my blog and let me know your feedback by commenting below.. I have lots more recipes to share with you.
Juicy and Tender Beef Satay TikkaJuicy and Tender Beef Satay Tikka recipeJuicy and Tender Beef Satay TikkaJuicy and Tender Beef Satay Tikka
Try this beef satay tikka recipe at your next BBQ party, the combination of honey and different spices give it an extra difference from your usual satay’s, its simple to make and requires few ingredients.
Shrimp, carrots, and spring onion are seasoned with chili sauce, oyster sauce and calamansi juice, then wrapped up tight, and deep fried to a golden brown finish.You could find this fab shrimp appetizer on a restaurant menu, but check out how easy it is to make at home !!
Photo: Shrimp Rolls Recipe
If you have any question about this Shrimp Rolls Recipe then you can ask by using comment box and we will clarify your confusion.
Love a bit of custard and fruit on your dessert? This triple flavored dessert is filled with ice cream, custard and fruit. This Ice Cream Fruit Custard has a wonderful taste and perfect to serve at any occasion.
Photo: Ice Cream Fruit Custard recipe
Check it out the Ice Cream Fruit Custard here !!
Prep Time: 1 hour + freezing
Cook Time:10 minutes
Servings:4
Ingredients
For Ice Cream
2 cups mango pulp
1 cup milk
1 cup condensed milk
1/2 cup sugar
1/2 cup lukewarm water
1 tsp gelatin powder
1 packet fresh cream
For Custard:
1/2 liter milk
1/2 cup sugar
1/2 tsp vanilla essence
2 tbsp strawberry custard
2 cups mixed fruit
1 cup whipped cream
Cherries as required
Directions:
To Make Ice Cream:Dissolve gelatin powder in water.Set aside.
Place mango pulp, milk, cream, gelatin, sugar and condensed milk in a blender.
Blend until smooth.
Then take it out in air tight box.
Place in the refrigerator for 6-8 hours or until freeze.
To Make Custard: Dissolve custard in 1/4 cup of milk.Pour remaining milk in a saucepan. Bring to a boil then add dissolve custard.
Stir constantly and cook for 4-5 minutes or until thicken.
Stir in vanilla essence.
Take it out in a serving dish and leave it for 1 hour or until cool.
Now add frozen ice cream.
Then spread mixed fruits over it.
Top with cream and cherries.
Ice Cream Fruit Custard is ready to serve.
Serve as a dessert after any meal.
If you like Ice Cream Fruit Custard Recipe and make it then let me know your feedback by commenting below.