Category: Breakfast Recipes

Discover hundreds of tasty Breakfast Recipes with photos, cooking tips and step by step instructions on how to make them.

  • Date-Filled Sandwich Biscuits Recipe

    Date-Filled Sandwich Biscuits Recipe

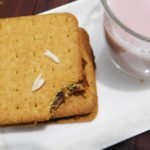
    Easy and impressive, these sandwich biscuits embellish store-bought whole wheat biscuits with a decadent three ingredient date-and-nutty spread that has a honey like sweetness and caramel overtones. Heavenly Delicious !

    A sticky and sweet date and nutty filling spread between Whole Wheat Fiber Rich Biscuits.

    Almost everyone enjoys having evening or morning tea with some light snacks. And if are a tea lover like me, cookies or biscuits would probably be your favorite tea companion. No matter which hot beverage you enjoy everyday, switching to healthy snacks is always a good idea for your health. I love digestive biscuits, but thanks to my sugar craving that persuaded me to turn these whole wheat slices into a delicious healthy treat to satisfy my sweet tooth.

    Why These Date-Filled Sandwich Biscuits are a smart choice

    • When you substitute dates for table sugar, you get a bunch of other nutrients along with your sugar! Sugar is just food that’s been stripped of all fiber, vitamins, and minerals, so why not make your treats sweet with something that actually provides all of those? Dates are high in calories, but unlike sugar, the calories obtained from dates come with a lot of nutritional properties.
    • Dates are rich in potassium, iron and other beneficial plant compounds. The high soluble fiber content helps in fighting off sugar cravings and stimulate the growth of healthy bacteria in the intestines. I prefer to use dates in dessert as a replacement for sugar.
    Date-Filled Sandwich Biscuits Recipe

    Enjoy the sweet, delicious taste of dates in these double-layered sandwich biscuits. This Date-Filled Sandwich Biscuits Recipe is very easy to follow, and the sandwich are a genuine treat that is hard to resist. These wholesome, healthy sandwich biscuits will quickly become one of your favorites. I use the word wholesome because they are made with whole wheat biscuits. Whole wheat provides more fiber. You will love the simplicity and the nutty flavor of these Hearty Date-Filled Sandwich Biscuits.

    Date-Filled Sandwich Biscuits Recipe

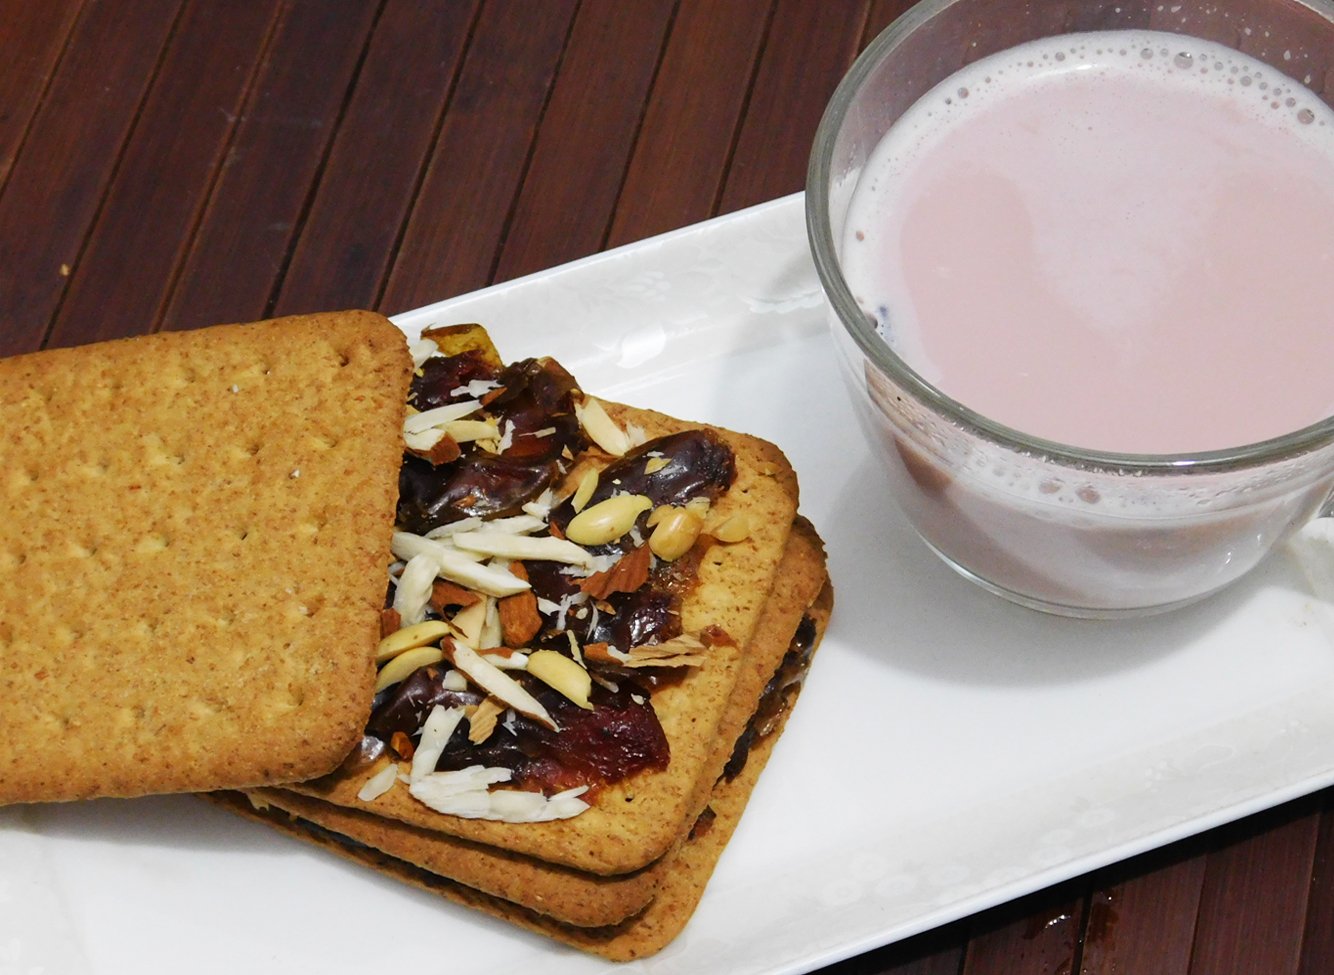
    They are perfectly sweetened with dates and make a great breakfast sandwich. As an added bonus, these healthy sandwich biscuits hold up perfectly when dunked in your hot beverage of choice. I enjoyed it with Kashmiri Green Tea. I know for sure that I’ll be experimenting more with dates in the future, but for now the best way I can think to eat them is squished between two Whole Wheat Sandwich Biscuits. Crunchy, soft, chewy and sweet. And they’re insanely good.

    Crunchy, soft, chewy Date-Filled Sandwich Biscuits. And they’re insanely good.

    Ingredients in Date-Filled Sandwich Biscuits Recipe?

    All you need Whole Wheat Pure Fiber Slices, pitted Medjool dates and nuts for topping. Surprisingly simple ?

    How to Make this Date-Filled Sandwich Biscuits:

    As I mentioned, these Date Filled Sandwich Biscuits are simple to make and they come together in no time at all.

    To make this sandwich biscuits, simply:

    1. First of all, smashed the dates with a fork. Medjool dates have a rich, almost caramel-like taste and a soft, chewy texture whereas regular dates and are easy to spread.
    2. Then arrange 4 whole wheat biscuits on a plate or sheet.
    3. Spread 3 smashed dates on each biscuit; sprinkle peanuts, almonds and pistachios and cover the sandwiches with remaining biscuits and enjoy 🙂
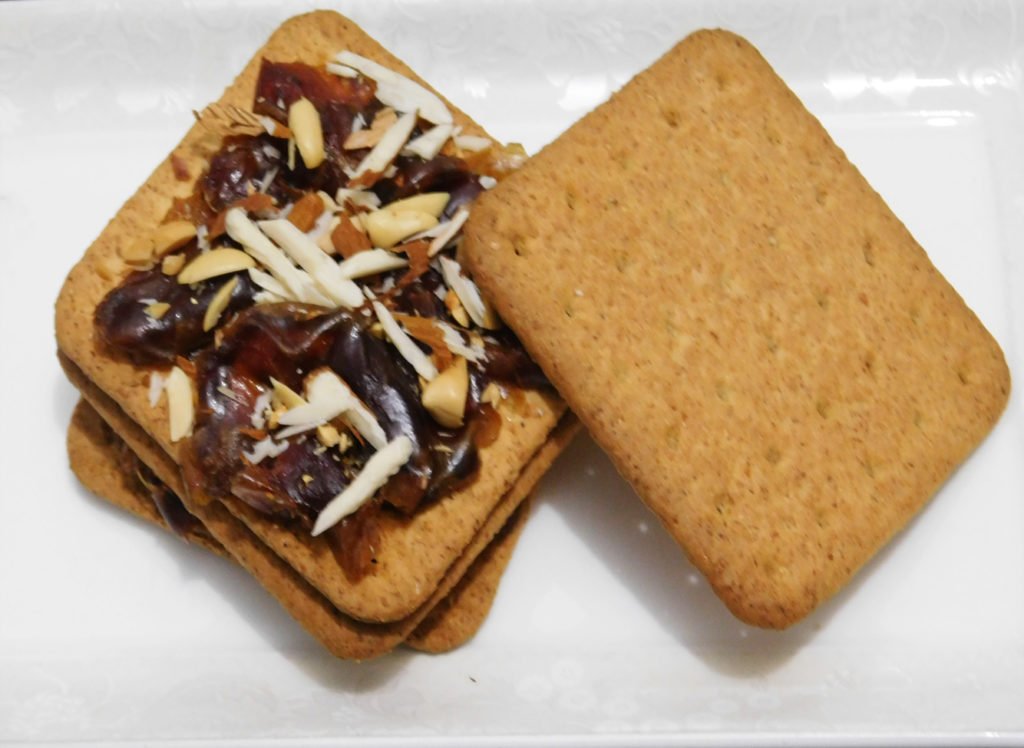
    Date-Filled Sandwich Biscuits Recipe

    Bismillah let’s get started.
    Check it out The Date-Filled Sandwich Biscuits and printable version here!!

    Date-Filled Sandwich Biscuits Recipe

    Enjoy the sweet, delicious taste of dates in these double-layered sandwich biscuits. This Date-Filled Sandwich Biscuits Recipe is very easy to follow, and the sandwich are a genuine treat that is hard to resist.
    Keyword biscuits, cookies, dates, dessert, healthy, kids friendly, Quick and Easy, Ramadan, sandwich, snack, sweet
    Prep Time 5 minutes
    Total Time 5 minutes
    Servings 4
    Author Bushra Waheed

    Ingredients

    • 8 Whole Wheat Pure Fiber Slices
    • 12 Medjool dates pitted
    • 2 tbsp chopped peanuts
    • 2 tbsp chopped almonds
    • 2 tbsp chopped pistachios

    Instructions

    • All you need to make these sandwich biscuits are dates, whole wheat slices or any cookies, nuts and a fork!
    • Smash dates with a fork.
    • Medjool dates have a rich, almost caramel-like taste and a soft, chewy texture whereas regular dates and are easy to spread.
    • Set aside.
    • Place 4 whole wheat biscuits on a plate or sheet.
    • Spread 3 smashed dates on each biscuit; sprinkle peanuts, almonds and pistachios and cover the sandwiches with remaining biscuits.
    • Serve immediately and enjoy 🙂

    Want more Healthy Snack Inspiration? 

    Here are some other healthy recipes on my blog:

    Hope that you all enjoy this one as much as I have!  Enjoy!
    Date-Filled Sandwich Biscuits Recipe

    Pin it For Later

    Enjoy the sweet, delicious taste of dates in these double-layered sandwich biscuits. This Date-Filled Sandwich Biscuits Recipe is very easy to follow, and the sandwich are a genuine treat that is hard to resist

    If you make this recipe, please let me know! Leave a comment, rate it, or snap a photo and tag it with #recipestable on Instagram!  I’d love to see your creations!
  • Lamb Corn Fritters Recipe

    Lamb Corn Fritters Recipe

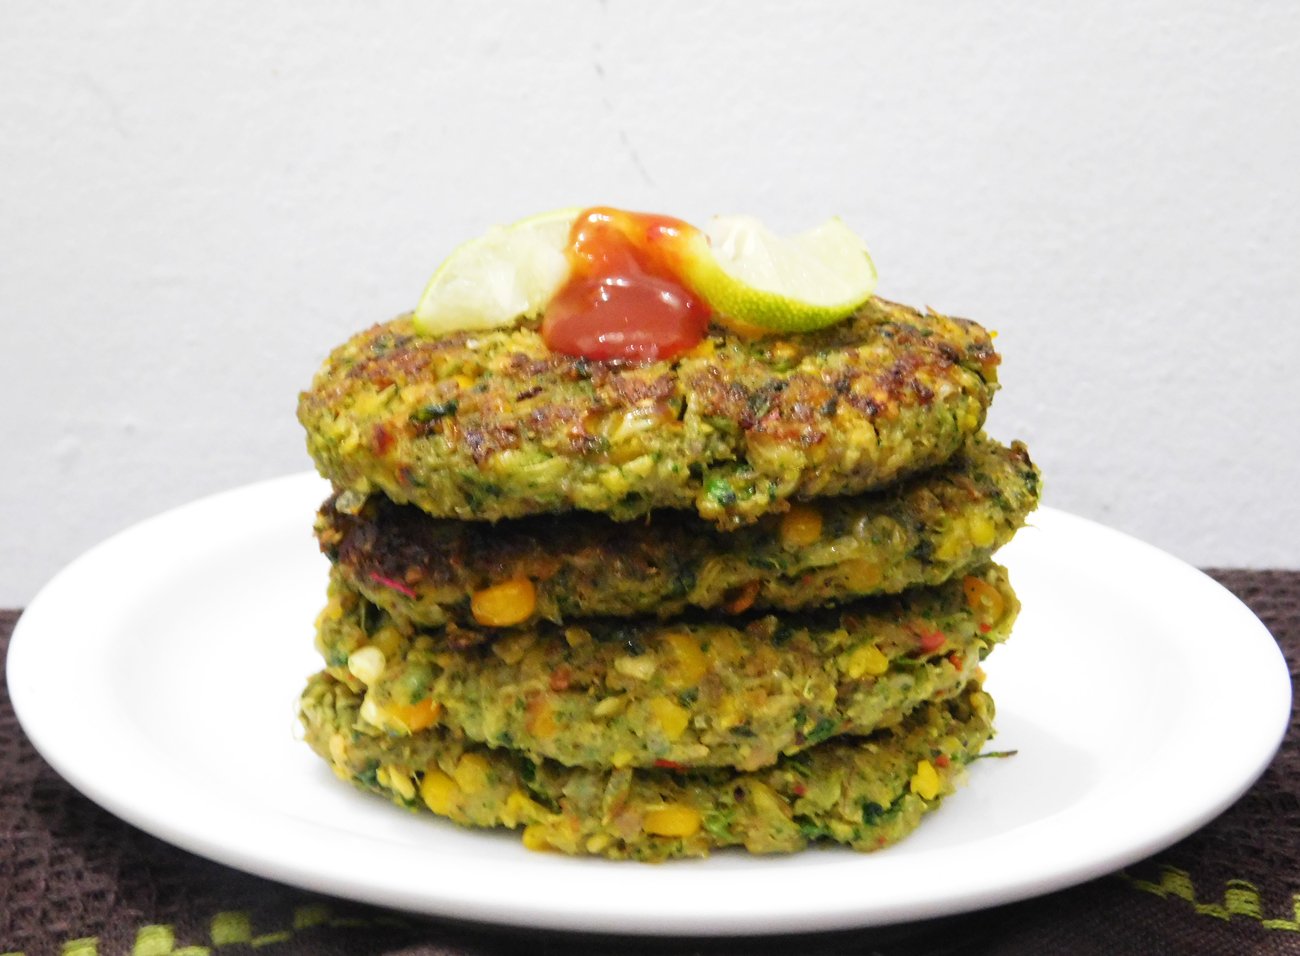
    Imagine if you will that a lamb meat patty married a corn fritter and they had babies = Lamb corn Fritters. I’m not sure why I hadn’t thought of this sooner. They are healthier than regular lamb fritters; being half meat and half veggie and they are super juicy and flavorful.

    Lamb Corn Fritters Recipe

    Here’s a healthy recipe for Lamb Corn Fritters – without deep frying! Because nobody likes soggy fritters. And nobody wants to deal with a vat of oil tonight! Dinner really doesn’t get any easier than this! These Lamb Corn Fritters are so easy, you can practically whip up these juicy fritters in no time!

    These fritters are ideal to make with fresh corn cut off the cob, but can be made with canned or frozen corn. Serve for breakfast, lunch, dinner!

    Lamb Corn Fritters Recipe
    Lamb Corn Fritters Recipe

    What you need to make really great, Lamb Corn Fritters

    Here’s what you need to make these Lamb Corn fritters:

    Ground Lamb: I like to grind my lamb at a ratio of about 80% lean. I feel this brings out the most flavor. The best places to buy fresh ground lamb is your local butcher shop. If you want to use lamb, ask your butcher to grind it for you or, to make your own ground lamb, start with a lean cut. You can also use lean ground beef or turkey instead.
    Corn: as noted above, fresh is better for both flavor and crispiness. But canned and frozen work too, you just need to make an effort to dry it out as much as you can.
    Egg: egg to bind the meat and corns. It will help to get mince to stick together better.
    Ricotta Cheese: – for a good hit of savory flavor AND to make the fritters extra juicy and flavorful!
    Green Masala: Green onion, green chilies and coriander – for a hit of freshness.
    Seasoning: salt, black pepper and red pepper flakes (my fav)
    Olive oil: to sauté

    Lamb Corn Fritters Recipe

    How to make Lamb Corn Fritters

    And here’s how to make them.

    1. Mixing: Place lamb mince and corn in a bowl. Then add 1 lb fresh ground lamb. 1 egg, finely sliced green chilies, green onions, fresh coriander, salt, black pepper, red pepper and 1 cup ricotta cheese. Mix until well combined. Let it rest for 15 minutes.
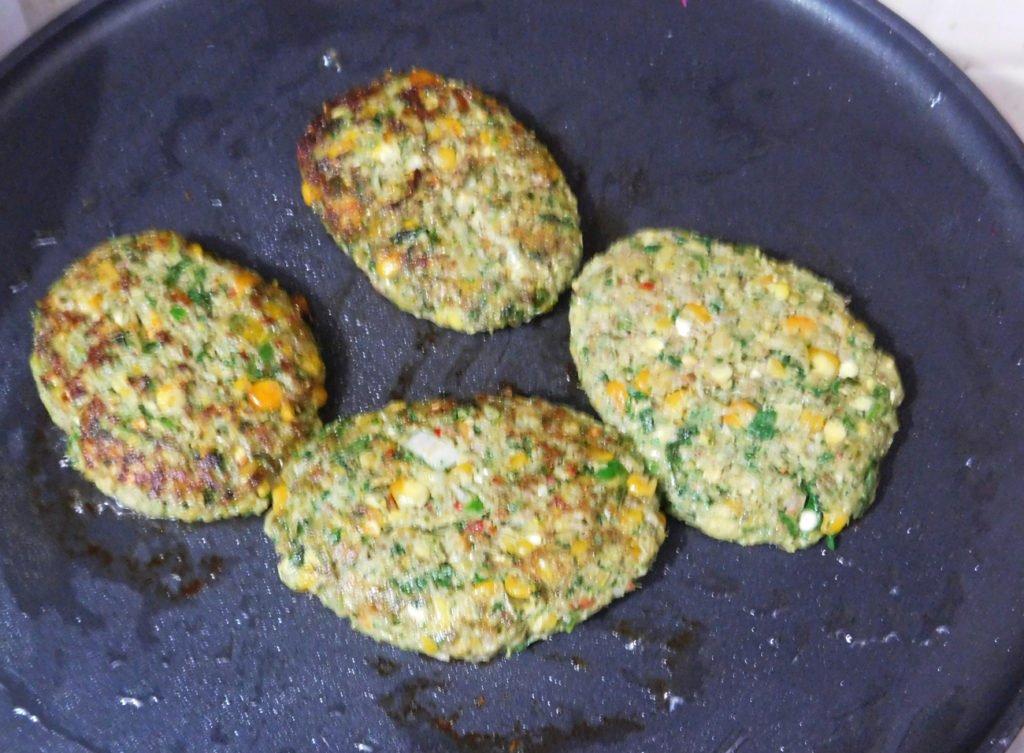
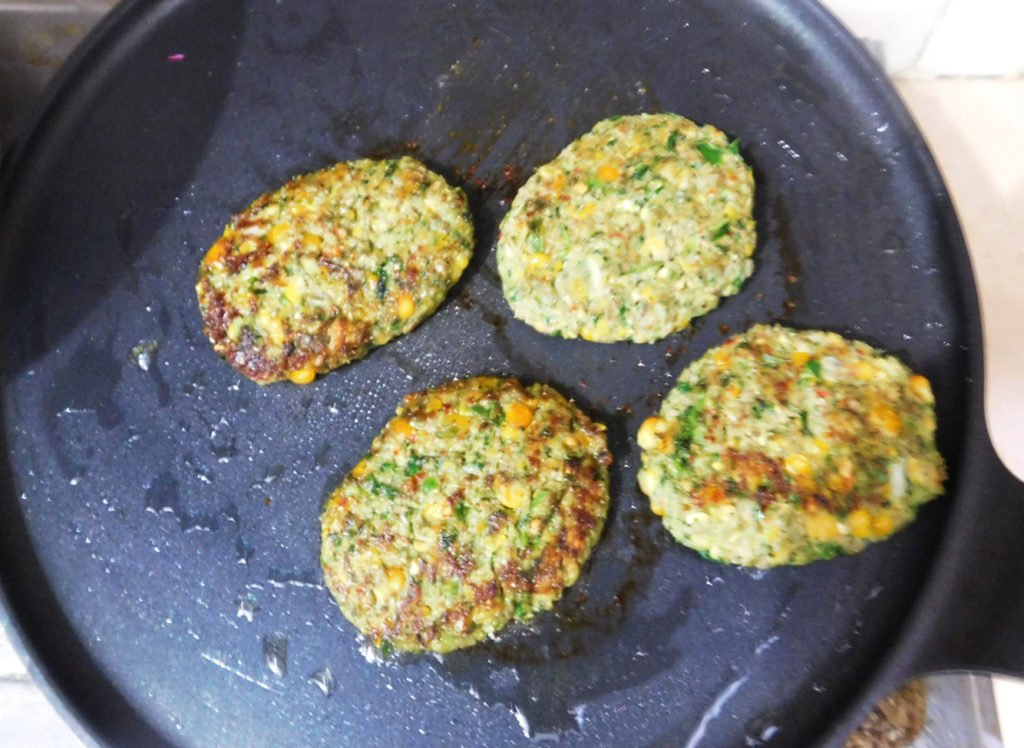
    2. Cooking: Heat a large non-stick skillet over medium heat and add 2 Tbsp. extra light olive oil. Place a heaping tablespoon of the mixture into your hand and form a oval or round shaped patty about 1/3-inch thick. Cook over medium heat uncovered for 5-7 minutes, then flip, cover and cook for another 5 minutes more or until meat cooked through. Add more oil to the pan as needed for subsequent batches.
    3. The fritters take a good 12-15 minutes to cook so they’re golden on the outside and for the raw meat to cook through (remember, these are fritters so they are not very thick).
    4. Pro Tip: You can use an ice cream scooper with a lever to scoop the batter into the pan. Then flatten using a greased spatula! But don’t crowd the skillet, adding more oil to pan if required.
    Lamb Corn Fritters Recipe

    How to serve corn fritters

    Corn fritters is one of those rare foods that truly spans the breakfast-lunch-dinner spectrum! Here’s how to serve it.

    Though having suggested those various ways to serve it, the reality is that you will want to snatch them fresh off the stove, before you’ve even had a chance to plate them up properly. And that’s totally ok too! – Bushra

    Lamb Corn Fritters Recipe

    Bismillah let’s get started.
    Check it out The Lamb Corn Fritters Recipe and printable version here!!

    Want more Fritters recipes? 

    If you’re looking for more fritters inspiration, here are a few more of my faves:

    Hope that you all enjoy this one as much as we have!  Cheers!

    HUNGRY FOR MORE? Subscribe to my newsletter and follow along on FacebookPinterest and Instagram for all of the latest updates.

    Pin it For Later

    Lamb Corn Fritters Recie
  • The Low-Carb Solution to Egg in a Hole Recipe

    The Low-Carb Solution to Egg in a Hole Recipe

    Can’t decide whether to make a grilled kabab or an egg in a hole? Make both!
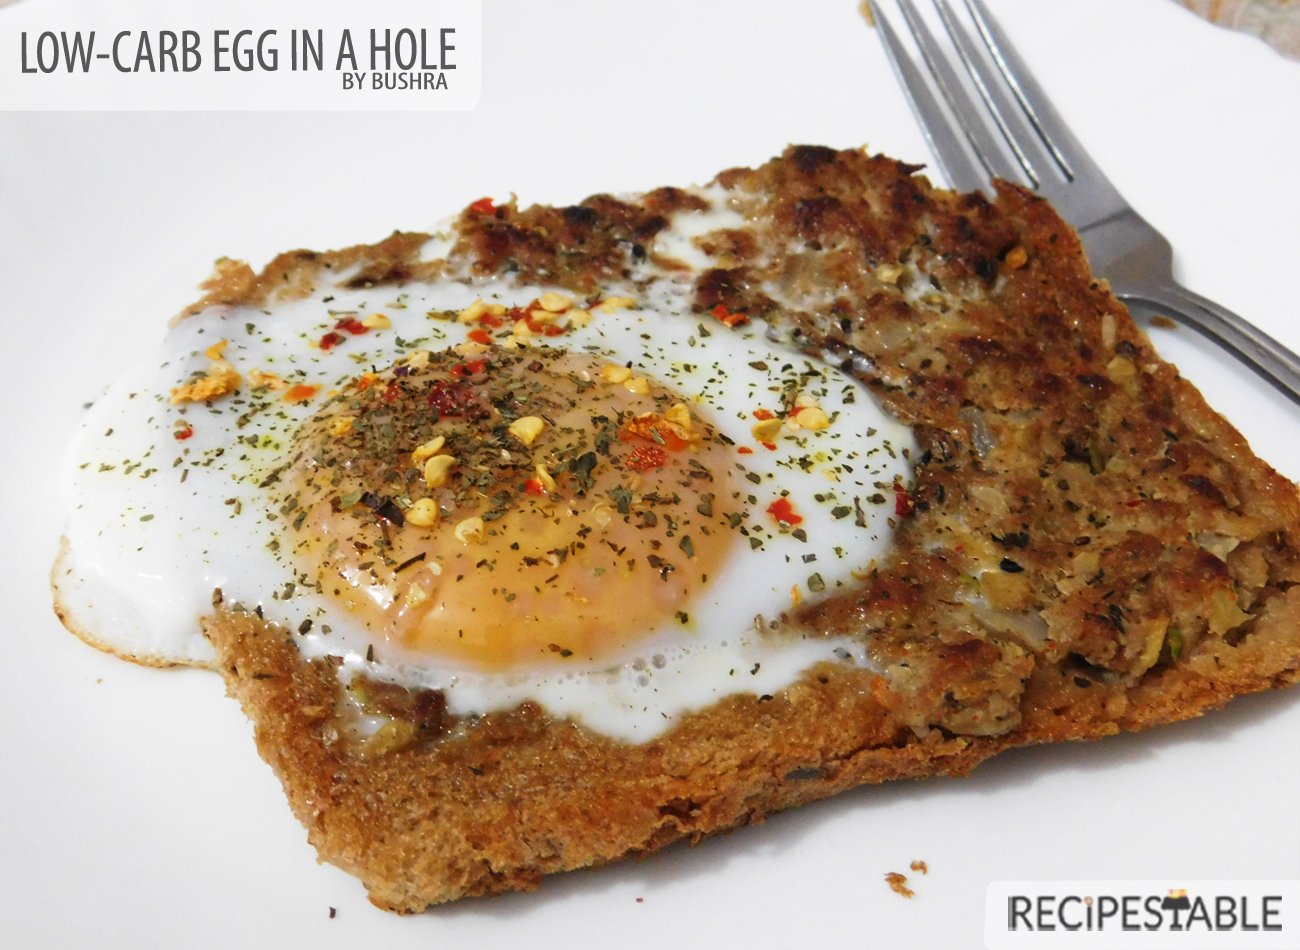
    Two of my favorite food groups—eggs and toast—unite in this take on the playful dish also known as egg in a hole, Egg in a Basket or Egg in a Boat or, more simply, egg in toast. I fancy it up by filling the bread center with mince crust and topping with basil or chili flakes. And It came out so delicious!

    Egg in-a-hole – Look at that perfect texture !!

    For this recipe, I used a normal mince kabab mixture for filling the bread , to keep it low carb. The outside was crunchy and crispy and inside was so juicy and tasted so good with the egg in the middle. A nice way to add some more protein to a sandwich, while also providing something of a sauce from the egg yolk (depending on how you cook your egg). It’s adds just a little oomph of flavor to the sandwich.

    Watch carefully as you cook the mince crust, and don’t raise the heat higher than medium: The goal is for the mince crust to brown and the egg to set simultaneously. Save the crust center for making breadcrumbs.

    Also how well the eggs must be cooked is a personal choice. Some like over easy, sunnyside up or completely cooked through. No matter how you make it, this will remain a favorite breakfast option passed on for many generations to come. When you make this cute breakfast-for-dinner recipe, you can vary it by using cheese, vegetables or sauteed Spinach in place of the mince filling.

    This Low-Carb Solution to Egg in a Hole Recipe can be an excellent addition to a healthy weight loss diet. They’re not only low-carb and low in calories but also high in protein and fiber that keep you feeling full.

    I’m really excited to share this recipe with you.
    So, Bismillah let’s get started and Check it out Low Carb Egg in a Hole Recipe and printable version here!!

    I have also posted Chocolate Date Bars recipe  and Vegetable Fried Brown Rice recipe which are another easiest & tastiest version of Healthy Eating. Do check it out as well.

    Put your own spin on it. And lemme know how it turns out. Post a photo on Facebook (Recipestable) or Instagram on Twitter so I can see how lovely yours turn out.

    Happy Healthy Eating!!
    Do you have another name for this classic breakfast? Please leave a comment below, and let me know!

  • Flower Shaped Buns Recipe with Step by Step Pictures

    Flower Shaped Buns Recipe with Step by Step Pictures

    Baking is an assortment of pure love, garnished with utmost care into a culmination of all the good things that life has to offer. These gorgeous Flower Shaped Buns are truly spectacular, and they taste just as amazing as they look! 

    Flower Shaped Buns recipe
    Warm, freshly baked Buns tastes very good with chicken filling.

     The Flower Shaped Buns. So elusive. So Cute. So majestic. So eye-catching

    How do you make them? Is there too hard to shape? Is there a complicated technique? Is it wizardry?

    Just a few of the thoughts I had before attempting these beauties. However, I’m elated to report that if you can master my Vegetable Stuffed Buns & Baby Chicken Bread (and you totally can), you can master the Flower Shaped Buns, too!

    These flower shaped buns are simple to make and cute to look at. 

    Flower Shaped Buns Recipe
    Flower Shaped Buns 

    It all starts with a simple dough that rises in 1 hour. To keep things a little on the healthier side, I went with a 2:1  mix of unbleached all purpose and whole wheat pastry flour for slightly-hearty-but-still-decadent buns.

    You could also go entirely all-purpose for true bakery style, all whole-wheat pastry for a healthier buns, or some other combination that I haven’t thought of! 

    So how are these simple? I’m glad you asked.

    13 ingredients including seasonings (sesame seeds being the 14th and optional ingredient)
    One true rise = less waiting
    Fool-proof methods
    No fancy techniques or equipment involved

    See? You can totally do this. Believe it.

    So what do these studs taste like? Amazing. They’re

    Soft
    Tender
    Fluffy
    Perfectly spiced
    Loaded with creamy chicken filling
    & Better with each bite

    Give it a try and You have bakery-worthy stuffed buns that will mystify your friends and family as to how you made them. Go you.

    Bismisllah Let’s Get This Started !

    Ingredients You will Need:

    For Buns Dough
    • 3 1/2 cups all-purpose flour
    • 1 cup milk
    • 2 tablespoon milk powder
    • 1/2 cup water (might use less)
    • 1 egg, lightly beaten
    • 1 tablespoon sugar
    • 4 tablespoon oil
    • 4 tablespoon melted butter
    • 1 1/2 teaspoon instant yeast
    • 1 teaspoon salt
    Chicken Filling
    • 2 cups boiled chicken, shredded
    • 1 large red onion, finel chopped
    • 2 tablespoon butter
    • 2 tablespoon plain flour
    • 1 teaspoon salt
    • 1 teaspoon black pepper
    • 1/2 teaspoon red chili, crushed
    • 4 tablespoon coriander leaves
    • 4 green chilies, finely chopped
    • 1 cup milk
    For Assembling Buns
    • white & black sesame seeds, as required
    • 1 egg yolk, beaten with 1 tsp milk, for brushing the buns before baking

    How to Make Flower Shaped Buns:

    Step 1: Sieve the flour and dry milk powder in a large mixing bowl. Make three holes in the flour, and then put sugar, yeast, and salt in each hole. Gently cover the holes with the flour. Then add the oil, melted butter and the egg, and combine together.

    Flower Shaped Buns Step 1
    Flower Shaped Buns Step 2

    Step 2: Pour lukewarm milk in the flour mix. Start kneading together and gradually add the lukewarm water a little at a time. You may not need to use all the water, so add it sparingly until your dough comes together and is nice and soft. Knead for a good 10-15 minutes.When the dough becomes smooth and elastic, it is done. (Note: The more you knead the dough, the softer the buns will be).

    Step 3: Touch a bit of oil with your fingertips and apply all over the ball of dough. Loosely cover the bowl with plastic wrap or cover with a damp cloth and set it in a warm place for 40 minutes to an hour for it to double in size.

    Flower Shaped Buns Step 3

    Step 4 :To Make Chicken Filling – Melt 2 tablespoon butter in a frying pan or wok. Saute onion in butter until transculant. Add flour, salt, pepper and red chili and cook for 2-3 minutes. Now add milk and cook for 4-5 minutes or until sauce is thickened. Add shredded chicken, green chilies, fresh coriander leaves. Stir until well combined and remove from the heat. Let it cool completely.

    Flower Shaped Buns Recipe Step 4

    Step 5: When the dough has risen into a nice big size, take the dough out of the bowl and Punch it down to remove some of the air in the dough.

    Flower Shaped Buns Recipe Step 5

    Step 6: Divide the dough into 16-18 balls, depending on the size of buns you would like.

    Flower Shaped Buns Recipe Step 6

    Step 7: Gently roll out each piece of dough and make a round ball. Flatten a ball until it is about 3 inches in diameter and place 2 tablespoon of chicken filling in the center.

    Flower Shaped Buns Recipe Step 7

    Step 8: Pull up the edges of the rolled out dough and pinch together to firmly seal the filling within.

    Flower Shaped Buns Recipe Step 8

    Step 9: Put the sealed part face down on the board and press the dough into about a 2 inch diameter. Make 8 decorative slits around the edge, equally spaced apart (either using a pizza cutter or sharp knife or even a pair of kitchen scissors).

    Flower Shaped Buns Recipe Step 9

    Step 10 : Place the prepared buns on a greased cooking sheet or tray and cover with a light cloth and let them rise for about 20 minutes to half an hour.

    Flower Shaped Buns Recipe Step 10

    Step 11: Brush each bun with beaten egg yolks and put some black and white sesame seeds in the center of the each bun.

    Flower Shaped Buns Recipe Step 11

    Step 12: Bake the buns, in the preheated oven for about 20 minutes or until golden.

    Flower Shaped Buns Recipe Step 12

    Step 13: Remove and brush the buns top with melted butter (it will give nice shiny look) and let it rest covered with a cloth for 2-3 min to soften the bread completely.. Flower Shaped Buns are ready to serve. ENJOY with your favorite dipping sauce.

    Flower Shaped Buns Recipe Step 13

    These Flower Shaped Buns are definitely a treat for weekend Tea Party. Especially when served with a luxurious garlic sauce generously topped with mayonnaise.

    Check it out the Flower Shaped Buns recipe and printable version here!!

    I believe that homemade cooking is delicious and healthy. If you love savory breads or rolls, but want to eat a little healthier, this recipe can be good to try. 🙂 Put your own spin on it. And lemme know how it turns out. Post a photo on Facebook (Recipestable) or  on Twitter so I can see how lovely yours turn out.


    Happy Baking!!

    Pin it For Later: 


    ATTENTION: All photos and content are copyright protected. Please do not use our photos without prior written permission. If you wish to republish this recipe, please rewrite the recipe in your own unique words and link back to Super Easy, Super Moist Chocolate Cupcakes on Recipestable. Thank you!

  • Vegetable Stuffed Buns Recipe

    Vegetable Stuffed Buns Recipe

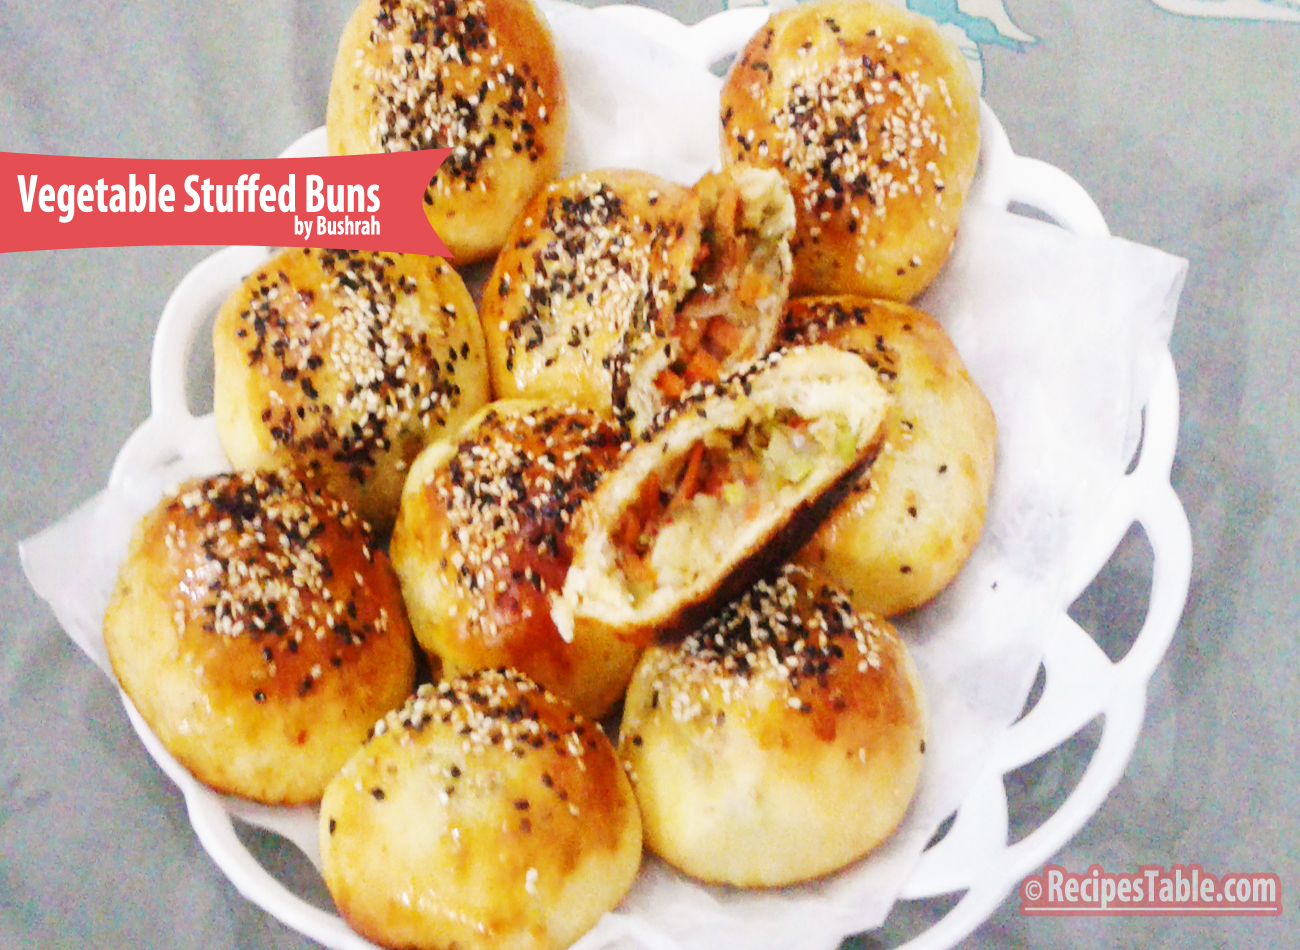
    Homemade Vegetable Stuffed Buns?  These Stuffed buns are loaded with veggies and are topped with two types of sesame seeds.  So warm, soft, Fluffy, fragrant and stuffed with fresh veggies – no can or frozen veggies, all real – totally yummy  ( + point is it contains only 200 calories). Try making these if you’re looking for the ultimate comfort food.

    Vegetable Stuffed Buns

    Photo: Vegetable Stuffed Buns

    This.

    I’ve made it twice in the last week, once for bringing life to the original recipe concept and taking some photos, and once for “recipe testing”. Aka licking the filling and testing the dough. Again. More. Soft Buns In my mouth. I like this recipe a lot, you guys.

    Unlike store bought buns, these are healthy and homemade, and can be packed with any filling of your choice, be it cheese, chicken, lamb or mutton, mushrooms (choices are endless). These vegetable stuffed buns are a fun way of using leftover dough and any stuffing of your choice. These can be eaten for tea or breakfast or a satisfying meal with some salad. It works well as a snack for children to take to school, or to simply enjoy with a favorite drink at any time of the day.

    These stuffed buns succeeds in titillating your senses with its soft, tenderness, and that fresh sesame-ish flavour makes these buns more appetizing. Bake Stuffed buns not because you must but because it tastes so yummy that you would regret not making it at your earliest once you devour its first bite! Having said that, I am not dropping more clues, get ready with some all purpose flour and some basic ingredients (filling of your choice) and get ready to bake fresh stuffed buns this weekend! So, are you ready to read the recipe?

    Vegetable Stuffed Buns

    Photo: Vegetable Stuffed Buns

    When you make these Vegetable Stuffed Buns, all you have to do is open your windows and let the divine baking aromas drift and I will come to you. My nose can find these things. Okay? See you soon.

    Check it out the Vegetable Stuffed Buns recipe and printable version here!!

    Extra Bonus Tips:

    1. It can last  for a week in an air tight container in the refrigerator or it can be frozen for longer. Any time you wish to serve these heat them in the microwave for 15-20 seconds or preheat in the oven for 2-3 minutes and enjoy the warm, soft vegetable-y stuffed buns!
    2. What I really love is that once you have this basic idea, the variety of stuffing you can make for these buns is absolutely endless.

    I have also posted Baby Chicken Bread recipe which is another easiest & tastiest version of making stuffed bread at home. Do check it out as well.  It’s finger lickin’ good. You’ll be coming back for more. 


    Put your own spin on it. And lemme know how it turns out. Post a photo on Facebook (Recipestable) or  on Twitter so I can see how lovely yours turn out.


    Happy Baking!!

  • Mini Pizza Cups Recipe

    Mini Pizza Cups Recipe

    Pizza is always a crowd pleaser, but making your own can be a bit of a headache. This bite-sized alternative is easy to make and healthy (just 150 calories each!) and as much fun to make as they are to eat.

    Mini Pizza Cups
    Mini Pizza Cups

    Mini Pizza Cups

    I’m sure you’ve all heard of or made Pizza Cupcakes or  Pizza Muffins before. But as simple or obvious as this recipe seems, sometimes we need a good reminder of the un-fussy classics. Sometimes you don’t have time or the right ingredients to make an elaborate meal. When this happens, it’s good to have something simple and inexpensive to fall back on.

    Mini Pizza Cups recipe

    Healthy, Budget Friendly Mini Pizza Cups? Yes, Yes, and Yes!

    Mini Pizza Cups recipe
    Mini Pizza Cups

    If you’re crazy about pizza like me, but can’t justify eating it as much as you’d like, this is a great recipe for you. I used leftover pizza dough, chicken, lots of fresh vegetables, and a tablespoon or so of cheese on each mini pizza. Considering each pizza cup base 60 calories, the shredded chicken & cheese about 40 calories, and the rest of the ingredients were vegetables, I’m guessing each pizza had about 150 calories. This is not scientific, but it’s my best guess.

    Mini Pizza Cups
    Mini Pizza Cups

    An interesting and fun way to present your pizzas. These cute little pizza cups will delight anyone, especially kids. Have your children create their own pizzas, and get creative with the toppings. Perfectly shaped and easy to handle, they make for a great addition to lunch boxes or for picnics and road trips.

    mini-pizza-cups
    Mini Pizza Cups

    Hope you will give this a try and let me know how it turns out for you..

    Check it out the Mini Pizza Cups recipe and printable version here!!

    I have also posted My Fav French Bread Pizza Recipe and Pizza Rolls Recipe which are another easiest & tastiest version of making Pizza. Do check it out as well.  It’s finger lickin’ good. You’ll be coming back for more.


    Put your own spin on it. And lemme know how it turns out. Post a photo on Facebook (Recipestable) or  on Twitter so I can see how lovely yours turn out.

    Follow my blog with Bloglovin


    Happy Baking!!

    If you like this post, Please Subscribe to my blog and let me know your feedback by commenting below.. I have lots more recipes to share with you.

  • Egg and Cucumber Sandwiches Recipe

    Egg and Cucumber Sandwiches Recipe

    ITS SUMMER TIME

    Summer has been kicking into high gear and the temperatures have been climbing here, and everyone wants to keep cool on hot summer days. So today, I have a recipe for a simple, classic and very popular sandwiches: “Egg and Cucumber Sandwiches”.

    Egg and Cucumber Sandwiches recipe
    Photo: Egg and Cucumber Sandwiches

    Egg and Cucumber Sandwiches

    Egg and Cucumber sandwiches are the most delicious, easiest finger foods to make. All you need is sliced white bread, boiled eggs, mayonnaise and of course, cucumbers. To enhance the flavor, I also spread a thin layer of dill with cream cheese spread.

    Egg and Cucumber Sandwiches recipe
    Photo: Egg and Cucumber Sandwiches

    I love adding cucumbers to egg mayonnaise. And sometimes different herbs too (especially dill goes very well with eggs and cucumbers). The cucumber can either be chopped finely and mixed into the egg mayonnaise or sliced thinly , I like the latter since it adds a nice fresh crunch to the sandwich. This can be made in advance and keeps well, so is perfect for tea parties.

    Egg and Cucumber Sandwiches recipe
    Photo: Egg and Cucumber Sandwiches

    What are your favorite foods for a tea time snack or tea party? For me, the food are simple to prepare and easy to eat (and not so messy), preferably something we can eat using our hands or toothpicks.

    Egg and Cucumber Sandwiches recipe
    Photo: Egg and Cucumber Sandwiches

    If you’re looking for an extremely quick and easy recipe for a lunch box, or a tea party, or a picnic, or you just so happen to have an extra cucumber lying around, then give these egg and cucumber sandwiches a try. They’re deliciously light and fresh, and I love the crunch of the cucumber. These delicious, easy-to-assemble sandwiches are great for a quick summer meal.

    Bismillah let’s get started. 

    Check it out the Egg and Cucumber Sandwiches recipe and printable version below!!

    I have also posted Zinger Club Sandwiches which is another easiest & tastiest version of making sandwiches. Do check it out as well.


    Put your own spin on it. And lemme know how it turns out. Post a photo on Facebook (Recipestable) or  on Twitter so I can see how lovely yours turn out.


    Happy Sandwiches Making!!

    If you like this post, Please Subscribe to my blog and let me know your feedback by commenting below.. I have lots more recipes to share with you.

  • Strawberry French Toast Roll Ups Recipe

    Strawberry French Toast Roll Ups Recipe

    Aslam-o-Alakaum My Lovelies !!

     In the Name of Allah, Most Gracious, Most Merciful

    Happy Spring Season!

    Spring is a perfect time to enjoy plump, juicy strawberry. Strawberry is a great fruit in so many ways. They’re sweet. They’re easy to handle and prepare, and they are kid-friendly.

    Celebrate spring with Strawberry!

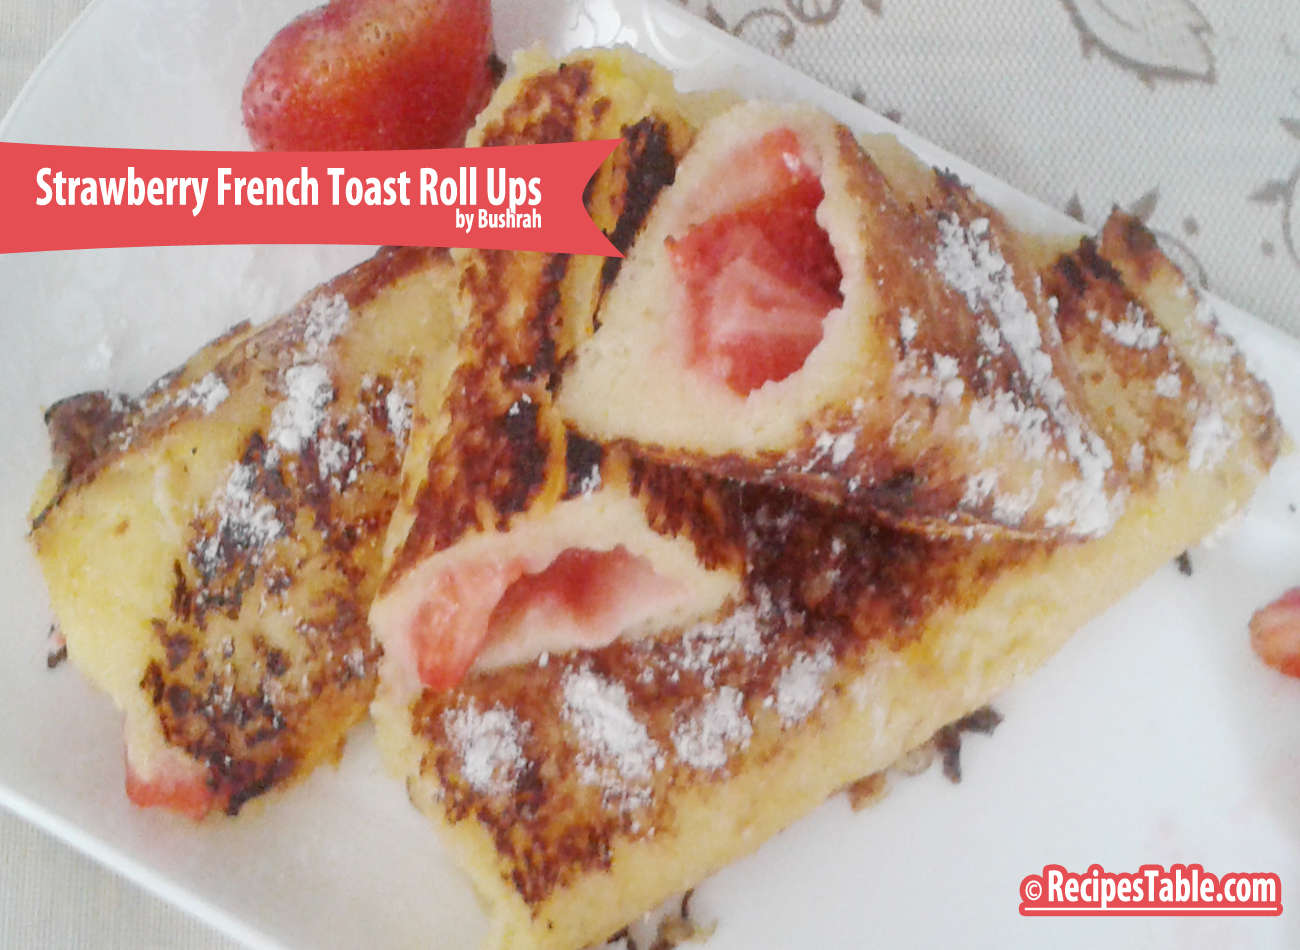
    Is there a person on this planet that doesn’t like Strawberry and French Toast?  Today I have come up with a  wonderful and very different recipe. Strawberry French Toast Roll Ups – just a handful of ingredients to make these in 15 minutes. These strawberry french toast roll ups are so fun and easy to make.They taste like doughnuts!

    Photo: Strawberry French Toast Roll Ups recipe

    For the rest of us that love the good life, here’s an easy recipe that will transform any bread into sweet, eggy magic.

     Strawberry French Toast Roll Ups recipe
    Photo: Strawberry French Toast Roll Ups 

    A must try recipe, your family will love these french toast roll ups filled with strawberries.

    Let’s begin!!

    Check it out the Strawberry French Toast Roll Ups  recipe and printable version below!!


    There are countless variations on this timeless recipe, so go ahead and get messy. Make up your own and share, there’s so many different ways to make this simple dish. Just about every recipe will have something similar as what i have for a base, feel free to use it as a guide and modify to make your breakfast super tasty.


    I have also posted Almond French Toast Hearts which is another easiest version of making breakfast or lunch box item . Do check it out as well.


    Put your own spin on it. And lemme know how it turns out. Post a photo on Facebook (Recipestable) or  on Twitter so I can see how lovely yours turn out.

    Happy Breakfast making!!

    If you like this Strawberry French Toast Roll Ups, Please Subscribe to my blog. I have lots more recipes to share with you. And If you make it then let me know your feedback by commenting below.

  • Chocolate Banana Filled Pancake Rolls Recipe

    Chocolate Banana Filled Pancake Rolls Recipe

    Aslam-o-Alakaum !!

    In the Name of Allah, Most Gracious, Most Merciful

    Its been a long time since I’ve posted something here, its has been a busy month.Actually I was really busy in my studies…..Sorry, I didnt get time to post anything.

    Chocolate Banana Filled Pancake Rolls

    Looking for a nice relaxing breakfast or dessert. Pancake Rolls? Today, I’ll share another pancake rolls recipe ~ “Chocolate and Banana Filled Pancake Rolls”,I made this a while back, clicked pictures but never got around to posting it. The recipes are piling up ! I’ll post a lot more soon, InshAllah.

    Chocolate and Banana Filled Pancake Rolls Recipe
    Photo: Chocolate and Banana Filled Pancake Rolls

    I made plain pancakes and spread generously with choco bliss and topped further with honey but it really is like a plain canvas for your imagination to run wild with flavours! So I decided to give my simple pancakes a new twist. Roll-up in banana slices and topped with chocolate curls.

    Chocolate and Banana Filled Pancake Rolls recipe
    Photo: Chocolate and Banana Filled Pancake Rolls

    You can add strawberries, apples, dried fruits and berry compote in the mixture! It’s up to you take pleasure in feeling like a domestic queen. A perfect way to start a day.

    Chocolate and Banana Filled Pancake Rolls
    Photo: Chocolate and Banana Filled Pancake Rolls

    Check it out the Chocolate and Banana Filled Pancake Rolls recipe and printable version below!!

    Recipe Note’s:

    In this recipe,  I made the batter a little thin because I wanted the pancakes to thin, more like crepes. For more traditional pancakes, use only about 1/2 cup milk.

    Put your own spin on it. And lemme know how it turns out. Post a photo on Facebook (Recipestable) or  on Twitter so I can see how lovely yours turn out.


    I have also posted Chocolate Chip Pancakes which is another easiest version of making tea time snack or lunch box item . Do check it out as well.


    Happy Pancakes making!!

    If you like this Chocolate and Banana Filled Pancake Rolls, Please Subscribe to my blog. I have lots more recipes to share with you. And If you make it then let me know your feedback by commenting below.

  • Chocolate Chip Pancakes Recipe

    Chocolate Chip Pancakes Recipe

    Aslam-o-Alakaum My Lovelies !!

     In the Name of Allah, Most Gracious, Most Merciful

    Hope, you are doing splendidly and enjoying the season. Well I’m in the middle of work, and anxiety has begun to sink its sharp little claws into my brain. It’s almost the final month of my training and I’m already drowning under a sea of coding assignments and project.

    Ahhh I love to code even though it makes me want to tear my eyes out every 10 minutes. Crying Out Loud ;(  I have constant fears that I’ve forgotten the code, functions, or left something somewhere blah blah blah. Problem is I love it but I have too much code to write though… ugh. This assignment is really doing my nut in! 

    code

    I’ m carving chocolate soo bad while coding up my project and backing up files. Every time I write a code, I delete it again. Almost time for a pancake break 😛  Anyhow before going back to coding, I decided to update you guys with this short post. 

    If there’s one thing you should know about me right up front it’s that I love Chocolate and pancakes, always have. Chocolate chips, Pancakes, foggy weather and coding are the reasons I love life.  Sounds super yummy! 

    chocolate-chips
    Pancakes are probably in my Top 10 favorite foods. But they need chocolate chips. 🙂

    Time for a Chocolate Chip Pancakes Break.

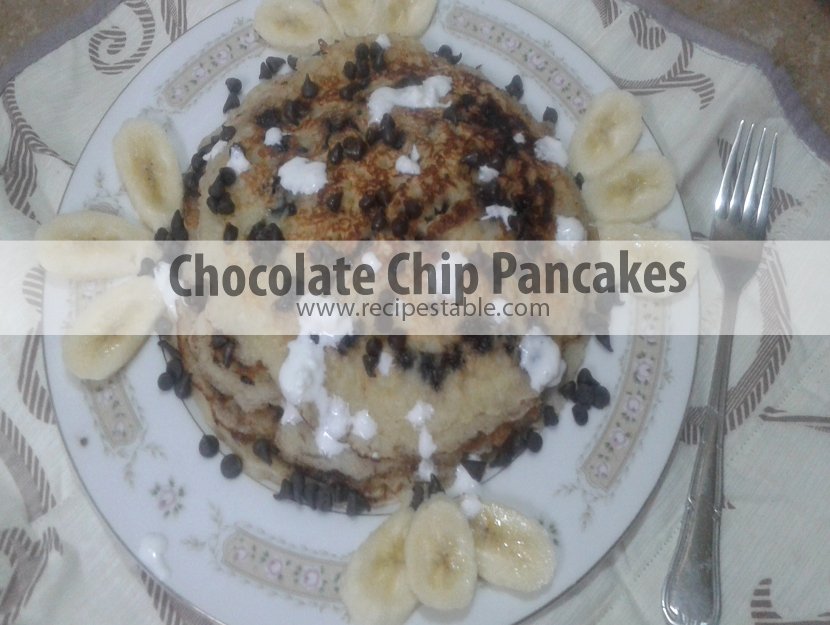
    No matter how difficult  life gets, just remember, there’s always time for a Pancakes break. 😀 These Chocolate Chip Pancakes have been a blessing while trying to write my final coding project. lol. They simple to make, so comforting, and lightened up with a few delicious tweaks. 

    Chocolate Chip Pancakes
    Photo: Chocolate Chip Pancakes

    This Chocolate Chip Pancakes recipe is a favorite of mine to make for special occasions or holidays. Eat while hot so the chocolate is all gooey. If you want to make it extra special, serve the pancakes with berries and whipped cream

    Chocolate Chip Pancakes Recipe
    Photo: Chocolate Chip Pancakes

    It was love at first bite, I’m telling you. The texture is fluffy but hearty and slightly dense, and plenty moist from the butter. They’re perfectly sweet even without any additional sugar – the chocolate chips provide a touch of decadence.

     Chocolate Chip Pancakes Recipe
    Photo: Chocolate Chip Pancakes

    They’re super tasty, easy to make, and use regular everyday ingredients. 

    Ingredients You will Need to Make These Pancakes
    Ingredients You will Need to Make These Pancakes

    Ingredients You will Need:

    1. Flour
    2. Sugar
    3. Baking Powder
    4. Cinnamon Powder
    5. Salt
    6. Eggs
    7. Milk
    8. Butter
    9. Vanilla Essence
    10. Chocolate Chips

    Tools You needed to make this recipe are:

    1. A pan or griddle
    2. A Spatula
    3. A Mixing Bowl
    4. Hand Beater

    Check it out the Chocolate Chip Pancakes Recipe and printable version below!!

    Tips For Diet Version Pancakes (Clean Eating):

    1. You can make gluten free Pancakes by using gluten-free oats and flour.
    2. For Sweeting: Add 1 Tablespoons of honey, apple syrup, or nectar is optional for extra sweetening, but I didn’t find it necessary.
    3. Don’t add butter. Mash very ripe banana with baking powder. It gives
    4. them a moist and fluffy texture.
    5. Serve plain or with a small drizzle of honey and a few additional chocolate chips for melting.

    Put your own spin on it. And lemme know how it turns out. Post a photo on Facebook (Recipestable) or  on Twitter so I can see how lovely yours turn out.

    Happy Chocolate Pancakes making!

    If you like this Chocolate Chip Pancakes Recipe, Please Subscribe to my blog. I have lots more recipes to share with you. And If you make it then let me know your feedback by commenting below.

  • Chocolate Date Bars Recipe

    Chocolate Date Bars Recipe

    Assalamu alaikum wa rahmatullahi wa barakatuhu!

    In the Name of Allah, Most Gracious, Most Merciful

    GOOD MORNING MY LOVELY READERS!!

     Good morning my fellow readers
    Good morning my fellow readers

    I hope you are well and happy today. The sun is shining brightly here this morning and the air is crisp. I need a little sun today and wireless signals are surprisingly good :P. So right Now, sitting in my roof top garden with my lappy writing today’s blog post and enjoying my morning tea. And beautiful pairs of sparrows and pigeons are also enjoying the morning sun with me. I love to hear the birds chirping in the morning – sweet songs of nature ♥☺

    Great start to the day.

    Trying to decide what to make for Quick Breakfast or Brunch, OR Snack? No worries, I’ve got you covered in today’s all new post.

    Today’s Recipe: Chocolate Date Bars

    SUPER healthy, naturally sweetened Chocolate Date Bars!! Just 7 ingredients to a snack that tastes more like a candy bar!! YUM YUM. The result is a simple, naturally-sweetened, healthy Date bars that is a little on the decadent side – just the way I like it.

    Chocolate date bars recipe
    Photo: Chocolate Date Bars Recipe

    They taste like Supreme awesomeness. They’re rich, dense, moist, super chocolaty, nutty, slightly crunchy and perfectly sweet and very filling.

    Chocolate Date Bars Recipe
    Photo: Chocolate Date Bars Recipe

    These Chocolate Date Bars DO indeed taste like a raw brownie. 😛

    1. They require just 7 ingredients.
    2. They’re no bake, aside from toasting your nuts (an optional step).
    3. They’re loaded with antioxidants, protein and healthy fats.
    4. They’re incredibly satisfying.
    5. They’re perfect for breakfast, dessert or a quick snack.
    6. They’re freezer-friendly.
    7. They’re uber chocolatey.
    8. They’re really just kind of perfect.

    I did have one for breakfast and found it quite filling. But for the most part I ate these as a healthy dessert. I’d go to the freezer, break off 1/3 and snack. Then repeat for the next 30 minutes until it was gone. Self control comes in waves, people, especially with these bars. 😛 ☺

    Really I should stop praising and tell you the recipe. So Let’s get started !

    Tools You needed to make this recipe are:

    1. A cookie sheet
    2. A frying pan
    3. A Spatula

    Check it out the Chocolate Date Bars Recipe and printable version below!!

    You MUST try these Date bars and let me know what you think! Post a photo on Facebook (Recipestable) or  on Twitter so I can see how lovely yours turn out.

    Happy Chocolate Date Bars making!

    If you like this Chocolate Date Bars Recipe, Please Subscribe to my blog. I have lots more recipes to share with you. And If you make it then let me know your feedback by commenting below.

  • Almond French Toast Hearts Recipe

    Almond French Toast Hearts Recipe

    Assalamu alaikum wa rahmatullahi wa barakatuhu!

    In the Name of Allah, Most Gracious, Most Merciful

    Almond French Toast Hearts

    These Almond French Toast Hearts are easy to make and so delicious. Confectioners’ sugar, and almond butter tastefully top off each bite. Do try it, Your kids will probably get a kick out of heart-shaped french toast.

    Almond French Toast Hearts Recipe
    Photo: Almond French Toast Hearts Recipe

    Heart shaped cookie cutters can do more than just make cookies, use them to make a special breakfast for the ones you love most. My brother was not in good mood and lil bit annoyed with me. So when I made these Almond French Toast hearts for breakfast yesterday it completely changed the overall of his mood. 

    Almond French Toast Hearts Recipe
    Photo: Almond French Toast Hearts Recipe

    Almond French Toast Hearts with Flavored Butter —- A perfect way to say” I Love You Brother ♥♥♥.”

    Almond French Toast Hearts Recipe
    Photo: Almond French Toast Hearts Recipe

    Let me tell you a little secret that it’s a really lovely thing, because if you are anything like me, you could eat golden french toast smothered in almond flavored butter every day of the week.

    Tools You needed to make this recipe:

    1. A large heart-shaped cookie cutter
    2. A frying pan
    3. A spatula
    4. A Hand- Beater 

    Let’s get started !

    Check it out the Almond French Toast Hearts Recipe and printable version below!!

    Recipe Tip’s:

    1. If you do not have a heart-shaped cookie cutter, use a heart-shaped template and sharp knife to cut heart shapes.
    2. Oh yeah, DON’T throw away the extra bread pieces left over from the heart cut-outs. I’ve got something you can do with them. Something tasty. More details later in the week…

    If you like this Almond French Toast Hearts Recipe, Please Subscribe to my blog. I have lots more recipes to share with you. And If you make it then let me know your feedback by commenting below.

  • Healthy Breakfast Option: Spinach and Cheese Omelet Recipe (Packed with Nutrients!)

    Spinach and Cheese Omelet

    Add extra nutrients to your breakfast by stirring in chopped fresh spinach, fresh herbs and shredded cheese into your protein-packed omelet. A carb-cutter’s perfect start for the day. Healthy and Nutritious Omelet made with home grown spinach from My Kitchen Garden.

    Spinach and Cheese Omelet Recipe
    Photo: Spinach and Cheese Omelet Recipe

    Freshly picked home grown spinach leaves turn into mouthwatering Omelet. Yes, this Spinach omelet is better than your omelet. Oragnic Eggs, fresh spinach, and CHEESE!!!! Please no drooling on my photo.

    This organic spinach and cheese omelet is full of flavors, it makes a perfect healthy breakfast. Enjoy it!

    Spinach and Cheese Omelette Recipe
    Photo: Spinach and Cheese Omelette Recipe

    Growing your own food isn’t just about saving money, it’s about so much more.I truly believe that as humans we posses an innate desire or need to take a hand-on role in the production of the food we consume. Whether through growing your own, foraging in the wild, hunting or even going to a local farm, knowing exactly where your food comes from provides a deep sense of appreciation for what you eat.

    Spinach and Cheese Omelette Recipe
    Spinach and Cheese Omelette made with Home grown Spinach

    Check it out the Spinach and Cheese Omelette Recipe here!!

    Spinach and Cheese Omelet Recipe

    This organic spinach and cheese omelet is full of flavors, it makes a perfect healthy breakfast. Enjoy it!
    Course Breakfast
    Cuisine American, Pakistani
    Keyword breakfast, cheese, eggs, kids friendly, omelet, Quick and Easy, spinach
    Prep Time 5 minutes
    Cook Time 8 minutes
    Total Time 13 minutes
    Servings 2
    Author Bushra Waheed

    Ingredients

    • 4 organic eggs
    • 1 cup baby spinach leaves chopped
    • 4 tablespoon grated cheddar cheese
    • 2 teaspoon butter or olive oil
    • 1/4 teaspoon pepper
    • salt to taste

    Instructions

    • Beat eggs in a bowl.
    • Stir in the baby spinach.
    • Season with salt and pepper. Mix well.
    • Melt butter in a pan over medium heat.Pour the egg mixture it it. As egg mixture starts to cook, gently lift edges of omelet with a spatula and tilt pan so uncooked egg mixture flows underneath.Cook for 2 minute or until almost set.
    • Sprinkle cheese over the omelet.
    • Fold omelet in half, allowing cheese to melt.
    • Slide cooked omelet onto a serving plate. Delicious Spinach and Cheese Omelet is ready to serve.

    Notes

    Serve with buttered toast and green smoothie.


    If you like Spinach and Cheese Omelet Recipe and make it then let me know your feedback by commenting below.And if you know more innovative ways in which we can utilize this mouth watering Spinach and Cheese Omelet, do share with us and we would be glad to give it a try.

  • Spicy Chicken Omelette Recipe

    Spicy Chicken Omelette

    If you’re in a hurry, try this Spicy Chicken Omelette Recipe that can be enjoyed any time of day. Combine chicken and egg for a delightful main dish that’s ready in just 25 minutes!

    Perfect for breakfast, lunch or dinner, be creative with you flavor combinations and add tomato, herbs, mushroom, or even olives!

    Spicy Chicken Omelette Recipe
    Photo: Spicy Chicken Omelette Recipe

    Check it out the Spicy Chicken Omelette Recipe here!!

    Spicy Chicken Omelette Recipe

    Course Breakfast
    Cuisine American, Pakistani
    Keyword breakfast, Chicken, eggs, omelet, spicy
    Prep Time 5 minutes
    Cook Time 8 minutes
    Total Time 13 minutes
    Servings 2
    Author Bushra Waheed

    Ingredients

    • 4 large eggs
    • 4 tablespoon milk
    • 1 cooked chicken breast thinly sliced
    • 1/4 cup chopped green onion
    • 2 green chilies finely chopped
    • 1/4 cup grated cheese
    • 1/4 teaspoon cayenne pepper
    • salt to taste
    • 1 tablespoon butter

    Instructions

    • In a small bowl, whisk together the eggs and milk.
    • Season with salt and pepper. Mix well.
    • Melt butter in a non-stick pan over medium heat. Add chicken, green onion and green chili. Cook and stir for 1-2 minutes then pour egg mixture over it.
    • As eggs set at the edges, with spatula, gently lift cooked portion to allow uncooked egg to flow underneath.
    • Cook on low flame for 2 minutes or until almost set.
    • Sprinkle cheese on half of the omelette.
    • Fold other half over cheese.
    • Remove from the heat and transfer into a platter.
    • Cut omelette in half. Spicy Chicken Omelette is ready to serve. ENJOY!!

    Notes

    Serve with salad, bread or paratha.

    If you like Spicy Chicken Omelette Recipe  and make it then let me know your feedback by commenting below.And if you know more innovative ways in which we can utilize this mouth watering Spicy Chicken Omelette, do share with us and we would be glad to give it a try.

  • Mango Pineapple Smoothie Recipe

    Mango Pineapple Smoothie

    I invented this Mango Pineapple Smoothie recipe one day, when I had leftover mangoes and pineapple chunks. A spoonful of pineapple ice cream added the sweetness and special flavor with a tropical flare. You may use frozen pineapple juice ice cubes instead for more of a slush drink.

    Do try This Mango Pineapple Smoothie recipe and make the vitamin-rich fruit smoothie for a quick breakfast or an afternoon snack.

    Mango Pineapple Smoothie Recipe
    Photo: Mango Pineapple Smoothie Recipe

    Check it out the Mango Pineapple Smoothie Recipe here!!

    Mango Pineapple Smoothie Recipe

    Course Breakfast, Drinks
    Cuisine American
    Keyword breakfast, cold beverages, drinks, fruit, mango, pineapple, smoothie
    Prep Time 5 minutes
    Total Time 5 minutes
    Servings 4
    Author Bushra Waheed

    Ingredients

    • 1 cup pineapple chunks
    • 1 large mango – peeled seeded, and chopped
    • 1 cup yogurt
    • 1 cup pineapple juice unsweetened
    • 1/2 cup non-fat milk
    • 2 tablespoon pineapple ice cream
    • honey to taste

    Instructions

    • Place yogurt, pineapple juice, pineapple chunks mango, milk and Ice cream in a blender. Blend until smooth.
    • Pour into 4 glasses.
    • Drizzle with honey. Mango Pineapple Smoothie is ready to drink. ENJOY!! 🙂

    Notes

    You can add any flavor of ice cream.
    Serve Immediately.


    If you like Mango Pineapple Smoothie Recipe and make it then let me know your feedback by commenting below.And if you know more innovative ways in which we can utilize this sweet and mouth watering Mango Pineapple Smoothie, do share with us and we would be glad to give it a try.

  • Energy Boost in a Glass: The Delicious Peanut Butter Banana Smoothie Recipe!

    Peanut Butter Banana Smoothie

    The perfect pair _ Bananas, milk, peanut butter, honey, and ice are all you need to make this filling yet refreshing smoothie. Not only will it taste like a treat but you’ll get a good dose of potassium, protein, and fiber to boot. This Peanut Butter Banana Smoothie Recipe might just become your new favorite breakfast recipe!

    Peanut Butter Banana Smoothie Recipe
    Photo: Peanut Butter Banana Smoothie Recipe

    Bismillah, let’s get started!

    Check it out the Peanut Butter Banana Smoothie Recipe and printable version below.

    Peanut Butter Banana Smoothie

    Not only will it taste like a treat but you’ll get a good dose of potassium, protein, and fiber to boot.This Peanut Butter Banana Smoothie Recipe might just become your new favorite breakfast recipe!
    Prep Time 5 minutes
    Total Time 5 minutes
    Servings 4
    Author Bushrah | Recipestable

    Ingredients

    • 4 bananas broken into chunks
    • 2 cups milk
    • 1/2 cup peanut butter
    • 2 tbsp honey or to taste
    • ice cubes as required

    Instructions

    Method

    • Place bananas, milk and peanut butter in a blender jug.
    • Add honey, and ice cubes.
    • Process for 30 seconds or until smooth.
    • Pour into four glasses.
    • Top each glass with a banana slice.Peanut Butter Banana Smoothie is ready to serve.

    Notes

    Recipe Note’s:
    If the smoothies seem too thick, just add another tablespoon or two of milk.
    Serving Suggestions:
    Serve with cookies.

    I have also posted Mango Lime Smoothie Recipe which is another easiest & tastiest version of making Smoothie. Do check it out as well.


    Put your own spin on it. And lemme know how it turns out. Post a photo on Facebook (Recipestable) or  on Twitter so I can see how lovely yours turn out.


    If you like this post, Please Subscribe to my blog and let me know your feedback by commenting below.. I have lots more recipes to share with you.