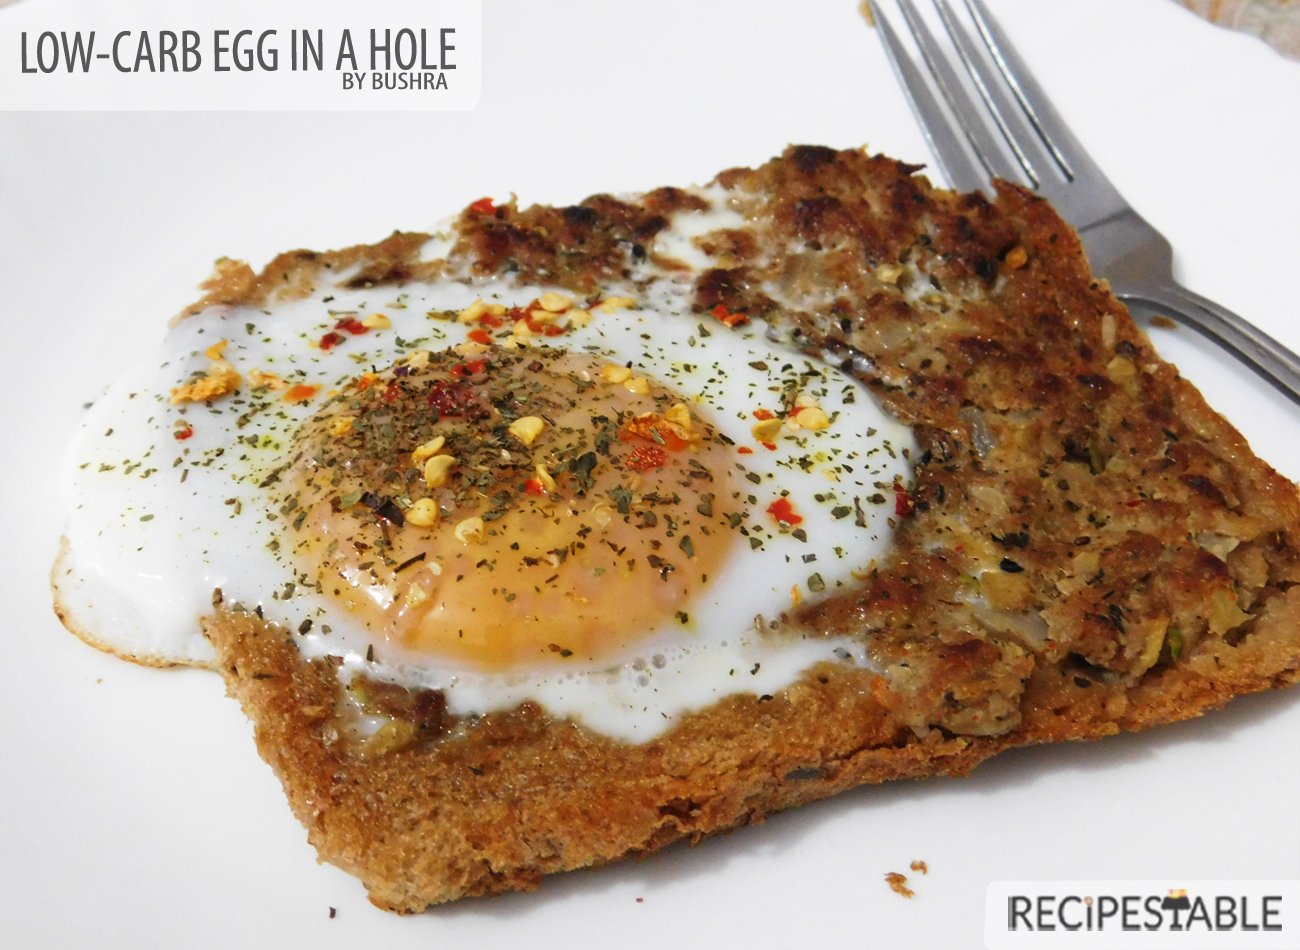
Can’t decide whether to make a grilled kabab or an egg in a hole? Make both! Two of my favorite food groups—eggs and toast—unite in this take on the playful dish also known as egg in a hole, Egg in a Basket or Egg in a Boat or, more simply, egg in toast. I fancy it up by filling the bread center with mince crust and topping with basil or chili flakes. And It came out so delicious!
Egg in-a-hole – Look at that perfect texture !!
For this recipe, I used a normal mince kabab mixture for filling the bread , to keep it low carb. The outside was crunchy and crispy and inside was so juicy and tasted so good with the egg in the middle. A nice way to add some more protein to a sandwich, while also providing something of a sauce from the egg yolk (depending on how you cook your egg). It’s adds just a little oomph of flavor to the sandwich.
Watch carefully as you cook the mince crust, and don’t raise the heat higher than medium: The goal is for the mince crust to brown and the egg to set simultaneously. Save the crust center for making breadcrumbs.
Also how well the eggs must be cooked is a personal choice. Some like over easy, sunnyside up or completely cooked through. No matter how you make it, this will remain a favorite breakfast option passed on for many generations to come. When you make this cute breakfast-for-dinner recipe, you can vary it by using cheese, vegetables or sauteed Spinach in place of the mince filling.
This Low-Carb Solution to Egg in a Hole Recipe can be an excellent addition to a healthyweight loss diet. They’re not only low-carb and low in calories but also high in protein and fiber that keep you feeling full.
I’m really excited to share this recipe with you. So, Bismillah let’s get started and Check it out Low Carb Egg in a Hole Recipe and printable version here!!
Put your own spin on it. And lemme know how it turns out. Post a photo on Facebook (Recipestable) or Instagram on Twitter so I can see how lovely yours turn out.
Happy Healthy Eating!! Do you have another name for this classic breakfast? Please leave a comment below, and let me know!
May this month be full of blessings, happiness, and peace for you and your family. As much as we must be eating light, Ramadan is the month when we end up eating most of the greasy stuff. All kind of fried dishes are made in the name of iftar.
The first word that comes into your mind when you think about an iftari is? Yes its pakora! Pakoras are one snack associated with Iftar here in Pakistan. Truly, a Pakistani iftar is incomplete without the presence of a mighty pakora. The word pakora is derived from a Sanskrit word “pakvavata” which means small food lump (pakva means cooked and vata means small lump). Pakoras can be made out of anything, from a simple potato, daal mung, spinach, chicken or even cheese.
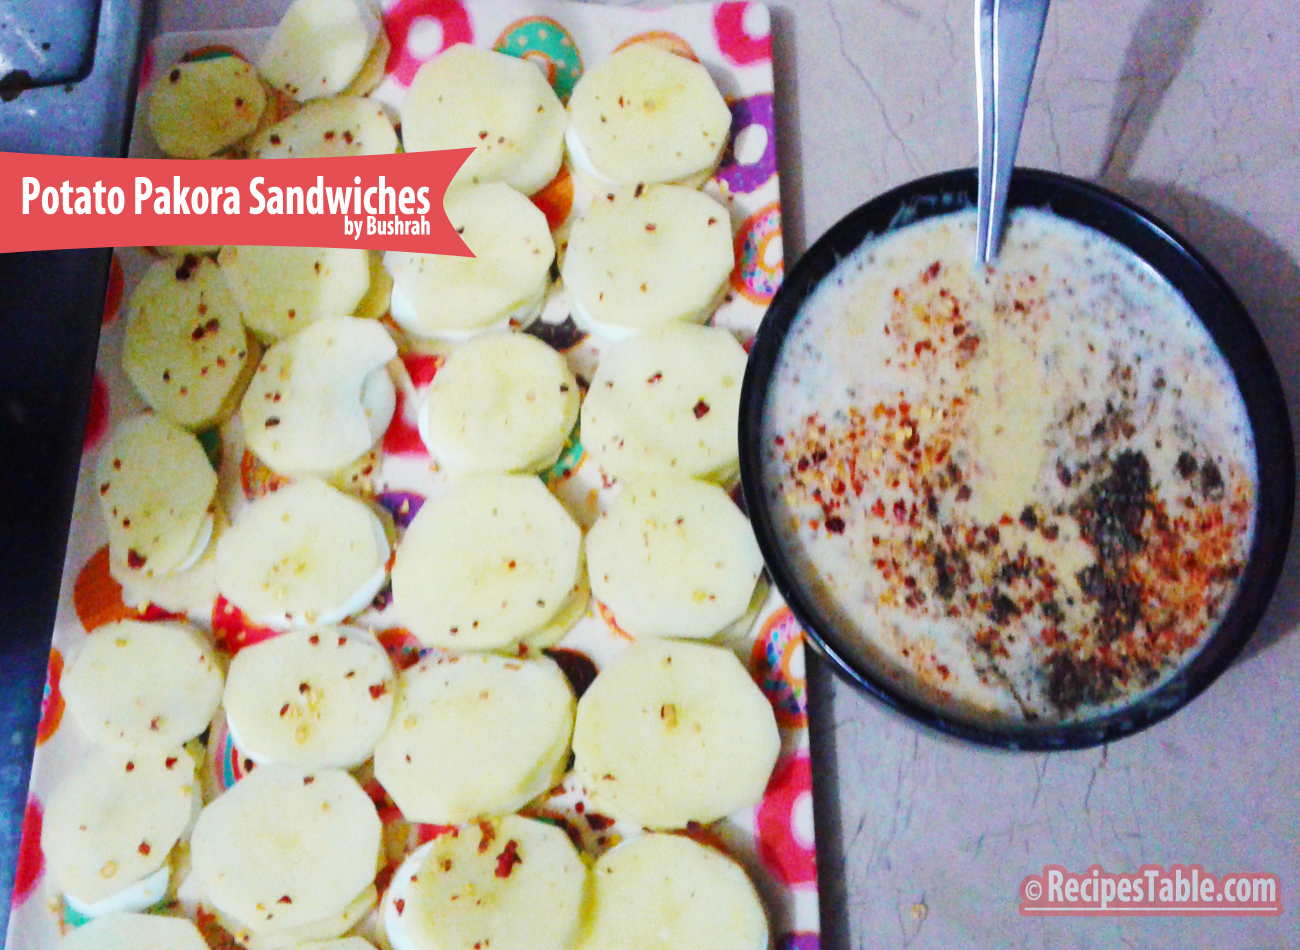
Photo: Potato Pakora Sandwiches
Today, I came up with an amazing idea of making Pakora’s. It’s our family favorite snack. I love these Potato Pakora sandwiches so much. Sinking your teeth into crisp Pakora sandwiches is a sensual pleasure. It has all the textures and flavors one would need in a Pakistani snack.
Try this recipe and turn your favorite Pakora’s into bite sized sandwiches, stuffed with eggs (or your favorite stuffing). It’s a perfect recipe for a quick and easy Iftar Snack. A great new way to make Pakoras!
To prepare this delicious pakora first egg slice covered in between 2 thin potato slices then dipped in spicy chickpea (besan) batter then deep fried.
Within every bite of this snack you will enjoy a variety of flavors and textures. Spicy Red pepper flakes and herbs give nice pops of heat and a soft slice of boiled egg in between potato sandwich, and a crispy coating of the chickpea flour. You just need a hot cup of tea or coffee to complement it and turn it into a heavenly delight!
Photo: Potato Pakora Sandwiches Recipe
I think I have talked enough about this mouth-watering Iftar or Rainy Day Snack. I insist you to make it ASAP, If you haven’t tried Potato Pakora sandwiches yet. Once you taste these heavenly, crispy and delish bites, you will know what pleasure I am talking about. Try this recipe and give your ordinary Pakora a delicious makeover with this Potato Pakora sandwiches recipe!It’s a perfect snack for get-together’s. And surely will be loved by everyone. Don’t be surprised if it disappears in a flash!
Let’s learn to make Potato Pakora Sandwiches !!
Peel hard boiled eggs and cut into slices with egg cutter. Set aside. Now peel potatoes then cut them into thin round slices. Soak in cold water. Meanwhile, Take a large mixing bowl. Add chickpea flour(besan), red chili, cumin seeds, coriander seeds, black pepper and salt and mix well. Add enough water to make a smooth batter, and whisk well to avoid any lumps.
Now prepare pakora sandwiches, first take an egg slice covered in between two thin slices. Repeat this method with rest of the potato and egg slices. Sprinkle seasoning, chili flakes, garlic powder and a pinch of salt over it. Keep aside.
Photo: Potato Pakora Sandwiches
Heat the oil in a deep pan over medium heat. Dip one potato egg sandwich in the batter. Make sure to cover on all sides.
Photo: Potato Pakora Sandwiches recipe
Put sandwich in a hot oil and deep-fry on a medium heat till it turns crisp and golden brown in colour from both the sides.
fry till they turn crispy and golden from the both sides.
Remove from the oil and drain on kitchen paper. Transfer into a serving platter. Sprinkle a pinch of red pepper flakes and fresh herbs.
Photo: Potato Pakora Sandwiches
They pair well with coriander and mint sauce or ketchup and a strong cup of tea. Give your taste buds a treat with this crunchy Potato Pakora sandwiches. Perfect for when you’d like to serve something a little out of the ordinary. This evening tea time snack would rock at your place anytime.
Check it out the Potato Pakora Sandwiches recipe and printable version here!!
I have also posted Sesame Chicken Pakora and Noodles Pakorawhich are another easiest & tastiest version of making pakora at home. Do check it out as well. It’s finger lickin’ good. You’ll be coming back for more.
Put your own spin on it. And lemme know how ilet turns out. Post a photo on Facebook (Recipestable) or on Twitter so I can see how lovely yours turn out.
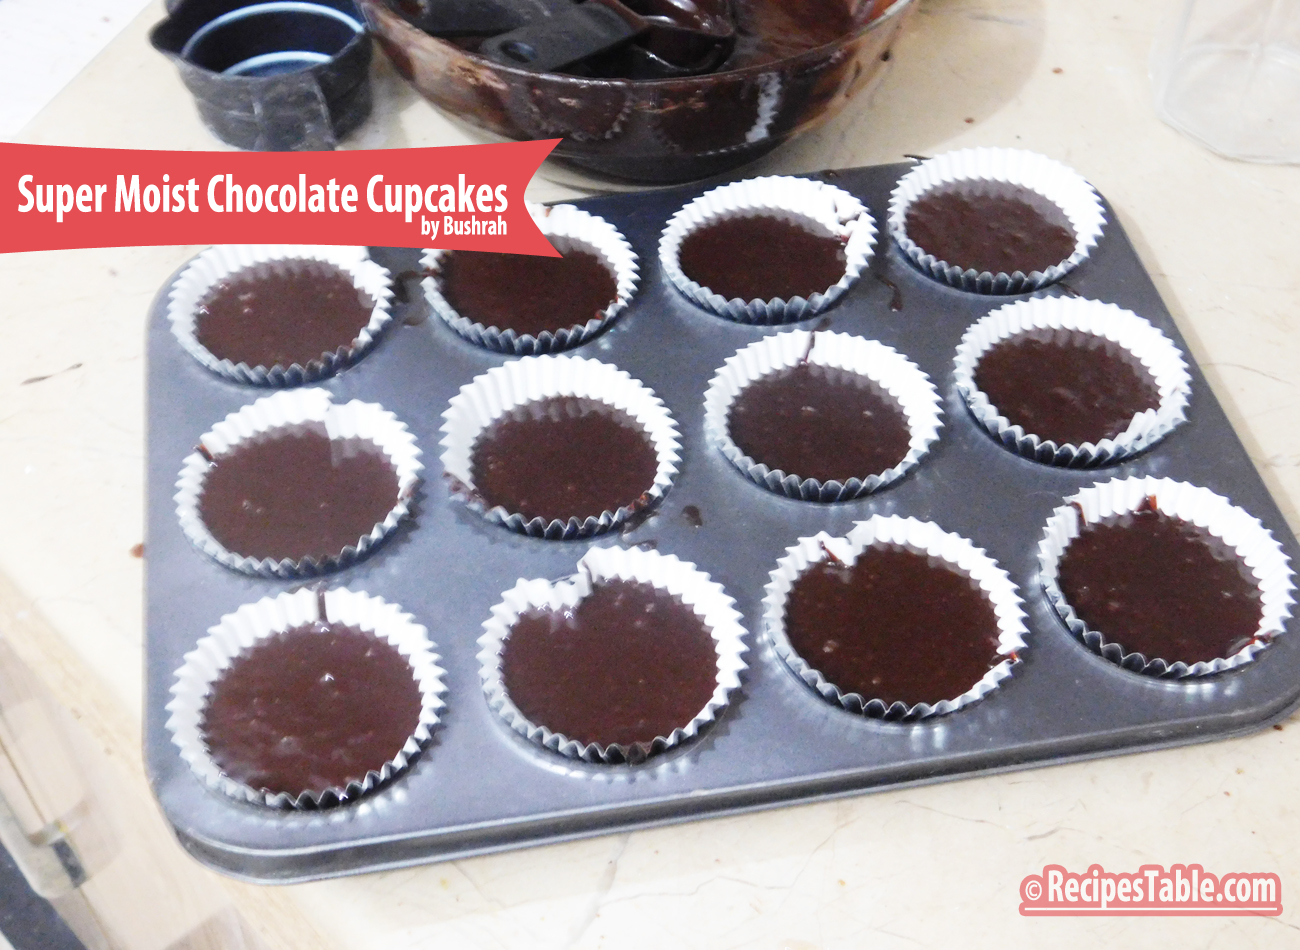
Like the title says, these are the ‘Super Easy,Super Moist Chocolate Cupcakes’. They are perfectly moist and insanely chocolaty, topped with More Chocolate Ganache & Coconut. Royal Treat ♥
Photo: Super Moist Chocolate Cupcakes
Looking for the perfect recipe can be exhausting because there are just so many out there. I’ve tried countless cupcakes over the years, but this is my top favorite recipe. I know we all have different preferences when it comes to our taste buds, but I honestly don’t think you can go wrong with this.
The absolute best recipe to make Chocolate Cupcakesthat are super easy, super moist, chocolaty and really delicious. If chocolate is what makes you go weak in the knees, then these are for you. This one is a must try for all Chocolate Lovers out there.
Photo: Super Moist Chocolate Cupcakes
I don’t know about you but I love cupcakes and I honestly don’t know many people that don’t love them. There’s something magical about a cupcake and adults are not immune to that magic.
Super easy, Super Moist Chocolate Cupcakes
I’m often asked to make desserts for family get together’s. picnic or parties. And it never fails, when I spend all day baking in the kitchen and come up with a signature dessert, it never gets the same response as cupcakes…sigh. So a while back I decided to give the people what they wanted, cupcakes!
Super easy, Super Moist Chocolate Cupcakes
One of the great things about this happy little dessert is that it doesn’t take long to make and it doesn’t break the bank! Not only is the dessert met with smiles and giggles, it’s an easy and inexpensive way to make everyone at the table happy! And making everyone happy is what its all about.
Super easy, Super Moist Chocolate Cupcakes
I made the Chocolate Coffee ganache with hot cream, good quality chocolate, butter and coffee extract. The higher the quality of chocolate used, the better the flavor and texture your ganache will have in the end. Coffee and coffee extract enhances the flavor of chocolate. It enhances the chocolate, and brings out the flavors in the chocolate while adding richness to the taste. I love to add coffee to all of my chocolate cakes. Some things are classics.I put chocolate cupcakes in that category. Pillows of rich chocolate cake. Top with chocolate ganache.
Pillows of rich chocolate cake. Top with chocolate ganache.
Check it out the Super Easy, Super Moist Chocolate Cupcakes recipe and printable version here!!
Extra Bonus Tips:
If you would like to add coffee to the recipe, either add 1 teaspoon espresso powder or instant coffee granules along with the sifted dry ingredients, or replace the water with room temperature brewed coffee.
Please make sure that you bake these for 20 minutes and not more. Baking timing is the most crucial thing for any cake recipe. A few minutes over and you’ll have a hard rock in the name of muffin. So keep checking!
And yes..no peeking and opening the oven door for the first 15 minutes at least.
Cupcakes are best the same day they’re made, but can be kept in an airtight container at room temperature for up to 3 days.
Un-frosted cupcakes can be kept in the freezer for up to 2 months. Thaw, still covered, on the counter or overnight in the fridge.
I have also posted Vanilla Cupcakes with Chocolate Frosting recipewhich is another easiest & tastiest version of making cupcakes home. Do check it out as well. It’s finger lickin’ good. You’ll be coming back for more.
Put your own spin on it. And lemme know how it turns out. Post a photo on Facebook (Recipestable) or on Twitter so I can see how lovely yours turn out.
Happy Cupcakes Making!!
ATTENTION: All photos and content are copyright protected. Please do not use our photos without prior written permission. If you wish to republish this recipe, please rewrite the recipe in your own unique words and link back to Super Easy, Super Moist Chocolate Cupcakes on Recipestable. Thank you!
Have you ever wanted something so bad you think you’d die if you don’t have it? And when you think you’ve finally gotten it, its snatched away from you?
If yes, then this Egg Pudding is especially for you.
Eat it warm, eat it cold; it provides comfort like no other.
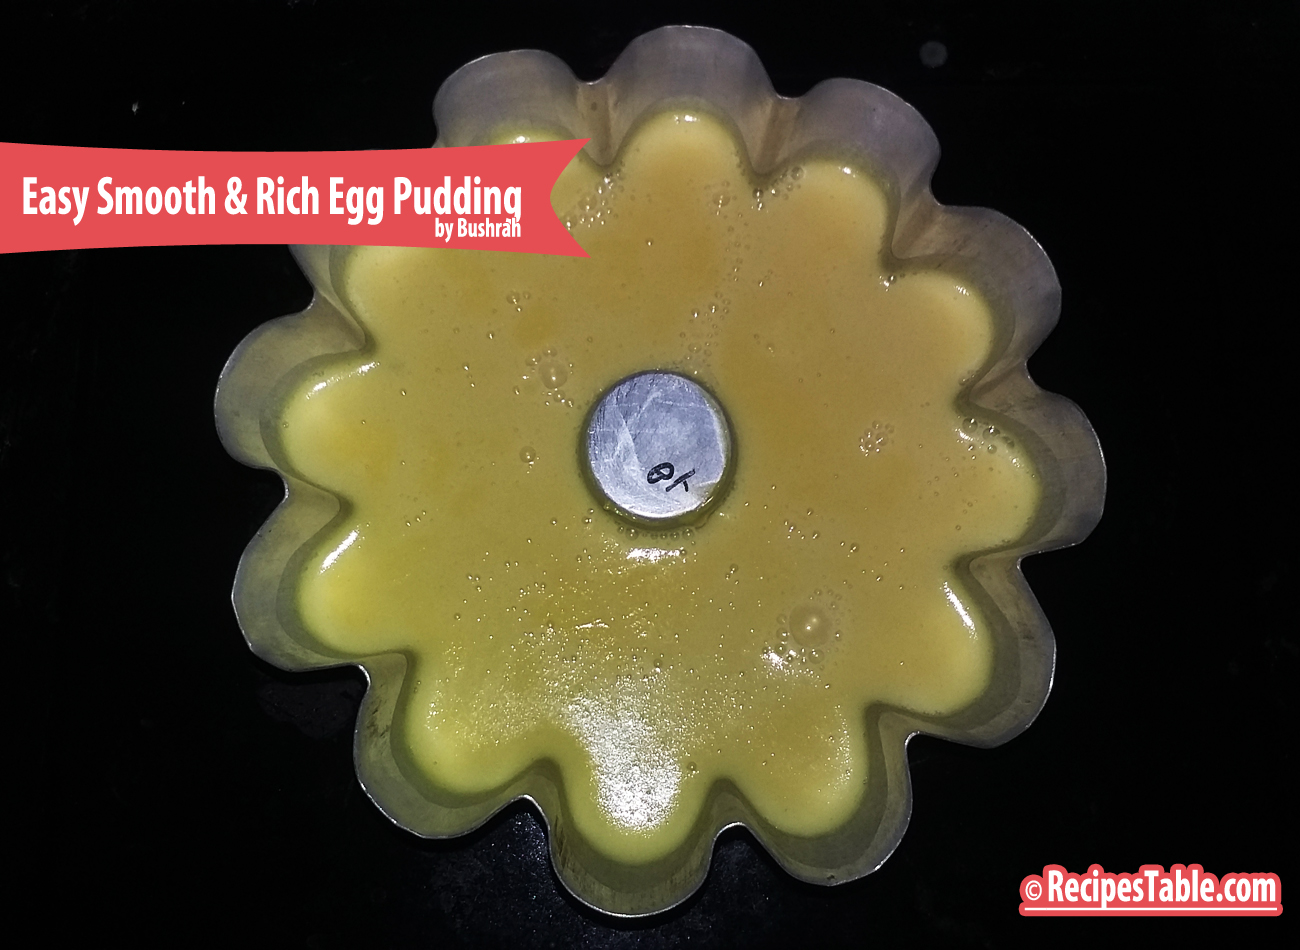
Egg pudding is just one of those things that never fails to bring a smile on your face or warmth to your toes. Its rich, its smooth, and it is so so SO easy to make even my fogged up brain can whip it up. Just needs a little bit of patience and whole lot of whisking!
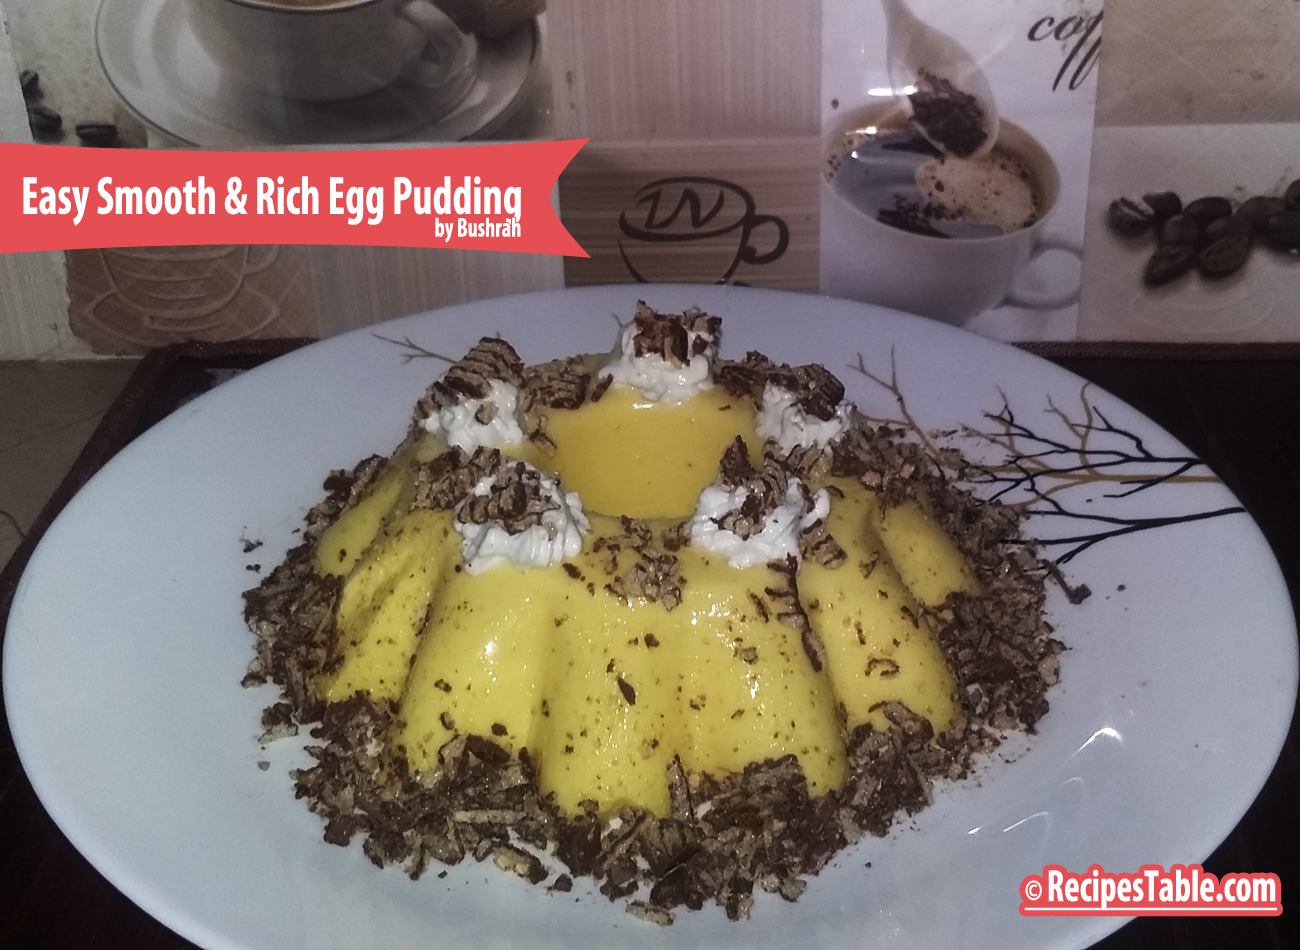
Easy Smooth & Rich Egg Pudding
Egg Pudding was my most favorite treat growing up. This easy dessert can be quickly made for festive occasions. Surprise everyone and get loads of compliments by making this easy egg pudding.
Easy Smooth & Rich Egg Pudding
Here’s a recipe for making a easy, simple, yet rich, smooth and satisfying egg pudding. I made this for my family and it totally rocked!! They said it was the most creamiest and richest egg pudding they’ve ever tasted. I never had any leftovers, and it would never be enough for them (lol). The only thing I WOULD get however, would be requests to make more!
Easy Smooth & Rich Egg Pudding
The creamy texture of this soft-smooth pudding is so inviting, you could call it comfort food. This recipe for egg pudding has a pleasant vanilla flavor complemented by cinnamon or nutmeg. This is the best dessert. I like it most for its sponginess. And it is also very easy to make with in 35 minutes.
Easy Smooth & Rich Egg Pudding
Some Important Tips to Make Best Egg Pudding:
Learn how to make best Egg Pudding by following these tips and tricks.
One-dish Pudding: Recipe can be baked in lightly greased 1-1/2 qt. soufflé or baking dish. Pour hot water to within 1 inch of top of dish. Increase baking time to 35 to 40 minutes.
No-mess pouring:Make pudding in a bowl with a pouring lip, or transfer it to a large glass measure, to make filling pudding cups easier and neater.
For perfectly smooth custard: Strain it through a sieve when filling pudding cups or baking dish to remove any tough egg strands.
Don’t skip the hot-water bath. A hot water bath, insulates the pudding from the direct heat of the oven and promotes even cooking so the edges don’t overcook before the center is done. Very hot tap water will do.
When is it done? Baked Pudding should be removed from the oven (and water bath) before the center is completely set. The center will jiggle slightly when dish or cup is gently shaken. Pudding will continue to “cook” after it’s removed and center will firm up quickly. Over baked Pudding may curdle.
The knife test: Test for doneness with a thin-bladed knife. Insert knife about 1 inch from the center of the dish. If knife is clean when pulled out, the pudding is done. If pudding clings to the blade, bake a few minutes longer and test again.
Serving Options: You can have this yummy dessert by adding dry fruits, jelly or caramel, but today I am making the basic one.
If you are craving for something sweet yet easy dessert in this foggy weather, nothing could be better than this Egg Pudding. Do try it, your kids are going to fall in love with this proteins and calcium rich dessert. You can also serve this dessert for your next party and this will definitely not going to disappoint your guests.
Check it out the Easy Smooth & Rich Egg Pudding recipe and printable version here!!
I have also posted Hot Chocolate Pudding Recipe which is another easiest & tastiest version of making Pudding. Do check it out as well. It’s finger lickin’ good. You’ll be coming back for more.
Put your own spin on it. And lemme know how it turns out. Post a photo on Facebook (Recipestable) or on Twitter so I can see how lovely yours turn out.
Happy Baking!!
If you like this post, Please Subscribe to my blog and let me know your feedback by commenting below.. I have lots more recipes to share with you.
Summer has been kicking into high gear and the temperatures have been climbing here, and everyone wants to keep cool on hot summer days. So today, I have a recipe for a simple, classic and very popular sandwiches: “Egg and Cucumber Sandwiches”.
Photo: Egg and Cucumber Sandwiches
Egg and Cucumber Sandwiches
Egg and Cucumber sandwiches are the most delicious, easiest finger foods to make. All you need is sliced white bread, boiled eggs, mayonnaise and of course, cucumbers. To enhance the flavor, I also spread a thin layer of dill with cream cheese spread.
Photo: Egg and Cucumber Sandwiches
I love adding cucumbers to egg mayonnaise. And sometimes different herbs too (especially dill goes very well with eggs and cucumbers). The cucumber can either be chopped finely and mixed into the egg mayonnaise or sliced thinly , I like the latter since it adds a nice fresh crunch to the sandwich. This can be made in advance and keeps well, so is perfect for tea parties.
Photo: Egg and Cucumber Sandwiches
What are your favorite foods for a tea time snack or tea party? For me, the food are simple to prepare and easy to eat (and not so messy), preferably something we can eat using our hands or toothpicks.
Photo: Egg and Cucumber Sandwiches
If you’re looking for an extremely quick and easy recipe for a lunch box, or a tea party, or a picnic, or you just so happen to have an extra cucumber lying around, then give these egg and cucumber sandwiches a try. They’re deliciously light and fresh, and I love the crunch of the cucumber. These delicious, easy-to-assemble sandwiches are great for a quick summer meal.
Bismillah let’s get started.
Check it out the Egg and Cucumber Sandwiches recipe and printable version below!!
I have also posted Zinger Club Sandwicheswhich is another easiest & tastiest version of making sandwiches. Do check it out as well.
Put your own spin on it. And lemme know how it turns out. Post a photo on Facebook (Recipestable) or on Twitter so I can see how lovely yours turn out.
Happy Sandwiches Making!!
If you like this post, Please Subscribe to my blog and let me know your feedback by commenting below.. I have lots more recipes to share with you.
In the Name of Allah, Most Gracious, Most Merciful
Happy Spring Season!
Spring is a perfect time to enjoy plump, juicy strawberry. Strawberry is a great fruit in so many ways. They’re sweet. They’re easy to handle and prepare, and they are kid-friendly.
Celebrate spring with Strawberry!
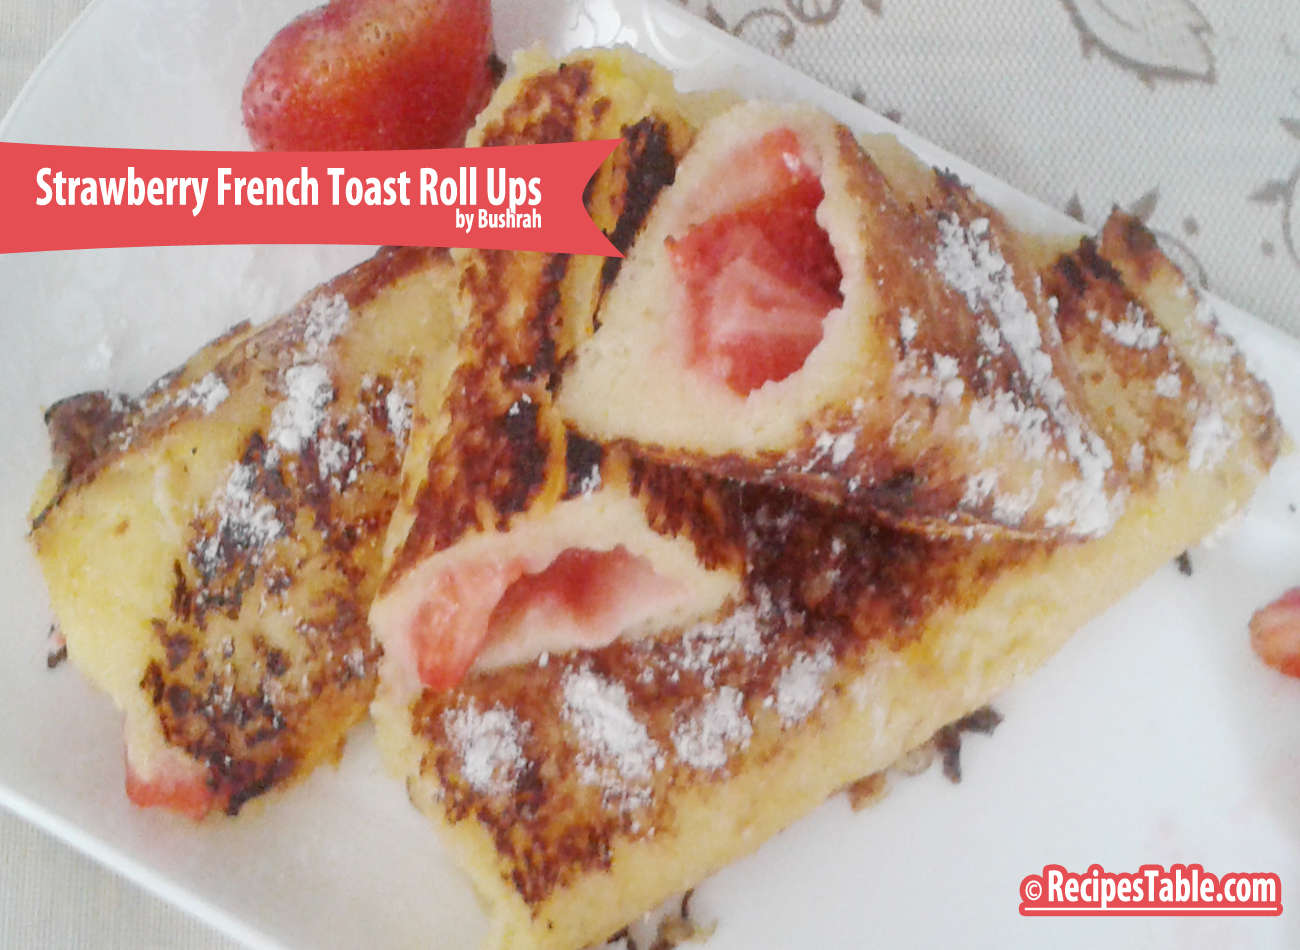
Is there a person on this planet that doesn’t like Strawberry and French Toast? Today I have come up with a wonderful and very different recipe. Strawberry French Toast Roll Ups – just a handful of ingredients to make these in 15 minutes. These strawberry french toast roll ups are so fun and easy to make.They taste like doughnuts!
Photo: Strawberry French Toast Roll Ups recipe
For the rest of us that love the good life, here’s an easy recipe that will transform any bread into sweet, eggy magic.
Photo: Strawberry French Toast Roll Ups
A must try recipe, your family will love these french toast roll ups filled with strawberries.
Let’s begin!!
Check it out the Strawberry French Toast Roll Ups recipe and printable version below!!
There are countless variations on this timeless recipe, so go ahead and get messy. Make up your own and share, there’s so many different ways to make this simple dish. Just about every recipe will have something similar as what i have for a base, feel free to use it as a guide and modify to make your breakfast super tasty.
I have also posted Almond French Toast Hearts which is another easiest version of making breakfast or lunch box item . Do check it out as well.
Put your own spin on it. And lemme know how it turns out. Post a photo on Facebook (Recipestable) or on Twitter so I can see how lovely yours turn out.
Happy Breakfast making!!
If you like this Strawberry French Toast Roll Ups, Please Subscribe to my blog. I have lots more recipes to share with you. And If you make it then let me know your feedback by commenting below.
A delicious and easy tea time snack for your friends and family. Fresh Parsley makes this traditional Potato Scotch egg recipe extra special.
Photo: Potato Scotch Eggs
Scotch eggs are one of those foods that have never gone out of favorite.I really love Scotch Eggs. Believe me this homemade potato scotch eggs are a world away from shop bought versions. They’re worth the effort for a special picnic treat. Packed with protein power, this summer fair favorite is easy to make in your home kitchen. Ready to eat in just 30 minutes, it makes a great start to the day, or a satisfying snack.
Photo: Potato Scotch Eggs Recipe
I have always been fascinated by Scotch eggs. I think they bring a little “wow” factor to any table. Scotch eggs are traditionally made with sausage meat wrapped around a hard boiled egg then breaded and deep fried. I wanted to shake up this UK savory treat with some Asian spices and do my own take on it. I decided instead of using a raw sausage meat, I would make a potato filling to wrap around the egg then bread it and deep fry it. I loved how these came out and they go perfectly with zeera rice and curry meal.
Photo: Potato Scotch Eggs
They also go well with a salad, bread, naan, etc… I think these beautiful eggs dress up any Asian or European table. If you are little worried about the size of the larger scotch eggs, I did make make a smaller version of this fun dish. I think the smaller version is actually a little more manageable to make and serve, although it doesn’t have the show-stopper look as the whole egg version when you cut them. Of course, both are equally tasty and fun and you will love to see them once they sit prettily on your table. Do try it, your kids will love it. Perfect for lunch box.
Note: Make sure you cut the larger scotch eggs in half or quarters before serving so the guests can see the inside because that’s the “wow” factor to the dish. Enjoy.
Check it out the Potato Scotch Eggs Recipe and printable version below!!
If you like this Potato Scotch Eggs recipe, Please Subscribe to my blog. I have lots more recipes to share with you. And If you make it then let me know your feedback by commenting below.
There is no limit to stuffed paratha. You can stuff the parathas with almost anything, but I’m sure you have never tried boiled eggs stuffed parathas before.Great recipe for Suhoor!They taste simply superb.
Photo: How to make Egg Paratha
This Egg Paratha recipe is easy, simple and takes less time, especially if you have leftover wheat dough.It’s protein rich, healthy and tasty. You can make it for your kids as a after school snack.
Photo: Egg Paratha Recipe
How to make Egg Paratha
Learn how to make egg Paratha by following the step by step instructions as shown in pictures. The recipe is simple and very easy to follow. You would successfully cook it in first attempt. (InshaAllah)
Bismillah Let’s Begin!
Step 1 : Mix the wheat flour with salt, water and knead to a smooth dough. Keep it aside for 30 minutes.
Step 2: Then make small balls from the dough and keep it aside.
Step 3: Take a mixing bowl, add mashed eggs add salt, pepper, chili powder, coriander and little bit of oil. Mix thoroughly.
Step 3 ~ Egg Paratha
Step 4:Take the dough balls and roll out each ball into a thin disc or a chapati.
Step 4 ~ Egg Paratha
Step 5:In the middle, place the filling mixture on one round chapati and cover with a another round chapati and seal the edges.
Step 5 ~ Egg Paratha
Step 6:Now sprinkle a little dry flour on top, then roll the paratha to a thin round shape chapati. Take care it should not break while rolling it out.
Step 6 ~ Egg Paratha
Step 7:Grease your tava OR griddle with Ghee (clarified butter) and place the paratha over it and when the base turns slightly golden color, apply Ghee (clarified butter) on the top and turn the paratha on the other side.
Step 7 ~ Egg Paratha
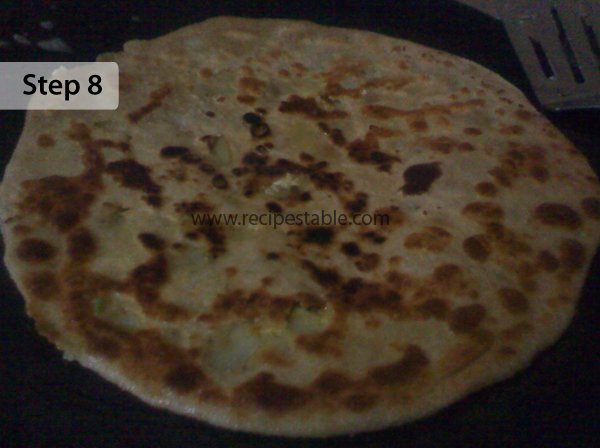
Step 8:Fry these parathas on both sides, pressing gently and keep turning the paratha until it turns golden brown.
Step 8 ~ Egg Paratha
Check it out the Egg Paratha recipe and printable version below:
If you like this Egg Paratha Recipe, Please Subscribe to my blog. I have lots more recipes to share with you. And If you make it then let me know your feedback by commenting below.
An quick and easy fruit cake recipe for tea time. Best eaten fresh. Enjoy this yummy fruit cake flavored with orange zest, vanilla essence and black currant.
If you’re in a hurry, try this Spicy Chicken Omelette Recipe that can be enjoyed any time of day. Combine chicken and egg for a delightful main dish that’s ready in just 25 minutes!
Perfect for breakfast, lunch or dinner, be creative with you flavor combinations and add tomato, herbs, mushroom, or even olives!
Photo: Spicy Chicken Omelette Recipe
Check it out the Spicy Chicken Omelette Recipe here!!
In a small bowl, whisk together the eggs and milk.
Season with salt and pepper. Mix well.
Melt butter in a non-stick pan over medium heat. Add chicken, green onion and green chili. Cook and stir for 1-2 minutes then pour egg mixture over it.
As eggs set at the edges, with spatula, gently lift cooked portion to allow uncooked egg to flow underneath.
Cook on low flame for 2 minutes or until almost set.
Sprinkle cheese on half of the omelette.
Fold other half over cheese.
Remove from the heat and transfer into a platter.
Cut omelette in half. Spicy Chicken Omelette is ready to serve. ENJOY!!
If you like Spicy Chicken Omelette Recipe and make it then let me know your feedback by commenting below.And if you know more innovative ways in which we can utilize this mouth watering Spicy Chicken Omelette, do share with us and we would be glad to give it a try.
I’m a big fan of the weekend. I’m most certainly everyone is as well. I mean what is not to love love about the weekend, whether it be a lazy Sunday morning, or the fact that you simply do not have to rush to get to work, only to repeat that routine Monday through Friday. Weekends are important to me just for the simple fact that I can unwind, figure things out on a slower pace, and cook great food.
Is there nothing better than French toast for Sunday breakfast? French toast, also known as eggy bread or gypsy toast.
Photo: French Toast Recipe
Today I am sharing a sweet French toast recipe.. Which is my mom’s recipe and I had enjoyed it in my Childhood. This French Toast Recipe uses vanilla extract and cinnamon to bring a richness of flavor. Pick your favorite bread and serve with butter and fresh berries.
Photo: French Toast Recipe
Let’s get started.
Check it out the French Toast Recipe and printable version below!!
In a shallow bowl, beat together the egg, milk, sugar, cinnamon powder and vanilla.
Keep aside.
Heat a lightly oiled griddle over medium-high heat.
Dunk each slice of bread in egg mixture, soaking both sides.
Place on the hot griddle and cook on both sides until golden.
Remove from the heat and take it out in a serving platter.
Drizzle with honey.
Top with strawberry slices. Delicious French Toast is ready to serve. ENJOY!!
Recipe Note’s:
When French toast is served as a sweet dish, milk, sugar, vanilla or cinnamon are also commonly added before pan-frying, and then it may be topped with sugar (often powdered sugar), butter, fruit, or syrup.
When it is a savory dish, it is generally fried with a pinch of salt, and can then be served with a sauce such as ketchup or mayonnaise.
Serve with butter and fresh berries.
If you like French Toast Recipe and make it then let me know your feedback by commenting below.And if you know more innovative ways in which we can utilize this sweet and mouth watering French Toast , do share with us and we would be glad to give it a try.
Nan Khatai is an Persian /Indo-Pakistani butter cookie that is made with ghee(clarified butter), sugar, all-purpose flour, gram flour, cardamom, and roasted almonds and pistachios. Do try it.
Add sugar and cardamom powder.Beat until light and fluffy.
Now take a separate bowl, sift flour, baking powder,gram flour and baking soda.
Now fold into ghee mixture.
Stir in the roasted almonds and pistachios.
Now roll out the dough, cut into rounds with a cookie cutter.
Put nan khatai on a greased baking tray.
Brush them with egg yolks.
Place baking tray in the preheated oven for 12-15 minutes or until done.
Remove from the oven and let it cool completely. Lahori Nan Khatai is ready to serve.
Notes
Serve with Tea.
If you like Lahori Nan Khatai Recipe and make it then let me know your feedback by commenting below.And if you know more innovative ways in which we can utilize this sweet and mouth watering Lahori Nan Khatai, do share with us and we would be glad to give it a try.
This gorgeous pudding has a taste of vanilla and chocolate in it. Rather then traditional pudding, hot Chocolate Pudding with Vanilla Custard can delightedly serve at the end of meal. Discover the Hot Chocolate Pudding Recipe
Photo: Hot Chocolate Pudding Recipe
Check it out the Hot Chocolate Pudding Recipe here!!
Prep Time:20 minutes
Cook Time:45 minutes
Servings: 4
Ingredients
For Chocolate Pudding:
2 cups milk
1/2 cup sugar
4 eggs
2 tbsp plain flour
2 tbsp cocoa powder
1/2 tsp vanilla essence
For Vanilla Custard:
1 cup milk
1/2 cup fresh cream
2 tbsp sugar
1 tbsp vanilla custard powder
few drops of vanilla essence
Directions:
For Chocolate Pudding:
Preheat oven to 180 degree C.
Pour milk in a saucepan.
Bring to a boil, add cocoa powder and sugar.
Stir well.
Cook for 5 minutes or until sugar has dissolved.
Remove from the heat and keep aside.
In a large bowl, beat eggs for 3-4 minutes or until fluffy.
Stir in vanilla essence.
Now add boiled milk mixture.
Beat well.
Also add flour and mix well.
Now bake in the preheated oven for 30 minutes.
For Vanilla Custard:
In a saucepan , add milk and sugar.
Bring to a boil and cook for 2-3 minutes.
Then stir in vanilla essence.
Dissolve vanilla custard in 2 tbsp milk.
Gradually pour custard mixture into the sauce.
Keep stirring.
Cook for 5 minutes or until thickened.
Remove from the heat and take it out in a serving bowl.
Hot chocolate pudding with vanilla custard is ready to serve.
Enjoy!
Serve as a dessert after any meal.
If you like Hot Chocolate Pudding Recipe and make it then let me know your feedback by commenting below.And if you know more innovative ways in which we can utilize this sweet and mouth watering Hot Chocolate Pudding , do share with us and we would be glad to give it a try.
Molten Lava cakes also known as chocolate lava cakes. They are rich individual chocolate cakes with oozing molten centers. Try this Molten Lava Cakes recipe and make these rich and impressive single-serving chocolate cakes.Decadent and delicious, these are the ideal dessert for any Special Occasion.
This rich and decadent Chocolate mousse cake is the ultimate CHOCOLATY DELIGHT.Chocolate cake with chocolate moussefilling and topped off with dark chocolate ganache. Must Try this Chocolate Mousse Cake recipe; everyone will think you bought it at a bakery!
Photo: Chocolate Mousse Cake Recipe
Check it out the Chocolate Mousse Cake Recipe here!!
In a large bowl, mix together sugar, flour, cocoa powder, baking powder and salt.
Step 4
Add milk, eggs, oil and vanilla. Stir with spatula for few minutes or until the batter is smooth and no lumps remain.
Step 5
Now add baking soda and mix well.
Step 6
Stir in the boiling water.
Step 7
Pour batter equally into prepared baking pans.
Step 8
Bake in the preheated oven for 30-35 minutes or until a tooth-pick inserted in the center comes out clean.
Step 9
Let it cool for 10 minutes then remove from the pans
to wire racks.
Step 10
Allow to cool completely.Chocolate Cake Sponge is ready 🙂
To Make The Chocolate Mousse:
Meanwhile cake is oven, let’s prepare the Chocolate Mousse.
Step 1
Place heavy cream in a large bowl. Beat for 10-12
minutes or until it forms stiff peaks.
Step 2
Place in the refrigerator until set.
Step 3
Take a small bowl, add egg yolk and sugar in it. Beat 3-4 minutes or until it becomes thick and pale in color and the sugar fully dissolved.
Step 4
Keep aside.
Step 5
Take a small pan and fill it with an inch of water.
Step 6
Bring it to a simmer.
Step 7
Place a small heat-proof bowl over the saucepan.
Step 8
Add the chocolate, water, and butter. Stir and cook on very low heat for few minutes or until the chocolate is melted.
Step 9
Spoon 1/4 of the chocolate mixture into the egg yolk
mixture. Stir until well combined.
Step 10
Pour the egg yolk mixture back into the small bowl over the simmering water in the saucepan with the remaining chocolate mixture.
Step 11
Stir in the vanilla extract.
Step 12
Keep stirring and cook over low heat for 2-3 minutes or until the mixture thickens.
Step 13
Let it cool for few minutes; stirring frequently.
Step 14
Place egg whites in another small bowl. Beat until it forms stiff peaks.
Step 15
Fold the egg white in the cooled chocolate mixture.
Step 16
Now fold into the whipped heavy cream.
Note: Be careful not to over mix otherwise the heavy cream will lose its texture.
To Assemble The Cake
Step 1
Cut the top dome texture of the cake sponges. This will help you to get a flat and even surface.
Step 2
Arrange the bottom layer of the cake in the spring form pan.
Step 3
Pour the thick chocolate mousse over the cake sponge.
Step 4
Spread evenly with a spatula.
Step 5
Now cover the pan with cling wrap or any plastic covering.
Step 6
Place the pan in the refrigerator for 20 minutes or until set.
Step 7
Remove the pan and gently place the second cake sponge on top of the mousse.
Step 8
Cover again and keep in the refrigerator for 30 minutes or until firm or set.
To Make Chocolate Ganache
Step 1
Place the chocolate in a medium bowl.
Step 2
Heat the heavy cream in a small sauce pan over medium heat.
Step 3
Bring just to a boil.
Step 4
When the cream has come to a boil, immediately pour over the chopped chocolate and stir until smooth.
Step 5
Stir in the 1/2 teaspoon of vanilla essence.
Step 6
Let it cool slightly.
Step 7
When cool, pour the chocolate ganache in the the center of the cake, it will slowly spread itself.
Step 8
Finally, cover the cake and refrigerate overnight or until the cake sets.
To Decorate The Chocolate Mousse Cake:
Step 1
When the cake has set, decorate the cake with chocolate curls and hazelnuts or walnuts.
Step 2
Slide the cake out of the pan and transfer to a cake plate. Mouthwatering Chocolate Mousse Cake is ready to eat!! ENJOY 😉
[/tab]
[tab]
Tip To Assemble the Cake: You will need a spring-form pan or a cake ring to hold everything neatly as the cake sets. So that you can later easily un-mold your cake once the mousse has set without ruining the delicate layers. If you don’t have a spring-form or cake ring, you can do this in a regular pan, make sure it is the same size as your cake. Serving out of a regular pan can be a bit tricky though as it will be hard to lift out the cake neatly with that soft creamy mousse in the middle.
Tip To Make Chocolate Mousse: If you want the mousse layer to show neatly and evenly through the cake, take an offset spatula or cut out a small rectangular piece off a tetra pack or hard paper and run it over the mousse around the circumference of the cake to remove the excess mousse, and give it a smoother finish.
Tip To Decorate The Cake: You can top the cake with whipped cream, cherries any type of nuts or leave it as is.
Tip To Make Chocolate Ganache: While making Chocolate ganache,don’t over boil the cream because if it boils for a few seconds, it will boil out of the pot.
Tip To Make Thicker Ganache: If you want a thicker consistency for piping the ganache, just let it cool for a longer time.
[/tab]
[tab]
Serve as a dessert after any meal or birthday party or any other special occasion.
[/tab] [/tabs]
If you like Chocolate Mousse Cake recipe and make it then let me know your feedback by commenting below.
Put Potatoes on wooden sticks.Dip sticks in beaten eggs and deep fry until nice golden color. Must try this Potato Sticks Recipe, your whole family will love it.