Tag: Kids Friendly

  • Creamy & Refreshing: Make Delicious Mango Kulfi Ice Cream at Home!

    Mango Kulfi Ice Cream

    Making Kulfi Ice Cream at home is an easy process with minimal ingredients. Fresh Mangoes processed to a pulp and mixed with creamy ingredients, This Mango Kulfi Ice Cream recipe is so simple, even kids can make it!

    Mango Kulfi Ice Cream Recipe
    Photo: Mango Kulfi Ice Cream Recipe

    Check it out the Mango Kulfi Ice Cream Recipe here!!

    [divider]

    [one_fourth]Prep Time:10 minutes + freezing[/one_fourth] [one_fourth]Cook Time:20 minutes[/one_fourth] [one_fourth]Servings: 4[/one_fourth] [one_fourth_last]Difficulty Level: Easy[/one_fourth_last]

    [divider]

    [tabs type=”horizontal”] [tabs_head] [tab_title]Ingredients[/tab_title] [tab_title]Nutrition[/tab_title] [/tabs_head] [tab]

    • 1 Ripe Mango
    • 1 can Sweetened Condensed Milk
    • 1/4 can Milk Powder
    • Sugar as per taste
    • 1/4 tsp Cardamom Powder
    • Few Strands of Saffron
    • 1/4 cup Pistachios(chopped coarsely)

    [/tab] [tab]Yield: 4  servings

    Nutritional information is not yet available. [/tab] [/tabs]

    Directions:
    [tabs type=”horizontal”] [tabs_head] [tab_title]Step by Step Method[/tab_title] [tab_title]Serving Suggestions[/tab_title][/tabs_head] [tab]

    Step 1

    Peel the mango and chop it into small pieces.

    Step 2

    Discard the seed.

    Step 3

    Combine the mango pieces, sugar, condensed milk and milk powder in a pan and bring it to a boil.

    Step 4

    Now add the cardamom powder, cook for 10 more minutes till the mixture thickens.

    Step 5

    Now add saffron and pistachios.

    Step 6

    Lower the flame and allow to cool completely.

    Step 7

    Pour into kulfi moulds and freeze overnight till firm.Mango Kulfi Ice Cream is ready to serve.Enjoy!

    [/tab] [tab]

    • Serve as a dessert after any meal.

    [/tab] [/tabs]
    If you like Mango Kulfi Ice Cream recipe and make it then let me know your feedback by commenting below.And if you know more innovative ways in which we can utilize this sweet and mouth watering Mango Kulfi Ice Cream, do share with us and we would be glad to give it a try.

  • Easy Pizza Sandwiches Recipe: Ready in Minutes (Perfect for Busy Weeknights!)

    Pizza Sandwiches

    Pizza is a favorite of many. But making it can be quite boring, because there are so many procedures for making it. You need do the dough, allow it to rest then make the sauce and prepare the toppings and bake it. OH MAN lots of work.

    So I am with solution for all this and a superb dish to satisfy your pizza craving even in the mid night. Pizza Sandwiches a quick solution for instant pizza. Must try this Pizza Sandwiches Recipe and don’t forget to share your experience with us!!

    Pizza Sandwiches Recipe
    Photo: Pizza Sandwiches Recipe

    Check it out the Pizza Sandwiches Recipe here!!

    [divider]

    [one_fourth]Prep Time:10 minutes[/one_fourth] [one_fourth]Cook Time:2 minutes[/one_fourth] [one_fourth]Servings:4 [/one_fourth] [one_fourth_last]Difficulty Level: Very Easy[/one_fourth_last]

    [divider]

    [tabs type=”horizontal”] [tabs_head] [tab_title]Ingredients[/tab_title] [tab_title]Nutrition[/tab_title] [/tabs_head] [tab]

    • 4 bread slices
    • 1 cup mayonnaise
    • 1/4 cup cooked chicken, shredded
    • 1/4 cup cheese
    • 1 tomato, remove seeds and chopped
    • 1 green pepper, remove seeds and chopped
    • 4 tbsp chili garlic sauce
    • 1/2 tsp black pepper
    • 1/2 tsp salt

    [/tab] [tab]Yield:4 servings

    Nutritional information is not yet available. [/tab] [/tabs]

    Directions:
    [tabs type=”horizontal”] [tabs_head] [tab_title]Step by Step Method[/tab_title] [tab_title]Serving Suggestions[/tab_title][/tabs_head] [tab]

    Step 1

    Shred the chicken.

    Step 2

    Add mayonaise, salt and pepper to form a paste.

    Step 3

    Spread chili garlic sauce on bread slices.

    Step 4

    Put chicken mixture on the bread slices.

    Step 5

    Sprinkle grated cheese on the slices.

    Step 6

    Now top with tomatoes and green pepper.

    Step 7

    Bake for 2 minutes or until the cheese is melted and bubbly.

    Step 8

    Remove from the oven and cut each bread slice in the triangle shape. Pizza sandwiches are ready to serve.

    [/tab] [tab]

    • Serve with chilli-garlic sauce.

    [/tab] [/tabs]
    If you like Pizza Sandwiches Recipe and make it then let me know your feedback by commenting below.And if you know more innovative ways in which we can utilize this mouthwatering Pizza Sandwiches, do share with us and we would be glad to give it a try.

  • Easy & Delicious Homemade Pizza Rolls Recipe: Perfect for Parties or Snacks!

    A tasty dinner option for busy nights and with few simple ingredients , prep has never been easier! Take your pizza and give it a roll!

    Homemade Pizza Rolls
    Homemade Pizza Rolls

    Homemade Pizza Rolls

    Does anyone remember those mini pizza bites…? Am I the only one that gobbled up two to three every day as a tea time snack? Well, guess what. These are sooooo much better! And easy to make!

    Homemade Pizza Rolls
    Homemade Pizza Rolls

    They would be perfect for the friends pizza party because you can fill them individually with a vast array of toppings. They’d also be perfect as an appetizer with a glass of lemonade. In fact, I don’t really know of a time that these pizza rolls is not appropriate, do you?

    I didn’t think so.

    Homemade Pizza Rolls
    Homemade Pizza Rolls

    This Homemade Pizza Roll Recipe is perfect and my family favorites. I used my favorite pizza dough recipe to make these rolls and they turned out beautifully in just over an hour, start to finish. Super fast. You could also make the dough ahead of time and freeze it, which is what I do often!

    Homemade Pizza Rolls
    Homemade Pizza Rolls

    Let it be known that although the recipe calls for whole wheat flour, more often times than not, I just use all white flour. What can I say? I’m a carb purist.

    All you is roll out the Pizza dough, then fill with whatever toppings you choose, rolled into a spiral then baked. I kept things simple with pizza sauce, chicken and mozzarella cheese, few veggies but you could totally go crazy here and add sauteed mushrooms, goat cheese, pepperoni, bits of sausage and even scrambled eggs and cheese. The options are endless!

    Homemade Pizza Rolls
    Homemade Pizza Rolls

    Pizza sauce is my favorite part about the pizza (besides a crispy crust) and the cheese is Fatima’s & Wahab’s favorite. I fill these pizza rolls with just a little bit of sauce to make them happy and I serve with extra sauce to make me happy. 🙂

    Dip until your heart is content!

    Check it out the printable version Homemade Pizza Rolls Recipe here!!

    Homemade Pizza Rolls

    A tasty dinner option for busy nights and with few simple ingredients , prep has never been easier! Take your pizza and give it a roll!
    Prep Time 10 minutes
    Cook Time 43 minutes
    Total Time 1 hour 13 minutes
    Servings 9
    Author Bushrah @ Recipestable

    Ingredients

    • 1 lb pizza dough
    • 1/2 cup pizza sauce
    • 1/2 cup cooked chicken pieces or mince
    • 1 cup grated Mozzarella Cheese
    • 1/2 cup grated Cheddar Cheese
    • 1 green bell pepper chopped
    • 4-5 black olives chopped
    • 1 teaspoon dried oregano
    • 1 teaspoon dried basil
    • a pinch of red pepper flakes

    Instructions

    • Line a 9×9 baking dish with parchment paper and keep aside.
    • Lightly flour a work surface and roll the dough into an 8×12 rectangle.
    • Spread the pizza sauce over the dough to the edges.
    • Top with the chicken or mince, then 1/2 of the mozzarella cheese, green pepper and olives.
    • Sprinkle oregano and basil over it.
    • Starting on the long side, roll the dough up to form a log.
    • Trim the edges if uneven, then cut the dough into 9 equal slices.
    • Place the slices, cut side down, in the prepared baking dish, making 3 rows of 3 rolls each.
    • Cover the dish with foil and let it sit to rise for 30 minutes.
    • Meanwhile, preheat the oven to 375ºF.
    • Place the rolls in the preheated oven, still covered, and bake for 20 minutes.
    • Remove the foil and return the pan to the oven and bake for an additional 20 minutes.
    • The rolls should be browned and the cheese melted.
    • Sprinkle the remaining 1/2 cup of mozzarella and red pepper flakes over the top of the rolls, then return to the oven until the cheese is melted, about 3 minutes.
    • Let the rolls cool slightly in the pan, then top with the remaining basil.
    • Delicious Homemade Pizza Rolls are ready to serve. ENJOY!

    Notes

    Recipe Note’s:
    You may use whole wheat pizza dough instead of white flour.
    If you prefer, you can bake these rolls in two muffin pans or even a 9×13 baking pan.

    Homemade Pizza Rolls Recipe with Step by Step Pictorial 

    Homemade Pizza Rolls Step. No: 1
    Homemade Pizza Rolls Step. No: 1
    Homemade Pizza Rolls Step. No: 2
    Homemade Pizza Rolls Step. No: 2
    Homemade Pizza Rolls Step. No: 3
    Homemade Pizza Rolls Step. No: 3
    Homemade Pizza Rolls Step. No: 4
    Homemade Pizza Rolls Step. No: 4
    Homemade Pizza Rolls Step. No: 5
    Homemade Pizza Rolls Step. No: 5
    Homemade Pizza Rolls Step. No: 6
    Homemade Pizza Rolls Step. No: 6

    Pin it For Later

    Homemade Pizza Rolls Recipe Pictorial
    Homemade Pizza Rolls Recipe Pictorial

    If you have any question about this Homemade Pizza Rolls Recipe  then you can ask by using comment box and I will clarify your confusion.

    I have also posted Mini Pizza Cups Recipe  and Two Cheese Pizza Recipe which are another easiest & tastiest version of making Pizza. Do check it out as well.  It’s finger lickin’ good. You’ll be coming back for more.


    Put your own spin on it. And lemme know how it turns out. Post a photo on Facebook (Recipestable) or  on Twitter so I can see how lovely yours turn out.

    Follow my blog with Bloglovin


    Happy Baking!!

    If you like this post, Please Subscribe to my blog and let me know your feedback by commenting below.. I have lots more recipes to share with you.

  • Think Outside the Pan: Double Pan Pizza Recipe (Next-Level Homemade Pizza!)

    Double Pan Pizza

    Bismillah, let’s begin!

    Check it out the Double Pan Pizza recipe and printable version below!

    Double Pan Pizza Recipe

    Prep Time 45 minutes
    Cook Time 30 minutes
    Total Time 1 hour 15 minutes
    Servings 6
    Author Bushrah | Recipestable

    Ingredients

    For Pizza Dough

    • 2 cups wheat flour
    • 2 cups refined flour
    • 1 egg
    • 3 tbsp milk powder
    • 2 tbsp yeast
    • 1 tbsp sugar
    • 1 tsp salt
    • 1 tsp fresh coriander
    • a pinch of onion seeds
    • 2 pinch crushed red chili
    • 2-1/2 cps Luke warm water or milk

    For Pizza Topping

    • 1 cup boneless chicken cut into cubes
    • 1 cup onion cut into cubes
    • 1 capsicum cut into cubes
    • 8 mushrooms
    • 1 packet Mozzarella Cheese
    • 2 tbsp garlic minced
    • 2 tbsp garlic sauce
    • 1 tbsp red chili crushed
    • 1 tsp black pepper
    • 1/2 tsp mustard seeds
    • 1 tsp salt

    For Pizza Sauce

    • 2 cups tomato paste
    • 4 tbsp olive oil
    • 2 tbsp garlic minced
    • 2 tbsp sugar
    • 2 tbsp coriander leaves
    • 1 tbsp red chili crushed

    Instructions

    To Make Pizza Sauce

    • Heat oil in a pan.
    • Add garlic and cook for 30 seconds.
    • Then add all sauce ingredients.
    • Mix well.
    • Cook on medium heat for 10 minutes or until sauce is thickened.

    To Make Pizza Topping

    • Heat oil in an another pan.
    • Saute garlic in it.
    • Put chicken to the pan and fry for for 5 minutes.
    • Then add red chili, onion seed and black pepper, salt.
    • Mix well.

    To Make Pizza Dough

    • In a large bowl, combine together flour, green coriander, milk powder, yeast, sugar, salt, crushed red chili, mustard seeds and egg.
    • Knead a dough by using warm water or warm milk.
    • Leave it for 45 minutes.

    To Proceed

    • Take a simple frying pan and spread the pizza dough on it.
    • Cover the pan with a lid and cook for 2-3 minutes.
    • Press it a little bit with a cloth like chapatti, to cook properly.
    • When it starts rising/cooking, turn it over.
    • Spread prepared pizza sauce over the cooked side of dough.
    • Place chicken, onion, capsicum and mushrooms on it.
    • Sprinkle mozzarella cheese over it.
    • Cover the pan again and let it cook on low flame for 15 minutes or until cheese melts.
    • Double Pan Pizza is ready to serve.

    Notes

    Serve hot with Mexican Tomato Sauce.

    I have also posted My Favorite French Bread Pizza which is another easiest & tastiest version of making Pizza. Do check it out as well.


    Put your own spin on it. And lemme know how it turns out. Post a photo on Facebook (Recipestable) or  on Twitter so I can see how lovely yours turn out.


    Happy Pizza Making!!

    If you like this post, Please Subscribe to my blog and let me know your feedback by commenting below.. I have lots more recipes to share with you.

  • Better than Takeout Chinese Chicken Fried Rice Recipe

    It’s my favorite fried rice again ! And I am sure it’s also the favorites of many of you out there. Because no one, simply no one I have heard of who doesn’t fancy a fried rice so far. And today version is further topped with salmon cubes and edamame beans ! And with the plus fact that it’s more protein packed than usual because there’s simply more eggs than rice in this fried rice !

    Also for the fact that I am trying to reduce my rice intake, so this plate of fried rice uses one whole chunk of salmon and 2 full eggs but only contains slightly more than 1/2 cup of short grain rice. So you can visualize yourself enjoying the ingredients rather than eating fried rice then. Lol.

    But I must reiterate that it’s still a fried rice nevertheless because it was intended to be one, and a very tasty one too ! Because salmon and edamame beans are healthy and delicious foods to begin with, so they can never go wrong with the scrambled eggs and Japanese short grain rice.

    Recently I saw someone sharing some thoughts about posting recipes that I find it very meaningful and true. It goes on to say something liked ~ instead of sharing very elaborate recipes which you would need to go to great strengths to produce that excellent food, why not share some down to earth and simple recipes which the majority of us can follow or even improvise to an even better one which would in turn benefit more people. And I am so in agreement with this. So here I am, sharing this quick and fuss free recipe here ! Hope you will like it too !

    Try this Chinese Chicken fried rice recipe ~ just like they serve in the restaurants. Chicken, eggs,carrots, pea pods, rice and soy sauce is all you need. !!

    Chinese Chicken Fried Rice

    Chinese Chicken Fried Rice[/caption]

    Bismillah, let’s begin!

    Check it out the Chinese Chicken Fried Rice Recipe and printable version below.

    Chinese Chicken Fried Rice Recipe

    Prep Time 20 minutes
    Cook Time 25 minutes
    Total Time 45 minutes
    Servings 8
    Author Bushrah | Recipestable

    Ingredients

    • 6 cups cooked white rice
    • 3 cups cooked chicken cut into cubes
    • 1/2 cup fresh pea pods
    • 3 eggs lightly beaten
    • 1 green onion chopped
    • 1 large carrots diced
    • 1 green bell pepper diced
    • 1 red bell pepper diced
    • 4 tbsp soy sauce
    • 1 tbsp sesame oil
    • salt and pepper to taste

    Instructions

    Method

    • Heat oil in a large wok or skillet over medium heat. Crack in eggs, stirring quickly to scramble eggs.
    • Add chicken; cook and stir for 2-3 minutes or until crispy.
    • Stir in green onion, carrots, pea pods and bell peppers.
    • Stir-fry 5 minutes or until vegetables crisp-tender.
    • Add rice and mix thoroughly.Drizzle with soy sauce.
    • Cover and cook another 5 minutes or until heated through.
    • Dish it out. Delicious Chinese Chicken Fried Rice is ready to serve.

    Notes

    Serving Suggestions:
    Serve with Chicken Manchurian.

    I have also posted Vegetable Fried Rice Recipe which is another easiest & tastiest version of making Fried Rice. Do check it out as well.


    Put your own spin on it. And lemme know how it turns out. Post a photo on Facebook (Recipestable) or  on Twitter so I can see how lovely yours turn out.


    Happy Cooking!!

    If you like this post, Please Subscribe to my blog and let me know your feedback by commenting below.. I have lots more recipes to share with you.

  • The Perfect Party Appetizer: Easy Potato Croquettes Recipe!

    Potato Croquettes

    Everyone loves Potato Croquettes. In this recipe, I am making Potato Croquettes, a perfect snack for every occasion.
    Must try this Potato Croquettes Recipe , you’ll love it.

    Check it out the Potato Croquettes Recipe here!!

    Prep Time:30 minutes

    Cook Time:10 minutes

    Servings: 4

    Ingredients:

    • 1/2 kg potatoes
    • 2 eggs
    • 1 cup bread crumbs
    • 50 gm butter
    • 4 tbsp parsley
    • 1 tbsp Parmesan cheese
    • 1 tsp black pepper
    • 1/2 tsp Chinese Salt
    • salt to taste

    Directions:

    1. Boil and Mash potatoes.
    2. Add butter, Chinese salt, parsley, and Parmesan cheese.
    3. Season with salt and pepper.
    4. Mix well.
    5. Shape them into croquettes.
    6. In a small bowl, beat eggs.
    7. Dip croquettes into beaten egg.
    8. Then roll them into breadcrumbs.
    9. Turn to coat evenly.
    10. Heat oil in a pan over medium heat.
    11. Fry croquettes for 5-6 minutes or until golden brown.
    12. Remove from the oil and drain on paper towel.
    13. Potato Croquettes are ready to serve.
    • Enjoy with Chili Garlic Sauce.

    If you like Potato Croquettes Recipe  and make it then let me know your feedback by commenting below.

  • Spicy Crispy and Juicy Fried Fish Recipe

    This post may contain affiliate links. Please read my disclosure policy.

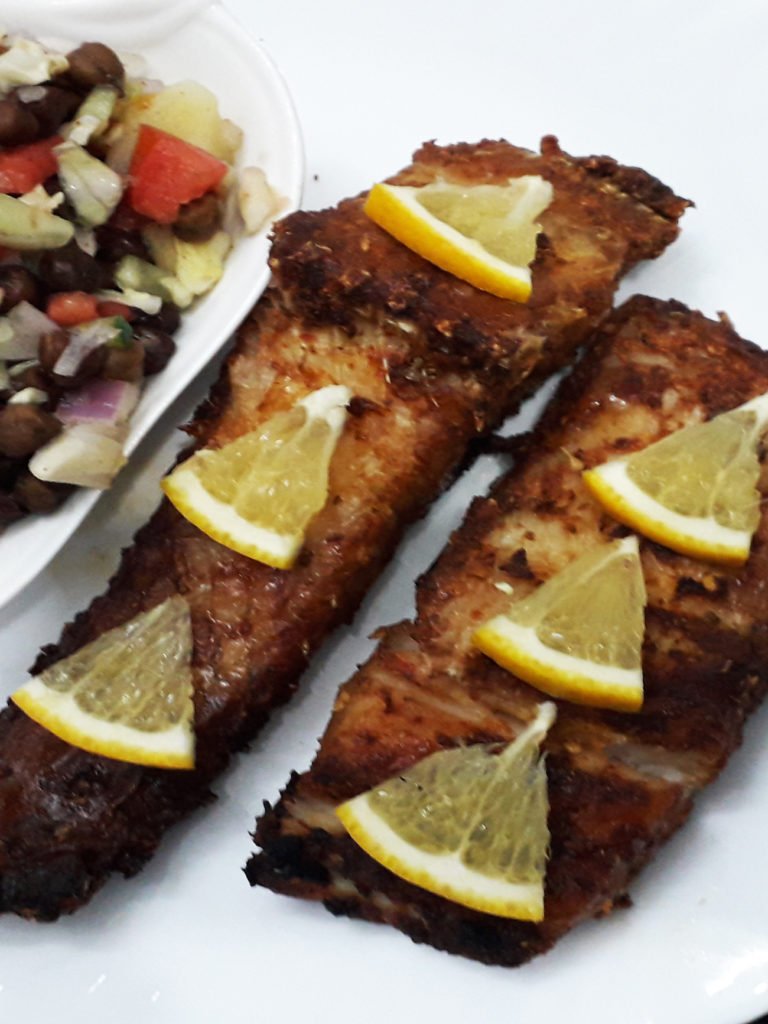
    This fried fish is so flavorful, crispy and juicy, your guests will beg you for the recipe. This easy to make restaurant style dish is a keeper and will have you fried fish on a regular basis.

    Spicy Fried Fish

    Try my Fried Fish Recipe. It will be a hit at your next dinner party, or a delicious week-night dinner. Cooking is not Rocket Science, we just need to learn to use what we have on hand to create simple delicious meals.

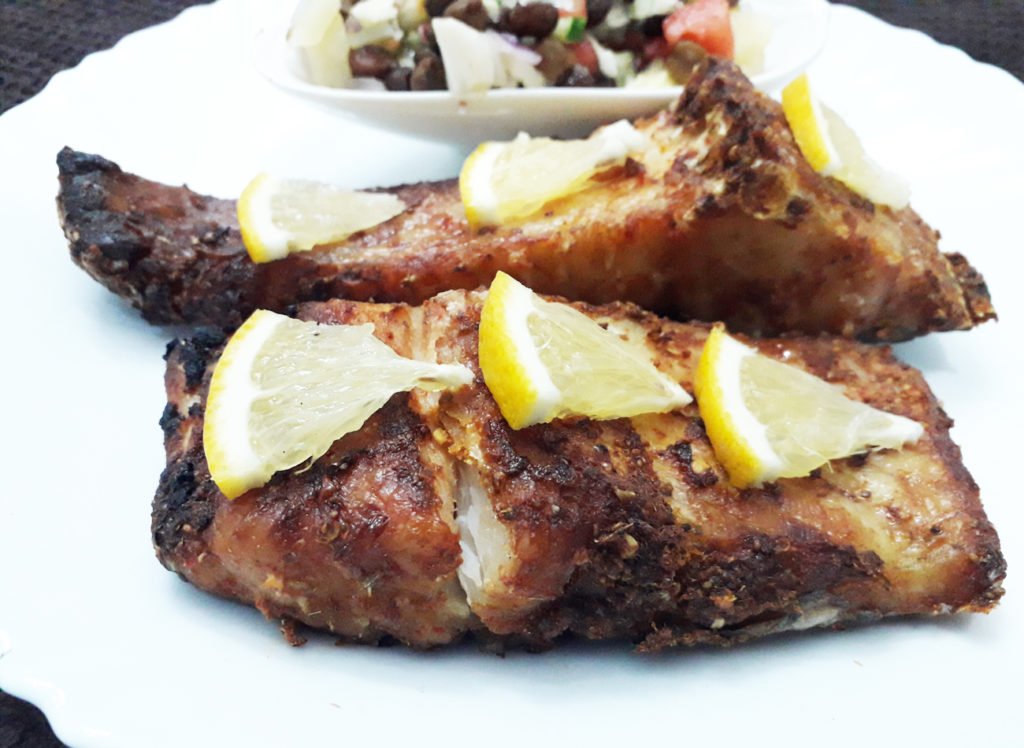
    Fried Fish
    Fried Fish

    Simple and easy Fried Fish recipe with an excellent flavor. It’s an outstanding dish that can be used as a mean to impress your social circle! Give it a try

    Bismillah let’s get started.
    Check it out The Juicy Fried Fish recipe Recipe and printable version here!!

    Juicy Fried Fish Recipe

    This fried fish is so flavorful, crispy and juicy, your guests will beg you for the recipe. This easy to make restaurant style dish is a keeper and will have you fried fish on a regular basis.
    Course Appetizer, Comfort Food, Main Course
    Cuisine Food Fusion, Indian, Pakistani
    Keyword 30 minutes meals, Dinner, fish, fried fish, fried food, Lunch, Ramadan, spicy
    Prep Time 10 minutes
    Cook Time 15 minutes
    Marination 2 hours
    Total Time 2 hours 25 minutes
    Servings 4
    Author Bushra Waheed

    Ingredients

    • 1 kg mahi mahi fish fillets (rahu machli)
    • 1/2 cup plain flour (maida)
    • 4 tbsp lemon juice (limo)
    • 2 tbsp garlic paste (lehsan paste)
    • 1 tsp mango powder
    • 1 tsp red chili powder
    • 1 tsp red pepper crushed
    • 1 tsp turmeric powder (haldi powder)
    • 1 tsp cumin powder crushed(zeera powder)
    • 1 tsp carom seeds crushed(ajwain)
    • salt to taste
    • oil for frying

    Instructions

    • Wash fish fillets and pat dry.
    • Sprinkle turmeric powder, salt and lemon juice over the fish. Toss the coat evenly.
    • Let it marinate for 2-3 hours.
    • In a large bowl, mix together the plain flour, garlic paste, mango powder, red chili, crushed red chili, carom seeds, cumin powder.Mix well.
    • Pour this paste over the fish fillets Cover and marinate for another 40 minutes.
    • After 40 minutes, heat oil in a pan over medium heat. Deep fry fish for 12-15 minutes or until crispy and golden brown.
    • Don’t overcook.
    • Remove from the oil and drain on kitchen paper.
    • Transfer into a serving dish.
    • Garnish with lemon or orange slices.
    • Fried Fish is ready to serve. ENJOY 🙂

    Want more Fried Fish Inspiration? 

    Here are some other Fried Fish recipes on my blog:

    Pin it for Later

    Hope you guys loved this one and are having a great winter. Pin it for Later!

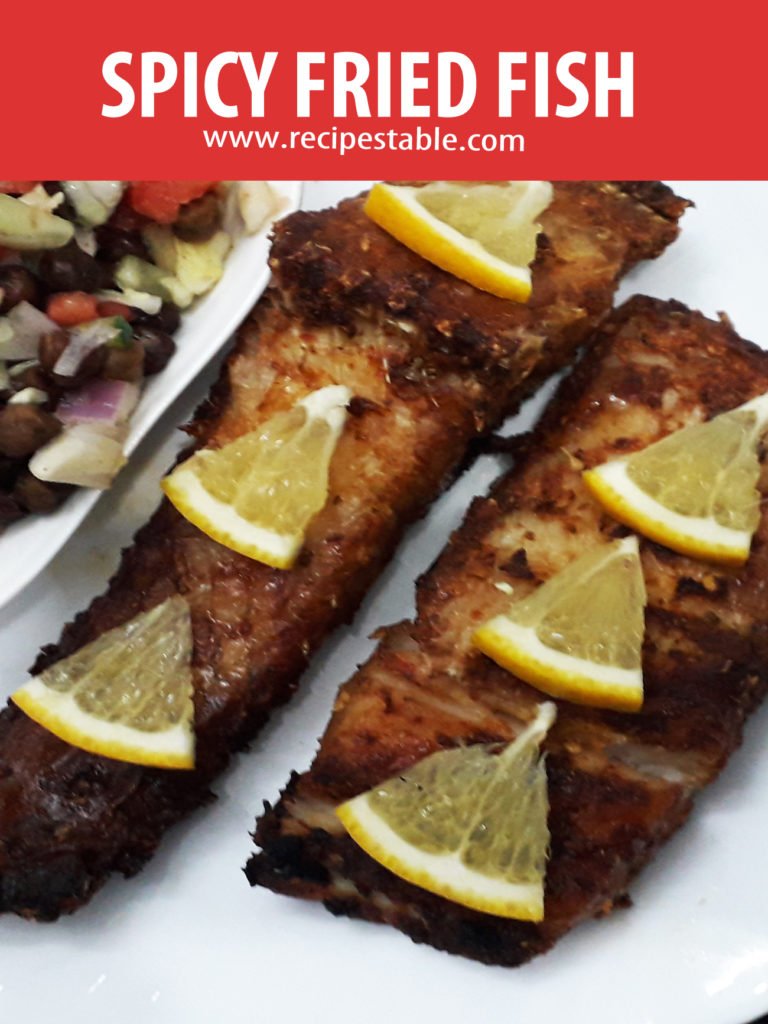
    Pin it for later ~ Spicy Fried Fish

    Put your own spin on it. And lemme know how it turns out and do take a few seconds to rate it! I would love to see your recreations so tag me on instagram @recipestable or Facebook (Recipestable) or on Twitter so I can see how lovely yours turn out.

  • The Perfect Batter: Secrets to Making Light and Crispy Fish Tempura!

    Fish Tempura

    Today I’m sharing one of the most popular Japanese recipes; Fish Tempura, a very crispy and light dish.

    Fish fillets are fried in crispy batter.Goes great with finger chips and salad.Must try this Fish Tempura Recipe, and dont forget to share you experience with us!!

    Fish Tempura Recipe
    Photo: Fish Tempura Recipe

    Check it out the Fish Tempura Recipe Here !!

    [divider]

    [one_fourth]Prep Time:10 minutes[/one_fourth] [one_fourth]Cook Time:10 minutes[/one_fourth] [one_fourth]Servings:4 [/one_fourth] [one_fourth_last]Difficulty Level: Easy[/one_fourth_last]

    [divider]

    [tabs type=”horizontal”] [tabs_head] [tab_title]Ingredients[/tab_title] [tab_title]Nutrition[/tab_title] [/tabs_head] [tab]

    • 1 kg fish fillets
    • salt and pepper
    • 1 egg, lightly beaten
    • 1/4 cup of water
    • 3 tbsp all-purpose flour
    • 1 cup bread crumbs
    • 2 cup cooking oil

    [/tab] [tab]Yield: 4 servings

    Nutritional information is not yet available. [/tab] [/tabs]

    Directions:
    [tabs type=”horizontal”] [tabs_head] [tab_title]Step by Step Method[/tab_title] [tab_title]Serving Suggestions[/tab_title][/tabs_head] [tab]

    Step 1

    Heat the cooking oil in a wide skillet or wok.

    Step 2

    Pat the fillets dry with paper towels.

    Step 3

    Season lightly with salt and pepper.

    Step 4

    Mix together the egg, water and flour.

    Step 5

    Dip each fillet into the batter then roll in the crumbs.

    Step 6

    Lower into the hot oil.

    Step 7

    Cook two to three at a time; they brown fast.

    Step 8

    Drain on paper towels.Fish Tempura is ready to serve.ENJOY!

    [/tab] [tab]

    [/tab] [/tabs]
    If you like Fish Tempura recipe and make it then let me know your feedback by commenting below.And if you know more innovative ways in which we can utilize this mouthwatering Fish Tempura, do share with us and we would be glad to give it a try.

  • Dates and Cream Recipe

    Dates and Cream

    It is the Muslim tradition to break a fast with dates because their Prophet Muhammad (peace be upon him) broke His fast with dates nearly 1400 years ago. Now lets go on with this tradition with a touch of yummy cream and nuts.

    Check it out the Dates and Cream Recipe here!!

    Prep Time:5 minutes + Chilling

    Servings:4

    Ingredients:

    • 200 ml fresh cream
    • 100 gm dates
    • 5 almonds, thinly sliced
    • 5 pistachios, thinly sliced

    Directions:

    1. Wash and slit dates.
    2. Then remove seeds of it.
    3. In a bowl, beat cream until its fluffy and thick.
    4. Fill dates with cream.
    5. Garnish with sliced almonds and pistachios.
    6. Cover and chill for 2 hours.
    7. Dates and Cream are ready to serve.
    8. Enjoy!
    • Serve with any meal.

    If you like Dates and Cream Recipe and make it then let me know your feedback by commenting below.

  • Level Up Your Fries: The Flavorful Italian Seasoned Fries Recipe!

    Italian Seasoned Fries

    These Spicy, Oven-baked fries are very easy to make, and a great way to kick up your burger platter. They are seasoned with a very flavorful Italian seasoning.Must Try this Italian Seasoned Fries, You’ll Love it.

    Seasoned Fries Recipe
    Photo: Italian Seasoned Fries Recipe

    Check it out the Italian Seasoned Fries Recipe Here !!

    Prep Time:15 minutes

    Cook Time:15 minutes

    Servings:3

    Difficulty Level: Easy

    Ingredients

    • 500 gm potatoes
    • 1/2 cup Parmesan cheese, grated
    • 2 tsp Italian seasoning
    • salt according to taste


    Directions:

    Step 1

    Preheat oven to 450 degree F.

    Step 2

    Wash potatoes and peel.

    Step 3

    Then cut into shape of French fries.

    Step 4

    Lined a baking dish with foil.

    Step 5

    Place potatoes on the baking dish.

    Step 6

    Bake for 8-10 minutes or until potatoes are half done.

    Step 7

    In a bowl, add cheese, Italian seasoning and salt.

    Step 8

    Sprinkle this mixture over baked potatoes.

    Step 9

    Toss to coat evenly.

    Step 10

    Bake 5 minutes longer or until crispy and golden brown. Italian Seasoned Fries are ready to serve.

    Recipe Note’s

    To Make Crispy Seasoned Fries:

    The secret I found to making the French fries crisp is to soak them in a salt water brine.

    Serving Suggestions:

    • Serve with Tomato Sauce.

    If you like Italian Seasoned Fries Recipe  and make it then let me know your feedback by commenting below.

  • Sweet & Silky: A Delicious Seviyan (Vermicelli Pudding) Recipe!

    Seviyan (Vermicelli Pudding

    A simple but deliciously sweet milk pudding, made with roasted vermicelli and cooked until a soft custard consistency.
    This is a traditional dessert specially made for Eid festivals. No Eid breakfast is complete without this tasty and easy dish. This Vermicelli Pudding is really simple to make, with the most easily available ingredients.

    Vermicelli Pudding Recipe
    Photo: Vermicelli Pudding Recipe

    Check it out Vermicelli Pudding Recipe here!!

    [divider]

    [one_fourth]Prep Time:5 minutes[/one_fourth] [one_fourth]Cook Time:30 minutes[/one_fourth] [one_fourth]Servings: 6[/one_fourth] [one_fourth_last]Difficulty Level: Easy[/one_fourth_last]

    [divider]

    [tabs type=”horizontal”] [tabs_head] [tab_title]Ingredients[/tab_title] [tab_title]Nutrition[/tab_title] [/tabs_head] [tab]

    • 1 packet vermicelli pasta ( about 8 ounce)
    • 4 tablespoon unsalted butter or clarified butter
    • 3 cups evaporated milk
    • 5 tablespoon sugar or to taste
    • 4 tablespoon khoya (optional)
    • 4 drops kewra essence
    • 1/4 cup Blanched Almonds
    • 2 tablespoon raisins

    For Granishing: 

    • a piece of silver paper
    • boil egg, sliced
    • chopped almonds and pistachios

    [/tab] [tab]

    Yield: 6 servings

    • Calories: 385 kcal
    • Carbohydrates: 68 g
    • Cholesterol: 20 mg
    • Fat: 5.8 g
    • Fiber: 2.5 g
    • Protein: 14.8 g
    • Sodium: 102 mg

    [/tab] [/tabs]

    Directions:
    [tabs type=”horizontal”] [tabs_head] [tab_title]Step by Step Method[/tab_title] [tab_title]Serving Suggestions[/tab_title][/tabs_head] [tab]

    Step 1

    Melt butter in a heavy bottom frying pan or skillet.

    Step 2

    Fry vermicelli in it for 1-2 minutes or until lightly browned.

    Step 3

    Scoop out the Vermicelli with a slotted spoon.

    Step 4

    Keep aside.

    Step 5

    Heat evaporated milk in heavy bottom pan to a boil.

    Step 6

    Add fried Vermicelli. Cook for 15 minutes or until vermicelli is tender.

    Step 7

    Stir in the kewra essence and sugar and Cook for 5 minutes or until the sugar is consumed.

    Step 8

    Turn off heat.

    Step 9

    Stir Almonds and raisins.

    Step 10

    Dish it out. Stir khoya in it.

    Step 11

    Garnish with almonds and egg slices. Vermicelli Pudding is ready to serve. Enjoy!

    [/tab] [tab]

    • Serve warm as a dessert after any meal.

    [/tab] [/tabs]
    If you like Vermicelli Pudding Recipe and make it then let me know your feedback by commenting below.And if you know more innovative ways in which we can utilize this sweet and mouth watering Vermicelli Pudding, do share with us and we would be glad to give it a try.

  • Crispy on the Outside, Gooey on the Inside: The Perfect Stuffed Bread Pakora Recipe!

    Stuffed Bread Pakora:

    Today I post Stuffed Braed Pakora recipe. If you want to try out something different kind of snack, this tasty and luscious Stuffed Bread pakora recipe is ideal for you.Easy and quick recipe for tasty Tea Time snack.

    Stuffed Bread Pakora Recipe
    Photo: Stuffed Bread Pakora Recipe

    Check it out the Stuffed Bread Pakora Recipe here!!

    [divider]

    [one_fourth]Prep Time:15 minutes[/one_fourth] [one_fourth]Cook Time:10 minutes[/one_fourth] [one_fourth]Servings:2 [/one_fourth] [one_fourth_last]Difficulty Level:Easy [/one_fourth_last]

    [divider]

    [tabs type=”horizontal”] [tabs_head] [tab_title]Ingredients[/tab_title] [tab_title]Nutrition[/tab_title] [/tabs_head] [tab]

    For Potato Mixture:

    • 4 bread slices
    • 2 potatoes
    • 1 green chili
    • 1/4 tsp coriander powder
    • 1/4 tsp red chili Powder
    • salt to taste

    For Besan Mixture:

    • 1/2 cup besan
    • 1/4 tsp red chili powder
    • 1/8 tsp mango powder
    • 1/8 tsp garam masala
    • Oil for frying
    • Water (for making paste of besan)
    • salt to taste

    For Serving:

    • 1 medium Onion
    • 1/2 tsp roasted cumin powder
    • 2 tbsp tamarind sauce

    [/tab] [tab]Yield: 2 servings

    Nutritional information is not yet available. [/tab] [/tabs]

    Directions:
    [tabs type=”horizontal”] [tabs_head] [tab_title]Step by Step Method[/tab_title] [tab_title]Serving Suggestions[/tab_title][/tabs_head] [tab]

    Step 1

    Boil potatoes until tender.

    Step 2

    Peel and mash the boiled potatoes in a bowl.

    Step 3

    Add spices (salt, red chili powder, coriander powder) and chopped green chilies. Mix well.

    Step 4

    Now take besan in a bowl.

    Step 5

    Add salt, red chili powder, mango powder, garam masala.

    Step 6

    Add 1 tbsp of water and mix well to make a smooth paste.

    Step 7

    Spread the potato mixture on a bread slice and cover it with another bread slice.

    Step 8

    Now cut the bread slices into two pieces.

    Step 9

    Heat oil in a pan.

    Step 10

    Dip the prepared slices in besan mixture and put them in a oil to deep fry.

    Step 11

    Fry till they become golden brown in color. Repeat the same with the other slices and prepare tasty bread pakoras.

    Step 12

    Cut prepared pakoras in three pieces and place them on a serving plate.

    Step 13

    Sprinkle finely chopped onion on prepared bread pakoras.

    Step 14

    Now sprinkle tamarind sauce,salt, roasted cumin powder on it.

    [/tab] [tab]

    • Serve hot & Enjoy with tea.

    [/tab] [/tabs]
    If you like Stuffed Bread Pakora Recipe  and make it then let me know your feedback by commenting below.And if you know more innovative ways in which we can utilize this Spicy and mouthwatering Stuffed Bread Pakora, do share with us and we would be glad to give it a try.

  • A Flavorful Twist on Fish: Try This Fried Fish Tikka Recipe

    Fried Fish Tikka

    In this recipe, fish tikka is prepared on a hot griddle or pan _ A new style of a classic fish Tikka. This Fried Fish Tikka is a great appetizer or side dish to complement the main course. Give this  recipe a try, you’ll love it!!

    Fried Fish Tikka Recipe
    Photo: Fried Fish Tikka Recipe

    Check it out the  Fried Fish Tikka Recipe here!!

    Prep Time:10 minutes + marination

    Cook Time:15 minutes

    Servings: 4

    Difficulty Level: Easy

    Ingredients:

    • 1 kg white fish fillets, cut into 2 inch cubes
    • 1/2 cup oil
    • 1/2 cup plain yogurt
    • 2 tablespoon fresh cream
    • 2 tablespoon garlic paste
    • 2 tablespoon ajwain
    • 2 tablespoon garam flour (besan)
    • 2 tablespoon lemon juice
    • 2 tablespoon green chutney
    • 2 teaspoon cumin powder
    • 2 teaspoon garam masala
    • 2 teaspoon red chili powder
    • Salt To Taste


    Directions:

    Step 1

    Wash fish and pat dry.

    Step 2

    Cut into 2 inch cubes.

    Step 3

    In a small bowl, mix together the all ingredients except oil.

    Step 4

    Pour this mixture over the fish pieces.

    Step 5

    Turn to coat evenly. Cover and marinate for 4 hours to blend flavors (for better result marinate overnight).

    Step 6

    Heat oil in a pan over medium heat.

    Step 7

    Fry fish for 4 minutes on each side or until crispy and golden brown.

    Step 8

    Remove from the oil and transfer into a serving platter.

    Step 9

    Garnish with lemon wedges.Delicious Fried Fish Tikka is ready to serve. ENJOY!!

    Serving Suggestions:

    • Serve with Ring Onion and Chutney.

    If you like Fried Fish Tikka Recipe and make it then let me know your feedback by commenting below.

  • The Best Hot Chocolate Pudding Recipe: Better Than Boxed Mix!

    Hot Chocolate Pudding with Vanilla Custard

    This gorgeous pudding has a taste of vanilla and chocolate in it. Rather then traditional pudding, hot Chocolate Pudding with Vanilla Custard can delightedly serve at the end of meal. Discover the Hot Chocolate Pudding Recipe 

    Hot Chocolate Pudding with Vanilla Custard
    Photo: Hot Chocolate Pudding Recipe 

    Check it out the Hot Chocolate Pudding Recipe here!!


    Prep Time:20 minutes

    Cook Time:45 minutes

    Servings: 4

    Ingredients

    For Chocolate Pudding:

    • 2 cups milk
    • 1/2 cup sugar
    • 4 eggs
    • 2 tbsp plain flour
    • 2 tbsp cocoa powder
    • 1/2 tsp vanilla essence

    For Vanilla Custard:

    • 1 cup milk
    • 1/2 cup fresh cream
    • 2 tbsp sugar
    • 1 tbsp vanilla custard powder
    • few drops of vanilla essence


    Directions:

    For Chocolate Pudding:

    1. Preheat oven to 180 degree C.
    2. Pour milk in a saucepan.
    3. Bring to a boil, add cocoa powder and sugar.
    4. Stir well.
    5. Cook for 5 minutes or until sugar has dissolved.
    6. Remove from the heat and keep aside.
    7. In a large bowl, beat eggs for 3-4 minutes or until fluffy.
    8. Stir in vanilla essence.
    9. Now add boiled milk mixture.
    10. Beat well.
    11. Also add flour and mix well.
    12. Now bake in the preheated oven for 30 minutes.

    For Vanilla Custard:

    1. In a saucepan , add milk and sugar.
    2. Bring to a boil and cook for 2-3 minutes.
    3. Then stir in vanilla essence.
    4. Dissolve vanilla custard in 2 tbsp milk.
    5. Gradually pour custard mixture into the sauce.
    6. Keep stirring.
    7. Cook for 5 minutes or until thickened.
    8. Remove from the heat and take it out in a serving bowl.
    9. Hot chocolate pudding with vanilla custard is ready to serve.
    10. Enjoy!


    • Serve as a dessert after any meal.

    If you like Hot Chocolate Pudding Recipe and make it then let me know your feedback by commenting below.And if you know more innovative ways in which we can utilize this sweet and mouth watering Hot Chocolate Pudding , do share with us and we would be glad to give it a try.

  • Chicken Chilli Nuggets Recipe

    Chicken Chilli Nuggets Recipe

    Chicken Chilli Nuggets

    Who doesn’t love chicken nuggets? Now you can make at home.These are easy to make, and are more healthy than restaurant or store bought.Tangy dipping sauce perfectly complements these crisp, golden bites of chicken. Nuggets are favorite food of kids and adults. Make nuggets with this recipe and add a burst of flavor to this snack. Green chilies are used to develop a taste in Chili Nuggets. Once you make, it is definitely on top of the chart attracting every one.Give this chicken chilli Nuggets recipe a try and You’ll love them and never bought them again from restaurant!

    So lets make Chicken Chilli Nuggets.

    Chicken Chilli Nuggets Recipe
    Photo: Chicken Chilli Nuggets Recipe

    Bismillah, let’s begin!

    Check it out the Chicken Chilli Nuggets Recipe and printable version below.

    Chicken Chilli Nuggets Recipe

    Prep Time 20 minutes
    Cook Time 15 minutes
    Total Time 35 minutes
    Servings 12
    Author Bushrah | Recipestable

    Ingredients

    • 1 kg boneless chicken
    • 2 bread slices
    • 2 eggs lightly beaten
    • 2 tablespoon chopped parsley
    • 2 teaspoon chicken powder
    • 1 teaspoon garlic powder
    • 1 teaspoon red pepper flakes
    • 1 teaspoon black pepper
    • 1 teaspoon hot sauce
    • 1 teaspoon green chili paste optional
    • salt according to taste
    • 2 cups bread crumbs for coating
    • Oil for deep frying

    Instructions

    Method

    • Soak bread slices in water or milk for few minutes. Then squeezed properly and keep aside.
    • Place chicken in a chopper or a food processor.Add bread slices, garlic powder, chicken powder, hot sauce, black pepper, red pepper, salt and parsley.
    • Cover and keep aside for 30 minutes or until mince is firm.
    • Shape mixture into nuggets, dip in egg and coat with breadcrumbs.
    • Heat oil in a deep pan over medium heat.
    • Fry Chicken Chilli nuggets for 4-5 minutes or until crispy and golden brown.
    • Remove from the oven and drain on paper towel. Delicious Chicken Chilli Nuggets are ready to serve. ENJOY!!

    Notes

    Recipe Note’s:
    To Freeze Chicken chilli Nuggets: After coating in bread crumbs, arrange them individually on a tray and place in the refrigerator. Once freeze keep them in freezer bag or in air tight container. When needed fry from frozen. You can freeze these Chicken Nuggets for 1 month.
    To Make Different Shapes of Nuggets: You can also shape mixture into fun shapes nuggets such as squares or squiggles etc.
    Serving Suggestions:
    Serve with Chilli Sauce or any dipping sauce.
     I have also posted Cinnamon Chicken Nuggets Recipe which is another easiest & tastiest version of making Chicken Nuggets. Do check it out as well.


    Put your own spin on it. And lemme know how it turns out. Post a photo on Facebook (Recipestable) or  on Twitter so I can see how lovely yours turn out.


    Happy Cooking!!

    Keep remember me in your Dua’s and Stay tuned for new content on the blog 🙂

    If you like this post, Please Subscribe to my blog and let me know your feedback by commenting below.. I have lots more recipes to share with you.

  • Carrot Chapati Recipe

    Carrot Chapati

    This carrot multi-grain chapati is high in nutrition. The carrot is extremely rich in vitamin A, which provides antioxidant effects to the body.

    This Carrot Chapati recipe is a simple and delicious. Kids love to eat and Its a good way to give our kid a healthy dish.

    Carrot Chapati Recipe
    Photo: Carrot Chapati Recipe

    Check it out the Carrot Chapati Recipe here!!

    [divider]

    [one_fourth]Prep Time:30 minutes[/one_fourth] [one_fourth]Cook Time:15 minutes[/one_fourth] [one_fourth]Servings:2 [/one_fourth] [one_fourth_last]Difficulty Level: Easy[/one_fourth_last]

    [divider]

    [tabs type=”horizontal”] [tabs_head] [tab_title]Ingredients[/tab_title] [tab_title]Nutrition[/tab_title] [/tabs_head] [tab]

    • 1 cup wheat flour
    • 1 carrot, grated
    • Salt to taste
    • water as required
    • butter (optional)

    [/tab] [tab]Yield: 2 servings

    Nutritional information is not yet available. [/tab] [/tabs]

    Directions:
    [tabs type=”horizontal”] [tabs_head] [tab_title]Step by Step Method[/tab_title] [tab_title]Serving Suggestions[/tab_title][/tabs_head] [tab]

    Step 1

    Place wheat flour, carrot, salt in a large bowl.

    Step 2

    Mix well.and Knead a soft dough with water.

    Step 3

    Cover the dough with wet cloth and set aside for 20 minutes.

    Step 4

    Now make small balls and roll into shape of chapati.

    Step 5

    Heat griddle (tawa) over medium heat.

    Step 6

    Cook carrot chapati on griddle. Spread butter on both sides of chapati. Carrot Chapati is ready to serve.

    [/tab] [tab]

    • Serve with pickle and raita.

    [/tab] [/tabs]
    If you like Carrot Chapati recipe and make it then let me know your feedback by commenting below.And if you know more innovative ways in which we can utilize this mouthwatering Carrot Chapati, do share with us and we would be glad to give it a try.