Tag: spicy

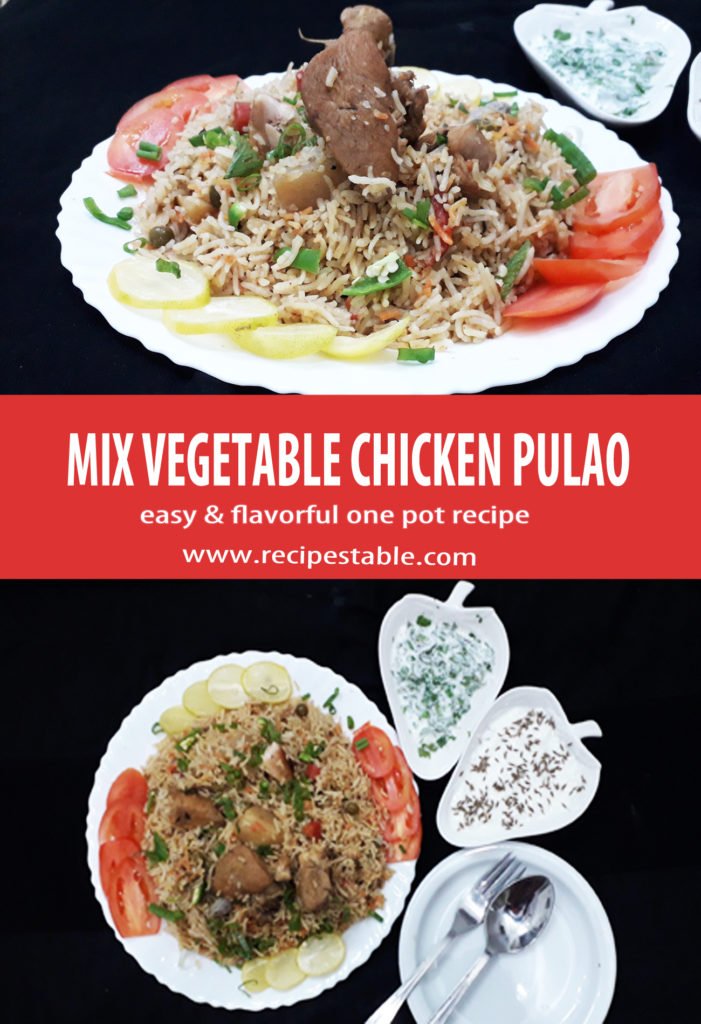
  • The Flavorful Mix Vegetable Chicken Pulao Recipe

    The Flavorful Mix Vegetable Chicken Pulao Recipe

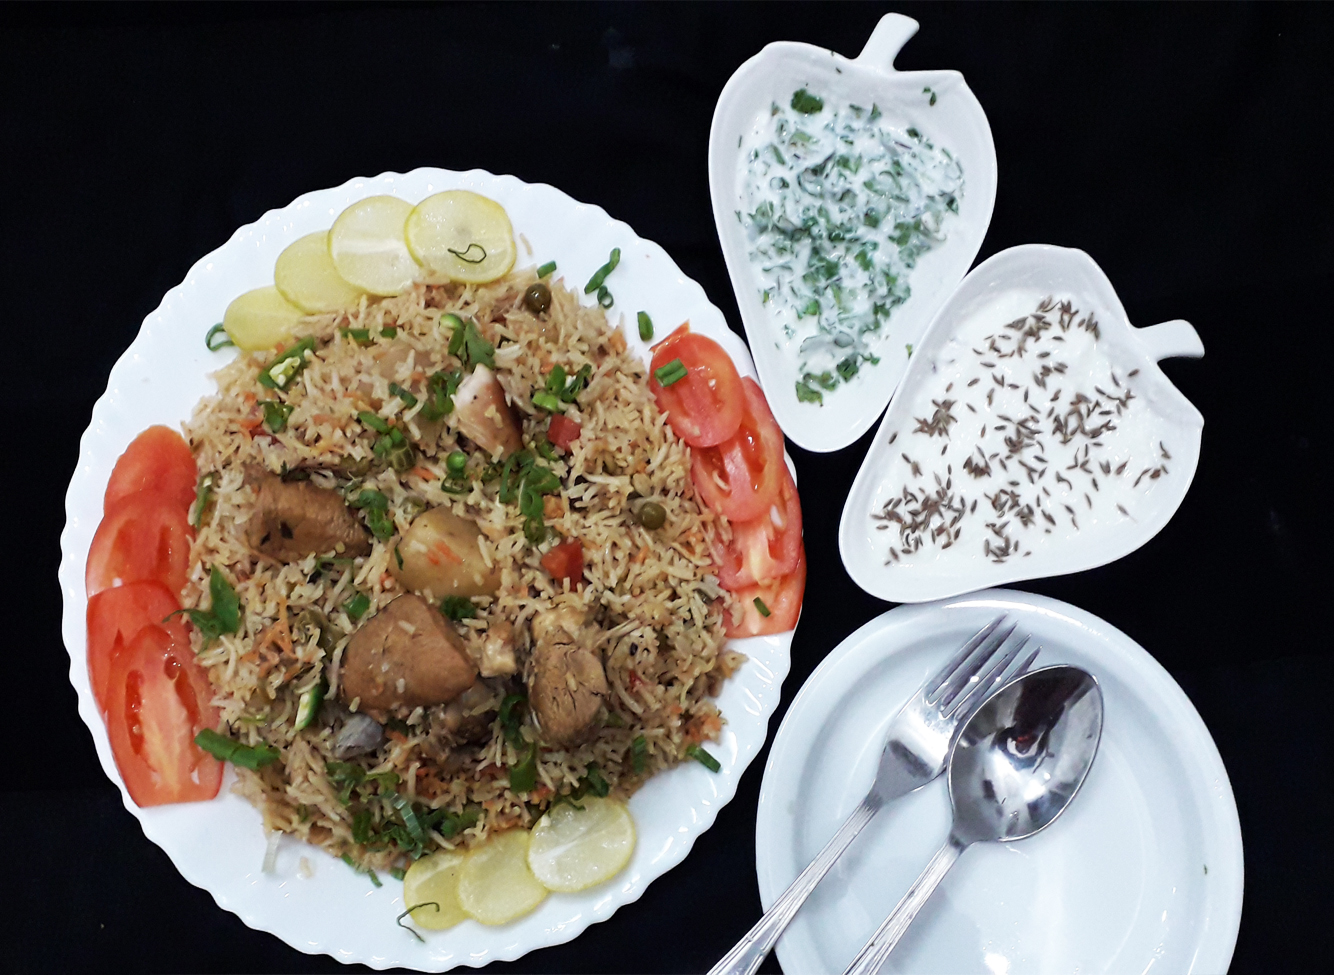
    Loaded with veggies and flavorful chicken, warm spices like cumin, cinnamon, nutmeg and mace and the heat of green chilies this Mix Vegetable Chicken Pulao is a delight to the taste buds in every bite!

    The Flavorful Mix Vegetable Chicken Pulao Recipe
    The Flavorful Mix Vegetable Chicken Pulao Recipe

    Chicken broth and seasonings are added to give it lots of flavor and moisture. It’s a one-pot meal to prepare and cook in a pot that comes together quickly for a hearty and hot week-night dinner.

    There are some Rice Pulao that are overly packed with gorgeous spices flavors, but this isn’t one of those. This Chicken pulao is a medley of rice, chicken, spices, and vegetables. I just add a tiny sprinkle of green onion as a garnish, just to add a little more color when serving. Pairs perfectly with any raita or curry of your choice.

    The Flavorful Mix Vegetable Chicken Pulao Recipe
    The Flavorful Mix Vegetable Chicken Pulao Recipe

    What goes in Mix Vegetable Chicken Pulao

    The ingredients you need to make this Mix Vegetable Chicken Pulao are:

    • Best rice for pulao – basmati rice is the best for both flavor and fluffiness. Basmati is a type of long grain rice – the longer the grain, the fluffier the rice. It also has a lovely subtle fragrance that really compliments the flavors in this rice pilaf; You can use brown rice as well for this pulao recipe.
    • Chicken: The juicy thighs or chicken breast are the ideal meat choices for making pulao. You can use either the boneless pieces or the bone-in ones like leg pieces. I personally, like pulao with boneless chicken pieces.
    • Fat – Ideally desi ghee (clarifying butter) is the best choice for making the pulao. I choose the clarified butter (desi ghee) for flavor, but if the aroma and taste of ghee are too over-powering for you, use unsalted butter, coconut oil, or any other cooking oil.
    • Flavor Base – sautéed ginger and onion, to add savouriness;
    • Pulao Spices – I’ve used a combination of cinnamon, cloves, nutmeg, mace, bay leaves and cumin in this Mix Vegetable Chicken Pulao. It’s reminiscent of traditional Middle Eastern flavors but also a festive combination. Feel free to customize this to your own taste;
    • Broth OR water – For extra flavor, I almost always make my pulao with broth. However, water will work just fine as well, though I’d add an extra pinch of each of the spices;
    • Vegetables – Use any vegetables you like here. I like using carrot and green peas for a vibrant color, and potatoes because the flavor melds in nicely with the rice. Cabbage and Capsicum also work well but be aware that they provide a sharper pop of flavor. Broccoli would also be great.
    • Garnishing – I’ve used green onions in this mix vegetable chicken pulao recipe. I adore both the flavor and fresh green color that green onion bring to this pulao. Fresh Coriander and Mint Leaves are also great!

    How to make Mix Vegetable Chicken Pulao:

    Mix Vegetable Chicken Pulao is straight forward to make.

    1. Soak the rice for 30 minutes then drain.
    2. Sauté onion and whole spices in butter, then add the ginger and chicken along with seasoning. Cook for 20 minutes or until chicken is no longer pink and all juices run clear.
    3. Then add carrots, green peas and potatoes cook 5-7 minutes or until vegetables crisp-tender then add chicken broth and bring it to boil. Then add rice cover the pot and let it simmer on medium low flame or until the rice is tender and the liquid has been absorbed. This takes roughly 10 minutes.
    4. Now give a dum for a further 15 minutes. Fluff the rice and dish it out.

    But here are my tips for how to make the best Pulao every time!

    • Soaking Rice or not: Soaking white rice for about half an hour before cooking allows moisture to get to the middle of the kernel. During cooking, the heat transfers quicker to the middle and the rice will be done in about eight minutes, causing less damage to the outside of the kernel. Thus, it’s more evenly cooked, and easier to separate than the non-soaked rice.
    • Right liquid to rice ratio – 1 1/2 Cups of liquid to 1 cup of rice will yield perfectly cooked fluffy rice. Adding too much liquid to cook rice always results in a mushy and sticky pulao
    • Do not peek while rice is cooking! Escaped heat compromises the cooking of the rice;
    • Rest undisturbed – this is the most important step for cooking rice. This is when the rice finishes cooking and becomes fluffy!

    What To Serve With Mix Vegetable Chicken Pulao?

    This is home-style, hearty chicken pulao with delicious flavors full of spices and aroma. I suggest, serve it hot right after dum (steaming) with zeera raita, or mint raita and kachumber salad for best taste. It would also go really well with my Chicken Shorba– a mild flavored desi style chicken stew with a great combination of Oriental spices. 
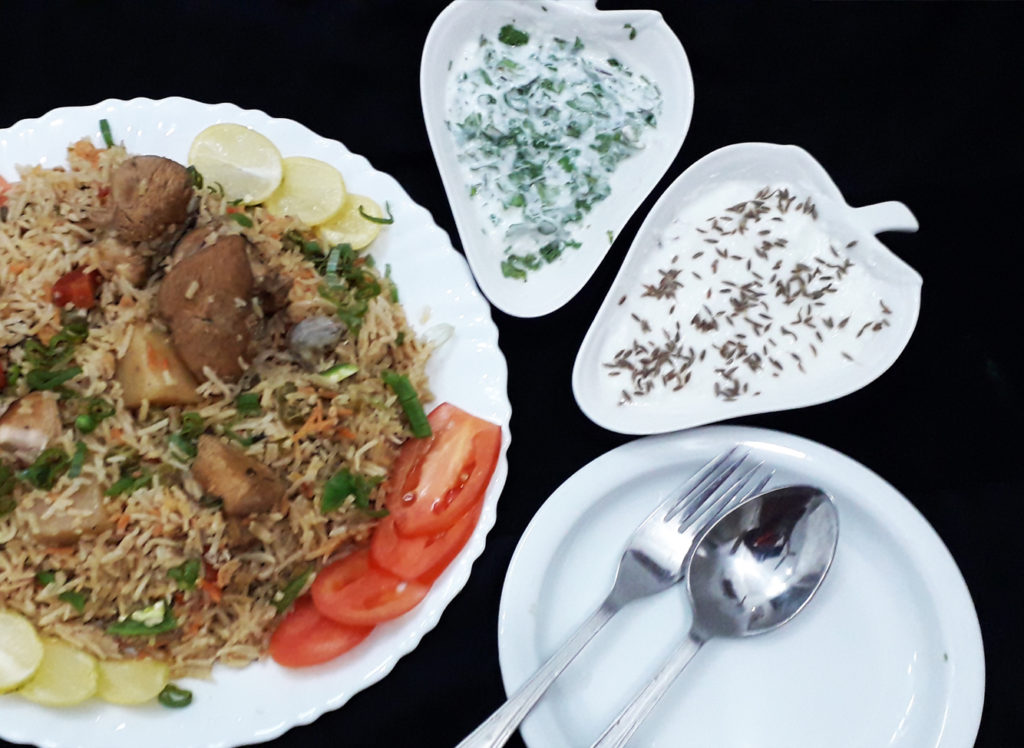
    The Flavorful Mix Vegetable Chicken Pulao Recipe
    The Flavorful Mix Vegetable Chicken Pulao Recipe

    Bismillah let’s get started.
    Check it out The Flavorful Mix Vegetable Chicken Pulao Recipe and printable version here!!

    The Flavorful Mix Vegetable Chicken Pulao Recipe

    Nothing like a good plate of aromatic pulao! This Flavorful Mix Vegetable Chicken Pulao hits all the right spots with its wonderful aroma and exotic flavors! Spice up your week with this flavorful Pulao!

    • 2 pounds Boneless Chicken
    • 3 cups long gran rice (basmati rice)
    • 1/2 cup clarified butter/ desi ghee or oil
    • 1 onion (thinly sliced)
    • 4 inch Ginger piece (thinly sliced)
    • 4 carrots (peeled and cubed)
    • 3 potatoes (peel and cubed)
    • 2 cups Green Peas
    • 2 green onions (thinly sliced( only green part))
    • 4 Green Chilies (thinly sliced)
    • 1 large Cinnamon Stick (daarcheeni)
    • 2 Black Cardamom (bari elachi)
    • 5-6 Cloves ((loong))
    • 2 Bay Leaves (tezpaat)
    • 1 tsp Cumin Seeds ((zeera))
    • 1 tsp nutmeg and mace powder
    • 1/2 tsp Black Peppercorns ((kali mirch))
    • 2 tsp Red Chili Flakes
    • 1 tsp all spice powder (garam Masala powder)
    • 2 tsp salt or according to your taste
    • 6 cups Chicken Broth (Yakhni)
    1. Rinse the basmati rice till the water becomes clear. Then soak it in water for 20 minutes. After soaking, drain the rice and keep it ready.
    2. Take a heavy bottom skillet or pot and melt clarified butter in it.
    3. Add the onions and sauté until they are a deep golden brown. This can take up to 5-7 minutes over a low heat. You will need to check and stir a couple of times. Don’t be tempted to rush this stage because this adds a lot of flavor to the finished dish.
    4. Add the cumin seeds, cinnamon stick, black cardamom, black peppercorns and cloves. Sauté for 2 minutes or until popping and fragrant.
    5. Now add the ginger slices and Chicken, cook for 15-20 minutes or till chicken turns golden brown before adding the vegetables.
    6. Now add Carrot, Potatoes and green Peas. Sauté and cook for 10 minutes or until vegetables are just tender-crisp.
    7. Season with salt, red pepper flakes and some garam masala.
    8. Next, add green chilies and sauté for a second and adjust the seasoning and add more salt if needed.
    9. Add Chicken Stock and once the it starts boiling add the soaked basmati rice and mix it gently.
    10. Now, wait for it to boil again, then cover and simmer on medium low flame or until the rice is tender and the liquid has been absorbed. This takes roughly 10 minutes.
    11. Put the pot covered (give a dum) for a further 15 minutes.
    12. Now, uncover the pot sprinkle green onion (only green part)and fluff the rice gently from the corners
    13. Remove from the heat and dish it out.
    14. Enjoy flavorful Mix Vegetable Chicken Pulao!!
    Chicken, Chicken Pulao, Dinner, Iftar Recipes, Pulao, Quick and Easy, Ramadan, Rice, vegetables, Veggie Pulao

    I can’t wait to hear what you think of this Mix Vegetable Chicken pulao. If you’ve tried both my chicken biryani and my chicken pulao you really have to let me know what you think!

    Want more Pulao Inspiration? 

    Here are some of the other Pulao Recipes that I love to make for my weekday meals.

    Pin it For Later:

    Like this recipe? Pin it to your favorite Pinterest board now so you will remember to make it later!
    HUNGRY FOR MORE? Subscribe to my newsletter and follow along on FacebookPinterest and Instagram for all of the latest updates.
  • Hot and Sour Noodles Recipe – Just Like the Restaurants Make It

    Hot and Sour Noodles Recipe – Just Like the Restaurants Make It

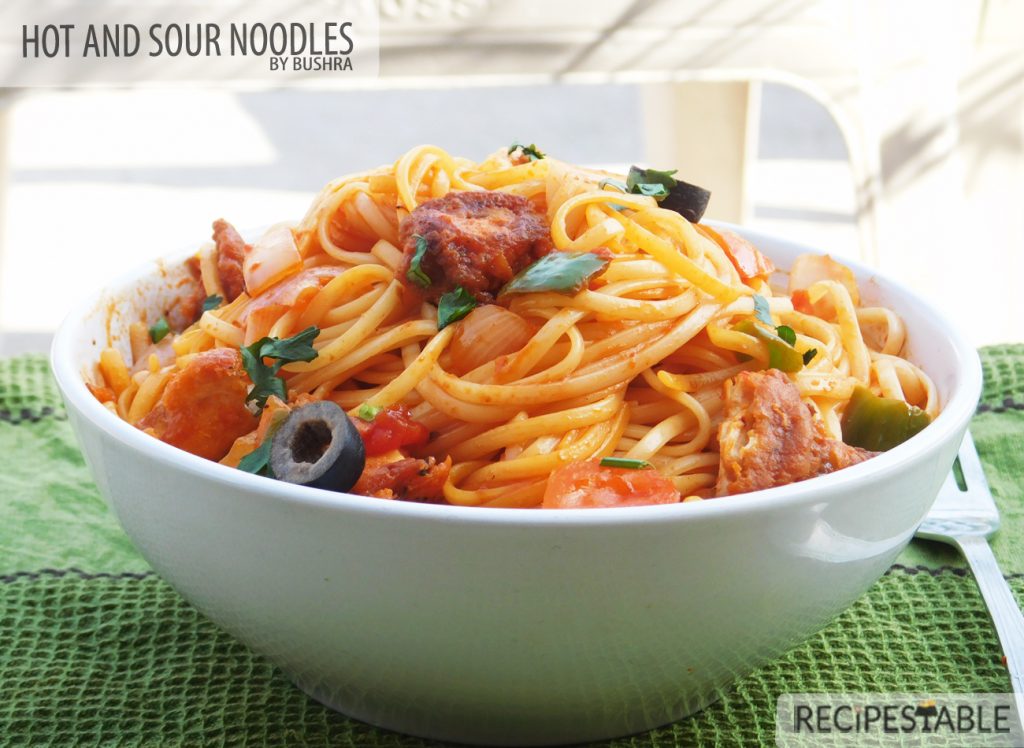
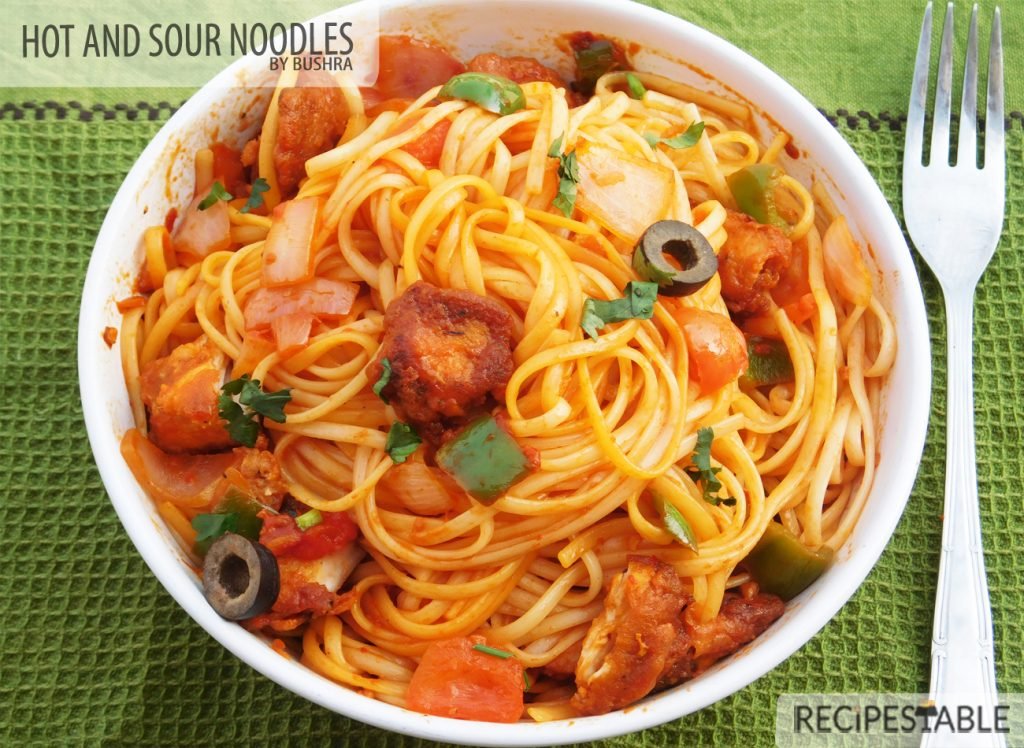
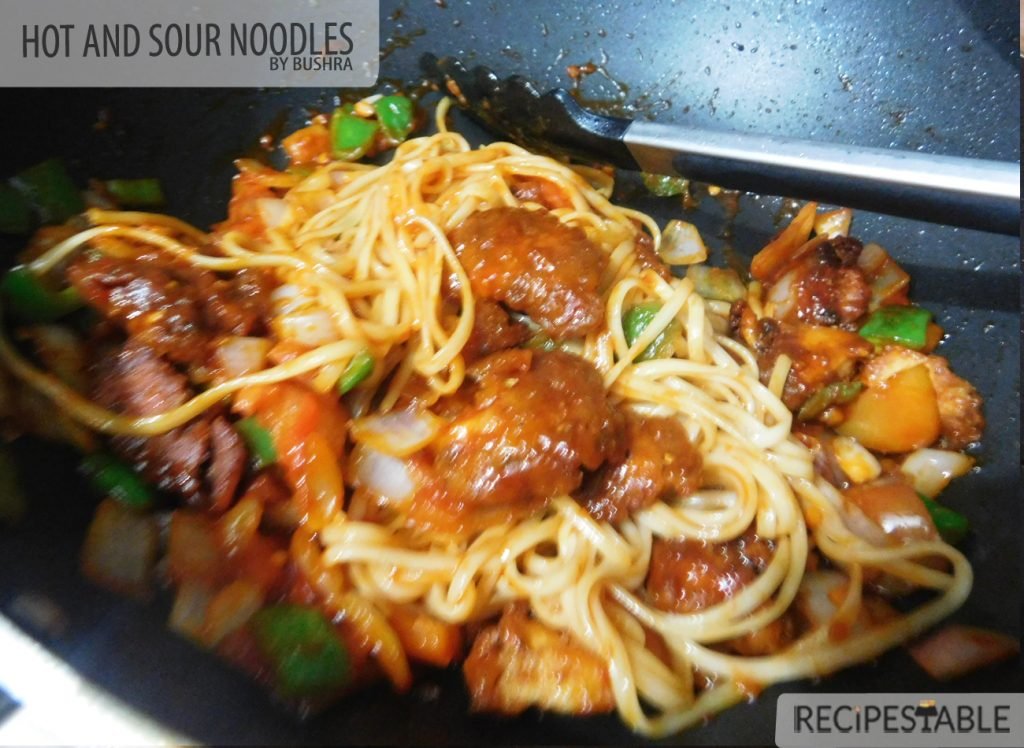
    Who needs takeout when homemade tastes better and you’re in control of the ingredients. Next time when you crave Chinese food, instead of take-out, make this quick, easy and Incredibly delicious hot and sour noodles. Perfect comfort food and a a hearty meal, full of veggies, egg noodles and fried chicken, that’s ready in under 30 minutes!

    Hot and Sour Noodles Recipe
    Hot and Sour Noodles Recipe – Just Like the Restaurants Make It

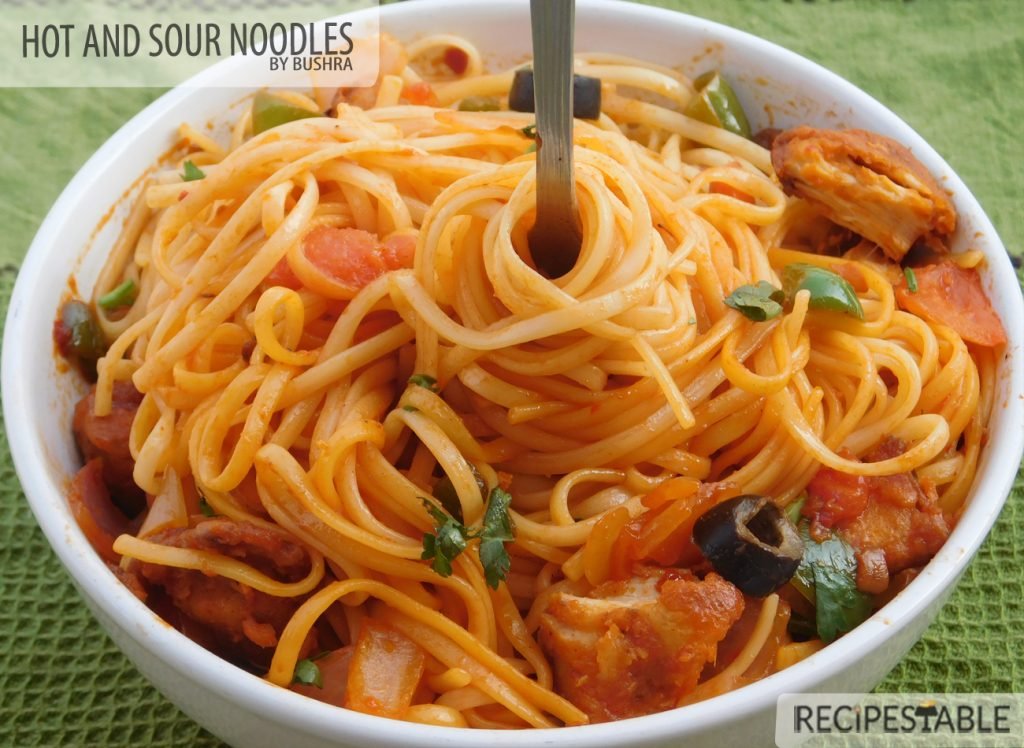
    This Hot and Sour Noodles Recipe makes a bright and healthy dinner for a small family. There are layers and layers of flavors in these easy noodles that are ready in 30 minutes. Soy sauce, hot pepper sauce, vinegar, ginger- garlic, red chili and tomato sauce coat the noodles beautifully. They’re hot and sour with a very subtle heat from the ginger and hot pepper sauce. Fried Chicken, Onion, Capsicum add texture and crunch. Olives and tomato add bright color.
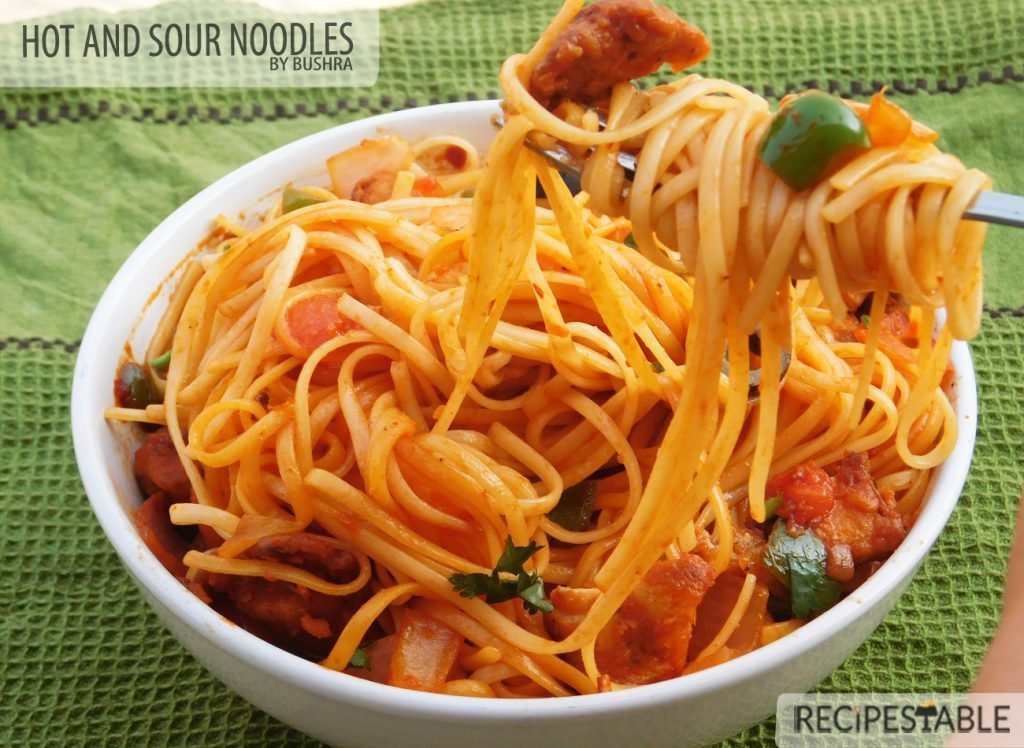
    I love the hot, spicy, salty, savory, garlicky and the slippery noodles. It’s all about the combination of textures and flavors — there’s tangy sauces, crispy fried Chicken, zesty vegetables, salty Egg noodles and chili flakes for heat.

    A bowl of hot and sour slurping goodness. _ Just Like the Restaurants Make It!

    These noodle bowls are a lightning fast dinner that the whole family is sure to enjoy. They are surprisingly easy to make from scratch, and you don’t need to worry about the questionable sodium ingredients that are listed in the store bought version.
    What makes hot and sour Noodles HOT?

    The heat in this hot and sour noodles comes from red pepper flakes and hot pepper sauce. The noodles has to be on the hotter side. The sourness comes from adding vinegar right at the end. If you add the vinegar in the beginning or towards the middle, the vinegar will evaporate during cooking. Which is why we add the vinegar right at the end.

    These noodles will be your new go-to. Take it to work for lunch, take it to cookouts, make it for your family dinner. Trust me – you’ll knock their socks off with this one.

    Bismillah let’s get started. 

    Ingredients in Hot and Sour Noodles?

    This Hot and Sour Noodles recipe is quick, requires few ingredients and is great for those days when you don’t have a lot of time to cook. The list of ingredients is so simple – red chilli flakes, ginger, garlic, onion, capsicum, tomato, chicken, soy sauce, hot pepper sauce, vinegar and egg noodles of course. These are things that are probably already in your pantry so its a quick and easy dinner to make which is ready in under 30 minutes. Perfect for last minute dinners!

    How to make the Restaurant Style Hot and Sour Noodles (step by step instructions):

    However, in order to get the restaurant like taste and texture it needs to be cooked in a certain way and this step by step recipe of Hot and Sour noodles explains it with photos and detailed instructions. The tips and serving ideas given after directions will also help you avoid some common mistakes which can ruin the dish.

    Hot and Sour Noodles Recipe
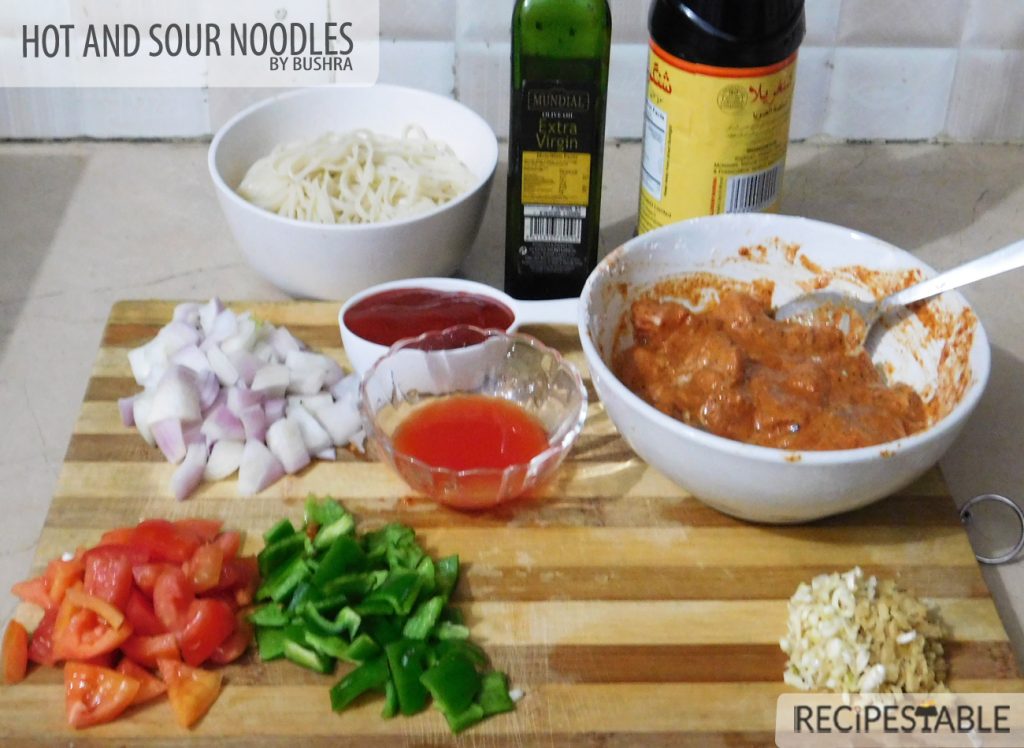
    1. Prepare the ingredients (this is the most time-consuming part of the recipe, but then it goes very quickly):
    Chicken: Cut chicken breast into 1-inch cubes, mix with ginger garlic paste, egg white, Cornflour, soy sauce, chili sauce, vinegar, red pepper and salt to taste.  You can cook right away or leave to marinate for 30 minutes to blend flavors.
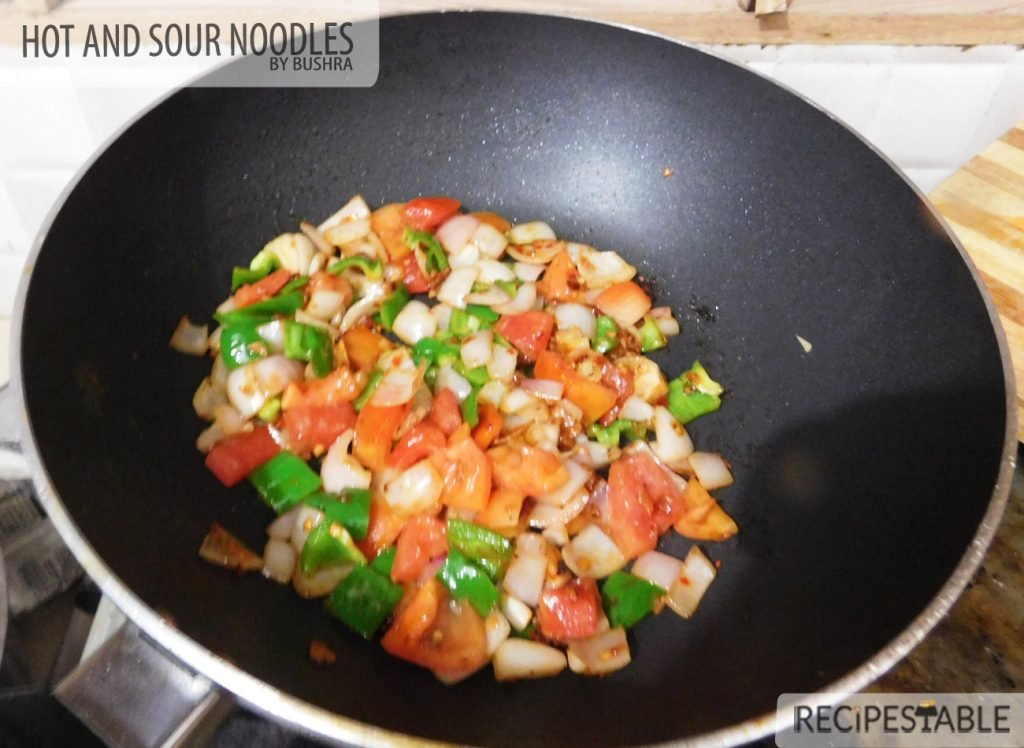
    Vegetables: Chopped ginger and garlic and cut onion, capsicum, and Tomato in ¼ inch cubes and keep aside.
    Hot and Sour Sauce: In a small bowl, whisk all the sauce ingredients, 1/2 cup water, 1/2 cup tomato ketchup, 2 tablespoon hot pepper Sauce, 1 tablespoon soy sauce, 1 tablespoon Vinegar, salt and Pepper to taste, chili flakes. Set aside.
    Egg Noodles: Cook the egg noodles in boiling water, add a little salt, cook for 5-7 minutes, then strain.

    Check it out Hot and Sour Noodles Recipe and printable version here!!

    Restaurant Style Hot and Sour Noodles Recipe

    This Restaurant Style Hot and Sour Noodles Recipe makes a bright and healthy dinner for a small family. There are layers and layers of flavors in these easy noodles that are ready in 30 minutes.

    • 1/2 packet Egg Noodles (boiled)
    • 1 medium onion (cut into cubes)
    • 1 large tomato (de-seeded and cut into cubes)
    • 1 green bell pepper (shimla mirch, cut into cubes)
    • 4 tablespoon Olive oil
    • 1 teaspoon chopped ginger
    • 1 teaspoon chopped garlic

    Ingredients for Marination:

    • 250 gm boneless chicken (cut into cubes)
    • 1 teaspoon ginger garlic paste
    • 1 egg white
    • 2 tablespoon Cornflour
    • 1 tablespoon soy sauce
    • 1 tablespoon Chili Sauce
    • 1 tablespoon Vinegar
    • 1 teaspoon red pepper (crushed)
    • salt to taste

    Ingredients For Sauce:

    • 1/2 cup water
    • 1/2 cup tomato ketchup
    • 2 tablespoon hot pepper Sauce
    • 1 tablespoon soy sauce
    • 1 tablespoon Vinegar
    • salt and Pepper to taste
    • chili flakes (optional)
    • black olives (optional)
    1. Cut all vegetable into cubes and keey aside. Then cut the chicken into cubes and marinate with ginger garlic paste, egg white, Cornflour, soy sauce, chili sauce, vinegar, red pepper and salt. Mix well and keep aside.


    2. Bring a large pot of salted water to a boil. Cook egg noodles for 5-7 minutes, until they reach desired consistency. Drain the noodles. Rinse in a bowl of cold water and drain again. Keep aside.

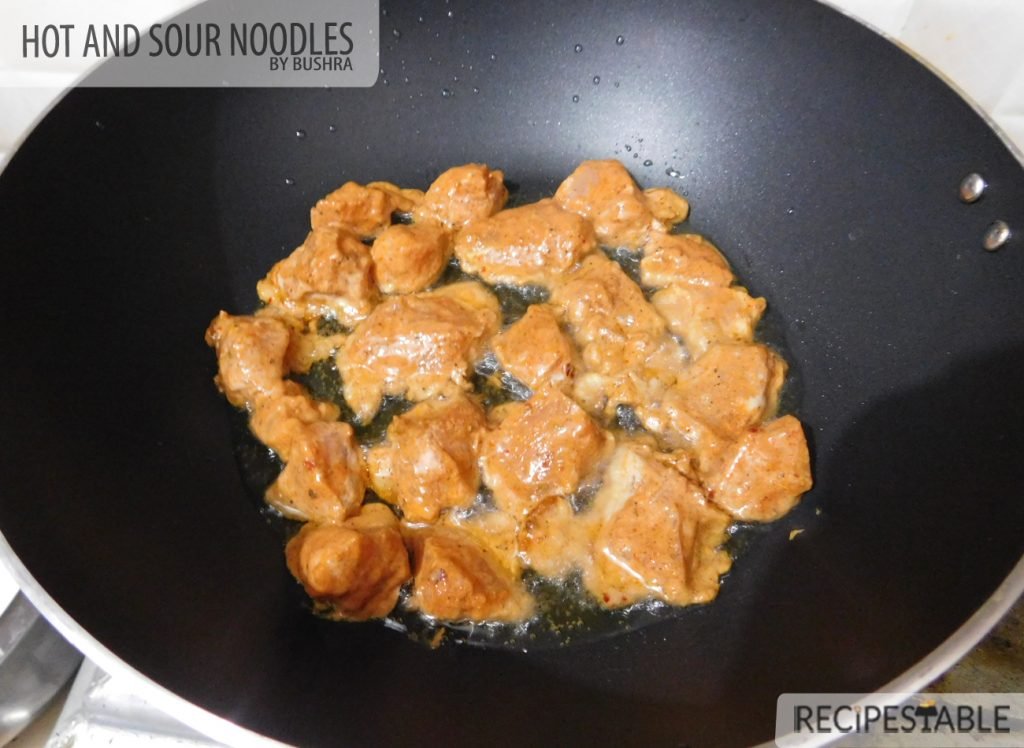
    3. Heat 4 tbsp olive oil in wok or large frying pan over a medium to high heat.


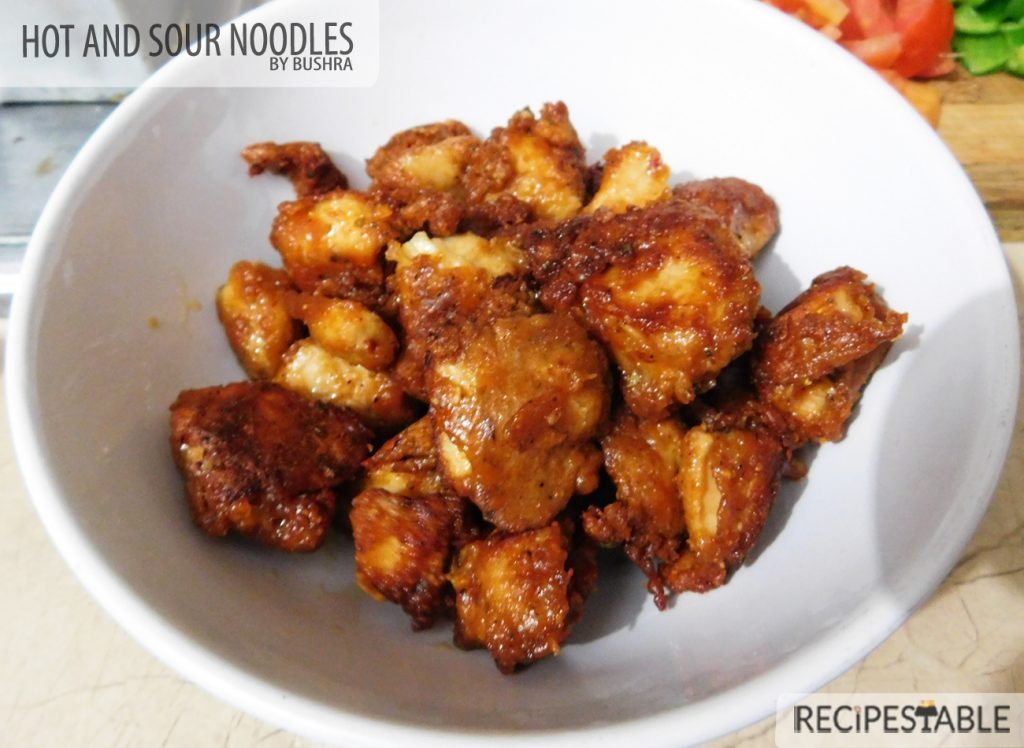
    4. Fry marinated chicken pieces for 8-10 minutes or until cook from inside and golden brown from outside.


    5. Remove from the oil and keep aside.

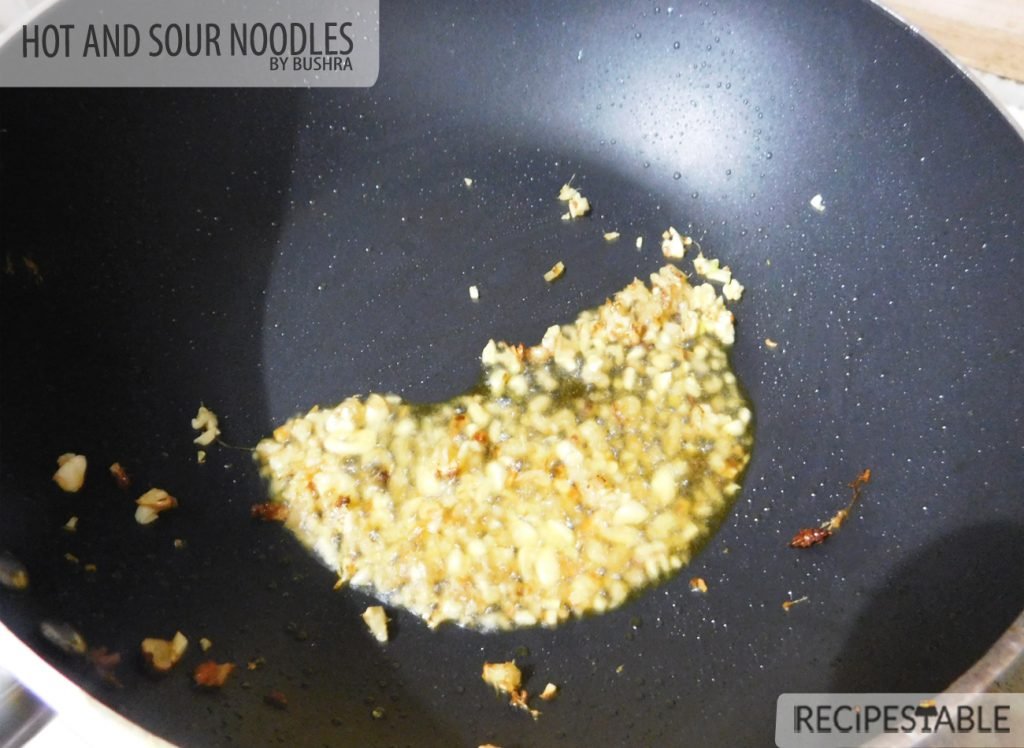
    6. Now saute chopped ginger garlic in the remaining oil for 30 seconds or until aromatic.


    7. Add half cup of water, hot pepper sauce, soy sauce, and chili flakes. Let it simmer for 2 minutes or until all water dries up.


    8. Add the onion and keep stirring on high flame. Season with salt and pepper.


    9. Add capsicum and stir fry together for 1 minute then add tomato and turn the heat on high.


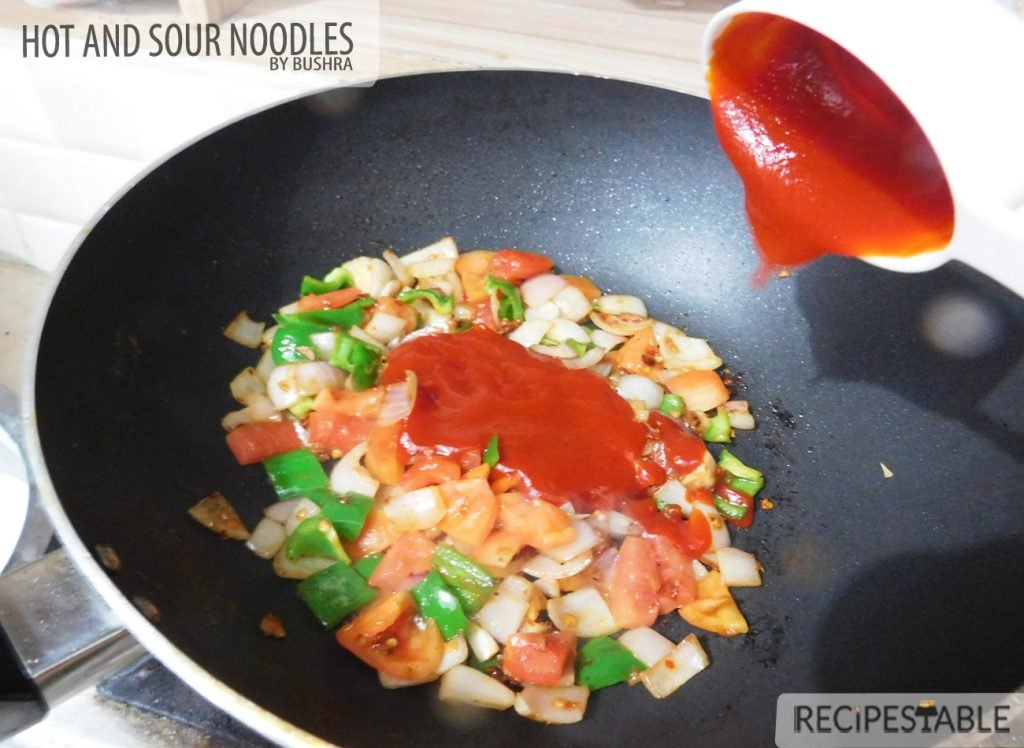
    10. Add the tomato ketchup and vinegar, continue to stir fry for 1 minute.


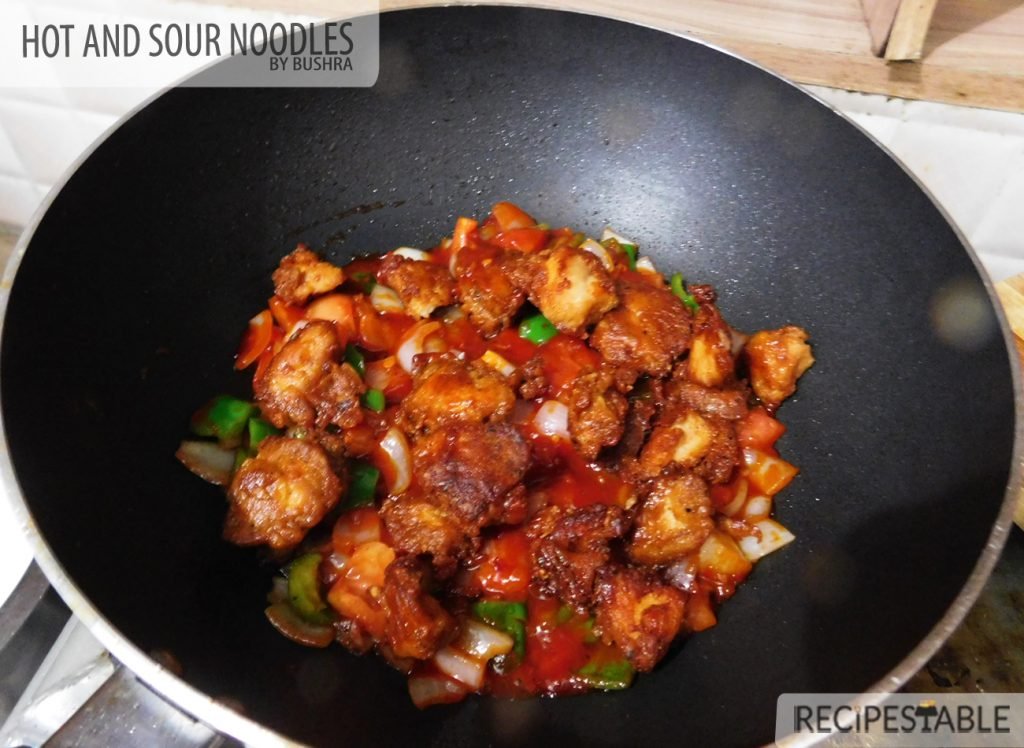
    11. Adjust the seasoning to taste and add fried chicken.


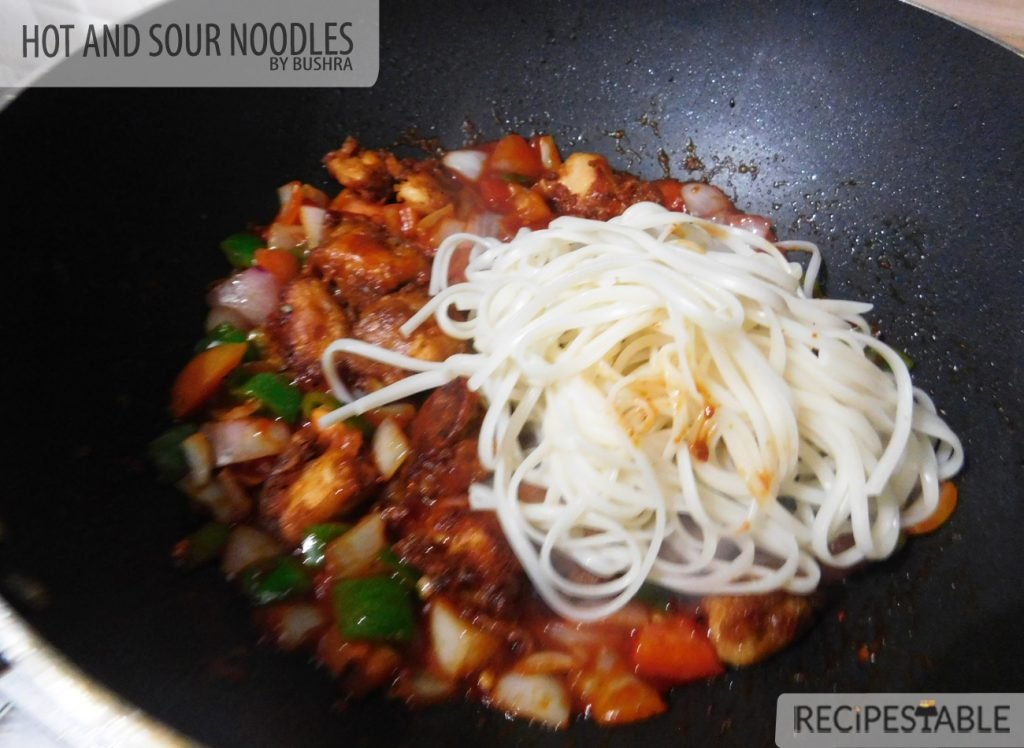
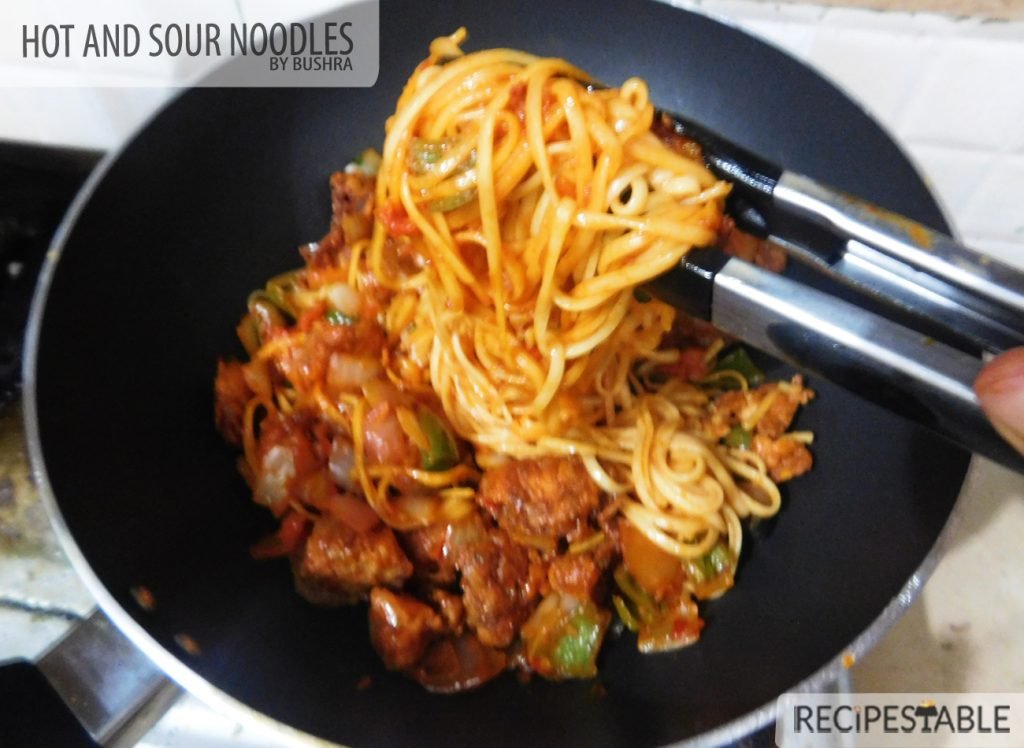
    12. Toss in the noodles,breaking up the clumps as you drop them in and continue to stir fry for 30 seconds.

    13. Pour in 2 tablespoons of water and let it steam up through the ingredients ,helping to cook the veg and to warm the noodles through.

    14. Remove the pan from the heat.Sprinkle some chili flakes over it and top up with olives.


    15. Serve up straight away to appreciate the kick. ENJOY!!


    1. To make non-sticky noodles, do not overcook them in step-2. Cook them until they are cooked but not mushy. Do not forget to pour cold water over noodles after cooking to remove excess starch.
    2. This is my absolute favorite ingredients combination, but feel free to use any vegetables or protein that you have on hand. Instead of chicken, you can use firm tofu to make it vegetarian. You can also use prawns or thinly sliced beef.
    3. As for the vegetables, don’t omit the crispy onion and capsicum. For variation, add baby corns, red and yellow capsicum, mushrooms or any other vegetables of your choice.
    4. You can use either green chilli sauce or hot pepper sauce sauce per your preference. Hot Pepper sauce sauce will help you get the typical restaurant color.
    5. Adjust quantity of hot sauce and soy sauce per your taste. Do not add more soy sauce as it tastes bitter and it will change the taste of noodles.
    6. All vegetables and noodles must be tossed over over high-flame to get restaurant like taste and texture.
    7. This dish is not very good after reheating because the noodles absorb the sauce and become mushy and the whole dish is just a little dry. If you want to make it ahead, store the sauce separately and combine only before serving.

    Other versions of this dish:

    Put your own spin on it. And lemme know how it turns out and do take a few seconds to rate it! I would love to see your recreations so tag me on instagram @recipestable or Facebook (Recipestable) or on Twitter so I can see how lovely yours turn out.

  • Restaurant Style Tawa Fish Recipe

    Restaurant Style Tawa Fish Recipe

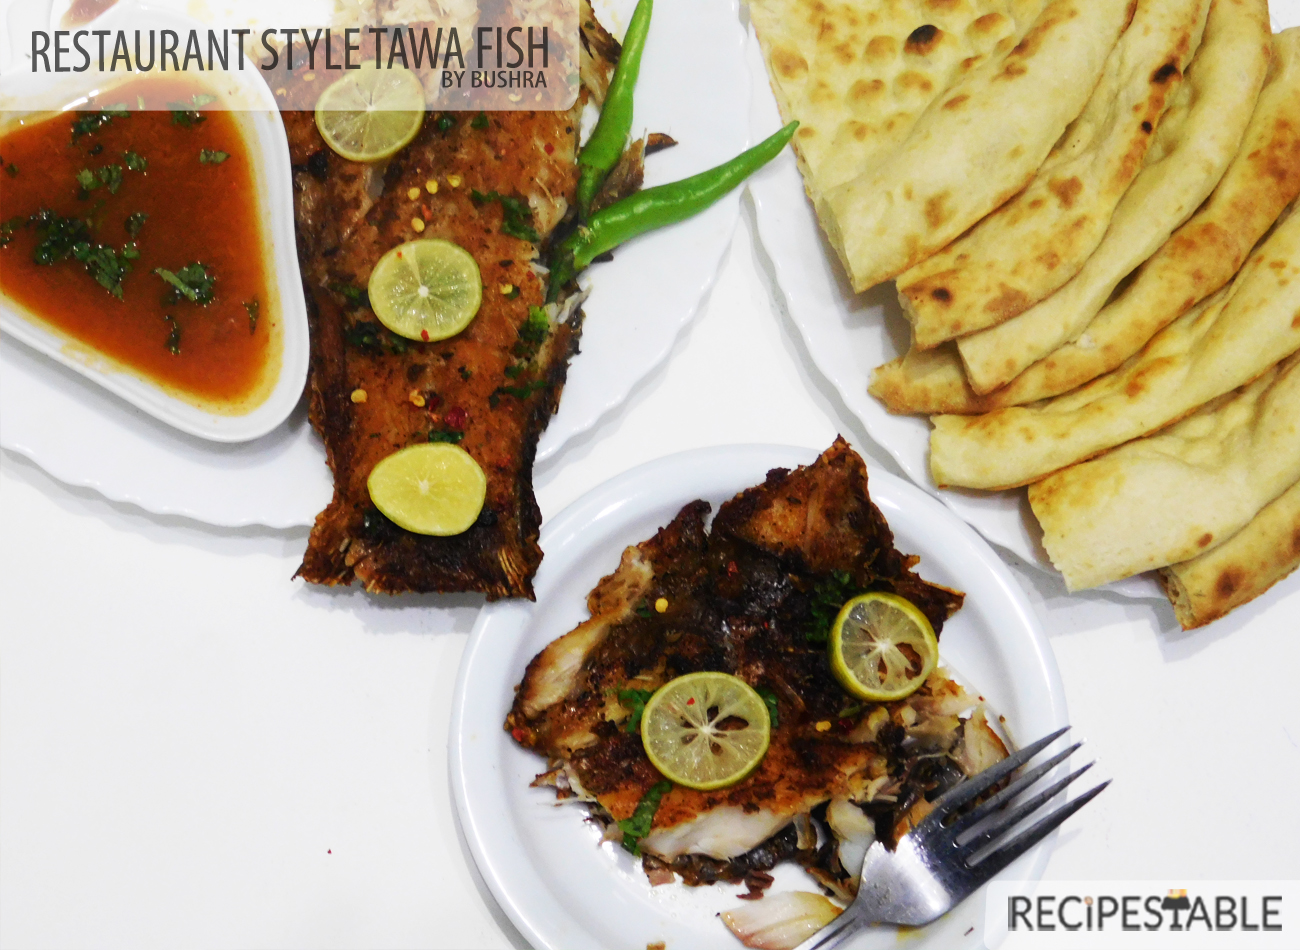
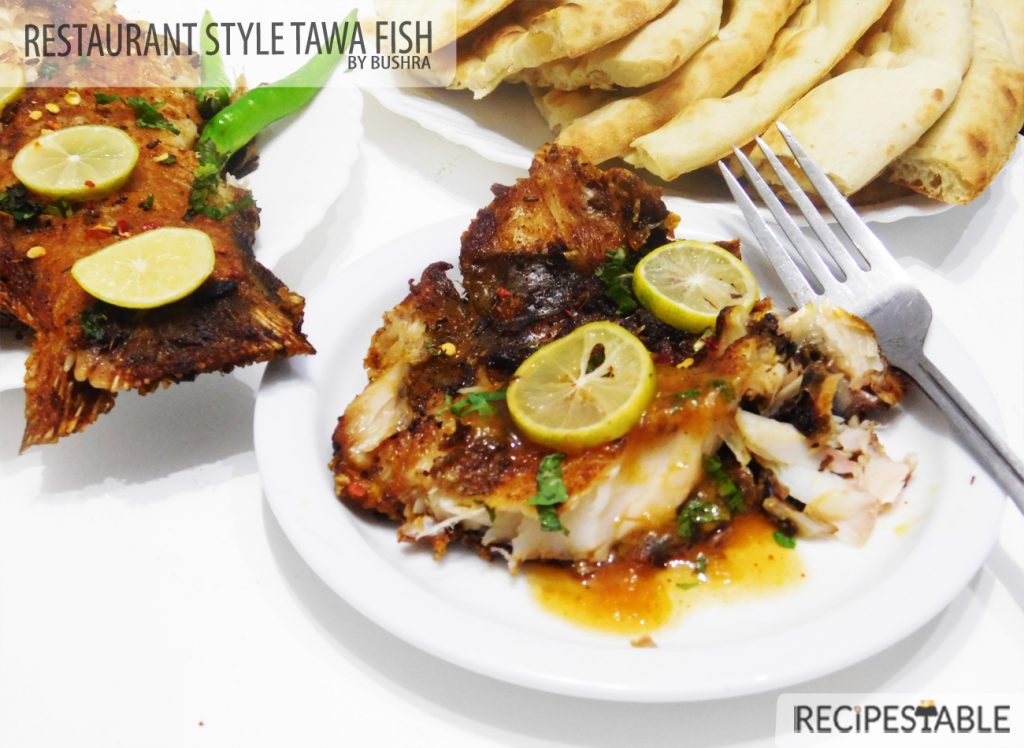
    This Restaurant Style Tawa Fish is a thing of beauty, with its crispy golden crust and spicy, juicy flesh inside. It’s a super quick and can be ready in less than 20 minutes and tastes just like the restaurant’s you would think it’s  take-out. Recreate your favorite Tawa Fish cheaper and better at home!

    Restaurant Style Tawa Fish

    One of the things I find so much fun about food blogging as a living is putting myself up to the challenge of recreating restaurant favorites at home. Although often involving a series of trial and error, it’s very rewarding to come up with a homemade version that’s pretty close to, if not better, than the original.

    Restaurant Style Tawa Fish

    The way I cook this Tawa Fish is a little unorthodox – but it’s a highly effective, no fail method! A blast of heat in a griddle pan and a basting of mustard oil and fish own juices does wonders for plain fish.

    This Restaurant Style Tawa Fish is made with a basic combination of rice flour and desi seasonings. Don’t be fooled by the simplicity of this dish. The fish fries up crispy and delicious. The cooking time is so short that the smell — which, if your fish is fresh and not funky, should not be overpowering — will dissipate quickly. And in the meantime, you have an easy dinner of spicy fish with a toothsome crust, anointed with rice flour and spices, mustard oil , perfumed with fresh Lemon wedges, paired with apricot chutney and naan.

    Restaurant Style Tawa Fish

    Rohu and Catla (Thela) Fish are two excellent choices for Tawa Fish, but baam, cod, or any other mild white fish should work fine. You can use any fish but my preference is rohu, skin on or off, as long as it is not too thick. Be careful not to overcook thin fillets.
    If the fish starts browning too fast, reduce the heat and add a splash of mustard oil to prevent scorching, or squeeze in the juice of half a lemon.

    How to cook Perfect Tawa Fish every time!

    1. Use a heavy duty Griddle (Tawa) – it DOES NOT need to be a non stick griddle or pan! Contrary to popular belief, it’s not just about using a non stick pan. A thin, cheap non stick pan will cause the fish to be in closer and harsher contact with the stove, causing the fish to brown unevenly in the few minutes it’s on the stove. Some crispy patches, some not so crispy ones.
    Use a heavy duty Griddle (Tawa), like a cast iron pan or a good quality, heavy non stick frying pan. I love my Griddle Pan, it heats better, and more evenly, which really helps to get an even, golden, crispy crust.

    2. Heat the pan first before adding the oil – I have NEVER had problems with fish sticking to the pan since I adopted this technique. It’s just an easy way to ensure the oil is hot enough but not too hot (a common mistake people make).
    To do this, just heat a dry pan, and as soon as you see small wisps of smoke, add oil, swirl to coat base, then immediately add the fish.

    3. If it sticks a bit, do not move until it naturally releases – Most fish fillets will initially stick to the pan as they start to cook (unless you’re using so much oil you’re basically shallow frying them). But it naturally releases once the surface is cooked and golden.
    So give it a nudge, and if it doesn’t want to move, then it means that it’s not ready. So just leave it and try again in another 15 seconds or so!

    4. Pat fish dry – Dry fish = crispier surface. Especially important for thawed frozen fish.

    5. Keep Basting with a little oil and its own juices –  it will gives nice juicy flavor.

    Packed generously with a crunchy coating but there is so much more to it than what meets the eye! The flavor beneath the crunchy golden layer is delicious because of the magical spice that hits you with the first bite!! This is one fish that everyone is sure to love. Using this Restaurant Style Tawa Fish recipe, you’ll get perfectly flavored tawa fish.

    Restaurant Style Tawa Fish Recipe
    Restaurant Style Tawa Fish

    That’s one last picture before you go. So that you can get a close, hard look at this Restaurant Style Tawa Fish and get tempted. Oh so so tempted.

    Restaurant Style Tawa Fish
    Restaurant Style Tawa Fish Recipe

    Sauces or Chutney For Tawa Fish

    With well seasoned crispy golden texture outside and spicy juicy flesh inside, I don’t need anything more than a squeeze of fresh lemon. But I am a sauce person, so I never turn down a sauce even for fish! Here are my few favorite Sauces for Tawa Fish:

    • Apricot Chutney (Khubani Ki Chutney) for Tawa Fish – this is an absolute ripper. Totally restaurant worthy, few ingredients, the secret is to soak apricots before preparing the chutney.
    • Mint Tamarind Chutney for fish – a shop stopper kind of chutney with its tangy Minty flavor – made with fresh mint leaves and tamarind pulp.
    • Imli ki Chutney – traditionally thought of for fried fish but equally good with the Tawa Fish.
    • Data Chutney / Khajoor ki Chutney – This smooth chutney, which balances the tartness of vinegar with the sweetness of dates, is a delicious accompaniment to the Tawa Fish & Naan.
    • Brown Chutney – for Fish Mellow down the spice of fish by adding a little brown chutney.
    • Lemon Chutney  for Fish. Lip-smacking chutney to add more zesty flavor to Tawa Fish. It’s finger licking good!

    This Restaurant Style Tawa Fish recipe is ‘sea’riously worth trying , it’s cheaper to make at home and tastes so much better!

    Restaurant Style Tawa Fish Recipe

    A blast of heat in a griddle pan (tawa) and a basting of mustard oil does wonders for plain fish fillets. Give this Restaurant Style Tawa Fish Recipe a try, it’s cheaper to make at home and tastes so much better!

    • 1-1/2 kg Fish Fillets
    • 4 tbsp Lime Juice ((Khatti))
    • 2 tbsp Lemon Juice ((limo))
    • 1 tbsp ginger paste ((adrak paste))
    • 2 tbsp garlic paste ((lehsan paste))
    • 2 tbsp crushed red chili ((Kutti Lal Mirch))
    • 1 tbsp coriander powder ((sukha Dhainya))
    • 1 tbsp cumin seeds ((crushed zeera))
    • 1 tbsp all spice powder (( garam masala))
    • 1/2 teaspoon turmeric powder ((optional))
    • 1/2 teaspoon carom seeds (( ajwain))
    • salt to taste
    • 2 tbsp plain flour
    • 1 tbsp rice flour
    • 1 tbsp water
    • oil for shallow frying
    • chaat masala (for sprinkling)

    For Garnishing:

    • Lemon Slices
    1. Cut off the fish head off directly behind the gills, if desired.
    2. Now rinse he fish of, inside and out, in cool water then cut fish into halves, lengthwise.

    3. Pat fillets dry with a paper towel.

    4. Sprinkle lime juice and lemon juice over the fish.
    5. Put salt and ginger-garlic paste on the fish.
    6. In a small bowl, mix together the rice flour, plain flour, red chili, coriander powder, cumin powder, all spice powder, turmeric powder, carom seeds (ajwain) with 1 tablespoon water and make a smooth paste.

    7. Dab this paste onto fish and refrigerate for 6 hours or preferably overnight. Remove from the fridge and strain excess water.

    8. Heat a large griddle (tawa) or cast-iron pan over high heat.

    9. Remove from the fridge and strain excess water.
    10. Heat a large griddle over medium heat.
    11. When the pan is hot, add the mustard oil ( you can use any cooking oil).

    12. Put the fish on the griddle, skin side down (if applicable), laying them down away from your body.

    13. If fish fillets have skin, press down gently with a spatula for about 20 seconds to prevent curling.

    14. Lower heat to medium and let sizzle until fish is crispy, golden and caramelized around edges, about 5-7 minutes.

    15. Carefully flip fillets and add some mustard oil to the griddle.

    16. Tilt the griddle slightly to let the mustard oil pool at one end.

    17. Use a spoon to baste the fish with the mustard oil.

    18. Continue basting until golden all over and cooked through, 2-3 minutes more, depending on the thickness of your fish.

    19. Take it out in a serving platter when crispy and golden brown from outside and cooked from inside.

    20. Sprinkle chaat masala and lemon juice over it.

    21. Garnish with Lemon slices.

    22. Your Restaurant Style Tawa Fish is ready to eat. ENJOY!!

    Serve hot with naan, Laccha onion, apricot chutney and lemon wedges to add more taste.

    If I may, ahem, say so myself, I’ve had quite a few successes with copycatting recipes. Here are a few of my favorites if you’d like to check them out:

    English Style Fish & Chips Recipe
    Fish Tikka Boti Recipe
    Tangy Pan Fried Fish Recipe
    Fish Steak Recipe
    Crumb Fried Fish Recipe
    Sweet and Sour Fish Recipe


    In the mood for more Pakistani food? Forget takeout and make your very own “combo plate” with Restaurant Style Lahori Mutton Karahi, Mutton Nihari Spicy Mutton Pulao , Angara Qeema.

    Put your own spin on it. And lemme know how it turns out and do take a few seconds to rate it! I would love to see your recreations so tag me on instagram @recipestable or Facebook (Recipestable) or on Twitter so I can see how lovely yours turn out.

  • Fat Free Chicken Karahi Recipe

    Fat Free Chicken Karahi Recipe

    Starting a healthier diet can be easier than you think. But what happens when you start to get bored with the healthy foods you are eating?  Chicken Karahi in a hurry is a winner for everyone in our house. We all get to enjoy some delicious comfort food and I don’t have to spend long in the kitchen to make it. Hurrah! 


    Today I’am going to share a Clean eating Version of Chicken Karahi. It is very delicious and easy to make. A lighter and healthier version of the Pakistani Chicken Karahi, this tomato-based curry is packed with extra fragrant spices and creamy yogurt. Yummilicious treat that will have you wanting to savor every last bite! 
    Clean Eating Chicken Karahi Recipe
    Clean Eating Chicken Karahi
     If you are following a weight loss plan then take your taste buds on an exotic ride with this Fat Free chicken karahi recipe. This delicious Clean Eating Chicken Karahi recipe will keep you satisfied and still help you lose weight. This recipe is low fat, low sodium, and a good source of protein. 

    Fat Free Chicken Karahi Recipe

    If you are following a weight loss plan then take your taste buds on an exotic ride with this Clean Eating chicken karahi recipe. This delicious Clean Eating Chicken Karahi recipe will keep you satisfied and still help you lose weight. This recipe is low fat, low sodium, and a good source of protein. 

    • 750 gm chicken breast or thighs (organic, cut into medium pieces)
    • 2 teaspoon olive oil
    • 4 tablespoon onion paste
    • 1/2 cup plain yogurt
    • 1/4 cup tomato puree
    • 1 to mato (chopped)
    • 4 green chilies (thinly sliced)
    • 1 teaspoon garlic paste
    • 1 teaspoon ginger paste
    • 1 teaspoon red pepper flakes
    • 1 teaspoon cumin seeds (roasted and crushed)
    • 1 teaspoon coriander powder
    • 1/2 teaspoon freshly ground black pepper
    • 1/2 teaspoon garam masala powder
    • salt to taste

    For Garnishing

    • few ginger slices
    • lemon slices
    • few coriander leaves (chopped)
    1. In a large bowl, mix together the chicken, yogurt, red pepper, salt, cumin powder, black pepper, coriander powder, ginger garlic paste.
    2. Cover and marinate for at least 30 minutes to blend flavors.
    3. Heat 2 teaspoon olive oil in a heavy bottom wok or karahi on medium heat.
    4. Saute onion for 4-5 minutes or until raw aroma of onions goes away.
    5. Add marinated chicken and cook on high flame for 25 minutes or until chicken is half done.
    6. Now add tomato puree and chopped tomatoes. Cook and stir for few minutes.
    7. Now add 1 cup water. Bring to a boil and simmer for 35 minutes or until chicken is tender.
    8. Increase the flame and cook on very high heat for 5-8 minutes or until sauce is thickened.
    9. Sprinkle green chilies and garam masala over it.
    10. Dish it out.
    11. Garnish with chopped coriander, ginger slices and lemon wedges.Delicious clean eating Chicken Karahi is ready to serve. ENJOY 🙂

    Serving Suggestions:
    You can eat it with naan, chapati or steamed rice. But if you are on your weight loss journey, enjoy this chicken karahi with zeera raita and green salad.

    I have also posted Salmon Fish Fry recipe  which is another easiest & tastiest Clean Eating version of making Fried Fish. Do check it out as well.


    Put your own spin on it. And lemme know how it turns out. Post a photo on Facebook (Recipestable) or on Twitter so I can see how lovely yours turn out.

    Happy Clean Eating!!


  • Potato Egg Pakora Bites Recipe (Family Favorite Snack)

    Potato Egg Pakora Bites Recipe (Family Favorite Snack)

    Happy Ramadan to you all!

    May this month be full of blessings, happiness, and peace for you and your family. As much as we must be eating light, Ramadan is the month when we end up eating most of the greasy stuff. All kind of fried dishes are made in the name of iftar.

    The first word that comes into your mind when you think about an iftari is? Yes its pakora! Pakoras are one snack associated with Iftar here in Pakistan.  Truly, a Pakistani iftar is incomplete without the presence of a mighty pakora. The word pakora is derived from a Sanskrit word “pakvavata” which means small food lump (pakva means cooked and vata means small lump). Pakoras can be made out of anything, from a simple potato, daal mung, spinach, chicken or even cheese.

     Potato Pakora Sandwiches recipe
    Photo: Potato Pakora Sandwiches

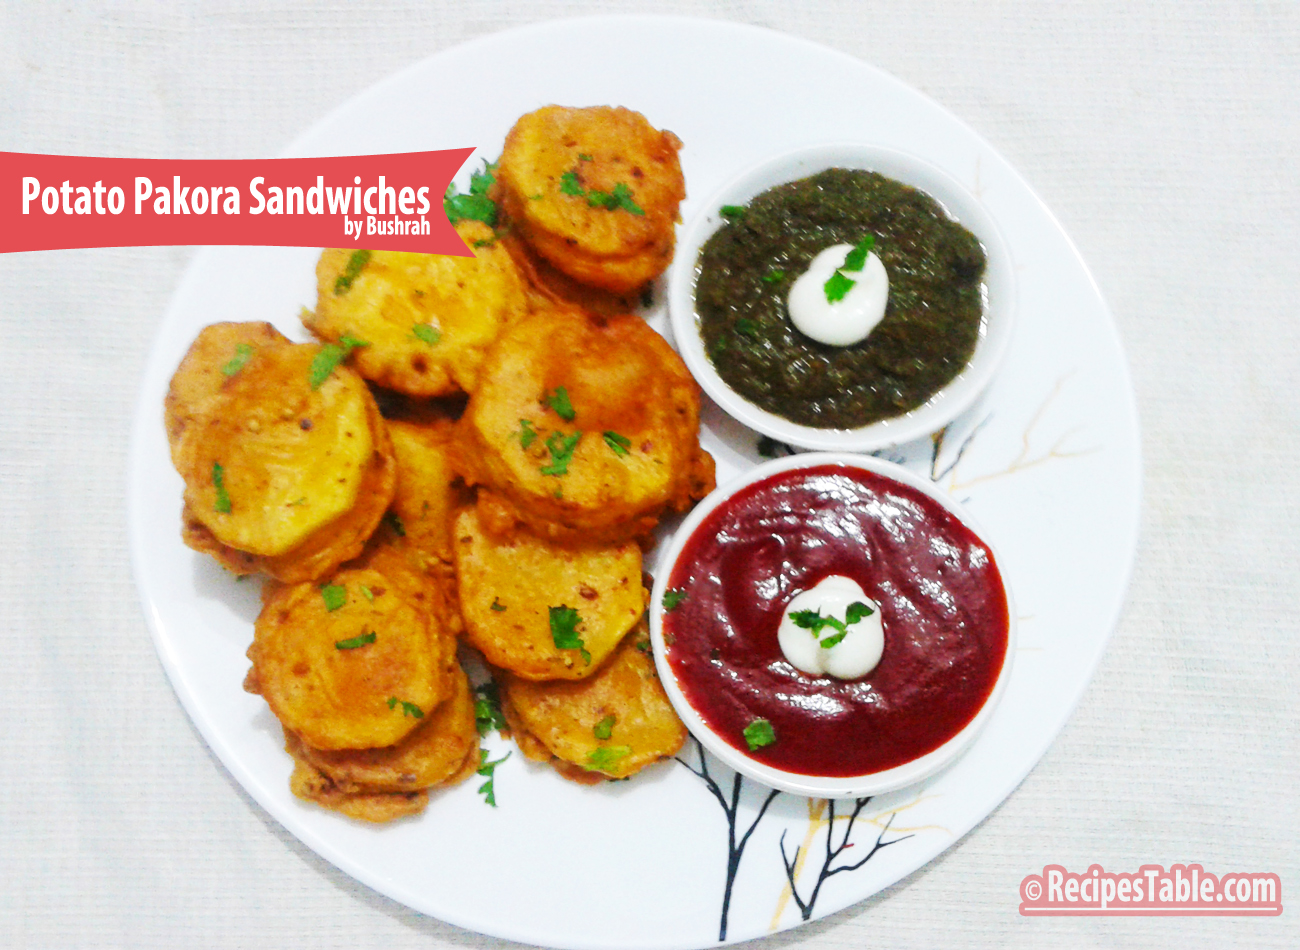
    Today, I came up with an amazing idea of making Pakora’s. It’s our family favorite snack. I love these Potato Pakora sandwiches so much. Sinking your teeth into crisp Pakora sandwiches is a sensual pleasure. It has all the textures and flavors one would need in a Pakistani snack.  

    Try this recipe and turn your favorite Pakora’s into bite sized sandwiches, stuffed with eggs (or your favorite stuffing).  It’s a perfect recipe for a quick and easy Iftar Snack. A great new way to make Pakoras!

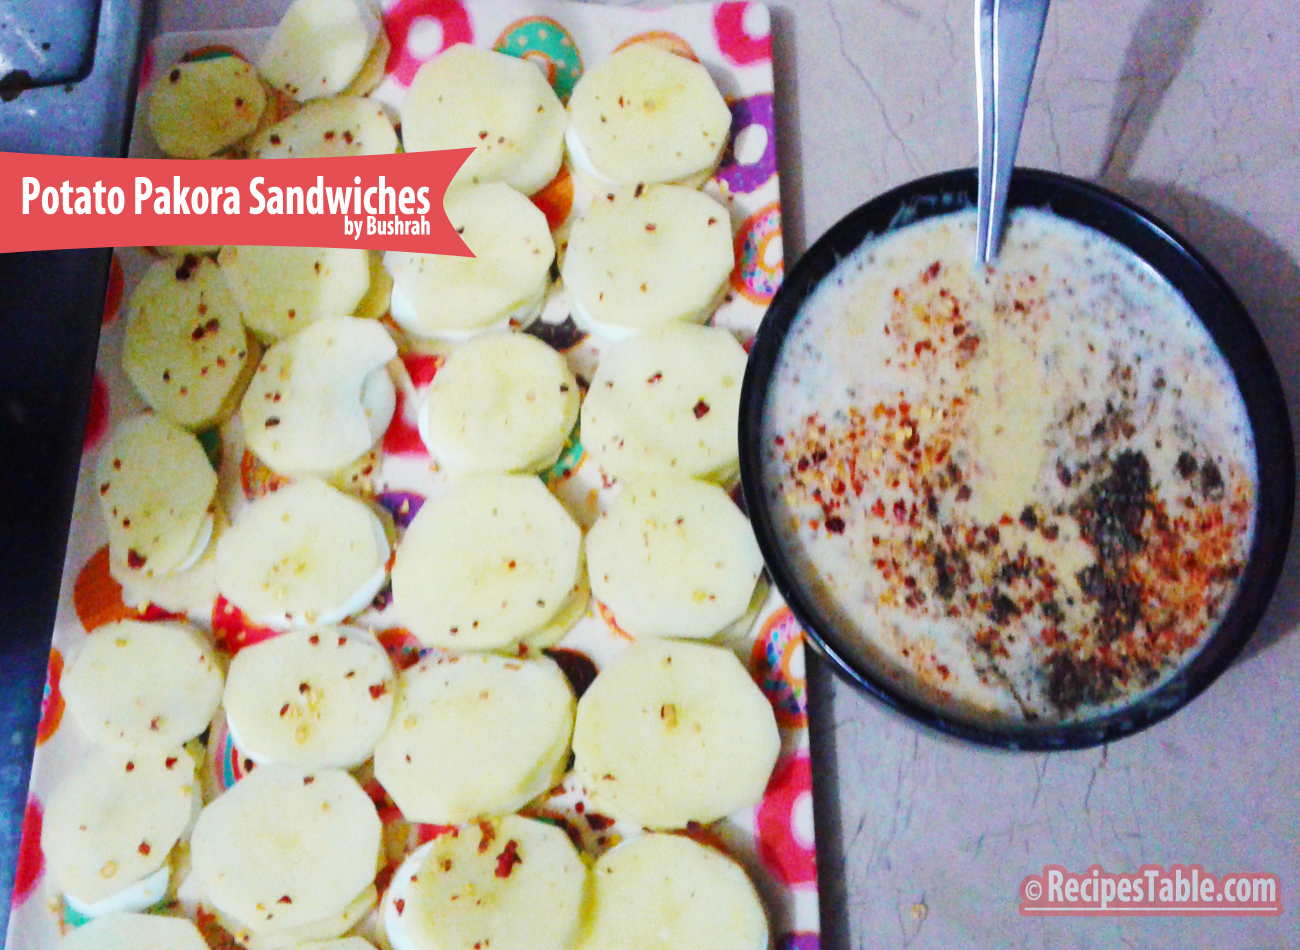
    To prepare this delicious pakora first egg slice covered in between 2 thin potato slices then dipped in spicy chickpea (besan) batter then deep fried.

    Within every bite of this snack you will enjoy a variety of flavors and textures. Spicy Red pepper flakes and herbs give nice pops of heat and a soft slice of boiled egg in between potato sandwich, and a crispy coating of the chickpea flour. You just need a hot cup of tea or coffee to complement it and turn it into a heavenly delight!

    Potato Pakora Sandwiches Recipe
    Photo: Potato Pakora Sandwiches Recipe

    I think I have talked enough about this mouth-watering Iftar or Rainy Day Snack. I insist you to make it ASAP, If you haven’t tried Potato Pakora sandwiches yet. Once you taste these heavenly, crispy and delish bites, you will know what pleasure I am talking about.
    Try this recipe and give your ordinary Pakora a delicious makeover with this Potato Pakora sandwiches recipe!It’s a perfect snack for get-together’s. And surely will be loved by everyone. Don’t be surprised if it disappears in a flash!

    Let’s learn to make Potato Pakora Sandwiches !!

    Peel hard boiled eggs and cut into slices with egg cutter. Set aside. Now peel potatoes then cut them into thin round slices. Soak in cold water. Meanwhile, Take a large mixing bowl. Add chickpea flour(besan), red chili, cumin seeds, coriander seeds, black pepper and salt and mix well. Add enough water to make a smooth batter, and whisk well to avoid any lumps.

    Now prepare pakora sandwiches, first take an egg slice covered in between two thin slices. Repeat this method with rest of the potato and egg slices. Sprinkle seasoning, chili flakes, garlic powder and a pinch of salt over it. Keep aside.

    Potato Pakora Sandwiches recipe
    Photo: Potato Pakora Sandwiches

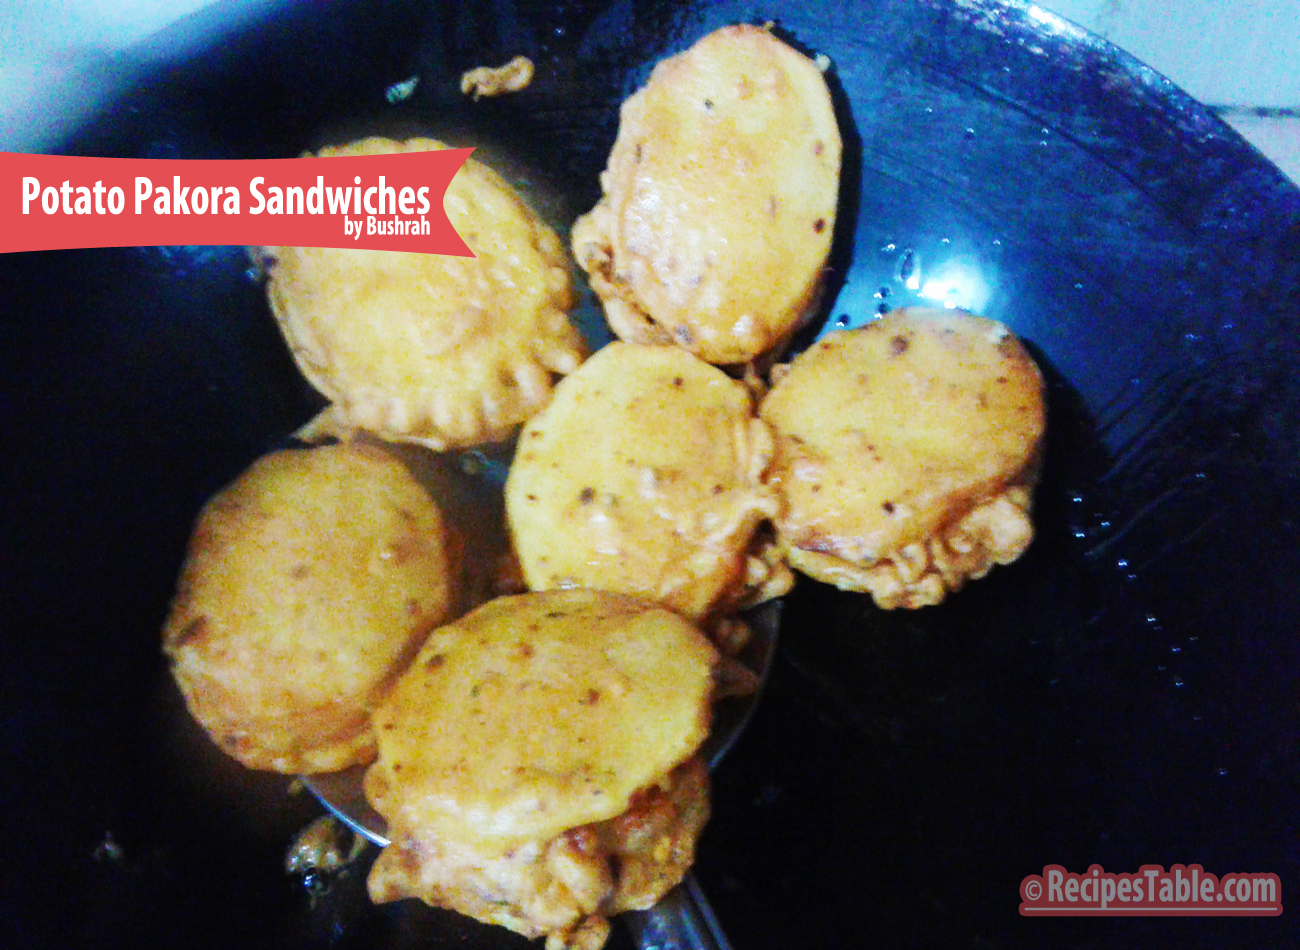
    Heat the oil in a deep pan over medium heat. Dip one potato egg sandwich in the batter. Make sure to cover on all sides.

    Potato Pakora Sandwiches recipe
    Photo: Potato Pakora Sandwiches recipe

    Put sandwich in a hot oil and deep-fry on a medium heat till it turns crisp and golden brown in colour from both the sides.

    Photo: Potato Pakora Sandwiches recipe
    fry till they turn crispy and golden from the both sides.

    Remove from the oil and drain on kitchen paper. Transfer into a serving platter.  Sprinkle a pinch of red pepper flakes and fresh herbs. 

    Potato Pakora Sandwiches recipe
    Photo: Potato Pakora Sandwiches

    They pair well with coriander and mint sauce or ketchup and a strong cup of tea. Give your taste buds a treat with this crunchy Potato Pakora sandwiches. Perfect for when you’d like to serve something a little out of the ordinary. This evening tea time snack would rock at your place anytime. 

    Check it out the Potato Pakora Sandwiches recipe and printable version here!!

    Potato Egg Pakora Bites Recipe

    It’s a perfect recipe for a quick and easy Iftar Snack. A great new way to make Pakoras!

    • 4 medium potatoes
    • 4 hard boiled eggs (sliced)
    • 1 teaspoon herb seasoning
    • 1/4 teaspoon garlic powder (optional)
    • 1/4 teaspoon red chili flakes
    • 1/4 teaspoon salt

    For Batter

    • 1 cup chickpea flour
    • 1/2 teaspoon red chili powder
    • 1/2 teaspoon cumin seeds (roasted & crushed)
    • 1/2 teaspoon whole coriander seeds (roasted & crushed)
    • 1/2 teaspoon black pepper (freshly ground)
    • salt to taste
    • oil for frying
    1. Peel and cut potatoes into thin round slices.
    2. Soak in cold water for 10 minutes.
    3. Meanwhile, whisk together all the ingredients for the batter with enough water to make a thick but fluid batter.(1/2 cup water per 1 cup gram flour), making sure there are no lumps. set aside.
    4. To prepare the pakora first take an egg slice covered in between 2 thin potato slices.
    5. Repeat this procedure with rest the potato and eggs.
    6. Sprinkle herb seasoning, chili flakes, garlic powder and a pinch of salt.
    7. Set aside.
    8. Heat oil in a deep pan over medium heat.
    9. Now dipped pakora sandwich in spicy chickpea (besan) batter then deep fried and cook for 5-8 minutes or until golden brown.
    10. Remove from the oil and drain on kitchen paper.
    11. Potato Pakora Sandwiches are ready to serve. ENJOY!!

    Serving Suggestions:
    Serve hot with ketchup, mint chutney or apricot chutney.

    I have also posted Sesame Chicken Pakora and Noodles Pakora which are another easiest & tastiest version of making pakora at home. Do check it out as well.  It’s finger lickin’ good. You’ll be coming back for more. 


    Put your own spin on it. And lemme know how ilet turns out. Post a photo on Facebook (Recipestable) or  on Twitter so I can see how lovely yours turn out.


    Happy & Blessed Iftar Making!!

  • Tandoori Spiced Baked Chicken in Yogurt Masala Recipe

    Tandoori Spiced Baked Chicken in Yogurt Masala Recipe

    Well, when I am sad and tired and overall cranky, I likes to eat the food prepared by my mothers hand, the flavorful easy to make food I grew up eating and these Tandoori Spiced Baked Chicken in Yogurt Masala hit the spot. Neither World’s most expensive dish Nor World’s best restaurant can compete Home Cooked Food by Mothers Hand 🙂

    On to today’s recipe!

    Tandoori Spiced Baked Chicken 

    Today’s recipe is a favorite of me and my family. It’s a revamped version of this tandoori Roast Chicken Recipe which is one of my popular recipes on the blog! Why is it revamped? Well, because this recipe is more of tastiest than the old one and this is my favorite version: the chicken is deliciously spiced with yogurt marination, and the mango chutney served alongside adds fruity, tangy flavor.

    Tandoori Spiced Baked Chicken In Yogurt Masala
    Recipe Photo: Tandoori Spiced Baked Chicken In Yogurt Masala

    To pair with the creamy yogurt, and spices, instead of using bone-in chicken or pieces of chicken breast, My mom used chicken thigh and wings. Chicken thigh is fattier, juicer and much more tender than chicken breast – I’m actually not a fan of chicken breast at all due to how tough and rubbery it is. Chicken thigh releases its juices during the cooking process, which leads to a deeply, beautifully flavored tandoori chicken which literally melts in your mouth – something chicken breast can’t do without extended marination times and slow cooking.

    Recipe Photo: Tandoori Spiced Baked Chicken In Yogurt Masala
    Recipe Photo: Tandoori Spiced Baked Chicken In Yogurt Masala

    This Tandoori Spiced Baked Chicken  is very popular in Pakistani restaurants and is usually served with naan bread and chutney. This dish is a great recipes to cook for your house parties and is loved by one and all.

     Tandoori Spiced Baked Chicken In Yogurt Masala
    Recipe Photo: Tandoori Spiced Baked Chicken In Yogurt Masala

    If you have the ingredients on hand and a micro-plane or grater, tandoori chicken wings are so easy to make! Goes great served with Zeera Raita(cumin yogurt dip) or mango chutneylemon wedges and some onion rings.

     Tandoori Spiced Baked Chicken In Yogurt Masala
    Recipe Photo: Tandoori Spiced Baked Chicken In Yogurt Masala

    Bismillah, let’s get started!

    Check it out the Tandoori Spiced Baked Chicken In Yogurt Masala recipe and printable version below.

    Tandoori Spiced Baked Chicken In Yogurt Masala Recipe

    This Tandoori Spiced Baked Chicken is very popular in Pakistani restaurants and is usually served with naan bread and chutney. This dish is a great recipes to cook for your house parties and is loved by one and all.

    • 2 pounds chicken pieces

    For marination

    • 1-1/2 cups plain yogurt
    • 2 tablespoon butter
    • 2 tablespoon ginger garlic paste
    • 2 tablespoon lemon juice
    • 2 tablespoons ground cumin
    • 2 tablespoons smoked paprika
    • 1 tablespoon coriander powder
    • 1 teaspoon garam masala powder
    • 1/2 teaspoon turmeric powder
    • 1/2 teaspoon cayenne pepper
    • salt to taste

    For Garnishing

    • 4 limes (quartered)
    • onion rings

    Method

    1. Make two deep slits crossways on the meaty parts of chicken piece.
    2. Sprinkle the salt over the chicken and squeeze over some of the lemon juice.
    3. In a large bowl, add the yogurt, lemon juice, ginger and garlic, plus all of the spices. Mix well and remove any lumps in the yogurt.
    4. Put the chicken into the yogurt mixture and toss to coat evenly.
    5. Cover and place in the refrigerator to marinate for about 4 hours to overnight, which is ideal.
    6. Preheat an oven to 200 degree C.
    7. Put the marinated chicken into a deep heat-proof dish. Cover with a lid or foil with holes poked in the top.
    8. Bake for 30 minutes then move the meat around with a spoon.
    9. Bake for an additional 30 minutes, uncovering the dish for the last 15 minutes of baking only.
    10. Use tongs to remove the meat from the dish and the yogurt sauce and place on a separate tray to broil or use the broil setting on your oven to sear the meat, about 5 minutes each side.Tandoori Spiced Baked Chicken is ready to serve. Enjoy!!

    Note:
    If you prefer the chicken to be a bright red colour, and a few drops of red coloring into the marinade.

    Serving Suggestions:
    Serve with fresh naan bread, onion rings, lemon wedges and a yogurt sauce on the side for dipping.

    I have also posted Tandoori Moti Tikka Recipe which is another easiest & tastiest version of making Tandoori Chicken. Do check it out as well.  It’s finger lickin’ good. You’ll be coming back for more. 


    Put your own spin on it. And lemme know how it turns out. Post a photo on Facebook (Recipestable) or  on Twitter so I can see how lovely yours turn out.


    Happy Cooking!!

    If you like this post, Please Subscribe to my blog and let me know your feedback by commenting below.. I have lots more recipes to share with you.

  • Restaurant Style Lahori Mutton Karahi Recipe

    Restaurant Style Lahori Mutton Karahi Recipe

    Isn’t the Title Interesting?Look down at the Picture just scrumptious and believe me the recipe is so simple.

    Restaurant Style Lahori Mutton Karahi Recipe
    Photo: Restaurant Style Lahori Mutton Karahi

    Restaurant Style Lahori Mutton Karahi

    Today, I come up with a new recipe: “Restaurant Style Lahori Mutton Karahi “. It is one of most popular Pakistani dish that you will come across almost every Pakistani restaurant menu anywhere in the world.

    Lahore is famous for its culturally enriched food items.. impossible to be on diet there 😛 lol. People here in Lahore are known as food lover, which is why many new restaurants are constantly opening.

    As all of you know, I always tempted to try popular dishes at home, and perfecting it as possible as I could. One among them was this “Restaurant Style Lahori Mutton Karahi”.

    Restaurant Style Lahori Mutton Karahi Recipe
    Photo: Restaurant Style Lahori Mutton Karahi

    Mutton Karahi is a specialty of Lahori food, this dish is made by stir-frying small cubes of lamb or mutton with tomatoes, green chilies, ginger, and garlic in a karahi, the wok-like pan that gives the dish its name.I made it with a less fat. But taste was so good and excellent. Meat was so tender, juicy, deeply marinated in the masala (gravy) and uniformly cooked.

    Photo: Restaurant Style Lahori Mutton Karahi recipe
    Photo: Restaurant Style Lahori Mutton Karahi

    Very simple and lip smacking dish for anyone who love to have spicy treat occasionally. Its so simple that if you have ingredients in hand then Ready get set go.

    Restaurant Style Lahori Mutton Karahi
    Photo: Restaurant Style Lahori Mutton Karahi

    It pairs the best with butter naan, or simply plain naan and may be served along with rice, tandoor roti and even homemade chapati’s along with zeera or mint raita and onion rings.

    Let the meat eating begin!

    Check it out the Restaurant Style Lahori Mutton Karahi recipe and printable version below!!

    Restaurant Style Lahori Mutton Karahi

    I always tempted to try popular dishes at home, and perfecting it as possible as I could. One among them was this “Restaurant Style Lahori Mutton Karahi”.It is one of most popular Pakistani dish that you will come across almost every Pakistani restaurant menu anywhere in the world.

    • 1-1/2 kg lamb or mutton
    • 1/2 cup pure butter
    • 1/2 cup plain yogurt
    • 3 to matoes (cut into four pieces)
    • 3 onions (thinly sliced)
    • 4 green chilies (chopped)
    • 2 tablespoon ginger garlic paste
    • 1/2 cup garlic water (mix 1 tsp garlic paste with 1 tsp lemon juice in 1/2 cup of water)
    • 1-1/2 teaspoon red chili pepper (crushed)
    • 1/2 teaspoon turmeric powder
    • 1 teaspoon dried fenugreek leaves (optional)
    • 2 tablespoon cumin seeds (roasted & crushed)
    • 2 tablespoon coriander seeds (roasted & crushed)
    • 1/4 teaspoon black pepper
    • 1-1/2 teaspoon salt or to taste

    For Garnishing

    • 1/2 teaspoon garam masala powder (for sprinkling)
    • fresh coriander leaves (chopped)
    • ginger (cut in julienne)
    • lemon (thinly sliced)
    • tomato (thinly sliced)

    For Serving

    • naan or butter naan

    Method

    1. Melt butter in a deep wok or pan over medium heat.
    2. Fry onions for 3-4 minutes or until transculent.
    3. Add ginger garlic paste and meat. Cook for 5-8 minutes or until meat change its color.
    4. Mix well and don’t add any water.
    5. Meat cooked in its own juice
    6. Cover with lid and cook for 45 minutes on medium heat.
    7. Now add tomatoes, cover it again and cook for another 10 minutes.
    8. Add all spices excpet black pepper, mix well.
    9. Cook on high heat for 4-5 minutes then add yogurt, green chilies and black pepper.
    10. Cook for another 15 minutes or until oil comes on top.
    11. Now add garlic water and cook for 10 more minutes or until meat is tender and gravy is thickened.
    12. Sprinkle garam masala over it.
    13. Garnish with coriander leaves, green chilies, lemon slices, and ginger.
    14. Restaurant Style Lahori Mutton Karahi is ready to serve. ENJOY!!

    Serving Suggestions:
    Serve with butter naan along with raita and ring onions.

    I have also posted Chicken Karahi and Kebab Karahi which are another easiest & tastiest version of making karahi. Do check it out as well.


    Put your own spin on it. And lemme know how it turns out. Post a photo on Facebook (Recipestable) or  on Twitter so I can see how lovely yours turn out.


    Happy Cooking!!

    If you like this Restaurant Style Lahori Mutton Karahi, Please Subscribe to my blog. I have lots more recipes to share with you. And If you make it then let me know your feedback by commenting below.

  • Mutton Nihari Recipe

    Mutton Nihari Recipe

    Aslam-o-Alakaum My Lovelies !!

     In the Name of Allah, Most Gracious, Most Merciful

    Mutton Nihari 

    Nihari is one of most favorite and traditional dishes of every Muslim home. Be it mutton, chicken or beef nihari, it can be relished with any kind of meat. Traditionally nihari made with the bone marrow meat. It’s a deliciously smooth flour based stew with slow cooked mutton and a myriad of spices.  Mutton Nihari takes a long time to cook but is easy to put together.

    mutton-nihari

    There are lot of ready made Nihari spices available in the market. But I would not Never Never recommend. As they are full of artificial colors and preservative agents. Not a healthy approach. 🙁 You can make the Nihari powder at home by following my Nihari Masala Mix and store it in airtight container for many days.

    This is a must try recipe from my Mommy.  We normally make Nihari with small pieces of mutton as we prefer it over the bone-in mutton.

     Mutton Nihari Recipe
    Photo: Mutton Nihari

    Note:

    Preferably it must be cook on low flame, but those of you who would rather prefer a faster process can cook it in a pressure cooker though the Nihari taste wont be the same as cooked on a low flame.

    So about this Mutton Nihari recipe. As you can see, there’s no layer of fat floating on top of the nihari, As many of you know, when we go out to eat it, we want the brain, marrow and floating oil on top, not a very healthy option. My mommy tried to make it just a little healthy by adding as little butter as possible without compromising on the flavor. Less fat and believe me, just as good. Or if you do like a little oil on top, when you are ready it dish it out, leave it covered on very low heat for about 5-7 minutes. Voila, the ‘little’ amount of oil will rise to the top! 

    Mutton Nihari with ginger and fried onion
    Mutton Nihari with ginger and fried onion

    Traditionally Nihari  served with ginger, fried onion, green chilies and the hottest crisp khameeri roti or naan.

    mutton nihari recipe
    Nihari goes great with ginger, green chilies, fried onion, lemon and Khamiri Roti.

    Let’s get started!

    Mutton  Nihari with Step by Step Picture

    Step 1

    Check it out the Mutton Nihari recipe and printable version below!!

    Mutton Nihari Recipe

    Nihari is one of most favorite and traditional dishes of every Muslim home. Be it mutton, chicken or beef nihari, it can be relished with any kind of meat. Traditionally nihari made with the bone marrow meat. It’s a deliciously smooth flour based stew with slow cooked mutton and a myriad of spices. This Mutton Nihari recipe takes a long time to cook but is easy to put together.

    • 1-1/2 kg mutton (shank portion, cut into 8 pieces)
    • 1/4 cup clarified butter or desi ghee
    • 3 medium onions (thinly sliced)
    • 1 tablspeoon ginger paste
    • 1 tablespoon garlic paste
    • 2 teaspoon coriander powder
    • 1/2 teaspoon turmeric powder
    • salt to taste
    • 4 tablebspoon wheat flour
    • 4 tablespoon nihari masala Mix

    Nihari Masala Mix

    • 1 tablespoon cumin seeds
    • 2 teaspoon fennel seeds
    • 1 teaspoon soonth (dry ginger)
    • 1/4 teaspoon nutmeg powder
    • 5-6 green cardamoms
    • 2 black cardamoms
    • 5 cloves
    • 1 bay leaf
    • 1 inch cinnamon stick
    • 10 black peppercorns

    For Garnishing

    • 1/2 cup crispy fried onion
    • 1 inch ginger (cut into this strips)
    • 1 lime (cut into wedges)
    • 2 green chilies (thinly sliced)
    • few fresh coriander leaves (chopped)
    • Juice of 1 lime

    Niahri Masala Mix Method

    1. To make your own Nihari masala from scratch, dry roast all the whole spices for the masala and grind them to a fine powder.

    Mutton Nihari Method

    1. Melt butter or ghee (you can use oil as well but ghee makes it tastier) in a heavy bottom pot.
    2. saute onion slices and fry till they start to turn brown(about4-5 minutes).
    3. Now add mutton pieces, ginger paste and garlic paste.
    4. Stir and cook for 5-8 minutes or until meat is no longer pink and all juices run clear.
    5. Now add coriander powder, turmeric powder and salt.
    6. Sauté for 5 minutes.
    7. Add the nihari masala and 8 cups of water.
    8. Stir well.
    9. Cover the pot and cook on very low flame for about 4 hours until the meat is tender.
    10. Keep checking in between. The way to know that the meat is cooked is when it breaks easily with a wooden spoon.
    11. Remove the lid and increase the flame.
    12. Dissolve wheat flour in half cup of water such that there are no lumps.
    13. Slowly pour wheat mixture into the gravy.
    14. Stir to mix well.
    15. Let it simmer for another 15 minutes or until the gravy is thickened.
    16. Drizzle some lime juice over it.
    17. Garnish with fried onion, ginger slices, green chilies and fresh coriander leaves.
    18. Delicious Mutton Nihari is ready to serve. Enjoy!!

    Serving Suggestions:
    Serve with Khameeri Roti or Naan. At time of serving, add chop fresh coriander, green chilies, Julienne cut ginger and fry onions.. and also lemon…. these things will improve the taste of nihari.


    Put your own spin on it. And lemme know how it turns out. Post a photo on Facebook (Recipestable) or  on Twitter so I can see how lovely yours turn out.

    Happy Cooking!!

    If you like this Mutton Nihari recipe, Please Subscribe to my blog. I have lots more recipes to share with you. And If you make it then let me know your feedback by commenting below.

  • Super Crispy French Fries Pakora Recipe

    Super Crispy French Fries Pakora Recipe

    French Fries Pakora

    Here is a Pakistani twist on the everyday french fries. Super simple to make and very tasty and crispy. You can eat them any time with cold drinks or tea. Would go great with a veggie burger or any type of burger. Or even just as a snack.

    It’s a perfect recipe for a quick and easy desi snack, consider making a spicy potato chips please guests who love spicy foods. delicious!!! I serve it with Homemade Tomato Ketchup. You can serve with any kind of dip or sauce you want.

    French Fries Pakora Recipe
    Photo: French Fries Pakora Recipe

    You should always use old potatoes to make french fries. New ones are moist and are extremely raw, that do not make french fries crispy.

    Step by Step ~ French Fries Pakora Recipe

    Step 1 ~ First Peel the potatoes with the help of a peeler and wash them.

     French Fries Pakora
    Step 1 ~ French Fries Pakora

    Step 2 ~ Now cut them into long pieces. You can use french fries cutter that can be easily bought from the market also. You will be able to cut the pieces quickly and in equal shapes.

    french Fries Pakora
    Step 2 ~ French Fries Pakora

    Step 3 ~ In a large bowl, add potatoes, chickpea flour, rice flour and cornflour. Season with salt, chili powder, cumin and garlic powder.

    French Fries Pakora
    Step 3 ~ French Fries Pakora

    Step 4 ~ Add little water and mix well to coat evenly.

    French Fries Pakora
    Step 4 ~ French Fries Pakora

    Step 5 ~ Heat oil in a pan over medium heat.

    French Fries Pakora
    Step 5 ~ French Fries Pakora

    Step 6 ~ Put the french fries pakora into it to fry. Make sure that the oil is not extremely heated.

     French Fries Pakora
    Step 6 ~ French Fries Pakora

    Step 7 ~ Fry them till they turn golden brown and crispy.

    French Fries Pakora
    Step 7 ~ French Fries Pakora

    Step 8 ~ Remove on a kitchen paper to drain excess oil.

    French Fries Pakora
    Step 8 ~ French Fries Pakora

    Step 9 ~ sprinkle chaat masala over them. Delicious French Fries Pakoras are ready serve. ENJOYY!!

     French Fries Pakora
    Step 9 ~ French Fries Pakora

    Check it out the French Fries Pakora recipe and printable version below!!

    French Fries Pakora

    Here is a Pakistani twist on the everyday French fries. Super simple to make and very tasty and crispy. You can eat them any time with cold drinks or tea. Would go great with a veggie burger or any type of burger. Or even just as a snack.

    • 500 gm potatoes
    • 2 tablespoon chickpea flour
    • 4 tablespoon rice flour
    • 2 tablespoon corn flour
    • 1 teaspoon red chilli powder
    • 1 teaspoon cumin powder
    • 1/4 teaspoon garlic powder (optional)
    • Salt to taste
    • Oil for frying
    • chaat masala powder (for sprinkiling)
    1. Peel potatoes and cut into strips.
    2. Place potatoes, chickpea flour, rice flour and cornflour in a large bowl.
    3. Season with salt, chili powder, cumin and garlic powder.
    4. Add some water and mix to coat evenly.
    5. Set aside.
    6. Heat oil in a deep pan or wok over medium heat.
    7. Add potatoes in a sprinkled way and fry for 8-10 minutes or until crispy and golden brown.
    8. Remove from oil and drain the excess oil.
    9. Sprinkle Chaat masala over it. French Fries Pakora is ready to serve. ENJOY!!

    You can also bake them for a Healthier version.

    Serving Suggestions:
    You can serve with Tomato Ketchup.

    If you like French Fries Pakora Recipe and make it then let me know your feedback by commenting below.

  • Heart-Healthy Pan Fried Fish Recipe

    Pan Fried Fish

    This Pan Fried Fish recipe is melt-in-your-mouth delicious and healthy too! Fish Fillets or Fish steaks are pan-fried, searing in the flavors and omega-3 goodness of the fish.

    Tangy Pan Fried Fish (Clean Eating Version)
    Photo: Tangy Pan Fried Fish (Clean Eating Version)

    It is pretty simple and fast to put together and differs completely from another pan fried fish I have posted earlier. This Tangy Pan Fried Fish relies on warm flavor of ginger, sharp garlic and the grassy heat of green chillies along with a tang from vinegar and chaat masala. I pan fry the fish in virgin olive oil, you need to try fish cooked in it to know how awesome it tastes but canola or other oil will work fine too.

    Photo: Tangy Pan Fried Fish (Clean Eating Version)
    Photo: Tangy Pan Fried Fish (Clean Eating Version)

     Check it out the Tangy Pan Fried Fish Recipe and printable version below!!

    Tangy Pan Fried Fish

    This Tangy Pan Fried Fish recipe is melt-in-your-mouth delicious and healthy too! Fish Fillets or Fish steaks are pan-fried, searing in the flavors and omega-3 goodness of the fish.

    • 1 pound thick fish fillets (cleaned (I use mahi mahi fish))
    • scant pinch turmeric powder
    • 1 tablespoon ginger garlic paste
    • 1 teaspoon green chilli paste
    • 1 tablespoon olive oil
    • 1 tablespoon white vinegar
    • 1 tablespoon lemon juice
    • 1 teaspoon red chilli flakes
    • 1/2 teaspoon Dijon mustard
    • 1/4 teaspoon roasted cumin powder
    • 1/2 teaspoon chaat masala powder
    • 1/2 teaspoon garam masala powder
    • salt to taste
    • 2 tablespoon rice flour

    To Serve

    • lemon wedges
    • grated white radish (add pinch of salt and cayenne pepper)

    Directions

    1. Clean fish properly and pat dry on paper towel or kitchen towels.
    2. Sprinkle turmeric over the fish fillets and set aside.
    3. Meanwhile, In a medium bowl, mix together the green chili paste, ginger garlic paste, vinegar, lemon juice, red chili, Dijon mustard, cumin, chaat masala, garam masala powder and salt.
    4. Rub this marination over the fish fillets.
    5. Refrigerate for at least 30 minutes to blend flavors.
    6. When ready to cook, set the fish out of the refrigerator.
    7. Heat up 1 tablespoon olive oil in a heavy bottomed pan over medium heat.
    8. Sprinkle rice flour over the marinated fish.
    9. Mix until well combined. The liquid in the marinade and from the fish should be enough to moisten the rice flour.
    10. Pan fry the fish on medium low heat in a single layer, flipping midway to brown on both sides. It took me about 4 minutes per sides.
    11. Remove from the pan and transfer into a serving platter. Tangy Pan Fried Fish is ready to serve.

    Serving Suggestions:
    Serve immediately with lime wedges and steamed vegetables, brown rice pilaf or lentils.

    I have also posted Restaurant Style Tawa Fish Recipe which is another quick version of making Fried Fish. Do check it out as well.

    If you like this Tangy Pan Fried Fish Recipe,Please Subscribe to my blog. I have lots more recipes to share with you. And If you make it then let me know your feedback by commenting below.

  • Aloo Keema Recipe (Minced Lamb With Potatoes)

    Aloo Keema (Minced Lamb With Potatoes)

    A very satisfying meal,You can categorize it as an exotic gourmet dish or a very simple homely dish,any which ways its very fulfilling and a treat to your taste buds.

    This is my mothers recipe for a simple Mince Curry or aloo keema as us Pakistanis like to call it. It is a really tasty curry especially when you add potatoes and spices like I did! Here’s a classic Aloo Keema – Minced Lamb With Potatoes Recipe that everyone, even the fussy kids, will love. Do try and don’t forget to share your experience with us!!

    Minced Lamb With Potatoes Recipe
    Photo: Aloo Keema – Minced Lamb With Potatoes

    Bismillah, let’s begin!

    Check it out the Aloo Keema – Minced Lamb With Potatoes Recipe and printable version below.

    Minced Lamb With Potatoes (Aloo Keema)

    • 500 gm lamb minced (keema)
    • 2 onions (finely chopped)
    • 2 to matoes (finely chopped)
    • 1 tablespoon ginger garlic paste
    • 3 medium potatoes (peeled & cubed)
    • 4 tablespoon sunflower oil
    • 1 teaspoon cumin powder
    • 1 teaspoon coriander powder
    • 1 teaspoon red chili powder
    • 1/2 teaspoon cayenne powder
    • 1/4 teaspoon turmeric powder
    • salt to taste
    • 2 tablespoon plain yogurt
    • 4 green chilies (thinly sliced)
    • few coriander leaves

    Method

    1. Heat oil in a deep pot or wok over medium high heat. Add the onions and cook for 3-4 minutes or until they turn light brown.
    2. Add the garlic and ginger paste. and saute for about 1 minute till you smell the aroma.
    3. Now add the chopped tomatoes next along with cumin powder, turmeric, cayenne, coriander and red chilli powder.
    4. Stir and cook for 5 minutes or until oil comes on top.
    5. Add minced. Turn heat to high and stir it with a spoon for 20 minutes on medium high heat.
    6. The meat will start separating,changing color, sweating and becoming watery. Do not worry, everything is going as per plan.
    7. Now add yogurt, 1/4 cup water and salt. Stir well.
    8. Turn the heat to the lowest possible on your burner.
    9. Cover the pot with a lid and let it simmer on low heat for about 20 minutes or until minc is cooked thorough. Note; {You ll need to stir and check periodically to ensure that lamb is not sticking to the bottom. Add more water if needed.}
    10. Now add the potatoes and again cover the pot.
    11. Cook covered for 10 minutes or until the potatoes are almost cooked.
    12. Remove the lid. Check the seasoning and cook on high again for 5 minutes till everything comes together.
    13. Garnish with chopped coriander and green chilies.
    14. Dish it out. Minced Lamb With Potatoes are ready to serve. ENJOY!!

    Serving Suggestions:
    Serve with chapati or brown rice along with green salad.

    Recipe Note’s:

    1. The cooking time will vary if you are using beef or chicken.
    2. Don’t add too much water at the beginning because ground meats leave moisture as they cook.Add water at intervals as per the consistency you want.
    3. At the end of about 20 minutes of cooking you will see that oil separating from and change in color of the ground meat.

    I have also posted Minced lamb with Peas which is another easiest & tastiest version of making dinner. Do check it out as well.


    Put your own spin on it. And lemme know how it turns out. Post a photo on Facebook (Recipestable) or  on Twitter so I can see how lovely yours turn out.


    Happy Cooking!!

    Keep remember me in your Dua’s and Stay tuned for new content on the blog 🙂

    If you like this post, Please Subscribe to my blog and let me know your feedback by commenting below.. I have lots more recipes to share with you.

  • Easy Spicy Mango Chutney Recipe (Perfect for Summer!)

    Whip up this Easy Spicy Mango Chutney Recipe in no time! This sweet and spicy condiment is the perfect summer companion for grilling, adding a burst of flavor to any dish.

    Spicy Mango Chutney Recipe

    • 3 large sweet mangoes (slightly ripened)
    • 1 tsp lemon rind (finely chopped)
    • 1 tsp lemon juice
    • 4 green chillies
    • 1- inch piece of ginger (finely chopped)
    • 1 tsp cumin seeds
    • 1/2 tsp fennel seeds
    • 1 tsp coriander seeds
    • 1 tsp mustard seeds
    • A pinch of hing
    • 3 tbsp cooking oil
    1. Peel the mango and cut it into small chunks.
    2. Heat about 2 tsp oil in a pan and fry the chunks till they turn mushy.
    3. Drain, mash well and set aside.
    4. Roast the methi, saunf, cumin and coriander seeds and crush coarsely using a mortar and pestle.
    5. Set aside and heat the remaining oil and add the hing and mustard.
    6. When the mustard crackles, add the ginger and green chillies and fry for about 1-2 minutes.
    7. Add the mango, powdered masala, salt to taste, lime rinds and lime juice.
    8. Bring to a boil on a low flame.
    9. Remove from heat and let it cool to room temperature.
    10. Store in an airtight container.
    11. If boiled and cooled well, since no water is used in making this dish, it should keep well for more than a week.
    12. Store it in airtight containers in the fridge.
    13. Enjoy!
  • Easy Spicy Mutton Pulao Recipe: Perfect for Weeknight Dinners

    Spicy Mutton Pulao

    Ramadan is a delicious time of the year in the Muslim world: Since people fast from sunrise to sunset, meals take on a special meaning. This month is associated with many delicacies with which the day long fast is broken. Spicy Mutton Pulao is one such dish.

    Spicy Mutton Pulao Recipe
    Photo: Spicy Mutton Pulao Recipe

    Spicy Mutton Pulao is a filling rice dish that can provide you with a heavy dinner after an entire day of fasting. That is why it is great Ramadan Recipes.

    Spicy Mutton Pulao Recipe
    Photo: Spicy Mutton Pulao

    Spicy mutton pulao is made out of red meat which is very popular for most Ramadan recipes. You need the proteins and energy from red meat when you are fasting. This Spicy Mutton Pulao recipe is quite similar to the biryani with minor differences in the cooking style. All the spices used in Mughlai mutton pulao make it a rich food item. Do try it!!

    Spicy Mutton Pulao Recipe
    Photo: Spicy Mutton Pulao

    Check it out the Spicy Mutton Pulao Recipe and printable version below!!

    Spicy Mutton Pulao

    This Spicy Mutton Pulao recipe is quite similar to the biryani with minor differences in the cooking style. All the spices used in Mughlai mutton pulao make it a rich food item. Do try it!!

    • 500 gm mutton
    • 2 cups basmati rice
    • 3-1/2 cup mutton stock (yakhni)
    • 2 onions (thinly sliced)
    • 4 tablespoon desi ghee
    • 1/2 cup plain yogurt
    • 2 tablespoon ginger garlic paste
    • 4 green chilies (thinly sliced)
    • 1 teaspoon red chilli powder
    • 1 teaspoon cumin seeds (roasted)
    • 1 inch piece of Cinnamon stick
    • 6 Peppercorns
    • 4 cloves
    • 4 cardamom
    • 1 bay leaf
    • a pinch of saffron (soaked in milk)
    • salt according to taste
    1. Marinate the mutton pieces with salt, red chilli, cumin, and ginger garlic paste for 40 minutes.
    2. Heat desi ghee in a heavy bottom skillet over medium heat.
    3. Saute the onions in it for 5 minutes on a low flame until lightly browned.
    4. Now add green chillies and cook for a minute on a low flame.
    5. Add the marinated mutton. Stir for 2 minutes until the spices are mixed uniformly.
    6. Add 2 cup water and Cover the skillet. Cook on a low flame for 40 minutes or meat is almost tender.
    7. Now add bay leaf, peppercorns, cinnamon, cardamom and cloves. Let the flavours bleed for 1 minute.
    8. Add yogurt and cook meat on high flame for few minutes or until oil comes on top.
    9. Add rice and yakhni. Lightly stir to mix.
    10. Adjust the seasoning.Cover and cook for 18-20 minutes on low flame.
    11. When the rice is cooked, pour the saffron on top the pulao.
    12. Put on dum for 10 minutes or until full done.
    13. Fluff rice with a fork and transfer into a dish. Spicy Mutton Pulao is ready to serve.

    Serving Suggestions:
    Serve with raita and onion rings.

    I have also posted Champ Pulao which is another easiest & tastiest version of making pulao at home. Do check it out as well.  It’s finger lickin’ good. You’ll be coming back for more. 


    Put your own spin on it. And lemme know how it turns out. Post a photo on Facebook (Recipestable) or  on Twitter so I can see how lovely yours turn out.


    Happy Lunch Making!!

    If you like this post, Please Subscribe to my blog and let me know your feedback by commenting below.. I have lots more recipes to share with you.


  • Healthy & Flavorful: Tawa Fish Recipe with a Light & Crispy Coating

    Tawa Fish

    A quick Tawa Fish recipe that requires little effort and tastes wonderful. Fish fillets cooked on a tawa (iron griddle) and does really impact on the flavor, with simple spices. A must try recipe!

    Tawa Fish Recipe
    Photo: Tawa Fish Recipe

    Check it out the Tawa Fish Recipe and printable version below!!

    Tawa Fish Recipe

    • 700 gm fish fillets (without fat)
    • 2 tablespoon garlic paste
    • 1 tablespoon ginger paste
    • 2 tablespoon lemon juice
    • 2 tablespoon Vinegar
    • 2 teaspoon crushed red chili
    • 1 teaspoon coriander powder
    • 1 teaspoon cumin powder
    • 1 teaspoon garam masala powder
    • 1/4 teaspoon turmeric powder
    • salt to taste
    • oil for shallow frying
    • chaat masala

    For Garnishing

    • lemon wedges
    • salad leaves

    Method

    1. Sprinkle salt on fish pieces.
    2. Leave aside for 10 minutes then wash and strain excess water.
    3. Now pour vinegar and lemon juice in a bowl.Add turmeric, chilli powder, coriander powder, garam masala, black pepper, cumin powder, garlic paste and salt in it.
    4. Mix well.
    5. Put this mixture on the fish fillets. Cover and marinate for at least 30 minutes.
    6. Heat oil in a shallow pan for frying fish.
    7. Fry fish for 4-5 minutes on each side or until fish flakes easily with a fork.
    8. Transfer into a platter. Sprinkle chaat masala over it.
    9. Garnish with salad leaves and lemon wedges. Tawa Fish is ready to serve. ENJOY!!

    Serving Suggestions:
    Serve with date chutney.

    I have also posted Crumb Fried Fish which is another easiest & tastiest version of making pulao at home. Do check it out as well.  It’s finger lickin’ good. You’ll be coming back for more. 


    Put your own spin on it. And lemme know how it turns out. Post a photo on Facebook (Recipestable) or  on Twitter so I can see how lovely yours turn out.


    Happy Lunch Making!!

    If you like this post, Please Subscribe to my blog and let me know your feedback by commenting below.. I have lots more recipes to share with you.

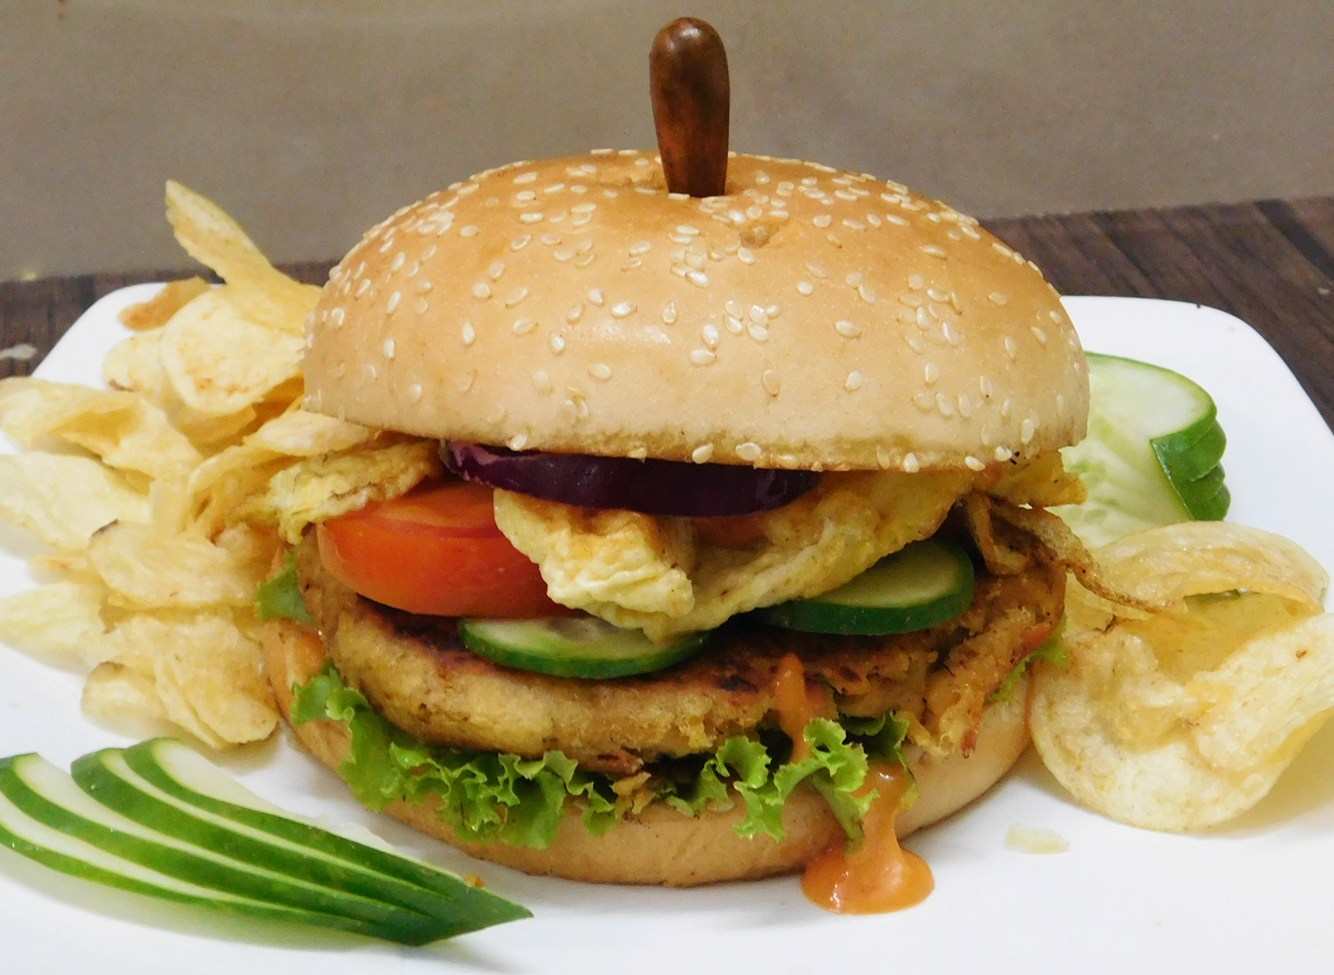
  • Shami Kabab Burger Recipe

    Shami Kabab Burger Recipe

    Shami Kabab Burger

    So Ramadan is coming up and we are all gearing up for it. Not only spiritually but also deliciously!! After a couple of random posts I will be posting over all the dishes that are very popular during Ramadan in our household and will share the recipes and other stories with you all.. so look forward to this space!!!

    Shami Kabab Burger Recipe
    Shami Kabab Burger Recipe

    My Mom made some Shami Kababs for a dinner party few weeks ago and had some left, so during one of the weekdays, I made these shami kabab burgers which weren’t just filing but very delicious as well. My Brother kept asking for more but I only had a few shami kababs left. This is a very simple and filling snack that is worth trying!

    Shami Kabab Burger Recipe
    Shami Kabab Burger Recipe
    Shami Kabab Burger Recipe
    Shami Kabab Burger Recipe

    If you want something astonishing but healthy for your your family then this do try this  Shami Kabab Burger Recipe. It contains lentil and meat which is high in vitamins, protein and minerals. 

    Check it out the Shami Kabab Burger Recipe and printable version below!!

    Shami Kabab Burger

    If you want something astonishing but healthy for your your family then this do try this Shami Kabab Burger Recipe. It contains lentil and meat which is high in vitamins, protein and minerals.

    • 8 shami kababs =>>>Check out my Shami Kabab recipe
    • 4 burger buns
    • 4 eggs (lightly beaten)
    • 1 onion (cut into rounds)
    • 1 cup shredded lettuce
    • 4 tablespoon green chutney
    • 4 tablespoon ketchup
    • 2 tablespoon mayonnaise
    • 4 cheese slices (optional)

    Directions

    1. Fry shami kabab in hot oil and keep aside.
    2. Fry egg and keep aside.
    3. Toast burger buns and spread mayonnaise over them.
    4. Place shami kababs, lettuce and onion over the buns.
    5. Drizzle with ketchup and green chutney.
    6. Place some cheese on one side of the bun and toast till cheese melts away.
    7. Place the cheesed bun on the top.
    8. Cut into halves. Shami Kabab Burger is ready to serve. ENJOY!!

    Serving Suggestions:
    Serve with chips and ketchup.

    Pin It For Later

    If you like this Shami Kabab Burger Recipe, Please Subscribe to my blog. I have lots more recipes to share with you. And If you make it then let me know your feedback by commenting below.

  • Aloo Shimla Mirch Recipe

    Aloo Shimla Mirch

    Aloo Shimla Mirch is a tasty vegetarian dish, cooked with capsicum, potato, onion and other ingredients. Try out this very healthy for your family and kids.

    Aloo Shimla Mirch Recipe
    Photo: Aloo Shimla Mirch Recipe

    Check it out the Aloo Shimla Mirch Recipe here!!

    [divider]

    [one_fourth]Prep Time:10 minutes[/one_fourth] [one_fourth]Cook Time:25 minutes[/one_fourth] [one_fourth]Servings:4 [/one_fourth] [one_fourth_last]Difficulty Level: Easy[/one_fourth_last]

    [divider]

    [tabs type=”horizontal”] [tabs_head] [tab_title]Ingredients[/tab_title] [tab_title]Nutrition[/tab_title] [/tabs_head] [tab]

    • 4 potatoes, cubed
    • 2 green bell peppers (shimla mirch), cubed
    • 2 onions, cubed
    • 1/4 cup fried onion paste
    • 2 tomatoes, chopped
    • 4 tablespoon oil or ghee
    • 1 teaspoon ginger garlic paste
    • 1 teaspoon dry red chili powder
    • 1/2 teaspoon cumin powder
    • 1/2 teaspoon coriander powder
    • 1/8 teaspoon turmeric powder
    • 1/4 teaspoon garam masala powder
    • Salt to taste

    [/tab] [tab]Yield: 4 servings

    Nutritional information is not yet available. [/tab] [/tabs]

    Directions:
    [tabs type=”horizontal”] [tabs_head] [tab_title]Step by Step Method[/tab_title] [tab_title]Recipe Note’s[/tab_title][tab_title]Serving Suggestions[/tab_title][/tabs_head] [tab]

    Step 1

    Heat the oil in a wok or karahi over medium heat.

    Step 2

    Once hot add onion paste and ginger garlic paste.

    Step 3

    Cook for 3-4 minutes or until you get the nice fragrant from them.

    Step 4

    Then add tomatoes. And sauté them till they are translucent and soft. It will take about 15 minutes.

    Step 5

    Now add red chili, coriander powder, cumin powder, turmeric powder and salt.

    Step 6

    Cook for 2-3 minutes then add potatoes.

    Step 7

    Add 1 cup water and cook for 10 minutes or until potatoes are tender.

    Step 8

    Add green pepper (shimla mirch) and onion. Mix well.

    Step 9

    Now Cover the pan and cook it till potatoes are done.

    Step 10

    It will take about 10 minutes and all the water will absorbed.

    Step 11

    Sprinkle garam masala over it and stir well. Aloo Shimla Mirch is ready to serve.

    [/tab] [tab]

    • Keep the size of onion, potato and green bell pepper same while cutting.

    [/tab][tab]

    • Serve with chapati or paratha.

    [/tab] [/tabs]
    If you like Aloo Shimla Mirch Recipe and make it then let me know your feedback by commenting below.And if you know more innovative ways in which we can utilize this mouth watering Aloo Shimla Mirch, do share with us and we would be glad to give it a try.