Tag: Summer Recipes

  • Creamy Cucumber Pasta Salad Recipe

    Creamy Cucumber Pasta Salad Recipe

    This post may contain affiliate links. Please read my disclosure policy.

    This quick and easy Creamy Cucumber Pasta Salad combines a creamy dressing – like a mixture of Greek yogurt or sour cream – with freshly sliced cucumbers and red onions along with plenty of chopped dill! It’s the perfect unique pasta salad recipe for your next barbecue party.
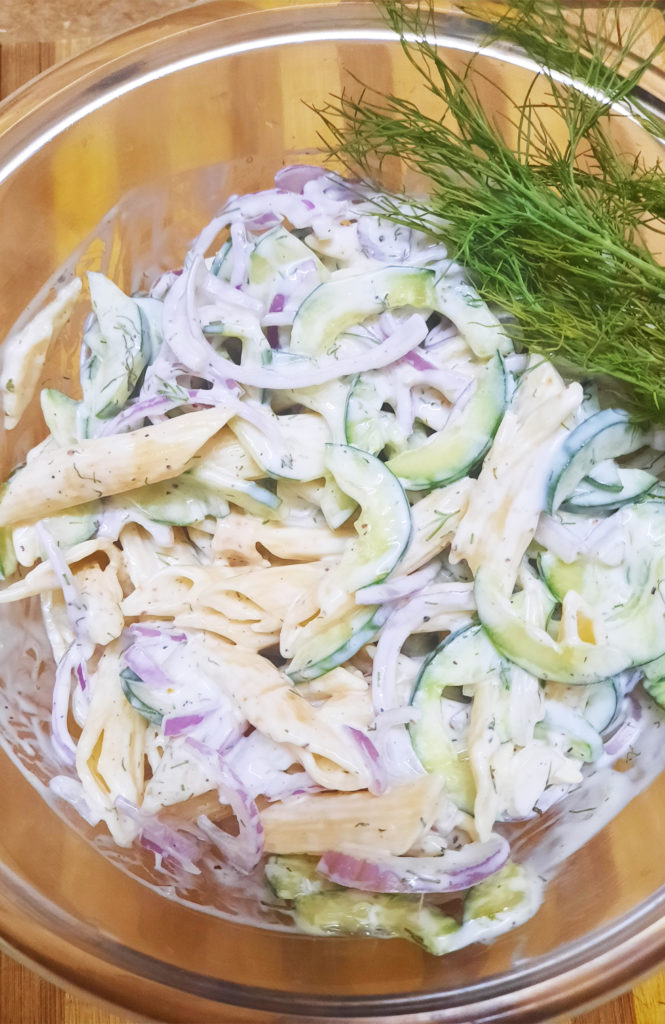
    This quick and easy Creamy Cucumber Pasta Salad combines a creamy dressing - like a mixture of Greek yogurt or sour cream - with freshly sliced cucumbers and red onions along with plenty of chopped dill! It's the perfect unique pasta salad recipe for your next backyard barbecue.
    Creamy Cucumber Pasta Salad Recipe

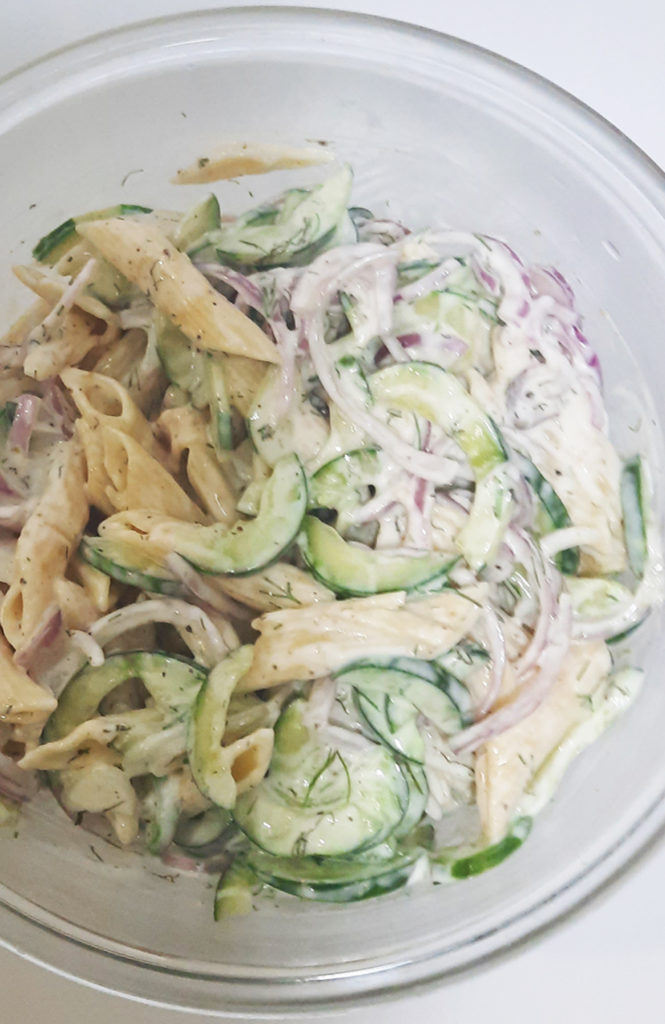
    Loaded with tender pasta, crisp juicy cucumbers, fresh dill and red onion, this dish will be the hit of every get together. And it comes together within just few minutes and it’s incredibly delicious! The dressing in this salad doesn’t have a lot of ingredients, but that’s really the beauty of this recipe! The fresh Greek yogurt adds a little zip to the dressing while the dill adds summery freshness complementing the cucumber and cooked pasta perfectly! 
    Creamy Cucumber Pasta Salad Recipe
    Creamy Cucumber Pasta Salad Recipe

    If you have access to fresh dill, it really makes a huge difference in this salad.

    Ingredients in Creamy Cucumber Pasta Salad Recipe?

    • Pasta: penne or rotini pasta
    • Cucumbers: fresh long English cucumbers work the best for this recipe
    • Onion: red onion (can sub white for less of a “bite”)
    • Dressing: sour cream or Greek yogurt and vinegar
    • Herb: fresh dill
    • Spices: salt and pepper

    Ist Gather Your Equipment’s:

    How to Make this Creamy Cucumber Pasta Salad:

    This is such an easy recipe, y’all. Seriously. Yes to Summer recipes that don’t require hardly any effort!

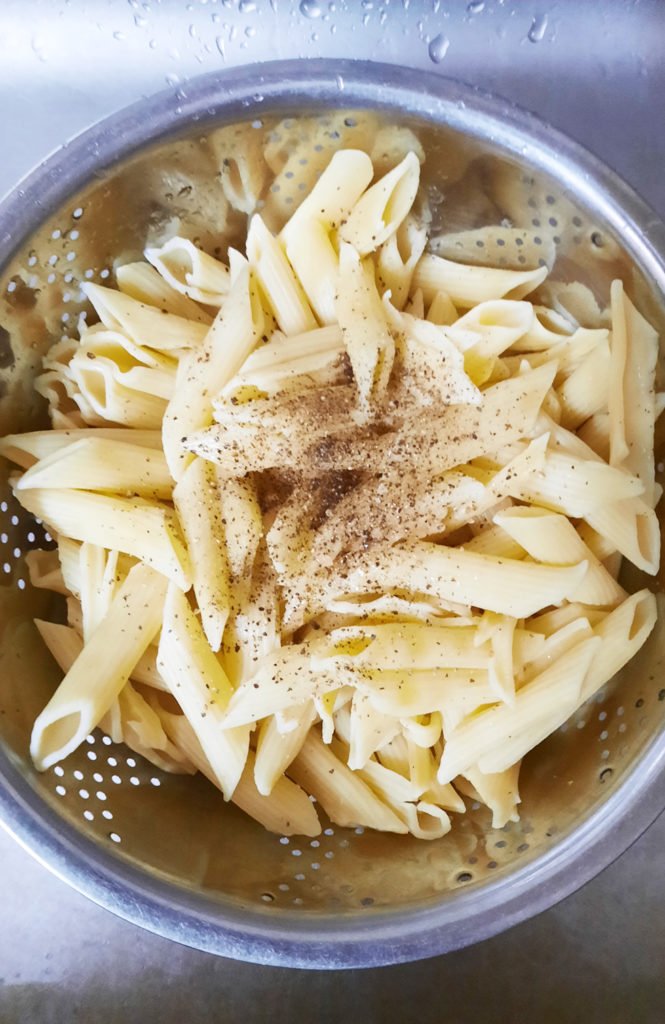
    1. First, begin by cooking your pasta according to the box instructions! Make sure to salt your water and cook the pasta until al dente. Once it’s done, let it cool! If desired, rinse cold water over top to stop the cooking and speed up the cooling process.
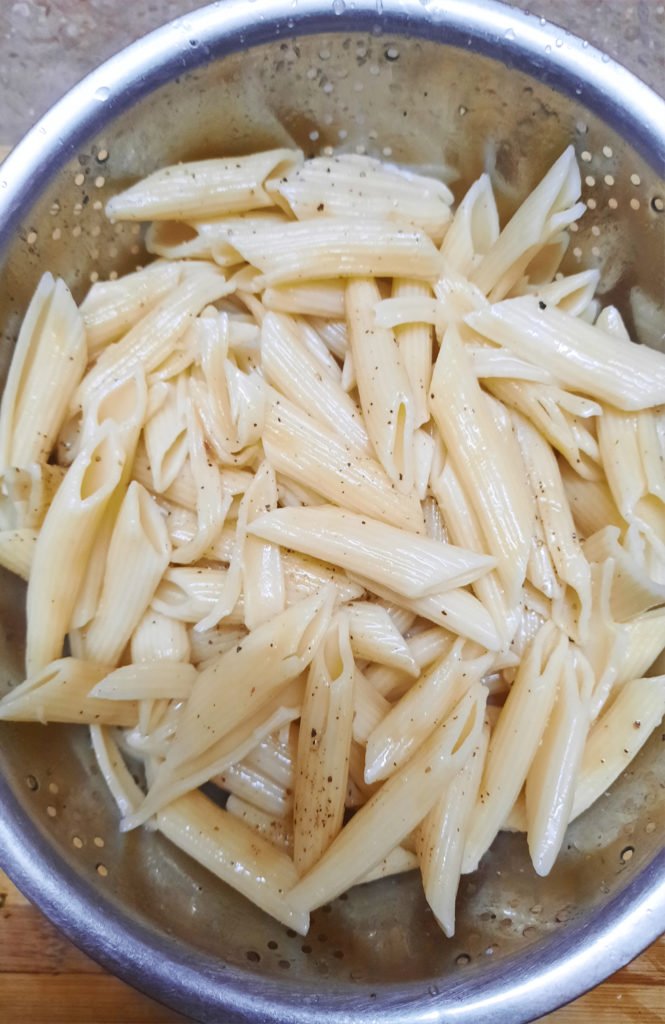
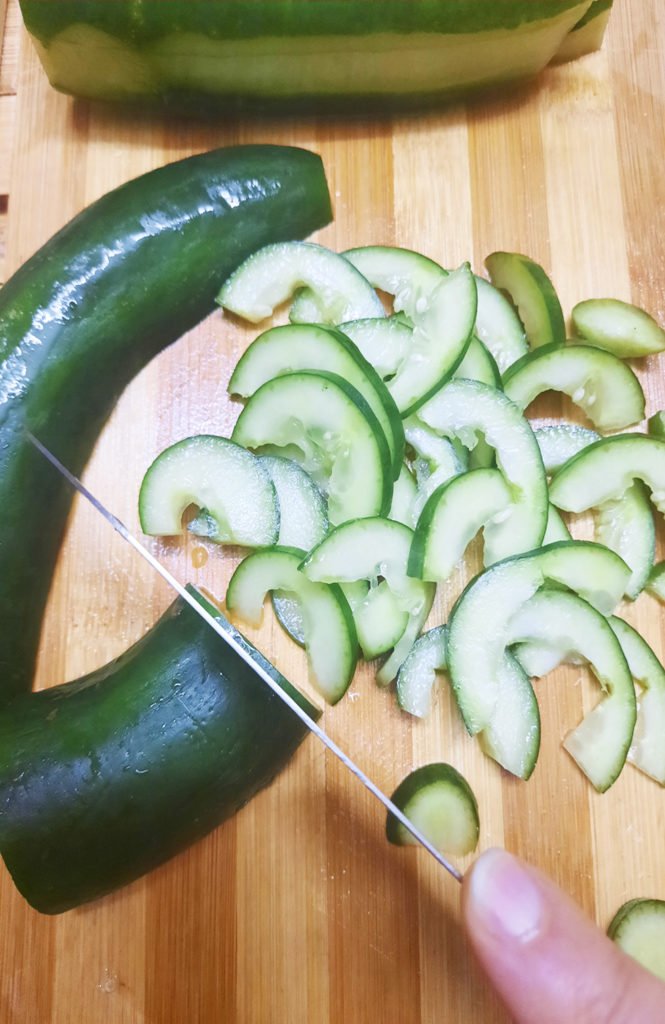
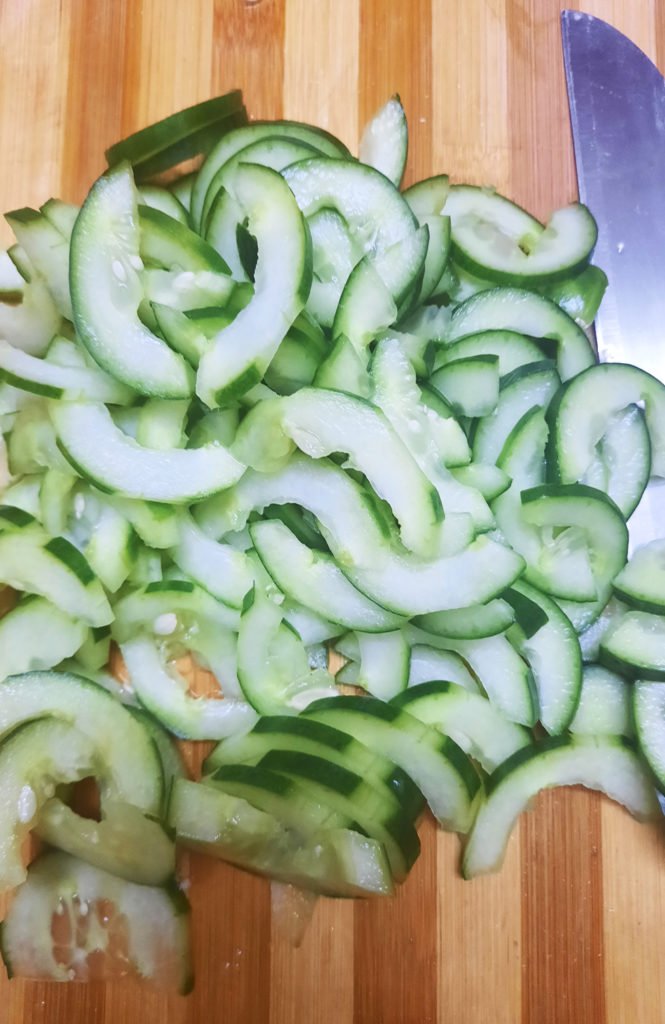
    2. While the pasta is cooling off, slice up your cucumber! Slice it in half lengthwise and then slice very thin slices of cucumber.
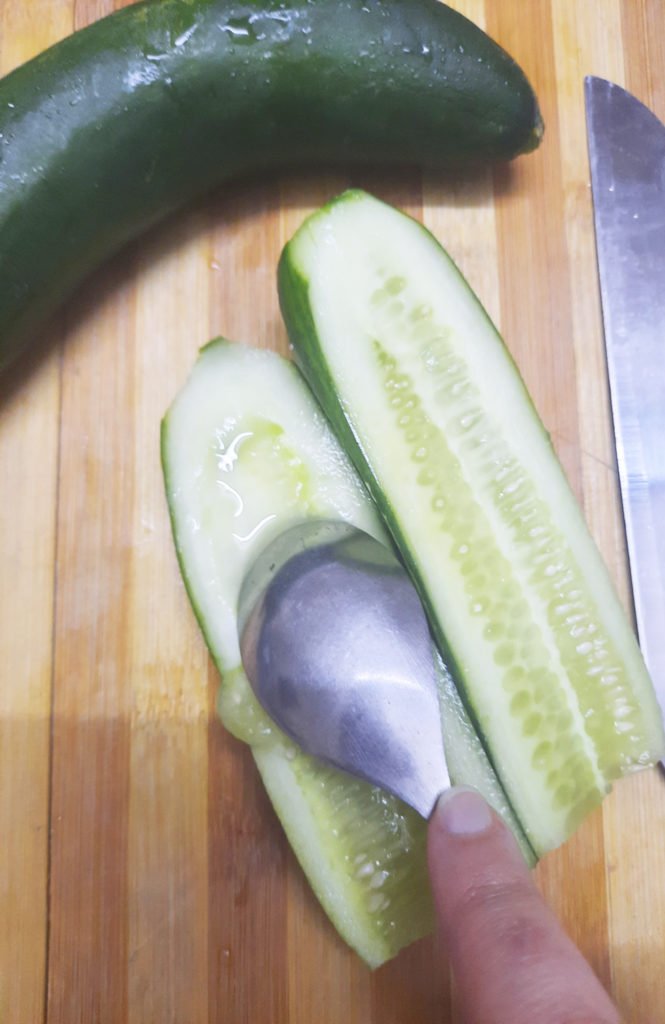
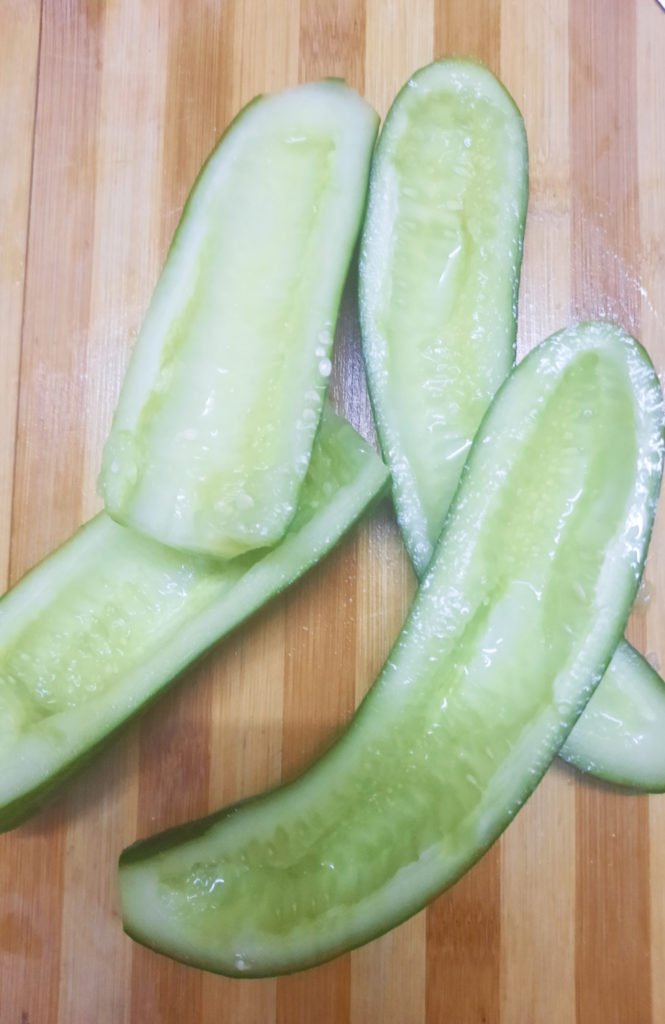
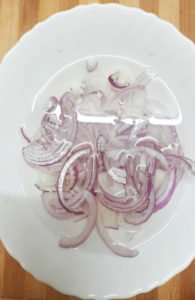
    3. Do the same thing with the red onion! Thin slices go a long way here, folks! While it’s not required, soaking the onions in cold water for a few minutes takes just a little bit of bite out of them.  .
    4. Next, mix together the delicious Greek yogurt dill dressing! Combine the Greek yogurt with the dill, vinegar, salt (i added the pink salt) and pepper. Mix until deliciously thick and creamy. Set this aside.
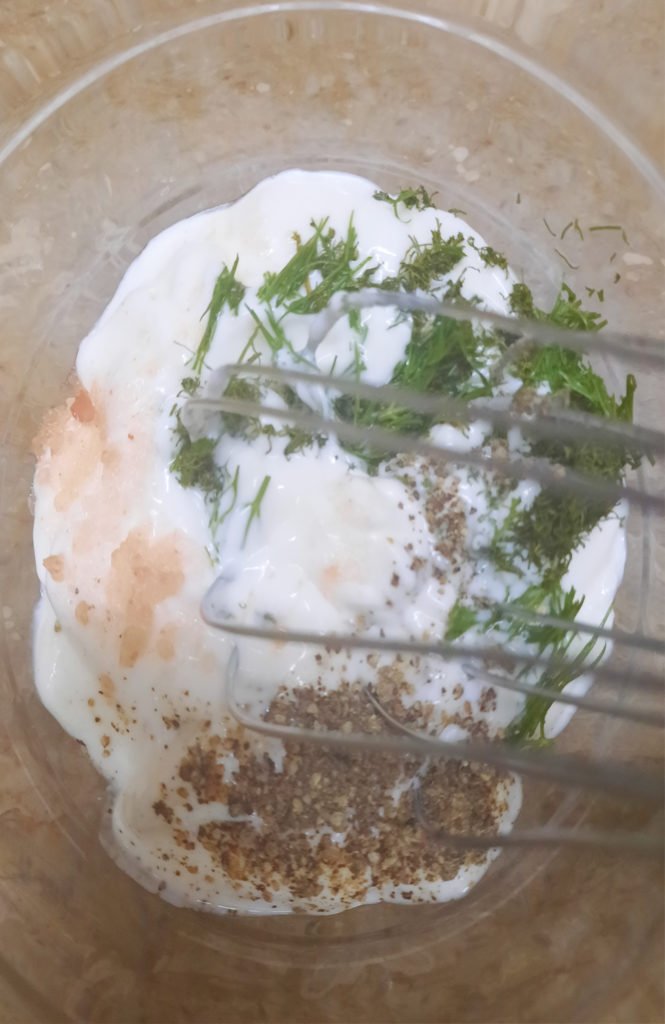
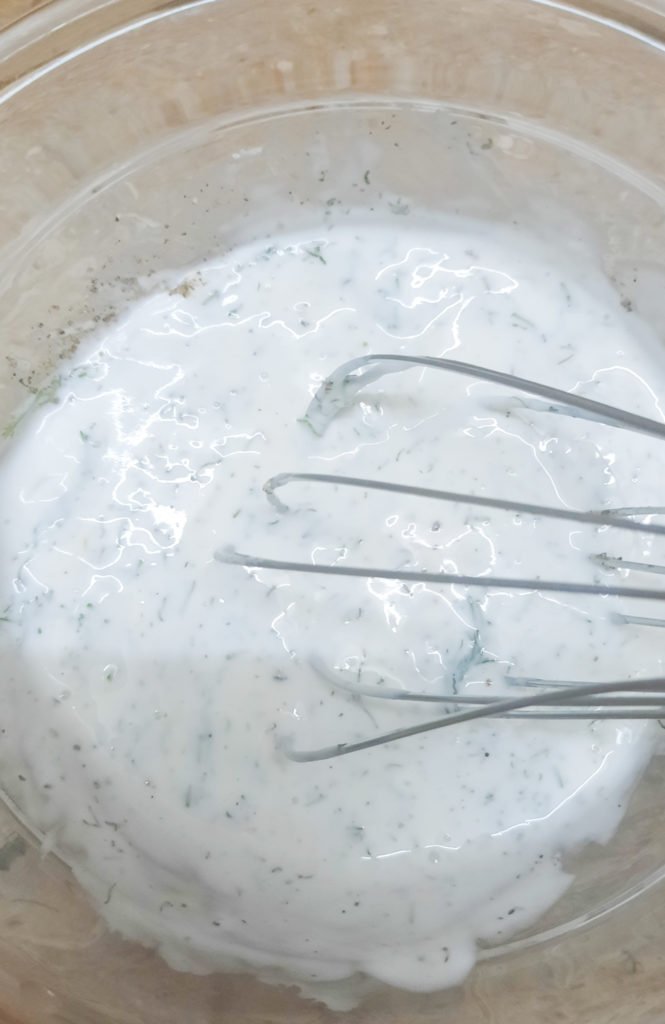
    5. In a large bowl, add your cooled off pasta. On top, add your cucumbers, onions and all of the Greek yogurt dressing! Mix together gently until fully combined.
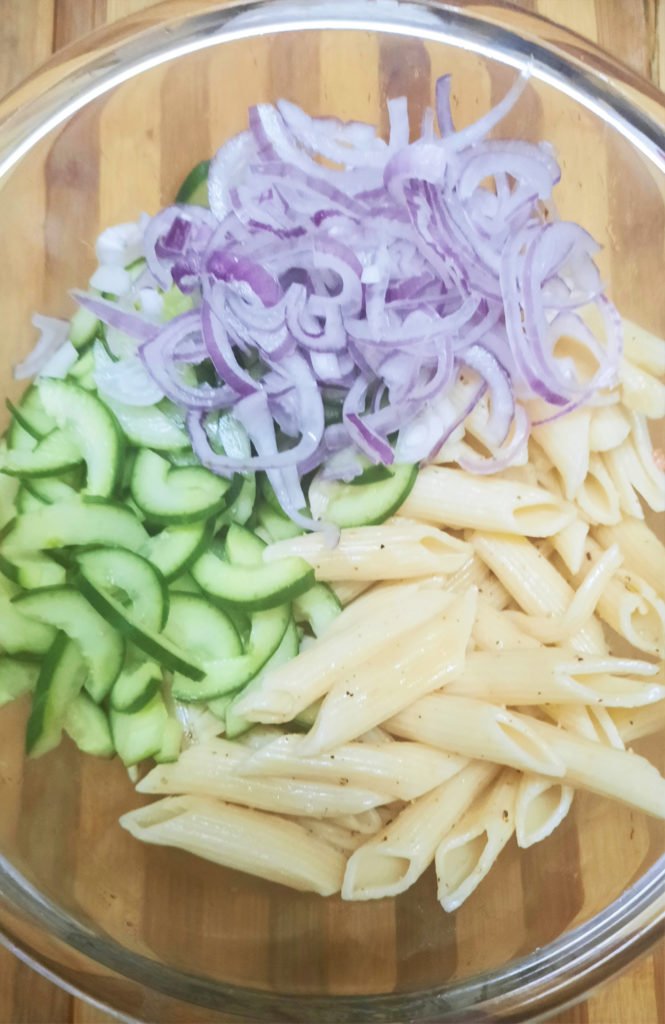
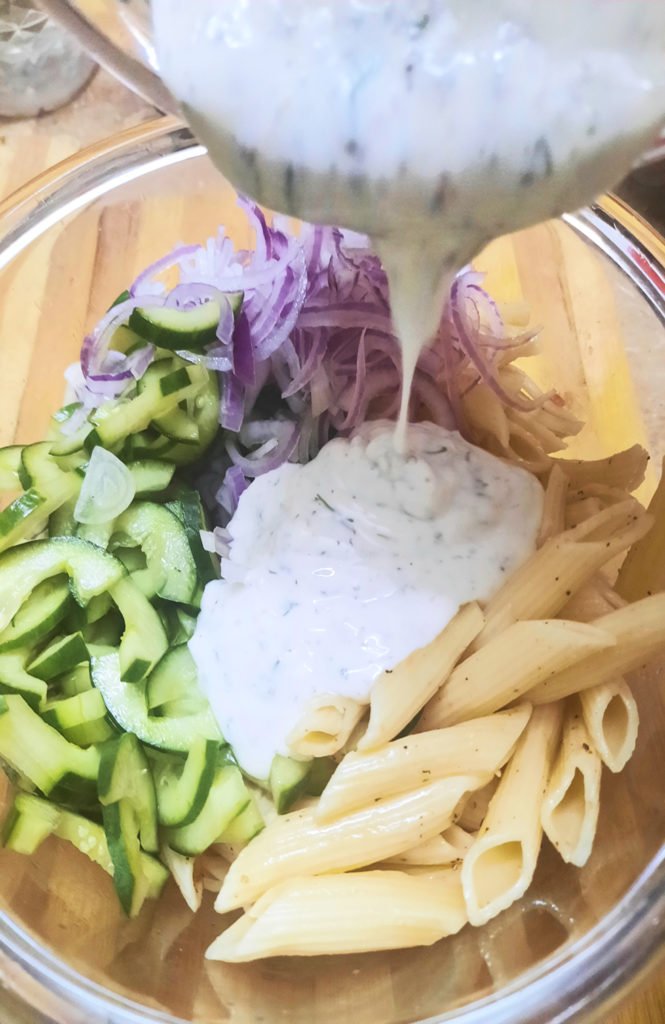
    6. Taste and adjust the seasoning if necessary. I always love garnishing with a big pinch of extra dill – it makes it taste extra fresh and adds an amazing pop of flavor.
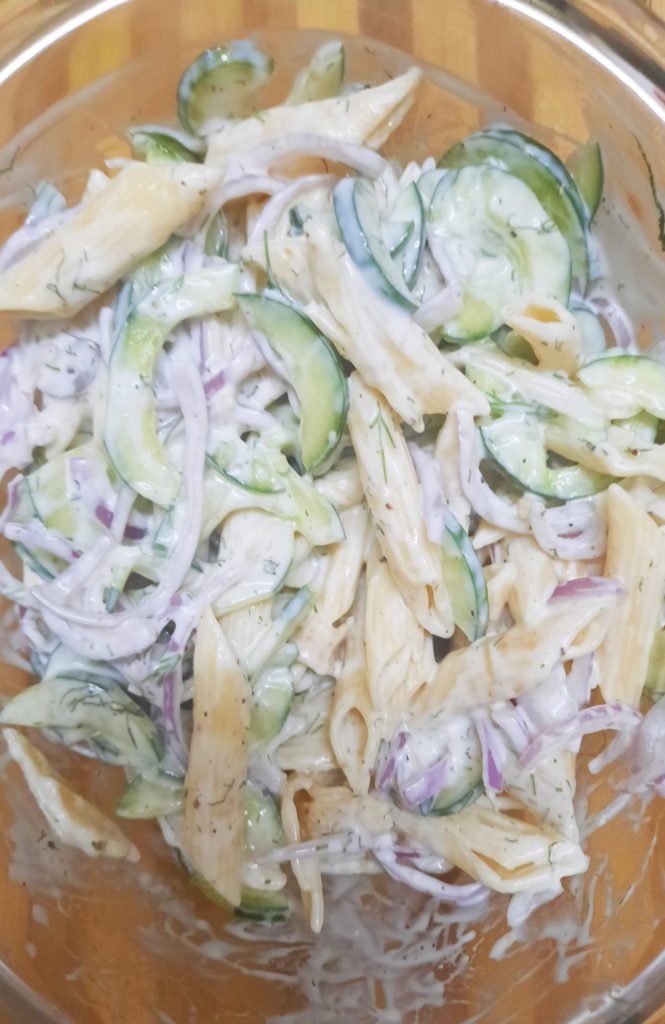
    7. Let it sit in the fridge for about 20-30 minutes to make sure all of the flavors can melt together and it can stay cold! Enjoy when chilled and eat up! 🙂


    Note: If possible try to toss this at least 1 hour before serving to allow the flavors to blend.

    Bismillah let’s get started.
    Check it out The Creamy Cucumber Pasta Salad Recipe and printable version here!!

    Creamy Cucumber Pasta Salad Recipe

    This quick and easy Creamy Cucumber Pasta Salad combines a creamy dressing – like a mixture of Greek yogurt or sour cream – with freshly sliced cucumbers and red onions along with plenty of chopped dill! It’s the perfect unique pasta salad recipe for your next backyard barbecue.
    Keyword 30 minutes meals, cucumber, greek yogurt, Pasta, pasta salad, salad, summer salad, veggie salad
    Prep Time 10 minutes
    Cook Time 10 minutes
    Total Time 20 minutes
    Servings 6
    Author Bushra Waheed

    Ingredients

    For Pasta Salad:

    • ½ pound medium sized pasta such as penne or rotini
    • 2 large English cucumber thinly sliced
    • 1 medium red onion thinly sliced

    For Salad Dressing:

    • 1 cup sour cream or whole fat plain Greek yogurt can substitute mayo if desired
    • 2 tbsp. fresh chopped dill
    • 2 tsp vinegar
    • 1/2 tsp salt
    • 1/2 tsp pepper

    For Garnishing

    • fresh dill

    Instructions

    • Cook pasta according to package directions, until al dente. Drain and drizzle with oil and sprinkle with a couple pinches of salt and pepper. Toss to coat evenly and let it cool.
    • While the pasta is cooling, Thinly slice onion and place in a bowl of cold water. (see note)
    • Slice the cucumber in half lengthwise and remove seeds using a spoon then dice it into thin slices.

    To Make The Salad Dressing:

    • In a small bowl, mix the sour cream or Greek yogurt along with the vinegar, fresh dill, salt and pepper. Mix until fully combined. Taste and adjust seasoning if needed.

    To Make The Creamy Cucumber Pasta Salad:

    • In a large bowl, add the cooled rigatoni pasta. Top with the fresh sliced cucumber and red onion.
    • Pour dressing over pasta and toss to combine.
    • Place in the refrigerator for 20-30 minutes to let the pasta salad cool off and for the flavors to meld together.
    • When serving, if desired, add a large handful of dill on top for garnish and an extra pop of flavor!
    • Delicious Creamy Cucumber Pasta Salad is ready to serve. Enjoy!

    Notes

    Soaking the onions in cold water is optional but takes a bit of the “bite” out of the onion.
    Serving Suggestions:
    Goes great with BBQ Chicken Wings.

    Want more Pasta Salad Inspiration? 

    Here are some other Pasta Salad recipes on my blog:

    Hope you guys loved this one and are having a great Summer. Let me know what your favorite garden produce is this time of year in the comments below! 

    Pin it For Later

    Put your own spin on it. And lemme know how it turns out and do take a few seconds to rate it! I would love to see your recreations so tag me on instagram @recipestable or Facebook (Recipestable) or on Twitter so I can see how lovely yours turn out.
  • Bean Salad with Olives and Herbs Recipe

    Bean Salad with Olives and Herbs Recipe

    This salad came to my mind right as I was falling asleep.

    Does your brain ever do crazy stuff like that? My best ideas seem to come when I’m about to doze off and don’t have a notebook or pen to write things down, so I just make a pact with my brain to remember. And the next day we both do our best to recall what we were thinking.

    Thankfully, this one made it through the pipeline! Three cheers for my old lady brain still working!

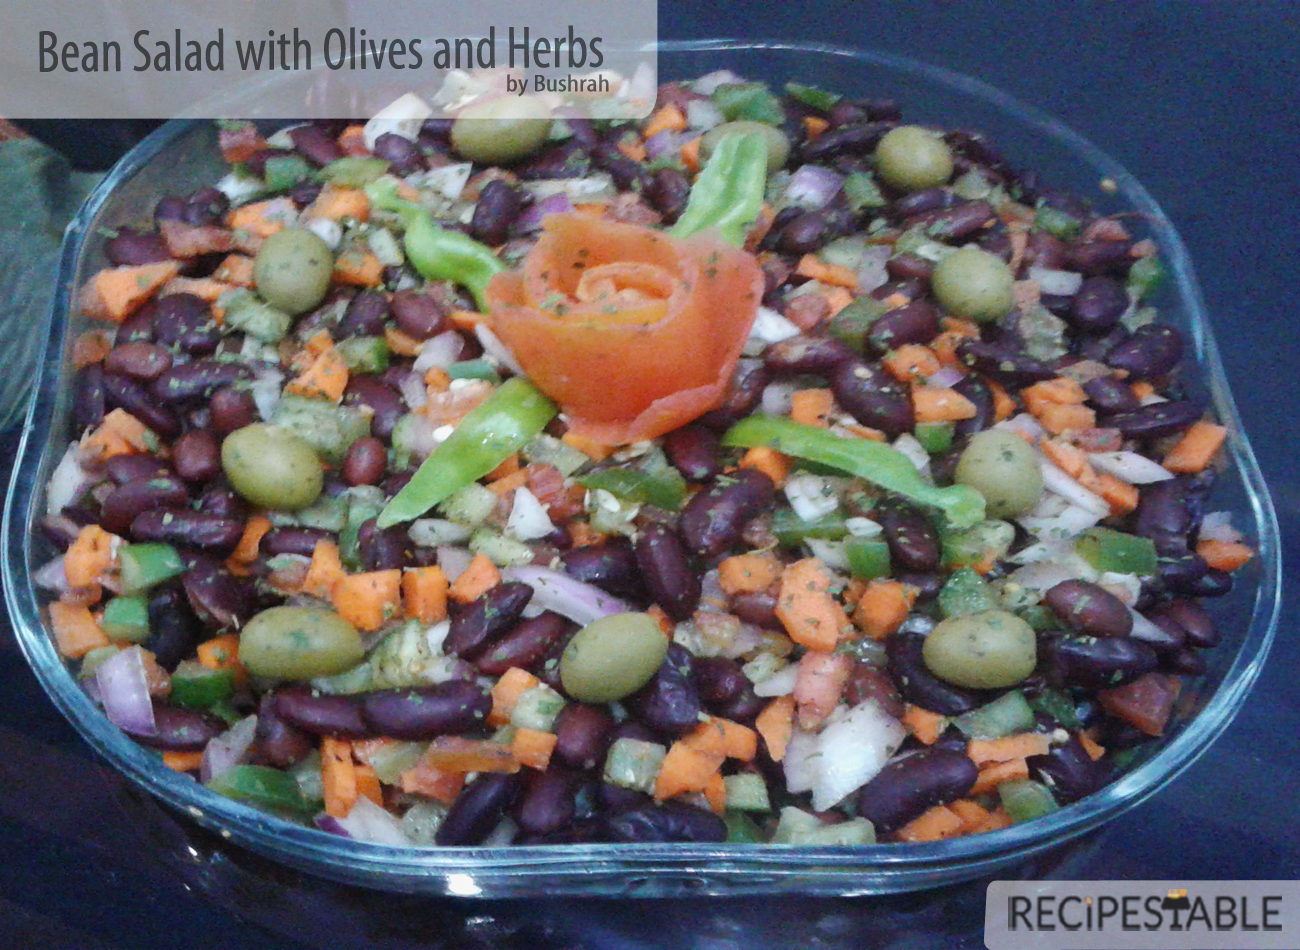
    Bean Salad with Olives and Herbs

    Bean Salad with Olives and Herbs

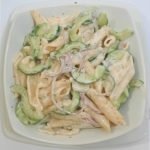
    I’ve made many a Bean salad before, but this one is special. This is the answer to the question, “What’s super cozy, flavorful and perfect for any BBQ Party?” It’s a great addition to any summer get together!

    This Pakistani/Italian flavor pairing came to mind, and the recipe is adapted from my all-time favorite Bean Salad.   One super easy thing you can prep ahead is beans. I love beans because you can make them so many different ways and they’re packed with protein, slow-digesting carbohydrates and fiber. Their nutritional profile makes them ideal for prepping before a workout and recovering after a workout. If you’re trying to lose weight or maintain a healthy weight, they’re great for that too since they make you feel full longer.

    One of my favorite ways to enjoy beans during the warmer months is with my Bean Salad. It’s super easy to make and it tastes really yummy too! This recipe is simple, requiring just 10 minutes to prepare! You can eat it all on its own (what I normally do) or dress it up by adding some more chopped veggies to it. It’s also great added to some greens either in a wrap or in a salad. 

    Bean Salad with Olives and Herbs

    Bean Salad with Olives and Herbs

    The dressing is SO easy (and dreamy).

    Italian herbs are blended with vinegar . Add olive oil water to thin and ‘voila!’ You have a super yummy, tangy Italian dressing ready to coat those gorgeous bean salad. Look at that salad goodness.

    Bean Salad with Olives and Herbs

    I hope you all LOVE this Bean salad! It’s:

    • Hearty
    • Flavorful
    • Vegetable-packed
    • Fiber- & Protein-rich
    • Tangy + Crunchy
    • Super healthy & Delicious

    This would make the perfect side dish for BBQ Party, or any get together, really. It yields four entrée-sized portions or 8 sides, so multiply as needed. Although it’s delicious on its own, it would pair extremely well with my Grilled Lamb Chops, and my Grilled Italian Chicken.

    Bismillah, let’s get started the recipe!!

    Check it out the Bean Salad with Olives and Herbs Recipe and printable version below!!

    Put your own spin on it. And lemme know how it turns out. Post a photo on Facebook (Recipestable) or  on Twitter so I can see how lovely yours turn out.
    Happy Salad Making!!

  • Quick & Easy Picnic Food: Creamy Shell Pasta Salad Recipe for Parties

    Creamy Shell Pasta Salad

    Looking for a Creamy Shell Pasta Salad Recipe? This Creamy Shell Pasta Salad is just the thing for summer. It’s creamy, flavorful and delicious.Hope you try it and love it.

    Creamy Shell Pasta Salad Recipe
    Photo: Creamy Shell Pasta Salad Recipe

    Check it out the Creamy Shell Pasta Salad Recipe here!!

    Creamy Shell Pasta Salad Recipe

    Course Salad, Side Dish
    Cuisine American, Italian
    Keyword 30 minutes meals, Pasta, pasta salad, salad, summer salad, veggie salad
    Prep Time 10 minutes
    Cook Time 10 minutes
    Total Time 20 minutes
    Servings 6
    Author Bushra Waheed

    Ingredients

    • 1 cup small pasta shells uncooked
    • 2 hard-boiled eggs peeled & chopped
    • 1 small carrot cubed
    • 1 large cucumber cubed
    • 1 green bell pepper cubed
    • 1/3 cup process cheese cubed
    • 1/2 cup broccoli florets boiled

    For Salad Dressing:

    • 1/2 cup mayonnaise
    • 1 tablespoon vinegar
    • 1 tablespoon dried minced onion
    • 1/2 teaspoon seasoned salt
    • 1/4 teaspoon garlic powder
    • 1/4 teaspoon dried parsley flakes
    • 1/4 teaspoon pepper
    • 1/4 teaspoon prepared mustard

    Instructions

    • Cook pasta according to package directions; drain and rinse in cold water.
    • Toast carrots and broccoli in a pan for 1-2 minutes.
    • Remove from the heat and let it cool.
    • Place pasta, broccoli, carrot, cheese, cucumber, and egg in a large bowl. Mix well.
    • In a small bowl, whisk the dressing ingredients.
    • Pour dressing over the salad and toss to coat evenly.
    • Creamy Shell Pasta Salad is ready to serve. ENJOY!!


    If you like Creamy Shell Pasta Salad Recipe and make it then let me know your feedback by commenting below.And if you know more innovative ways in which we can utilize this mouth watering Creamy Shell Pasta Salad, do share with us and we would be glad to give it a try.

  • Creamy & Refreshing: Make Delicious Mango Kulfi Ice Cream at Home!

    Mango Kulfi Ice Cream

    Making Kulfi Ice Cream at home is an easy process with minimal ingredients. Fresh Mangoes processed to a pulp and mixed with creamy ingredients, This Mango Kulfi Ice Cream recipe is so simple, even kids can make it!

    Mango Kulfi Ice Cream Recipe
    Photo: Mango Kulfi Ice Cream Recipe

    Check it out the Mango Kulfi Ice Cream Recipe here!!

    [divider]

    [one_fourth]Prep Time:10 minutes + freezing[/one_fourth] [one_fourth]Cook Time:20 minutes[/one_fourth] [one_fourth]Servings: 4[/one_fourth] [one_fourth_last]Difficulty Level: Easy[/one_fourth_last]

    [divider]

    [tabs type=”horizontal”] [tabs_head] [tab_title]Ingredients[/tab_title] [tab_title]Nutrition[/tab_title] [/tabs_head] [tab]

    • 1 Ripe Mango
    • 1 can Sweetened Condensed Milk
    • 1/4 can Milk Powder
    • Sugar as per taste
    • 1/4 tsp Cardamom Powder
    • Few Strands of Saffron
    • 1/4 cup Pistachios(chopped coarsely)

    [/tab] [tab]Yield: 4  servings

    Nutritional information is not yet available. [/tab] [/tabs]

    Directions:
    [tabs type=”horizontal”] [tabs_head] [tab_title]Step by Step Method[/tab_title] [tab_title]Serving Suggestions[/tab_title][/tabs_head] [tab]

    Step 1

    Peel the mango and chop it into small pieces.

    Step 2

    Discard the seed.

    Step 3

    Combine the mango pieces, sugar, condensed milk and milk powder in a pan and bring it to a boil.

    Step 4

    Now add the cardamom powder, cook for 10 more minutes till the mixture thickens.

    Step 5

    Now add saffron and pistachios.

    Step 6

    Lower the flame and allow to cool completely.

    Step 7

    Pour into kulfi moulds and freeze overnight till firm.Mango Kulfi Ice Cream is ready to serve.Enjoy!

    [/tab] [tab]

    • Serve as a dessert after any meal.

    [/tab] [/tabs]
    If you like Mango Kulfi Ice Cream recipe and make it then let me know your feedback by commenting below.And if you know more innovative ways in which we can utilize this sweet and mouth watering Mango Kulfi Ice Cream, do share with us and we would be glad to give it a try.

  • Tropical Twist: The Perfect Peach Colada Recipe for Summer!

    Peach Colada

    This is the most easiest cocktail you can make, great for kids, or to serve up on a hot summer’s day.Discover the refreshing Peach Colada Recipe 

     Peach Colada Recipe by Rida Aftab
    Photo: Peach Colada Recipe

    Check it out the Peach Colada Recipe here !!

    Prep Time:10 minutes

    Cook Time:0 minutes

    Servings:2

    Ingredients

    • 1 cup peaches, peeled and cut into slices
    • 1 tin coconut milk
    • 2 cups pineapple juice
    • 1/2 cup condensed milk
    • 1 cup ice cubes
    • few mint leaves

    Directions:

    1. Place all ingredients except mint leaves in a blender.
    2. Process for 1 minute or until well blended.
    3. Pour into serving glasses.
    4. Garnish with mint leaves.
    5. Peach Colada is ready to serve.
    6. Enjoy!
    • Serve with sandwiches or burgers.

    If you like Peach Colada Recipe  and make it then let me know your feedback by commenting below.And if you know more innovative ways in which we can utilize this sweet and mouth watering Peach Colada, do share with us and we would be glad to give it a try.

  • Creamy & Delicious: Homemade Aamras Recipe (Just a Few Ingredients!)

    Mango Rus (Aam Ka Rus)

    Mango Rus(Aam Ka Rus) is a unique and refreshing way to enjoying the benefits of Mango. Cool , refreshing and energetic Summer Drink!! Must Try this Mango Rus Recipe, Hope you’ ll like it.

    Mango Rus Recipe
    Photo: Mango Rus Recipe

    Check it out the Mango Rus Recipe here!!

    [divider]

    [one_fourth]Prep Time:10 minutes[/one_fourth] [one_fourth]Cook Time:not required[/one_fourth] [one_fourth]Servings: 6[/one_fourth] [one_fourth_last]Difficulty Level:Easy [/one_fourth_last]

    [divider]

    [tabs type=”horizontal”] [tabs_head] [tab_title]Ingredients[/tab_title] [tab_title]Nutrition[/tab_title] [/tabs_head] [tab]

    • 6 ripe mangoes
    • 1/2 cup whole milk

    [/tab] [tab]Yield: 6 servings

    Nutritional information is not yet available. [/tab] [/tabs]

    Directions:
    [tabs type=”horizontal”] [tabs_head] [tab_title]Step by Step Method[/tab_title] [tab_title]Serving Suggestions[/tab_title][/tabs_head] [tab]

    Step 1

    Peel mangoes then cut into large chunks.

    Step 2

    Place mango chunks in the blender.Process until smooth.

    Step 3

    Then strain into a medium bowl, discarding any fiber.

    Step 4

    Combine mango pulp and milk in a jug.Keep stirring until well combined.

    Step 5

    Place in a refrigerator for 6-8 hours or until chill. Mango Rus is ready to serve.

    [/tab] [tab]

    • Serve chilled.

    [/tab] [/tabs]

    If you like Mango Rus recipe and make it then let me know your feedback by commenting below. And if you know more innovative ways in which we can utilize this sweet and mouth watering Mango Rus, do share with us and we would be glad to give it a try.

  • Beat the Heat with this Easy Mango Ice Cream Recipe (Perfect for Summer!)

    Mango Ice Cream

    This Mango Ice Cream Recipe is very easy to make at home. It is rich, creamy and full of mango flavor ice cream.

    Mango Ice Cream Recipe by Rida Aftab
    Photo: Mango Ice Cream Recipe

    Check it out the Mango Ice Cream Recipe here!!

    Prep Time: 6 hours

    Cook Time:10 minutes

    Servings:4

    • 250 gm mango pulp
    • 1 cup milk
    • 1 packet fresh cream
    • 1 tin condensed milk
    • 4 tbsp sugar
    • 2 tsp gelatin powder
    • 1/2 tsp mango essence

    Directions:

    1. Place mango pulp in a saucepan.
    2. Cook on low flame for 2-3 minutes.
    3. Then add sugar and gelatin powder.
    4. Stir constantly.
    5. When sugar gets dissolved, turn the heat off.
    6. Let it cool completely.
    7. Place milk, condensed milk, mango essence and cooked mango pulp in a blender.
    8. Process until smooth.
    9. Pour this batter in an air tight container.
    10. Freeze it for 4-6 hours or until chill.
    11. Tasty Mango Ice Cream is ready to serve.
    12. Enjoy!

    If you like Mango Ice Cream Recipe  and make it then let me know your feedback by commenting below.

  • Recipe: Onion Raita

    Onion Raita

    Cool your day by adding the Onion raita along with any meal as accompaniment. Onion Raita is one of the easiest raita, as the major ingredient of it is only onion and yogurt. 

    Indian Onion Raita Recipe
    Photo:Onion Raita Recipe

    Check it out the Onion Raita Recipe here!!

    Prep Time: 10 minutes

    Cook Time:0 minutes

    Servings: 4

    Difficulty Level: Easy

    Ingredients

    • 2 cups plain Yogurt
    • 1 big yellow sweet onions
    • 1 Green Chili chopped finely
    • 1/4 th cup chopped Cilantro leaves
    • Salt to taste


    Directions:

    Step 1

    Slice the onions lengthwise, Wash under cold water and swish.

    Step 2

    Drain all water.

    Step 3

    Wash and dry the cilantro and chop finely.

    Step 4

    In a serving bowl beat the yogurt with the salt. Add the onions and chilies with salt.

    Step 5

    Garnish with cilantro. Indian Onion Raita is ready to serve.

    • Serve with any rice dish.

    If you like Onion Raita recipe and make it then let me know your feedback by commenting below.

  • Red Radish Raita Recipe

    Red Radish Raita

    This raita is good for health and a great summer treat that’s packed with a lot of nutrients that come from radish and lots of calcium that comes from the yogurt. Super Easy and Healthy raita with red radishes. Its really a easiest one with thick yogurt and grated red radish. Check it out the Red Radish Raita Recipe here!!

    Red Radish Raita recipe
    Photo: Red Radish Raita Recipe

    [divider]

    [one_fourth]Prep Time: 10 minutes[/one_fourth] [one_fourth]Cook Time:2 minutes[/one_fourth] [one_fourth]Servings: 4[/one_fourth] [one_fourth_last]Difficulty Level: Easy[/one_fourth_last]

    [divider]

    [tabs type=”horizontal”] [tabs_head] [tab_title]Ingredients[/tab_title] [tab_title]Nutrition[/tab_title] [/tabs_head] [tab]

    • 1 bunch red radish
    • 1 green chilli
    • 1 cup of yogurt
    • 1/2 tsp sugar
    • Salt to taste
    • Few fresh coriander leaves

    For tarka/tempering:

    • 1 tbsp olive oil
    • 1/4 tsp mustard seeds

    [/tab] [tab]Yield: 3 servings Nutritional information is not yet available. [/tab] [/tabs]

    Directions:
    [tabs type=”horizontal”] [tabs_head] [tab_title]Step by Step Method[/tab_title] [tab_title]Serving Suggestions[/tab_title][/tabs_head] [tab]

    Step 1

    Wash and grate radish.

    Step 2

    Chop chilli and coriander leaves. Mix all the ingredients in a bowl.

    Step 3

    Heat oil in a small pan, add mustard seeds.

    Step 4

    When they crackle, add the tarka to the bowl and mix.

    Step 5

    If desired you can add crushed peanuts to this raita. Red Radish Raita is ready to serve.

    [/tab] [tab]

    • Serve with Pulao, Biryani or any kind of curry.

    [/tab] [/tabs]

    If you like Red Radish Raita recipe and make it then let me know your feedback by commenting below.

  • Malai Aur Peraywali Lassi Recipe: A Step-by-Step Guide to Make This Pakistani Drink!

    Malai Aur Padewali Lassi

    A delicious blend of yogurt and fresh cream,garnished with crumbled malai pedas. Perfect drink for a hot day. Check it out the Malai Aur Pedewali Lassi Recipe here!!

    Malai Aur Pedewali Lassi recipe
    Photo: Malai Aur Pedewali Lassi Recipe

    [divider]

    [one_fourth]Prep Time: 10 minutes[/one_fourth] [one_fourth]Cook Time: 0 minutes[/one_fourth] [one_fourth]Servings: 4[/one_fourth] [one_fourth_last]Difficulty Level: Easy[/one_fourth_last]

    [divider]

    [tabs type=”horizontal”] [tabs_head] [tab_title]Ingredients[/tab_title] [tab_title]Nutrition[/tab_title] [/tabs_head] [tab]

    • 4 cups Yogurt
    • 1 cup milk ,
    • 4 malai Pera
    • 4 tbsp thick cream
    • 1 cup sugar
    • ice cubes as required

    [/tab] [tab]Yield: 4 servings

    Nutritional information is not yet available. [/tab] [/tabs]

    Directions:
    [tabs type=”horizontal”] [tabs_head] [tab_title]Step by Step Method[/tab_title] [tab_title]Serving Suggestions[/tab_title][/tabs_head] [tab]

    Step 1

    Take a bowl, put yogurt in the bowl.

    Step 2

    Add sugar and whisk it for about 10 minutes until the sugar gets dissolves.

    Step 3

    Add a little milk and whisk it .

    Step 4

    Add the ice cubes and then keep it aside for 2 to 3 minutes so that the mixture gets chilled.

    Step 5

    Now take four tall serving glasses and then pour the lassi in the glasses.

    Step 6

    Take thick cream or fresh malai, add 1 tablespoon of cream to each glass.

    Step 7

    Now take malai pedas and crumble them in a bowl.

    Step 8

    Sprinkle the crumbled pedas in each glass. Delicious Malai aur Padewali lassi is ready to serve.

    [/tab] [tab]

    • Serve with any meal.

    [/tab] [/tabs]

    If you like  Malai aur Padewali lassi  recipe and make it then let me know your feedback by commenting below.

  • Cool & Refreshing: The Perfect Cucumber Mint Raita Recipe for Summer!

    Cucumber Mint Raita

    A cool, fresh Cucumber Mint Raita  that takes seconds to make. Use it to top fiery curries or as a dip for pakora’s.  Do try out the Cucumber Mint Raita Recipe and send me the feedback please.

    Cucumber Mint Raita

    [divider]

    [one_fourth]Prep Time: 10 minutes [/one_fourth] [one_fourth]Cook Time:0 minutes[/one_fourth] [one_fourth]Servings: 6 [/one_fourth] [one_fourth_last]Difficulty Level: Easy[/one_fourth_last]

    [divider]

    [tabs type=”horizontal”] [tabs_head] [tab_title]Ingredients[/tab_title] [tab_title]Nutrition[/tab_title] [/tabs_head] [tab]

    • 600 ml yogurt
    • 1 cucumber, peeled and coarsely grated
    • 2 tbsp chopped, fresh mint
    • 1/2 teaspoon ground cumin
    • 1/2 teaspoon chat masala
    • 1/4 teaspoon cayenne pepper
    • 1 teaspoon salt

    [/tab] [tab]Yield: 6 servings

    Nutritional information is not yet available. [/tab] [/tabs]

    Directions:
    [tabs type=”horizontal”] [tabs_head] [tab_title]Step by Step Method[/tab_title] [tab_title]Serving Suggestions[/tab_title][/tabs_head] [tab]

    Step 1

    Put the yogurt in a bowl.

    Step 2

    Beat lightly with a fork or whisk until smooth and creamy.

    Step 3

    Add all the other ingredients and mix.

    Step 4

    Cover and refrigerate till ready to eat. Cucumber Raita is ready to serve. Enjoy!

    [/tab] [tab]

    • Serve with Pakoras, Paratha etc.

    [/tab] [/tabs]

    If you like Cucumber Mint Raita recipe and make it then let me know your feedback by commenting below.

  • Dal Nawabi Recipe

    Here’s a yummy, spicy dal recipe. Give it a try, hope you’ll like it. Check it out the Dal Nawabi Recipe here!!

    Dal Nawabi Recipe
    Photo: Dal Nawabi Recipe

    [divider]

    [one_fourth]Prep Time: 30 minutes[/one_fourth] [one_fourth]Cook Time: 1 hour 30 minutes[/one_fourth] [one_fourth]Servings: 6[/one_fourth] [one_fourth_last]Difficulty Level: Medium[/one_fourth_last]

    [divider]

    [tabs type=”horizontal”] [tabs_head] [tab_title]Ingredients[/tab_title] [tab_title]Nutrition[/tab_title] [/tabs_head] [tab]

    • 1 cup split black gram lentil
    • 1/2 cup Bengal gram
    • 1/2 cup red kidney beans
    • 1 piece ginger
    • 4 onion
    • 7-8 garlic
    • 6 tomato
    • some tamarind
    • 2 green chilly
    • few coriander leaves
    • 50 gm cottage cheese
    • 1/2 cup curd
    • 1 cup cream
    • 1/2 tsp turmeric powder
    • 1 tsp cumin seeds
    • salt to taste
    • 1/2 tsp red chilly powder
    • 1/2 tsp black pepper powder
    • 2 tsp sugar
    • 4 tbsp clarified butter

    [/tab] [tab]Yield: 6 servings

    Nutritional information is not yet available. [/tab] [/tabs]

    Directions:
    [tabs type=”horizontal”] [tabs_head] [tab_title]Step by Step Method[/tab_title] [tab_title]Serving Suggestions[/tab_title][/tabs_head] [tab]

    Step 1

    Soak all dals and kidney beans in a container for 6-7 hours.

    Step 2

    Grind ginger, garlic buds and onions.

    Step 3

    Finely chop green chilies and tomatoes.

    Step 4

    Soak tamarind in 1/2 cup water for 1/2 an hour and then strain.

    Step 5

    Boil all dals in a pressure cooker with turmeric and salt until it is cooked properly and then remove it from the flame.

    Step 6

    Heat ghee in a pan and fry cottage cheese and then take them out.

    Step 7

    In the same ghee crackle cumin seeds and fry onion paste until it turns pink.

    Step 8

    Then add tomatoes and cook for few seconds. Then add curd and stir continuously.

    Step 9

    Then add salt red chilly powder, black pepper powder, sugar and tamarind and fry for a minute.

    Step 10

    Then add some cream and cook for some more time.

    Step 11

    Lastly add all boiled dals and cottage cheese pieces and simmer for 5 minutes. Then remove it from the flame.

    Step 12

    Garnish with coriander leaves and green Chilies. Dal Nawabi is ready to serve.

    [/tab] [tab]

    • Serve with  chapati, paratha, or rice.

    [/tab] [/tabs]

  • A Taste of Pakistan: Besan Wala Naan Recipe

    Besan Wala Naan

    A famous desi naan bread of Pakistan that is made with gram flour, spinach, green chilies and spices. Perfect to serve in lunch time. This is a Besan Wala Naan recipe for everyone who likes to eat Naan. I learned it yesterday.

    Besan wala naan Recipe
    Photo: Besan wala naan Recipe

    Bismillah, let’s get started

    Check it out the Besan wala naan recipe here!!

    Besan Wala Naan Recipe

    A famous desi naan bread of Pakistan that is made with gram flour, spinach, green chilies and spices. Perfect to serve in lunch time. This is a Besan Wala Naan recipe for everyone who likes to eat Naan. I learned it yesterday.
    Prep Time 10 minutes
    Cook Time 10 minutes
    Total Time 20 minutes
    Servings 6
    Author Bushrah@Recipestable

    Ingredients

    • 2 cup gram flour besan
    • 1/2 cup water or as required
    • 1 onion finely chopped
    • 1/2 cup spinach finely chopped
    • 2 green chilies thinly sliced
    • 1 tsp red chilli powder
    • 1/2 tsp coriander powder
    • 1/2 tsp garam masala powder.
    • salt to taste
    • 6 naans
    • 3 tablespoon butter or oil

    For Garnishing

    • green chilies optional

    Instructions

    Method

    • In a small bowl, mix together the gramflour(besan), onion, spinach, green chilies, spices, salt and red chili. Add water and make a thick mixture.
    • Spread the besan mixture on the naan.
    • Put naan on a greased baking tray.
    • Sprinkle green chilies over it. Bake in the preheated oven for 8-10 minutes or until golden brown.
    • Remove from the oven.
    • Brush with butter or oil. Besan Wala Naan is ready to serve. ENJOY!!

    Notes

    Serving Suggestions:
    Serve with mint raita or Namkeen Lassi
     

    I have also posted Cheese Kulcha and Garlic Naan which are another easiest & tastiest version of making Naan’s. Do check it out as well.


    Put your own spin on it. And lemme know how it turns out. Post a photo on Facebook (Recipestable) or  on Twitter so I can see how lovely yours turn out.Put your own spin on it. And lemme know how it turns out. Post a photo on Facebook (Recipestable) or on Twitter so I can see how lovely yours turn out.

    Happy Cooking!!

    If you like this Besan Wala Naan Recipe, Please Subscribe to my blog. I have lots more recipes to share with you. And If you make it then let me know your feedback by commenting below.

  • Vegetable Raita Recipe

    Vegetable Raita

    Yoghurt with a mix of veggies serves as an accompaniment for biryani /paratha etc. A Must try recipe !!

    Vegetable Raita Recipe
    Photo: Vegetable Raita Recipe

    Check it out the Vegetable raita recipe here!!

    [divider]

    [one_fourth]Prep Time:10 minutes[/one_fourth] [one_fourth]Cook Time:not required minutes[/one_fourth] [one_fourth]Servings: 4[/one_fourth] [one_fourth_last]Difficulty Level: Very Easy[/one_fourth_last]

    [divider]

    [tabs type=”horizontal”] [tabs_head] [tab_title]Ingredients[/tab_title] [tab_title]Nutrition[/tab_title] [/tabs_head] [tab]

    • 2 Cup yogurt
    • 2 Chopped onions
    • 1/2 Chopped tomato
    • 1 Grated cucumber
    • 1/2 tsp Red chilli flakes
    • 2 Green chilies.
    • 1/2 tsp Roasted cumin seeds
    • Salt to taste

    [/tab] [tab]Yield: 6 servings

    Nutritional information is not yet available. [/tab] [/tabs]

    Directions:
    [tabs type=”horizontal”] [tabs_head] [tab_title]Step by Step Method[/tab_title] [tab_title]Serving Suggestions[/tab_title][/tabs_head] [tab]

    Step 1

    Beat the yogurt until smooth.

    Step 2

    Add chopped onion, tomato and grated cucumber, chopped green chilies Mix well.

    Step 3

    Sprinkle red chili flakes, roasted cumin seeds and salt. Vegetable Raita is ready to serve. Enjoy!

    [/tab] [tab]

    • Serve along with biryani and paratha.

    [/tab] [/tabs]

    If you like Vegetable Raita Recipe  and make it then let me know your feedback by commenting below.And if you know more innovative ways in which we can utilize this mouth watering Vegetable Raita, do share with us and we would be glad to give it a try.

  • Cabbage Raita Recipe

    Cabbage Raita

    Cabbage raita is a simple raita recipe made with yogurt, grated cabbage and spices. This fiber rich raita is tasty and aids in digestion. Fresh Mint adds refreshing minty flavor. Try this cabbage raita recipe during the summers with biryani or Paratha.

    Cabbage Raita Recipe
    Photo: Cabbage Raita Recipe

    Check it out the Cabbage Raita Recipe here!!

    [divider]

    [one_fourth]Prep Time:10 minutes[/one_fourth] [one_fourth]Cook Time:not required[/one_fourth] [one_fourth]Servings: 4[/one_fourth] [one_fourth_last]Difficulty Level: Very Easy[/one_fourth_last]

    [divider]

    [tabs type=”horizontal”] [tabs_head] [tab_title]Ingredients[/tab_title] [tab_title]Nutrition[/tab_title] [/tabs_head] [tab]

    • 1 cup Plain yogurt
    • 1 cup shredded cabbage
    • 1 green chili, finely chopped
    • 2 tbsp chopped mint
    • 2 tbsp coriander leaves
    • 1/2 tsp ground cumin
    • 1/2 tsp salt
    • 1/4 tsp black pepper
    • 1/4 tsp chat masala

    [/tab] [tab]Yield: 4 servings

    Nutritional information is not yet available. [/tab] [/tabs]

    Directions:
    [tabs type=”horizontal”] [tabs_head] [tab_title]Step by Step Method[/tab_title] [tab_title]Serving Suggestions[/tab_title][/tabs_head] [tab]

    Step 1

    Take a mixing bowl and add yogurt to it.

    Step 2

    Whisk with a hand beater until smooth.

    Step 3

    Stir in green chilies, mint and coriander leaves.

    Step 4

    Season with cumin, salt and pepper.

    Step 5

    Add cabbage; stir to coat evenly.

    Step 6 

    Cover and refrigerate for 30 minutes or until chilled.

    Step 7

    Just before serving, sprinkle chat masala over it. Cabbage Raita is ready to serve. Enjoy!!

    [/tab] [tab]

    [/tab] [/tabs]

    If you like Cabbage Raita Recipe  and make it then let me know your feedback by commenting below.And if you know more innovative ways in which we can utilize this mouth watering Cabbage Raita, do share with us and we would be glad to give it a try.

  • Recipe: Capsicum Raita

    Capsicum Raita 

    Capsicum is the most common vegetable that you could find in almost every part of the world. This Capsicum raita recipe is very easy to make and a quick side dish for rice or roti.

    Check it out the Capsicum raita recipe!!

    Prep Time: 10 minutes

    Cook Time: 2 minutes

    Servings: 4

    Ingredients

    • 4 capsicums
    • 1 1/2 cups curd
    • salt to taste
    • 1 sprig of curry leaves
    • 1/2 tsp mustard seeds
    • 1 tbsp oil
    • 1/2 tsp sugar


    Directions:

    Step 1

    Chop the capsicums.

    Step 2

    Heat the oil and add the mustard. When done, add the curry leaves and the capsicums, and fry until soft.

    Step 3

    Allow to cool.

    Step 4

    Beat the curds with sugar and salt, add to the capsicums, and mix well. Capsicum Raita is ready to serve. Serve chilled.

    Serving Suggestions:

    • Serve with rice or paratha.