Nan Khatai is an Persian /Indo-Pakistani butter cookie that is made with ghee(clarified butter), sugar, all-purpose flour, gram flour, cardamom, and roasted almonds and pistachios. Do try it.
Add sugar and cardamom powder.Beat until light and fluffy.
Now take a separate bowl, sift flour, baking powder,gram flour and baking soda.
Now fold into ghee mixture.
Stir in the roasted almonds and pistachios.
Now roll out the dough, cut into rounds with a cookie cutter.
Put nan khatai on a greased baking tray.
Brush them with egg yolks.
Place baking tray in the preheated oven for 12-15 minutes or until done.
Remove from the oven and let it cool completely. Lahori Nan Khatai is ready to serve.
Notes
Serve with Tea.
If you like Lahori Nan Khatai Recipe and make it then let me know your feedback by commenting below.And if you know more innovative ways in which we can utilize this sweet and mouth watering Lahori Nan Khatai, do share with us and we would be glad to give it a try.
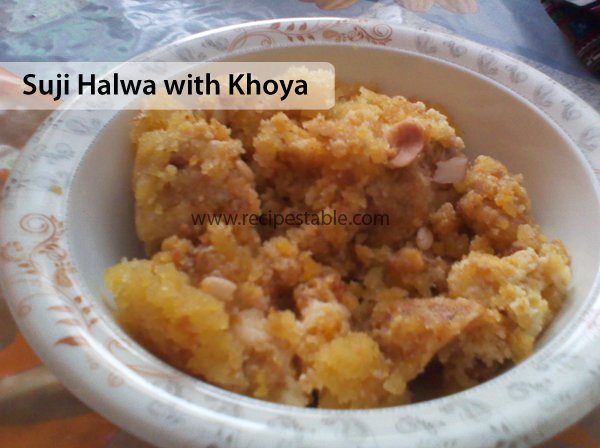
You don’t need to wait for an occasion to savor the sweet and creamy Suji halwa with Khoya as it can be prepared at home in just few minutes and does not require any expert cooking skills. This Suji Halwa with Khoya Recipe takes its taste and texture to next level as use of khoya and generous amount of dry fruits provide nice creamy texture while ghee and cardamom provides irresistible aroma.
If you don’t have khoya, then don’t worry, read tips and variations given below to make equally tempting Suji halwa with khoya (mawa). Do try it!!
Photo: Suji Halwa with Khoya Recipe
Check it out the Suji Halwa with Khoya Recipe here!!
Add cardamom and semolina (suji) and roast it well.
Add sugar and water. Stir continuously till sugar is dissolved.
Leave it on low flame for 10 minutes to cook perfectly.
When ghee comes on top add khoya.Stir well.
Dish it out. Garnish with nuts. Suji Halwa with Khoya is ready to eat. ENJOY!!
Notes
Replace khoya with 4 tablespoons of dry milk powder and increase amount of sugar.
It can be served as a dessert or as a sweet accompaniment to main dish.
Serve it along with puri’s to entertain the guests.
If you like Suji Halwa with Khoya Recipe and make it then let me know your feedback by commenting below.And if you know more innovative ways in which we can utilize this sweet and mouth watering Suji Halwa with Khoya, do share with us and we would be glad to give it a try.
I know there are a lot of people out there that have issues with fruit cake, but this White Fruit Cake recipe has converted even the most reluctant. Great to serve with tea or even it is likely eaten without tea.
Photo: White Fruit Cake Recipe
If there are certain fruits you don’t like, you can always include more of another, or some of your own favourites. Dried fruits soaked in juice can take the place of candied fruits, and seeds can replace nuts. Follow this simple White Fruit Cake Recipe to prepare a delicate taste and texture of Fruit Cake .
Photo: White Fruit Cake Recipe
Bismillah Let’s get started.
Check it out the White Fruit Cake Recipe and printable version below.
I know there are a lot of people out there that have issues with fruit cake, but this White Fruit Cake recipe has converted even the most reluctant.
Prep Time 30 minutesminutes
Cook Time 2 hourshours
Total Time 2 hourshours30 minutesminutes
Servings 24
Author Bushrah | Recipestable
Ingredients
3cupsall purpose floursfited
4cupsconfectioners’ sugar
2cupsbutter
8eggsseparated
1-1/2cupscandied pineapple chunks
2cupsgolden raisins
2cupschopped cashew
1-1/2cupscandied cherries
1cupdried currants
1/2cuporange juice
2tablespooncandied orange peel
2tablespooncandied citron peel
Instructions
Method
hop raisins, cherries and pineapple.
In a mixing bowl, combine together the chopped fruit with currants, orange peel, and citron.
Soak in orange juice for 2-3 hours.
Preheat oven to 135 degrees C.
Place a small pan of water in the oven.
Line three loaf pans with doubled waxed paper.
Now Place butter and confectioner’s sugar in a large bowl.
Beat until light and fluffy.
Beat egg yolks in a separate bowl.
Then stir in the butter mixture.
Stir in fruit, juice, and cashew.
Gradually stir in the sifted flour.
In a clean bowl, beat the egg whites to peaks.
Fold into batter.
Fill pans 2/3 rd full.
Bake for 2 hours or until a toothpick inserted in the center comes out clean.
Turn on a wire rack and let them cool completely.
Cut into slices and save in an air-tight container. Delicious White Fruit Cake is ready to serve.
Notes
Serving Suggestions: Serve with tea or coffee.
I have also posted Carrot Cake Recipewhich is another easiest & tastiest version of making cake. Do check it out as well.
Put your own spin on it. And lemme know how it turns out. Post a photo on Facebook (Recipestable) or on Twitter so I can see how lovely yours turn out.
Happy baking!!
If you like this post, Please Subscribe to my blog and let me know your feedback by commenting below.. I have lots more recipes to share with you.
Coconut Rice Pudding (Nariyal Kheer) is a nutty twist to the favorite Pakistani dessert Kheer. Coconut and rice are main ingredients for this sweet dish. It’s the best rice pudding (kheer)I’ve ever had, and very easy to make! Must try it!!
Photo: Coconut Rice Pudding Recipe
Check it out the Coconut Rice Pudding Recipe here!!
Wash the rice thoroughly with few changes of water.
Soak in water for 20 minutes.
Put rice in a deep pot.
Pour milk in it.
Bring water to a boil then reduce heat to the low and gently boiling for 1 hour or until the rice is thoroughly cooked and the milk has thickened to a pudding consistency.
Now stir in the condensed milk, sugar, cardamom and coconut. Cook 5 minutes longer or until thickened.
Dish it out or distribute into 12 serving dishes.
Garnish with raisins, coconut and almonds.
Let it cool completely then put in the refrigerator for 4 hours to chill. Coconut Rice Pudding is ready to serve.ENJOY!!
Notes
Serve as a dessert after any meal.
If you like Coconut Rice Pudding Recipe and make it then let me know your feedback by commenting below.And if you know more innovative ways in which we can utilize this sweet and mouth watering Coconut Rice Pudding, do share with us and we would be glad to give it a try.
Gajar Halwa is a must have dessert in winter season. Everyone love to eat it. It is unbelievable how the combination of carrots, milk, sugar can end up tasting so divine, khoya is added to give and extra luscious flavor to this halwa.
Photo: Instant Gajar Halwa Recipe
It’ very simple to make and my family(especially my lil bro)loves it. This Instant gajar halwa recipe is very good especially for those who want to make scrumptious dessert in hurry.
Photo: Instant Gajar Halwa Recipe
This Instant Gajar Halwa recipe is also good for people of those areas where you cant find khoya (ricotta cheese) immediately. Must try my recipe, hope you will enjoy and do let me know how it was.
Check it out the Instant Gajar Halwa Recipe here!!
Heat oil in a large skillet or wok over medium heat.
Step 2
Add cardamom pods in it. When they crackle, add the grated carrots (gajar) and cook on a medium heat so that the water is evaporated and the color is slightly changed.
Step 3
Add sugar and keep stirring once in a while.
Step 4
Cook for about 5 more minutes until ghee comes on top.
Step 5
Now add dry milk powder and stir well.
Step 6
Sprinkle khoya over it.
Step 7
Turn the heat off. and dish it out.
Step 8
Granish with nuts, silver paper and boiled egg.Instant Gajar Halwa is ready to serve. ENJOY!!
[/tab] [tab]
If you don’t have khoya (ricotta cheese) increase the amount of dry milk powder , it will eventually turn in to khoya or you can also use evaporated milk.
[/tab][tab]
Serve hot as a dessert after any meal or you can enjoy as a tea time snack with kashmiri chai.
[/tab] [/tabs]
If you like Instant Gajar Halwa Recipe and make it then let me know your feedback by commenting below.And if you know more innovative ways in which we can utilize this sweet and mouth watering Instant Gajar Halwa , do share with us and we would be glad to give it a try.
Put almonds in a food processor. Process until finely chopped.
Step 3
Spread grinded almonds on a baking sheet and toast in oven for 3-4 minutes, or until fragrant and a shade darker.
Step 4
Now put dates into the food processor.
Step 5
Process for 2-3 minutes or until finely chopped.
Step 6
Take it out in a bowl. Add almonds.
Step 7
Stir in the honey. Mix together until well combined.
Step 8
Use melted butter to dampen your hands periodically, and shape mixture into 1-inch balls.
Step 9
Then roll in the coconut.
Step 10
Store in an air-tight container at room temperature for a few days.Delicious Honey Date Balls are ready to serve. ENJOY!!
[/tab] [tab]
You can also freeze them for a couple of weeks.
[/tab][tab]
Serve with a glass of milk.
[/tab] [/tabs]
If you like Honey Date Balls Recipe and make it then let me know your feedback by commenting below.And if you know more innovative ways in which we can utilize this sweet and mouth watering Honey Date Balls, do share with us and we would be glad to give it a try.
Line the bottom and sides of a deep 8×8 container with foil.
Step 2
Spread ice cream in container, packing firmly.
Step 3
Cover and freeze for overnight or until firm.
Step 4
Preheat oven to 175 degrees C.
Step 5
Grease and flour an 8×8 inch pan.
Step 6
Prepare cake mix with egg and almond extract.
Step 7
Pour into the prepared container.
Step 8
Bake, in the preheated oven, for 25 minutes or until center of cake springs back when lightly touched.
Step 9
Beat egg whites with cream of tartar, salt and sugar until stiff peaks form.
Step 10
Line a baking sheet with parchment paper.
Step 11
Place cake in the center.
Step 12
Turn molded ice cream out onto cake.
Step 13
Quickly and prettily spread meringue over cake and ice cream, all the way to paper to seal.
Step 14
Return to freezer for 2 hours.
Step 15
Preheat oven to 220 degrees C.
Step 16
Bake the Alaska on the lowest shelf for 8 minutes or until meringue is lightly browned.
Step 17
Remove from the oven. Baked Alaska is ready to serve.
[/tab] [tab]
Serve as a dessert after any meal.
[/tab] [/tabs]
If you like Baked Alaska Recipe and make it then let me know your feedback by commenting below.And if you know more innovative ways in which we can utilize this sweet and mouth watering Baked Alaska, do share with us and we would be glad to give it a try.
A simple, moist, yummy carrot cake with delicious cream cheese frosting. This moist carrot cake is welcome at birthdays, weddings, reunions and all special occasions. A Perfect delight!!
Grease and flour a 9×13 inch baking pan. Set aside.
Step 3
Beat eggs with oil, white sugar and vanilla essence in a large bowl.
Step 4
In another bowl, combine together the flour, baking soda, baking powder, salt and cinnamon.
Step 5
Stir in the carrots.
Step 6
Fold in Walnuts.
Step 7
Pour into the prepared pan.
Step 8
Bake, in the preheated oven, for 40 minutes or until a toothpick inserted into the center of the cake comes out clean.
Step 9
Allow to cool for 10 minutes then turn out onto a wire rack.
Step 10
Let it cool completely.
Step 11
To Make Frosting:
In a medium bowl, mix together the butter, cream cheese, confectioners’ sugar and vanilla essence.
Step 12
Beat until the mixture is smooth and creamy.
Step 13
Stir in chopped Walnuts.
Step 14
Frost over the cooled cake. Delicious Carrot Cake is ready to serve. ENJOY!!
[/tab] [tab]
Serve with Tea or coffee.
[/tab] [/tabs]
If you like Carrot Cake Recipe and make it then let me know your feedback by commenting below.And if you know more innovative ways in which we can utilize this sweet and mouth watering Carrot Cake, do share with us and we would be glad to give it a try.
Add all the four above mentioned ingredients to a deep non stick vessel.
Step 2
Allow the milk to boil on low flame stirring the contents occasionally.
Step 3
Once the milk starts thickening, check if the mixture has attained the required consistency.
Note: A simple test is to wet your hand, put some mixture on the palm and see if you can roll it up into a ball. If you cannot, then wait for some more time before you can try it out again.
Step 4
Keep stirring the contents throughout the whole process.
Step 5
Once the consistency is right, pour the mixture on to a greased tray (greased with ghee or butter).
Step 6
Cut the mixture into squares and allow it to cool. Coconut Burfi is ready to serve. Enjoy!
[/tab] [tab]
Serve as a dessert to celebrate any occasion after any meal.
[/tab] [/tabs]
If you like Coconut Burfi recipe and make it then let me know your feedback by commenting below.And if you know more innovative ways in which we can utilize this sweet and mouth watering Coconut Burfi, do share with us and we would be glad to give it a try.
Making Kulfi Ice Cream at home is an easy process with minimal ingredients. Fresh Mangoes processed to a pulp and mixed with creamy ingredients, This Mango Kulfi Ice Cream recipe is so simple, even kids can make it!
Photo: Mango Kulfi Ice Cream Recipe
Check it out the Mango Kulfi Ice Cream Recipe here!!
Combine the mango pieces, sugar, condensed milk and milk powder in a pan and bring it to a boil.
Step 4
Now add the cardamom powder, cook for 10 more minutes till the mixture thickens.
Step 5
Now add saffron and pistachios.
Step 6
Lower the flame and allow to cool completely.
Step 7
Pour into kulfi moulds and freeze overnight till firm.Mango Kulfi Ice Cream is ready to serve.Enjoy!
[/tab] [tab]
Serve as a dessert after any meal.
[/tab] [/tabs]
If you like Mango Kulfi Ice Cream recipe and make it then let me know your feedback by commenting below.And if you know more innovative ways in which we can utilize this sweet and mouth watering Mango Kulfi Ice Cream, do share with us and we would be glad to give it a try.
A delicious Pakistani and Indian recipe served as a Dessert. Rabri Falooda is a sweet, rich drink so thick it’s served with a spoon consisting of vermicelli noodles. Try this Rabri Falooda Recipe, you’ll like it.
Heat 1 cup Thread Noodles in microwave with ¼ water with 2 tsp. sugar and 1 tsp kewra liquid.
Step 2
When Noodles are softened,cool it down and refrigerate it till Rabri is ready.
Step 3
Discard crusts from bread slices.
Step 4
Grind these slices in a processor and prepare fresh bread crumbs.
Step 5
Boil milk in a pan by simmering in low flame.
Step 6
Add bread crumbs, condensed milk and sugar altogether.
Step 7
Simmer on a medium flame, stir continuously for about 10 minutes.
Step 8
Remove from the fire.
Step 9
Add safforn and cardamon powder and mix well.
Step 10
Keep it in a refrigerator for 2-3 hours. Rabri is ready to serve, take out the cold Falooda.
[/tab] [tab]
Serve in Individual Bowls with few saffron strands and kewra drops, chopped Almonds and Pista and Falooda. Enjoy! 🙂
[/tab] [/tabs]
If you like Rabri Falooda Recipe and make it then let me know your feedback by commenting below.And if you know more innovative ways in which we can utilize this sweet and mouth watering Rabri Falooda, do share with us and we would be glad to give it a try.
Loki ka Halwa is an easy to make Pakistani and Indian dessert which made with bottle gourd (loki) and khoya. Green cardamom gives a refreshing flavour to the halwa. Must try this Loki Ka halwa recipe and impress your friends and family.
Then put in a pan and cook in steam for 25 minutes or until soft.
Step 3
Now add sugar and cook until sugar is dissolved.
Step 4
Now add desi ghee or butter and green cardamoms, cook well until ghee comes on top.
Step 5
Now add khoya, dry milk powder and cover for 5 minutes. Note:(Don’t stir)
Step 6
Sprinkle dry fruits and lightly stir.
Step 7
Dish it out. Garnish with sliver papers. Loki Ka Halwa is ready to serve.
[/tab] [tab]
Serve as a dessert after any meal.
[/tab] [/tabs]
If you like Loki ka Halwa Recipe and make it then let me know your feedback by commenting below.And if you know more innovative ways in which we can utilize this sweet and mouth watering Loki ka Halwa, do share with us and we would be glad to give it a try.
A simple but deliciously sweet milk pudding, made with roasted vermicelli and cooked until a soft custard consistency.
This is a traditional dessert specially made for Eid festivals. No Eid breakfast is complete without this tasty and easy dish. This Vermicelli Pudding is really simple to make, with the most easily available ingredients.
Melt butter in a heavy bottom frying pan or skillet.
Step 2
Fry vermicelli in it for 1-2 minutes or until lightly browned.
Step 3
Scoop out the Vermicelli with a slotted spoon.
Step 4
Keep aside.
Step 5
Heat evaporated milk in heavy bottom pan to a boil.
Step 6
Add fried Vermicelli. Cook for 15 minutes or until vermicelli is tender.
Step 7
Stir in the kewra essence and sugar and Cook for 5 minutes or until the sugar is consumed.
Step 8
Turn off heat.
Step 9
Stir Almonds and raisins.
Step 10
Dish it out. Stir khoya in it.
Step 11
Garnish with almonds and egg slices. Vermicelli Pudding is ready to serve. Enjoy!
[/tab] [tab]
Serve warm as a dessert after any meal.
[/tab] [/tabs]
If you like Vermicelli Pudding Recipe and make it then let me know your feedback by commenting below.And if you know more innovative ways in which we can utilize this sweet and mouth watering Vermicelli Pudding, do share with us and we would be glad to give it a try.
This gorgeous pudding has a taste of vanilla and chocolate in it. Rather then traditional pudding, hot Chocolate Pudding with Vanilla Custard can delightedly serve at the end of meal. Discover the Hot Chocolate Pudding Recipe
Photo: Hot Chocolate Pudding Recipe
Check it out the Hot Chocolate Pudding Recipe here!!
Prep Time:20 minutes
Cook Time:45 minutes
Servings: 4
Ingredients
For Chocolate Pudding:
2 cups milk
1/2 cup sugar
4 eggs
2 tbsp plain flour
2 tbsp cocoa powder
1/2 tsp vanilla essence
For Vanilla Custard:
1 cup milk
1/2 cup fresh cream
2 tbsp sugar
1 tbsp vanilla custard powder
few drops of vanilla essence
Directions:
For Chocolate Pudding:
Preheat oven to 180 degree C.
Pour milk in a saucepan.
Bring to a boil, add cocoa powder and sugar.
Stir well.
Cook for 5 minutes or until sugar has dissolved.
Remove from the heat and keep aside.
In a large bowl, beat eggs for 3-4 minutes or until fluffy.
Stir in vanilla essence.
Now add boiled milk mixture.
Beat well.
Also add flour and mix well.
Now bake in the preheated oven for 30 minutes.
For Vanilla Custard:
In a saucepan , add milk and sugar.
Bring to a boil and cook for 2-3 minutes.
Then stir in vanilla essence.
Dissolve vanilla custard in 2 tbsp milk.
Gradually pour custard mixture into the sauce.
Keep stirring.
Cook for 5 minutes or until thickened.
Remove from the heat and take it out in a serving bowl.
Hot chocolate pudding with vanilla custard is ready to serve.
Enjoy!
Serve as a dessert after any meal.
If you like Hot Chocolate Pudding Recipe and make it then let me know your feedback by commenting below.And if you know more innovative ways in which we can utilize this sweet and mouth watering Hot Chocolate Pudding , do share with us and we would be glad to give it a try.
Molten Lava cakes also known as chocolate lava cakes. They are rich individual chocolate cakes with oozing molten centers. Try this Molten Lava Cakes recipe and make these rich and impressive single-serving chocolate cakes.Decadent and delicious, these are the ideal dessert for any Special Occasion.
This rich and decadent Chocolate mousse cake is the ultimate CHOCOLATY DELIGHT.Chocolate cake with chocolate moussefilling and topped off with dark chocolate ganache. Must Try this Chocolate Mousse Cake recipe; everyone will think you bought it at a bakery!
Photo: Chocolate Mousse Cake Recipe
Check it out the Chocolate Mousse Cake Recipe here!!
In a large bowl, mix together sugar, flour, cocoa powder, baking powder and salt.
Step 4
Add milk, eggs, oil and vanilla. Stir with spatula for few minutes or until the batter is smooth and no lumps remain.
Step 5
Now add baking soda and mix well.
Step 6
Stir in the boiling water.
Step 7
Pour batter equally into prepared baking pans.
Step 8
Bake in the preheated oven for 30-35 minutes or until a tooth-pick inserted in the center comes out clean.
Step 9
Let it cool for 10 minutes then remove from the pans
to wire racks.
Step 10
Allow to cool completely.Chocolate Cake Sponge is ready 🙂
To Make The Chocolate Mousse:
Meanwhile cake is oven, let’s prepare the Chocolate Mousse.
Step 1
Place heavy cream in a large bowl. Beat for 10-12
minutes or until it forms stiff peaks.
Step 2
Place in the refrigerator until set.
Step 3
Take a small bowl, add egg yolk and sugar in it. Beat 3-4 minutes or until it becomes thick and pale in color and the sugar fully dissolved.
Step 4
Keep aside.
Step 5
Take a small pan and fill it with an inch of water.
Step 6
Bring it to a simmer.
Step 7
Place a small heat-proof bowl over the saucepan.
Step 8
Add the chocolate, water, and butter. Stir and cook on very low heat for few minutes or until the chocolate is melted.
Step 9
Spoon 1/4 of the chocolate mixture into the egg yolk
mixture. Stir until well combined.
Step 10
Pour the egg yolk mixture back into the small bowl over the simmering water in the saucepan with the remaining chocolate mixture.
Step 11
Stir in the vanilla extract.
Step 12
Keep stirring and cook over low heat for 2-3 minutes or until the mixture thickens.
Step 13
Let it cool for few minutes; stirring frequently.
Step 14
Place egg whites in another small bowl. Beat until it forms stiff peaks.
Step 15
Fold the egg white in the cooled chocolate mixture.
Step 16
Now fold into the whipped heavy cream.
Note: Be careful not to over mix otherwise the heavy cream will lose its texture.
To Assemble The Cake
Step 1
Cut the top dome texture of the cake sponges. This will help you to get a flat and even surface.
Step 2
Arrange the bottom layer of the cake in the spring form pan.
Step 3
Pour the thick chocolate mousse over the cake sponge.
Step 4
Spread evenly with a spatula.
Step 5
Now cover the pan with cling wrap or any plastic covering.
Step 6
Place the pan in the refrigerator for 20 minutes or until set.
Step 7
Remove the pan and gently place the second cake sponge on top of the mousse.
Step 8
Cover again and keep in the refrigerator for 30 minutes or until firm or set.
To Make Chocolate Ganache
Step 1
Place the chocolate in a medium bowl.
Step 2
Heat the heavy cream in a small sauce pan over medium heat.
Step 3
Bring just to a boil.
Step 4
When the cream has come to a boil, immediately pour over the chopped chocolate and stir until smooth.
Step 5
Stir in the 1/2 teaspoon of vanilla essence.
Step 6
Let it cool slightly.
Step 7
When cool, pour the chocolate ganache in the the center of the cake, it will slowly spread itself.
Step 8
Finally, cover the cake and refrigerate overnight or until the cake sets.
To Decorate The Chocolate Mousse Cake:
Step 1
When the cake has set, decorate the cake with chocolate curls and hazelnuts or walnuts.
Step 2
Slide the cake out of the pan and transfer to a cake plate. Mouthwatering Chocolate Mousse Cake is ready to eat!! ENJOY 😉
[/tab]
[tab]
Tip To Assemble the Cake: You will need a spring-form pan or a cake ring to hold everything neatly as the cake sets. So that you can later easily un-mold your cake once the mousse has set without ruining the delicate layers. If you don’t have a spring-form or cake ring, you can do this in a regular pan, make sure it is the same size as your cake. Serving out of a regular pan can be a bit tricky though as it will be hard to lift out the cake neatly with that soft creamy mousse in the middle.
Tip To Make Chocolate Mousse: If you want the mousse layer to show neatly and evenly through the cake, take an offset spatula or cut out a small rectangular piece off a tetra pack or hard paper and run it over the mousse around the circumference of the cake to remove the excess mousse, and give it a smoother finish.
Tip To Decorate The Cake: You can top the cake with whipped cream, cherries any type of nuts or leave it as is.
Tip To Make Chocolate Ganache: While making Chocolate ganache,don’t over boil the cream because if it boils for a few seconds, it will boil out of the pot.
Tip To Make Thicker Ganache: If you want a thicker consistency for piping the ganache, just let it cool for a longer time.
[/tab]
[tab]
Serve as a dessert after any meal or birthday party or any other special occasion.
[/tab] [/tabs]
If you like Chocolate Mousse Cake recipe and make it then let me know your feedback by commenting below.