When I begin to think about cakes, the first ingredient that comes to mind is chocolate! And what if your chocolate cake full of chocolate chips, topped with creamy chocolate ganache and dark chocolate? Then, we are talking about one of the most decadent chocolate cakes – Chocolate Lover’s Dream Cake.
Chocolate in three forms, makes this cake extra chocolaty—and extra delicious. A chocolate lover’s dream come true!!!
Chocolate Lover’s Dream Cake
Since I began blogging, there are a few fantastic recipes which made me say, “Wooow, I hope I will be able to make something like this some day”. Of course, after a good look and many photos of these desserts, I always gave up not having enough belief in my baking possibilities.
But, with time, after a lot of experience and time spent in the kitchen, my confidence began to grow. And in time missions in the kitchen that looked impossible were beginning to be solved. So I began to flirt with recipes like Chocolate Mousse Cake, Banana Chocolate Loaf Cake and similar.
Well, today it was turn for another chocolate masterpiece, Chocolate Lover’s Dream Cake. Only one look at the photos of this divine chocolate cake always made me drool.
Chocolate Lover’s Dream Cake
A heavenly delicious chocolate cakeyou’ve been dreaming of! So good, every bite is worthy of a celebration! After all, there is never too much chocolate, right?! It’s pure decadence in every single bite!!!
Chocolate Lover’s Dream Cake
I have to admit this cake is not the prettiest cake but with that chocolate ganache and grated dark chocolate on top it dresses it up and makes it look scrumptious.
You can serve this cake warm without ganache or cold with creamy ganache on top. I can guardsmen that there will be no leftovers of this cake. If you have chocolate lovers around you better stand back because they will run you over just to get a piece of this cake. This chocolate cake is wonderful for birthdays, bake sales, tea parties or any gathering.
If you are not a true chocoholic then move on. But if you are, then you must try this Chocolate Lover’s Dream Cake!!!
Check it out the Chocolate Lover’s Dream Cake recipe and printable version here!!
Put your own spin on it. And lemme know how it turns out. Post a photo on Facebook (Recipestable) or on Twitter so I can see how lovely yours turn out
Happy Baking!!
Pin it for later
Chocolate Lover’s Dream Cake ~ Pin it for later
ATTENTION: All photos and content are copyright protected. Please do not use our photos without prior written permission. If you wish to republish this recipe, please rewrite the recipe in your own unique words and link back to Chocolate Lovers Dream Cake Recipe on Recipestable. Thank you!
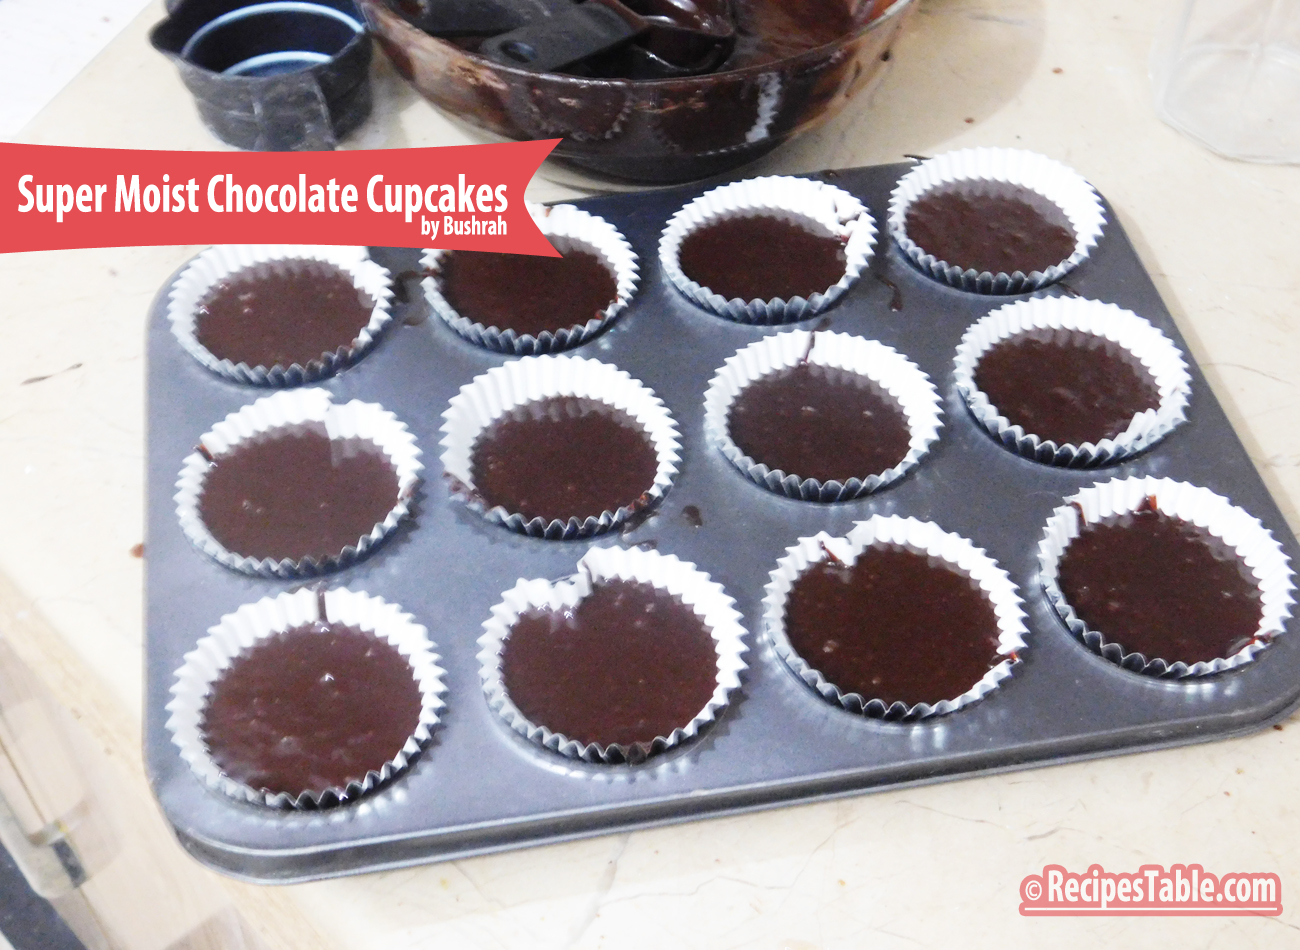
Like the title says, these are the ‘Super Easy,Super Moist Chocolate Cupcakes’. They are perfectly moist and insanely chocolaty, topped with More Chocolate Ganache & Coconut. Royal Treat ♥
Photo: Super Moist Chocolate Cupcakes
Looking for the perfect recipe can be exhausting because there are just so many out there. I’ve tried countless cupcakes over the years, but this is my top favorite recipe. I know we all have different preferences when it comes to our taste buds, but I honestly don’t think you can go wrong with this.
The absolute best recipe to make Chocolate Cupcakesthat are super easy, super moist, chocolaty and really delicious. If chocolate is what makes you go weak in the knees, then these are for you. This one is a must try for all Chocolate Lovers out there.
Photo: Super Moist Chocolate Cupcakes
I don’t know about you but I love cupcakes and I honestly don’t know many people that don’t love them. There’s something magical about a cupcake and adults are not immune to that magic.
Super easy, Super Moist Chocolate Cupcakes
I’m often asked to make desserts for family get together’s. picnic or parties. And it never fails, when I spend all day baking in the kitchen and come up with a signature dessert, it never gets the same response as cupcakes…sigh. So a while back I decided to give the people what they wanted, cupcakes!
Super easy, Super Moist Chocolate Cupcakes
One of the great things about this happy little dessert is that it doesn’t take long to make and it doesn’t break the bank! Not only is the dessert met with smiles and giggles, it’s an easy and inexpensive way to make everyone at the table happy! And making everyone happy is what its all about.
Super easy, Super Moist Chocolate Cupcakes
I made the Chocolate Coffee ganache with hot cream, good quality chocolate, butter and coffee extract. The higher the quality of chocolate used, the better the flavor and texture your ganache will have in the end. Coffee and coffee extract enhances the flavor of chocolate. It enhances the chocolate, and brings out the flavors in the chocolate while adding richness to the taste. I love to add coffee to all of my chocolate cakes. Some things are classics.I put chocolate cupcakes in that category. Pillows of rich chocolate cake. Top with chocolate ganache.
Pillows of rich chocolate cake. Top with chocolate ganache.
Check it out the Super Easy, Super Moist Chocolate Cupcakes recipe and printable version here!!
Extra Bonus Tips:
If you would like to add coffee to the recipe, either add 1 teaspoon espresso powder or instant coffee granules along with the sifted dry ingredients, or replace the water with room temperature brewed coffee.
Please make sure that you bake these for 20 minutes and not more. Baking timing is the most crucial thing for any cake recipe. A few minutes over and you’ll have a hard rock in the name of muffin. So keep checking!
And yes..no peeking and opening the oven door for the first 15 minutes at least.
Cupcakes are best the same day they’re made, but can be kept in an airtight container at room temperature for up to 3 days.
Un-frosted cupcakes can be kept in the freezer for up to 2 months. Thaw, still covered, on the counter or overnight in the fridge.
I have also posted Vanilla Cupcakes with Chocolate Frosting recipewhich is another easiest & tastiest version of making cupcakes home. Do check it out as well. It’s finger lickin’ good. You’ll be coming back for more.
Put your own spin on it. And lemme know how it turns out. Post a photo on Facebook (Recipestable) or on Twitter so I can see how lovely yours turn out.
Happy Cupcakes Making!!
ATTENTION: All photos and content are copyright protected. Please do not use our photos without prior written permission. If you wish to republish this recipe, please rewrite the recipe in your own unique words and link back to Super Easy, Super Moist Chocolate Cupcakes on Recipestable. Thank you!
I hope everyone has a beautiful, positive and productive week. Today starts a new chapter in my life, ‘Uni started again’. Hopefully, I’ll try to update the blog more regularly. (InshaAllah)
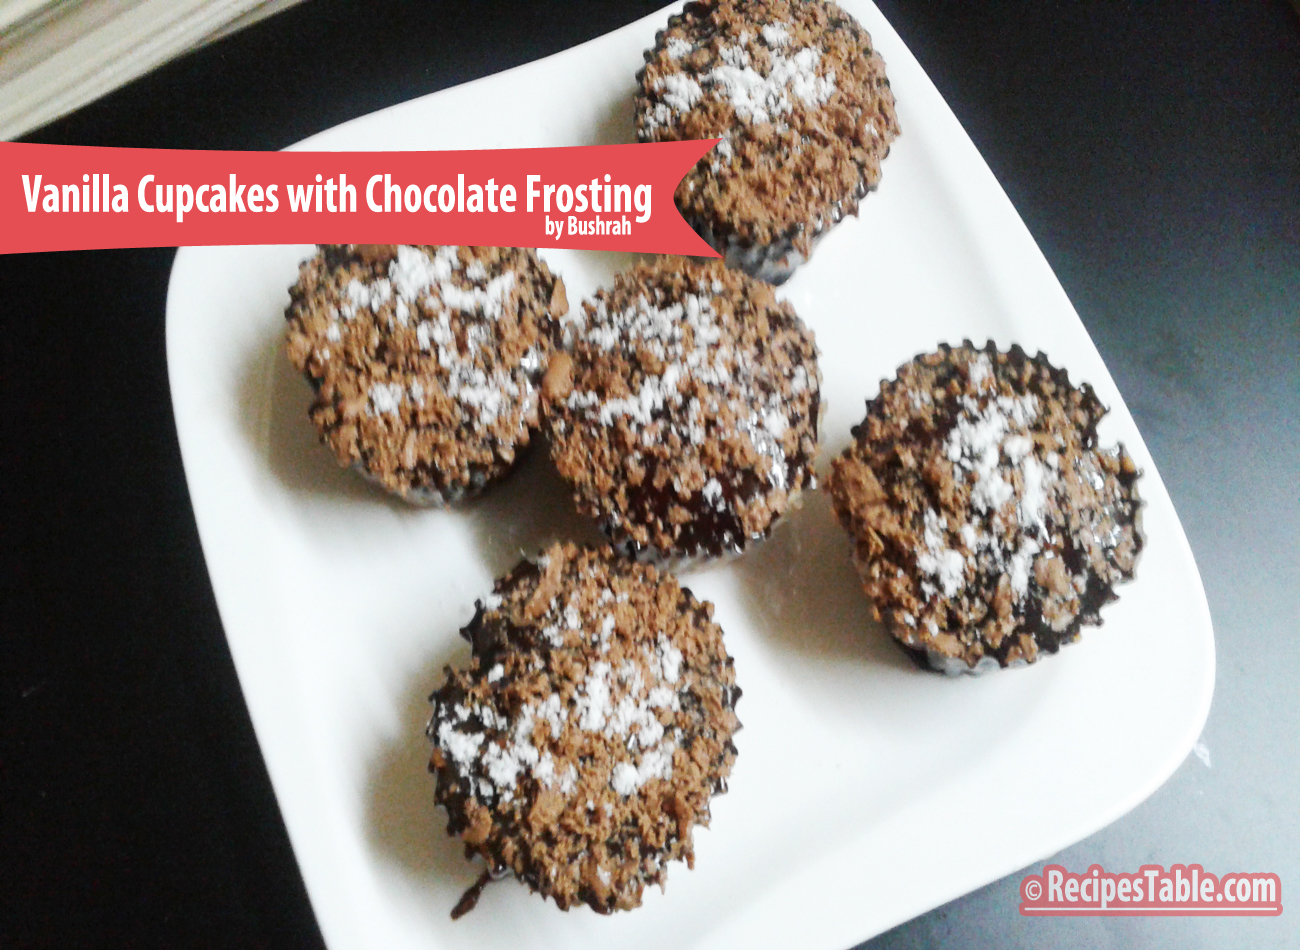
Vanilla Cupcakes with Chocolate Frosting
Do you find ways to celebrate everyday occasions like me?
Let’s Celebrate This Special Day with Vanilla Cupcakes!
Cupcakes are an easy way to make an beautiful yet tasty dessert without much effort. Today I’m sharing one of my favorite Vanilla Cupcakes recipe. I love this recipe because it includes butter milk to make it lighter and fluffier. The best ever recipe that makes the moistest cupcakes and perfect chocolate on top of it! This recipe is perfect for the upcoming holiday summer season and is sure to become a favorite.
Vanilla Cupcakes with Chocolate Frosting
I actually made these a long time back but never really got around to editing the pictures which is why I didn’t post them. They look super pretty and I wanted them to look like it in the pictures so I took my time with them.
Vanilla Cupcakes
These cupcakes are plain vanilla flavored (which is very difficult to get right) and are so moist that they’ll actually dissolve in your mouth the minute you take a bite. Pillowy soft, these cupcakes are topped with favorite chocolate frosting made with unsalted butter and whipping cream which gives it that perfect flavour without making it heavy.
Vanilla Cupcakes with Chocolate Frosting
Having a staple recipe is so handy, and this one is great with other flavours added. The frosting.. well it’s a whole other thing! It is divine, and rich, and well, perfect to go with anything.
Check it out the Vanilla Cupcakes with Chocolate Frosting recipe and printable version here!!
Extra-Bonus Tip:
Dark chocolate lovers, be sure to use bittersweet chocolate.
I have also posted Extra Easy Cupcakes recipewhich are another easiest & tastiest version of making cupcakes home. Do check it out as well. It’s finger lickin’ good. You’ll be coming back for more.
Put your own spin on it. And lemme know how it turns out. Post a photo on Facebook (Recipestable) or on Twitter so I can see how lovely yours turn out.
Samosas are always hit appetizer or snack of tea party and iftar even now it’s included in wedding dinner’s appetizer also. Today, I m sharing my Chocolate Samosa recipe with all of you. Crispy samosas with chocolate and walnut is a classic snack for everyone. Try once you will love it for sure
Bismillah, let’s get started!
Check it out the Chocolate Samosa recipe and printable version below.
If you like this post, Please Subscribe to my blog and let me know your feedback by commenting below.. I have lots more recipes to share with you.
In the Name of Allah, Most Gracious, Most Merciful
Its been a long time since I’ve posted something here, its has been a busy month.Actually I was really busy in my studies…..Sorry, I didnt get time to post anything.
Chocolate Banana Filled Pancake Rolls
Looking for a nice relaxing breakfast or dessert. Pancake Rolls? Today, I’ll share another pancake rolls recipe ~ “Chocolate and Banana Filled Pancake Rolls”,I made this a while back, clicked pictures but never got around to posting it. The recipes are piling up ! I’ll post a lot more soon, InshAllah.
Photo: Chocolate and Banana Filled Pancake Rolls
I made plain pancakes and spread generously with choco bliss and topped further with honey but it really is like a plain canvas for your imagination to run wild with flavours! So I decided to give my simple pancakes a new twist. Roll-up in banana slices and topped with chocolate curls.
Photo: Chocolate and Banana Filled Pancake Rolls
You can add strawberries, apples, dried fruits and berry compote in the mixture! It’s up to you take pleasure in feeling like a domestic queen. A perfect way to start a day.
Photo: Chocolate and Banana Filled Pancake Rolls
Check it out the Chocolate and Banana Filled Pancake Rolls recipe and printable version below!!
Recipe Note’s:
In this recipe, I made the batter a little thin because I wanted the pancakes to thin, more like crepes. For more traditional pancakes, use only about 1/2 cup milk.
Put your own spin on it. And lemme know how it turns out. Post a photo on Facebook (Recipestable) or on Twitter so I can see how lovely yours turn out.
I have also posted Chocolate Chip Pancakeswhich is another easiest version of making tea time snack or lunch box item . Do check it out as well.
Happy Pancakes making!!
If you like this Chocolate and Banana Filled Pancake Rolls, Please Subscribe to my blog. I have lots more recipes to share with you. And If you make it then let me know your feedback by commenting below.
In the Name of Allah, Most Gracious, Most Merciful
Hope, you are doing splendidly and enjoying the season. Well I’m in the middle of work, and anxiety has begun to sink its sharp little claws into my brain. It’s almost the final month of my training and I’m already drowning under a sea of coding assignments and project.
Ahhh I love to code even though it makes me want to tear my eyes out every 10 minutes. Crying Out Loud ;( I have constant fears that I’ve forgotten the code, functions, or left something somewhere blah blah blah. Problem is I love it but I have too much code to write though… ugh. This assignment is really doing my nut in!
I’ m carving chocolate soo bad while coding up my project and backing up files. Every time I write a code, I delete it again. Almost time for a pancake break 😛 Anyhow before going back to coding, I decided to update you guys with this short post.
If there’s one thing you should know about me right up front it’s that I love Chocolate and pancakes, always have. Chocolate chips, Pancakes, foggy weather and coding are the reasons I love life. Sounds super yummy!
Pancakes are probably in my Top 10 favorite foods. But they need chocolate chips. 🙂
Time for a Chocolate Chip Pancakes Break.
No matter how difficult life gets, just remember, there’s always time for a Pancakes break. 😀 These Chocolate Chip Pancakes have been a blessing while trying to write my final coding project. lol. They simple to make, so comforting, and lightened up with a few delicious tweaks.
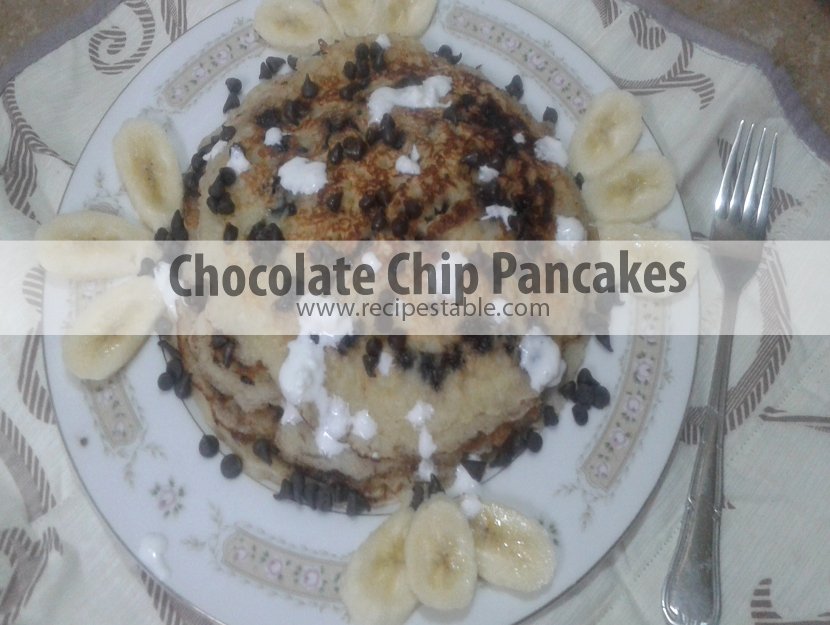
Photo: Chocolate Chip Pancakes
This Chocolate Chip Pancakes recipe is a favorite of mine to make for special occasions or holidays. Eat while hot so the chocolate is all gooey. If you want to make it extra special, serve the pancakes with berries and whipped cream
Photo: Chocolate Chip Pancakes
It was love at first bite, I’m telling you. The texture is fluffy but hearty and slightly dense, and plenty moist from the butter. They’re perfectly sweet even without any additional sugar – the chocolate chips provide a touch of decadence.
Photo: Chocolate Chip Pancakes
They’re super tasty, easy to make, and use regular everyday ingredients.
Ingredients You will Need to Make These Pancakes
Ingredients You will Need:
Flour
Sugar
Baking Powder
Cinnamon Powder
Salt
Eggs
Milk
Butter
Vanilla Essence
Chocolate Chips
Tools You needed to make this recipe are:
A pan or griddle
A Spatula
A Mixing Bowl
Hand Beater
Check it out the Chocolate Chip Pancakes Recipe and printable version below!!
Tips For Diet Version Pancakes (Clean Eating):
You can make gluten free Pancakes by using gluten-free oats and flour.
For Sweeting: Add 1 Tablespoons of honey, apple syrup, or nectar is optional for extra sweetening, but I didn’t find it necessary.
Don’t add butter. Mash very ripe banana with baking powder. It gives
them a moist and fluffy texture.
Serve plain or with a small drizzle of honey and a few additional chocolate chips for melting.
Put your own spin on it. And lemme know how it turns out. Post a photo on Facebook (Recipestable) or on Twitter so I can see how lovely yours turn out.
Happy Chocolate Pancakes making!
If you like this Chocolate Chip Pancakes Recipe, Please Subscribe to my blog. I have lots more recipes to share with you. And If you make it then let me know your feedback by commenting below.
In the Name of Allah, Most Gracious, Most Merciful
GOOD MORNING MY LOVELY READERS!!
Good morning my fellow readers
I hope you are well and happy today. The sun is shining brightly here this morning and the air is crisp. I need a little sun today and wireless signals are surprisingly good :P. So right Now, sitting in my roof top garden with my lappy writing today’s blog post and enjoying my morning tea. And beautiful pairs of sparrows and pigeons are also enjoying the morning sun with me. I love to hear the birds chirping in the morning – sweet songs of nature ♥☺
Great start to the day.
Trying to decide what to make for Quick Breakfast or Brunch, OR Snack? No worries, I’ve got you covered in today’s all new post.
Today’s Recipe: Chocolate Date Bars
SUPER healthy, naturally sweetened Chocolate Date Bars!! Just 7 ingredients to a snack that tastes more like a candy bar!! YUM YUM. The result is a simple, naturally-sweetened, healthy Date bars that is a little on the decadent side – just the way I like it.
Photo: Chocolate Date Bars Recipe
They taste like Supreme awesomeness. They’re rich, dense, moist, super chocolaty, nutty, slightly crunchy and perfectly sweet and very filling.
Photo: Chocolate Date Bars Recipe
These Chocolate Date Bars DO indeed taste like a raw brownie. 😛
They require just 7 ingredients.
They’re no bake, aside from toasting your nuts (an optional step).
They’re loaded with antioxidants, protein and healthy fats.
They’re incredibly satisfying.
They’re perfect for breakfast, dessert or a quick snack.
They’re freezer-friendly.
They’re uber chocolatey.
They’re really just kind of perfect.
I did have one for breakfast and found it quite filling. But for the most part I ate these as a healthy dessert. I’d go to the freezer, break off 1/3 and snack. Then repeat for the next 30 minutes until it was gone. Self control comes in waves, people, especially with these bars. 😛 ☺
Really I should stop praising and tell you the recipe. So Let’s get started !
Tools You needed to make this recipe are:
A cookie sheet
A frying pan
A Spatula
Check it out the Chocolate Date Bars Recipe and printable version below!!
You MUST try these Date bars and let me know what you think! Post a photo on Facebook (Recipestable) or on Twitter so I can see how lovely yours turn out.
Happy Chocolate Date Bars making!
If you like this Chocolate Date Bars Recipe, Please Subscribe to my blog. I have lots more recipes to share with you. And If you make it then let me know your feedback by commenting below.
Do you love Chocolate Bars? Have you ever thought of making your own versions at home? Homemade bounty bars are so easy to make – you only need 3 ingredients!
Photo: Homemade Bounty Bars Recipe
So these may not be the best looking bounty bars ever, but they taste just like the real thing! Trust me when I say that it doesn’t matter what they look like. But first of all, if you’ve never had a bounty bar before, they are amazing, especially if you like coconut.
The sweet coconut filling is not as hard to make as you might think, a simple combination of coconut and condensed milk will recreate the filling of the classic chocolate bar.
Photo: Homemade Bounty Bars Recipe
Bounty bars are one of my brother favorite chocolates, so I wanted to surprise him with these. When a friend posted a simple recipe for homemade Bounty bars, I had to try it.They are so easy to make, it literally only takes 30 seconds to mix the ingredients together, and then a few minutes to shape the bars and coat them in chocolate.
When he found them in the fridge and tried them, he had to come and tell me how they tasted just like the real thing. So if a true bounty bar fan can’t tell the difference, well then these must be pretty close to the real thing. Perfect for the holiday season or any occasion!
Check it out the Homemade Chocolate Bars Recipe and printable version below!!
Have you ever thought of making your own versions at home? They are so easy to make – you only need 3 ingredients. Do try my Homemade Bounty Bars Recipe, you’r kids will love it.
Prep Time 50 minutesminutes
Cook Time 2 minutesminutes
Total Time 52 minutesminutes
Servings 12
Author Bushrah | Recipestable
Ingredients
3cupssweetened shredded coconut
3cupsmilk or plain chocolate
1-1/2can condensed milk
Instructions
Directions
Place coconut in a large bowl.
Pour the condensed milk over the coconut and stir until evenly mixed.
Make a thick and sticky paste.
Take handfuls of the coconut mixture and shape into bars.
Arrange on a lined baking tray and put in the refrigerator for 1 hour to firm up.
Meanwhile, melt the chocolate in the microwave.
Let it cool.
Spoon the chocolate over the coconut bars and leave on a wire rack to harden.
Place a plate under the wire rack to catch excess chocolate.
Once a little set, put onto some grease proof paper and place in the fridge to set. Your Homemade Chocolate Bars are ready to enjoy!!
Notes
Notes: You can make them as big or as small as you like. The coconut will not go too firm but it will hold it’s shape.Serving Suggestions: Serve with a glass of milk.
If you like this Homemade Chocolate Bars Recipe,Please Subscribe to my blog. I have lots more recipes to share with you. And If you make it then let me know your feedback by commenting below.
This gorgeous pudding has a taste of vanilla and chocolate in it. Rather then traditional pudding, hot Chocolate Pudding with Vanilla Custard can delightedly serve at the end of meal. Discover the Hot Chocolate Pudding Recipe
Photo: Hot Chocolate Pudding Recipe
Check it out the Hot Chocolate Pudding Recipe here!!
Prep Time:20 minutes
Cook Time:45 minutes
Servings: 4
Ingredients
For Chocolate Pudding:
2 cups milk
1/2 cup sugar
4 eggs
2 tbsp plain flour
2 tbsp cocoa powder
1/2 tsp vanilla essence
For Vanilla Custard:
1 cup milk
1/2 cup fresh cream
2 tbsp sugar
1 tbsp vanilla custard powder
few drops of vanilla essence
Directions:
For Chocolate Pudding:
Preheat oven to 180 degree C.
Pour milk in a saucepan.
Bring to a boil, add cocoa powder and sugar.
Stir well.
Cook for 5 minutes or until sugar has dissolved.
Remove from the heat and keep aside.
In a large bowl, beat eggs for 3-4 minutes or until fluffy.
Stir in vanilla essence.
Now add boiled milk mixture.
Beat well.
Also add flour and mix well.
Now bake in the preheated oven for 30 minutes.
For Vanilla Custard:
In a saucepan , add milk and sugar.
Bring to a boil and cook for 2-3 minutes.
Then stir in vanilla essence.
Dissolve vanilla custard in 2 tbsp milk.
Gradually pour custard mixture into the sauce.
Keep stirring.
Cook for 5 minutes or until thickened.
Remove from the heat and take it out in a serving bowl.
Hot chocolate pudding with vanilla custard is ready to serve.
Enjoy!
Serve as a dessert after any meal.
If you like Hot Chocolate Pudding Recipe and make it then let me know your feedback by commenting below.And if you know more innovative ways in which we can utilize this sweet and mouth watering Hot Chocolate Pudding , do share with us and we would be glad to give it a try.
This is a tasty smoothiealternative when you really feel like a sweet chocolatey hit.Try this mouthwatering Rich Chocolate Smoothie recipe
Check it out the Rich Chocolate Smoothie Recipe here!!
Prep Time:5 minutes
Cook Time: not required
Servings:1
Ingredients
1 cup yogurt
1 glass milk
1 tsp coffee powder
1 tsp cocoa powder
2 tsp sugar
4 tbsp cream
1 tbsp grated chocolate
1 cup ice, crushed
Directions:
Place yogurt, milk, coffee, cocoa powder, sugar, cream, and ice in a blender.
Process until smooth.
Pour into a serving glass.
Top with grated chocolate.
Rich Chocolate Smoothie is ready to serve.
Serve immediately.
Serve with Cookies, Biscuits or brownies.
If you like Rich Chocolate Smoothie Recipe and make it then let me know your feedback by commenting below.And if you know more innovative ways in which we can utilize this sweet and mouthwatering Rich Chocolate Smoothie, do share with us and we would be glad to give it a try.
Molten Lava cakes also known as chocolate lava cakes. They are rich individual chocolate cakes with oozing molten centers. Try this Molten Lava Cakes recipe and make these rich and impressive single-serving chocolate cakes.Decadent and delicious, these are the ideal dessert for any Special Occasion.
This rich and decadent Chocolate mousse cake is the ultimate CHOCOLATY DELIGHT.Chocolate cake with chocolate moussefilling and topped off with dark chocolate ganache. Must Try this Chocolate Mousse Cake recipe; everyone will think you bought it at a bakery!
Photo: Chocolate Mousse Cake Recipe
Check it out the Chocolate Mousse Cake Recipe here!!
In a large bowl, mix together sugar, flour, cocoa powder, baking powder and salt.
Step 4
Add milk, eggs, oil and vanilla. Stir with spatula for few minutes or until the batter is smooth and no lumps remain.
Step 5
Now add baking soda and mix well.
Step 6
Stir in the boiling water.
Step 7
Pour batter equally into prepared baking pans.
Step 8
Bake in the preheated oven for 30-35 minutes or until a tooth-pick inserted in the center comes out clean.
Step 9
Let it cool for 10 minutes then remove from the pans
to wire racks.
Step 10
Allow to cool completely.Chocolate Cake Sponge is ready 🙂
To Make The Chocolate Mousse:
Meanwhile cake is oven, let’s prepare the Chocolate Mousse.
Step 1
Place heavy cream in a large bowl. Beat for 10-12
minutes or until it forms stiff peaks.
Step 2
Place in the refrigerator until set.
Step 3
Take a small bowl, add egg yolk and sugar in it. Beat 3-4 minutes or until it becomes thick and pale in color and the sugar fully dissolved.
Step 4
Keep aside.
Step 5
Take a small pan and fill it with an inch of water.
Step 6
Bring it to a simmer.
Step 7
Place a small heat-proof bowl over the saucepan.
Step 8
Add the chocolate, water, and butter. Stir and cook on very low heat for few minutes or until the chocolate is melted.
Step 9
Spoon 1/4 of the chocolate mixture into the egg yolk
mixture. Stir until well combined.
Step 10
Pour the egg yolk mixture back into the small bowl over the simmering water in the saucepan with the remaining chocolate mixture.
Step 11
Stir in the vanilla extract.
Step 12
Keep stirring and cook over low heat for 2-3 minutes or until the mixture thickens.
Step 13
Let it cool for few minutes; stirring frequently.
Step 14
Place egg whites in another small bowl. Beat until it forms stiff peaks.
Step 15
Fold the egg white in the cooled chocolate mixture.
Step 16
Now fold into the whipped heavy cream.
Note: Be careful not to over mix otherwise the heavy cream will lose its texture.
To Assemble The Cake
Step 1
Cut the top dome texture of the cake sponges. This will help you to get a flat and even surface.
Step 2
Arrange the bottom layer of the cake in the spring form pan.
Step 3
Pour the thick chocolate mousse over the cake sponge.
Step 4
Spread evenly with a spatula.
Step 5
Now cover the pan with cling wrap or any plastic covering.
Step 6
Place the pan in the refrigerator for 20 minutes or until set.
Step 7
Remove the pan and gently place the second cake sponge on top of the mousse.
Step 8
Cover again and keep in the refrigerator for 30 minutes or until firm or set.
To Make Chocolate Ganache
Step 1
Place the chocolate in a medium bowl.
Step 2
Heat the heavy cream in a small sauce pan over medium heat.
Step 3
Bring just to a boil.
Step 4
When the cream has come to a boil, immediately pour over the chopped chocolate and stir until smooth.
Step 5
Stir in the 1/2 teaspoon of vanilla essence.
Step 6
Let it cool slightly.
Step 7
When cool, pour the chocolate ganache in the the center of the cake, it will slowly spread itself.
Step 8
Finally, cover the cake and refrigerate overnight or until the cake sets.
To Decorate The Chocolate Mousse Cake:
Step 1
When the cake has set, decorate the cake with chocolate curls and hazelnuts or walnuts.
Step 2
Slide the cake out of the pan and transfer to a cake plate. Mouthwatering Chocolate Mousse Cake is ready to eat!! ENJOY 😉
[/tab]
[tab]
Tip To Assemble the Cake: You will need a spring-form pan or a cake ring to hold everything neatly as the cake sets. So that you can later easily un-mold your cake once the mousse has set without ruining the delicate layers. If you don’t have a spring-form or cake ring, you can do this in a regular pan, make sure it is the same size as your cake. Serving out of a regular pan can be a bit tricky though as it will be hard to lift out the cake neatly with that soft creamy mousse in the middle.
Tip To Make Chocolate Mousse: If you want the mousse layer to show neatly and evenly through the cake, take an offset spatula or cut out a small rectangular piece off a tetra pack or hard paper and run it over the mousse around the circumference of the cake to remove the excess mousse, and give it a smoother finish.
Tip To Decorate The Cake: You can top the cake with whipped cream, cherries any type of nuts or leave it as is.
Tip To Make Chocolate Ganache: While making Chocolate ganache,don’t over boil the cream because if it boils for a few seconds, it will boil out of the pot.
Tip To Make Thicker Ganache: If you want a thicker consistency for piping the ganache, just let it cool for a longer time.
[/tab]
[tab]
Serve as a dessert after any meal or birthday party or any other special occasion.
[/tab] [/tabs]
If you like Chocolate Mousse Cake recipe and make it then let me know your feedback by commenting below.
Get an Energetic Beverage with coffee texture and chocolate chunks and in every sip for your kids and all. Try thisCoffee Toffee Shake Recipe, you’ll love it.
Photo: Coffee Toffee Shake Recipe
Prep Time:10 minutes
Cook Time: not required
Servings:2
Ingredients
1 glass milk
1 caramel chocolate
2 tbsp sugar
2 tbsp chocolate syrup
1 tsp coffee
1/2 cup fresh cream
1 cup ice cubes
2 drops vanilla essence
chocolate chunks as required
Directions:
Place all ingredients except chocolate syrup in a blender.
Process until well blended.
Pour into glasses and add chocolate chunks.
Top with chocolate syrup.
Coffee Toffee Shake is ready to serve.
Serve with cookies.
If you like Coffee Toffee Shake Recipe and make it then let me know your feedback by commenting below.
If you like your brownies chewy in the middle and crisp on the outside edges, then this Chewy Chocolate Brownies Recipe is for you. It’s fudgy, chewy and delicious!
Photo: Chewy Chocolate Brownies Recipe
Check it out the Chewy Chocolate Brownies Recipe here !!
Prep Time:10 minutes
Bake Time:30 minutes
Servings: 8
Ingredients
8 ounces chocolate
100 gm butter
3 eggs
1 cup flour
1 cup sugar
1/2 cup walnuts
1/2 tsp vanilla essence
1/2 tsp baking powder
1/4 tsp salt
Directions
Preheat oven to 180 degree C.
Place chocolate, butter, sugar and water in a microwaveable bowl.
Microwave for 2 minutes.
Let it cool completely.
In a separate bowl, sieve together flour, baking powder and salt.
Mix well.
Add eggs in chocolate mixture.
Beat well until smooth.
Then fold in sieved flour mixture.
Also add walnuts and vanilla essence.
Mix well.
Pour this mixture in greased baking dish.
Bake for 30 minutes or until toothpick insert into the center comes out clean.
Let it cool on the wire rack.
Remove from the oven.
Cut into squares.
Chewy Chocolate Brownies are ready to serve.
Serve with a glass of milk.
If you like Chewy Chocolate Brownies Recipe and make it then let me know your feedback by commenting below.
ChoColic is a wonderful chocolaty shake, packed with chocolate, designed specially for chocohilics wanting to cool down with a chocolaty drink! chocolate syrup, cream, ice-cream, milk plenty of richness!
Photo: Chocolic Thick Shake Recipe
Check it out the Chocolic Thick Shake Recipe here!!
Prep Time: 10 minutes
Cook Time: not required
Servings:2
Ingredients
4 scoops chocolate ice cream
4 tbsp fresh cream
4 tbsp chocolate syrup
1 tbsp caster sugar
1/2 cup milk
1 cup ice cubes
Directions:
Place all ingredients except ice cream in a blender.
Blend for 1 minute or until smooth.
Pour into serving glasses
Add ice-cream scoop in the serving glasses.
Top with grated chocolate.
Cho-Colic Thick Shake is ready now.
Serve chilled.
Serve chilled with Chocolate cookies.
If you like Cho-Colic Thick Shake Recipe and make it then let me know your feedback by commenting below.
Who don’t like to eat bounty? How is it possible when a drink is made with bounty and some resist! Vanilla ice cream adds an extra flavor in Bounty Smoothie. You can serve it in kids party.
Check it out the Bounty Smoothie Recipe here!
Prep Time: 10 minutes
Cook Time: not required
Servings:4
Ingredients
4 bounty chocolate
4 scoop vanilla ice cream
2 tbsp fresh cream
1/2 cup milk
1 cup ice, crushed
Directions:
Place bounty chocolate,vanilla ice cream, milk, cream and crushed ice in a blender.
Blend for 1 minutes or until creamy and smooth.
Pour into glasses.
Top with flaked coconut and chocolate syrup.
Bounty Smoothie is ready to serve. ENJOY!!
Serve chilled with any cookies or biscuits.
If you like Bounty Smoothie Recipe and make it then let me know your feedback by commenting below.