Tag: tea time snack

  • Crunchy Vegetable Nuggets Recipe

    Crunchy Vegetable Nuggets

    Are you looking for a healthy alternative for processed chicken nuggets? This Crunchy Vegetable Nuggets Recipe is sure to be a favorite for your kids.

    Crunchy Vegetable Nuggets Recipe
    Photo: Crunchy Vegetable Nuggets Recipe

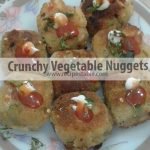
    These Vegetable Nuggets are crispy from the outside and soft from inside comprising of different flavours of many vegetables, cheese and herbs. This is the best way to turn vegetables into tiny kid-friendly nuggets. Making homemade veggie nuggets isn’t hard and beat the store-bought.

    Crunchy Vegetable Nuggets Recipe
    Photo: Crunchy Vegetable Nuggets Recipe

    You can serve Vegetable Nuggets with tea in the evening or as a starter to your guests. Do try it!!
    Check it out the Crunchy Vegetable Nuggets Recipe and printable version below!!

    Crunchy Vegetable Nuggets

    Are you looking for a healthy alternative for processed chicken nuggets? This Crunchy Vegetable Nuggets Recipe is sure to be a favorite for your kids.
    Prep Time 20 minutes
    Cook Time 10 minutes
    Total Time 30 minutes
    Servings 6
    Author Bushrah | Recipestabale

    Ingredients

    • 2 boiled potatoes
    • 1/2 cup grated carrots
    • 1/4 cup sweet corn
    • 1/4 cup boiled green peas
    • 1/4 cup green beans trimmed and boiled
    • 1/4 cup cheese grated
    • 1/2 teaspoon mixed herbs basil, parsley
    • 2 tablespoon chopped coriander leaves
    • 1/2 teaspoon black pepper
    • Salt To Taste
    • 1 egg lightly beaten
    • 2 tablespoon plain flour
    • 2 tablespoon cornflour
    • 1/2 cup bread crumbs
    • Oil for deep frying

    Instructions

    Directions

    • In a large bowl, combine together the boiled potatoes, grated carrots, beans, green peas and sweet corns.
    • Season with herbs, salt and pepper.
    • Add corainder leaves and cheese. Mix until well combined.
    • Now add add plain flour,cornflour in it.
    • Shape into nuggets.
    • Place bread crumbs in a shallow bowl.
    • Dip vegetable nuggets in egg then coat with bread crumbs.
    • Heat oil in a deep pan over medium heat.
    • Deep fry nuggets for 2-3 minutes or until golden brown.
    • Remove from the oil and absorbent on kitchen paper.Crunchy Vegetable Nuggets are ready to serve. ENJOY!!

    Notes

    Serving Suggestions:
    Serve with tomato ketchup or your favorite dipping sauce.

    Note: For a healthier version of these nuggets, you can bake them. After you bread them, lay them out on a baking sheet and drizzle with olive oil. They will probably need to bake at 350-400 degrees F. for 15-20 minutes to get nice and crispy.

    I have also posted Chicken Nuggets Recipe which is another quick version of making Nuggets. Do check it out as well.

    [divider]

    If you like this Crunchy Vegetable Nuggets Recipe,Please Subscribe to my blog. I have lots more recipes to share with you. And If you make it then let me know your feedback by commenting below.

  • Party Appetizer Alert: Reshmi Samosa Recipe (Crowd-Pleaser!)

    Reshmi Samosa

    Samosa is an important meal of Iftar time. Reshmi Samosa _ Crisp, light and hot and bursting with flavour. This Reshmi Samosa recipe has a special taste of samosa with chicken, mayonnaise, cream and other seasonings. Do try it and make reshmi samosa on next Iftar to feed your friends & family. Goes great with ketchup or imli sauce.

    Reshmi Samosa Recipe
    Photo: Reshmi Samosa Recipe

    Check it out the Reshmi Samosa Recipe here!!

    Reshmi Samosa Recipe

    Course Appetizer, Comfort Food, Snack
    Cuisine Indian, Pakistani
    Keyword Chicken, Iftar Recipes, kids friendly, Quick and Easy, Ramadan, samosa, snack
    Prep Time 20 minutes
    Cook Time 10 minutes
    Total Time 30 minutes
    Servings 12
    Author Bushra Waheed

    Ingredients

    For Samosa Filling:

    • 250 gm boneless chicken cut into strips
    • 2 tablespoon vegetable oil
    • 2 tablespoon fresh coriander leaves
    • 2 tablespoon fresh mint leaves
    • 1 teaspoon ginger garlic paste
    • 2 green onions thinly sliced
    • 4 green chilies thinly sliced
    • 1 tablespoon fresh cream
    • 1 tablespoon mayonnaise
    • 1/2 teaspoon cumin powder
    • 1/2 teaspoon black pepper
    • salt to taste

    For Samosa

    • 12 samosa sheets samosa patti’s
    • oil for deep frying

    Instructions

    • Heat 2 tablespoon oil in a frying pan. Add ginger garlic paste and fry for few minutes.
    • When the aroma comes out, add chicken strips.
    • Cover with a lid and cook on low heat for 5-8 minutes or until chicken is no longer pink.
    • When all water dries up, take it out in a dish.
    • Allow to cool and shred the cooked chicken.
    • Now add green chilies, green onion, mint and coriander leaves.
    • Season with cumin powder, black pepper and salt .
    • Stir in the mayonnaise and fresh cream.
    • Place 1 teaspoon of filling onto a samosa sheet ( samosa patti).
    • Fold samosa sheet around filling into a triangular shape. Seal edges with egg yolks or cold water.
    • Repeat this method with remaining ingredients.
    • Heat oil in a deep pan over medium heat.
    • Fry Reshmi samosa’s in hot oil for 1-2 minutes or until they turn crispy and golden brown.
    • Drain on absorbent paper. Reshmi Samosa is ready to serve. ENJOY!!

    Notes

    Serve with imli ki chutney.

    If you like Reshmi Samosa Recipe and make it then let me know your feedback by commenting below.And if you know more innovative ways in which we can utilize this mouth watering Reshmi Samosa, do share with us and we would be glad to give it a try.

  • Ramadan Special: Achari Aloo Samosa Recipe for Iftar

    Achari Aloo Samosa

    Achari Aloo Samosa is a special appetizer to give you a combo taste of aloo samosa and achar(pickle).Very easy and quick Achari Aloo Samosa recipe. Don’t wait and must try my Achari Aloo Samosa recipe and don’t forget to share your experience with us!.

     Achari Aloo Samosa Recipe
    Photo: Achari Aloo Samosa Recipe

    Check it out the Achari Aloo Samosa Recipe here!!

    Achari Aloo Samosa Recipe

    Course Appetizer, Snack
    Cuisine Indian, Pakistani
    Keyword fried food, Iftar Recipes, potato, Ramadan, samosa
    Prep Time 20 minutes
    Cook Time 10 minutes
    Total Time 30 minutes
    Servings 12
    Author Bushra Waheed

    Ingredients

    • For Filling:
    • 4 boiled potatoes
    • 1 small onion minced
    • 2 tablespoon fresh coriander leaves
    • 2 tablespoon chopped mint leaves
    • 2 green chilies finely chopped
    • 1 tablespoon achar masala
    • 1 teaspoon lemon juice
    • 1 teaspoon dry mango powder
    • 1 teaspoon crushed red chili
    • salt to taste
    • For Samosa
    • samosa wraps as required
    • oil for frying

    Instructions

    • Mash potatoes in a large bowl.
    • Add onion, fresh coriander, mint, green chilies, and lemon juice.
    • Season with achar masala, dry mango powder, red chili and salt. Mix until well combined.
    • Place a samosa wrap on a clean, dry surface and put a portion of the potato filling in one corner of the samosa patti and fold into a triangle.
    • Apply a little water at the edges and seal it.
    • Repeat with the remaining wraps and stuffing to make more samosas.
    • Heat the oil in a pan over medium heat.
    • Deep-fry the samosas in batches till they turn golden brown in colour from all sides.
    • Drain on absorbent paper. Achari Aloo Samosa is ready to serve. ENJOY!

    Notes

    Serve with mint chutney.

    If you like Achari Aloo Samosa Recipe and make it then let me know your feedback by commenting below.And if you know more innovative ways in which we can utilize this mouth watering Achari Aloo Samosa, do share with us and we would be glad to give it a try.

  • Potato Pakora Sticks Recipe

    Potato Pakora Sticks Recipe

    Pakoras are fried snack found all across Asia and are preferred most during Ramadan. As we all know Ramadan are just around the corner, and it is the time of the year when one can try something new Pakora recipes.

    Below is an easy to make, very interesting Potato Pakora Sticks recipe, you can make these pakora sticks with any seasonal veggies of your choice.

    Potato Pakora Sticks Recipe
    Photo: Potato Pakora Sticks Recipe

    Check it out the Potato Pakora Sticks Recipe here!!

    Potato Pakora Sticks Recipe

    Course Appetizer, Snack
    Cuisine Indian, Pakistani
    Keyword 30 minutes meals, Iftar Recipes, pakora, potato, Ramadan
    Prep Time 10 minutes
    Cook Time 20 minutes
    Total Time 30 minutes
    Servings 6
    Author Bushra Waheed

    Ingredients

    • 3 potatoes
    • 1 cup chickpea flour
    • 2 tablespoon rice flour
    • a pinch of baking powder
    • 1/2 cup water
    • 1/2 teaspoon chili powder
    • 1/2 teaspoon cumin powder
    • 1/2 teaspoon chaat masala powder
    • salt to taste
    • oil for deep frying

    Instructions

    • Peel potatoes and cut into thick sticks of equal size.
    • In a bowl, mix together the chickpea flour, rice flour, salt, chaat masala, red chili and cumin powder.
    • Add water and make a thick batter.
    • Now add a pinch of baking powder
    • Heat oil in a deep frying pan.Check the oil by dropping a drop of the batter in the oil.
    • Now dip the potato sticks in the batter and drop it one by one in the hot oil.
    • Fry on medium heat for 10 minutes or until it turns crispy and golden brown.
    • Take it out on a paper towel to take out the excess oil.  Potato Pakora Sticks are ready to nibble anytime.

    Notes

    Serve with your favorite dipping sauce.
  • Super Easy Rainbow Bread Rolls Recipe

    Rainbow Bread Rolls

    Bread rolls is one of the favourite Ramadan recipes. There are several recipes of bread rolls different from each other. One recipe is listed below with a distinct taste made with chicken, green chutney and tomato ketchup filling. Thrice coloured Bread Rolls.

    Rainbow Bread Rolls Recipe
    Photo: Rainbow Bread Rolls Recipe

    All those who are new to cooking and desire to attempt something easy and unproblematic yet lip-smacking then they should go for this Rainbow Bread Rolls recipe. It can be a perfect addition to your Iftar meal and can be less expensive and better tasting than other bread rolls. Rainbow bread rolls take bit more time, but they add a special touch.

    Rainbow Bread Rolls Recipe
    Photo: Rainbow Bread Rolls Recipe

    Try these scrumptious Rainbow bread rolls, they are great, you can enjoy it as an evening snack or can be prepared on birthday parties, ramadan etc..

    Rainbow Bread Rolls Recipe
    Photo: Rainbow Bread Rolls Recipe

    Here is the Step by Step Rainbow Bread Rolls Recipe !!

    For Rainbow Bread Rolls

    • 6 bread slices
    • 2 eggs, lightly beaten
    • 3 tbsp tomato ketchup
    • 3 tsp butter
    • 3 tsp green chutney
    • 1/2 cup bread crumbs
    • oil for deep frying

    For Chicken Filling

    • 1 cup boiled shredded chicken
    • 2 tbsp mayonnaise
    • 1 tbsp chili garlic sauce
    • 1 tbsp soy sauce
    • 1/2 tsp black pepper
    • salt to taste

    To Make Chicken Filling: In a large bowl, combine together the chicken, mayonnaise, soy sauce, chili garlic, salt and pepper. Set aside.

    Step 1 ~ Rainbow Bread Rolls Recipe
    Step 1 ~ Rainbow Bread Rolls

    Step 2

    Remove crust from the bread slices.

    Step 1 ~ Rainbow Bread Rolls Recipe
    Step 2 ~ Rainbow Bread Rolls

    Step 3

    Slightly roll bread slices with a rolling pin.

    Step 2 ~ Rainbow Bread Rolls Recipe
    Step 3 ~ Rainbow Bread Rolls

    Step 4

    Spread half teaspoon butter on the each bread slices. Place 1 tbsp chicken mixture at the one corner of bread slices.

    Step 4 ~ Rainbow Bread Rolls Recipe
    Step 4 ~ Rainbow Bread Rolls

    Step 5

    Put 1/2 teaspoon green chutney over it.

    Step 5 ~ Rainbow Bread Rolls Recipe
    Step 5 ~ Rainbow Bread Rolls

    Step 6

    Apply tomato ketchup on the second corner as shown in the picture.

    Step 6 ~ Rainbow Bread Rolls Recipe
    Step 6 ~ Rainbow Bread Rolls

    Step 7

    Roll Like Swiss rolls. Carefully seal edges with wet hands. Dip bread rolls in egg.

    Step 7 ~ Rainbow Bread Rolls Recipe
    Step 7 ~ Rainbow Bread Rolls

    Step 8

    Then coat with breadcrumbs.

    Step 8~ Rainbow Bread Rolls Recipe
    Step 8~ Rainbow Bread Rolls

    Step 9

    Repeat this method with remaining ingredients.

    Step 9~ Rainbow Bread Rolls Recipe
    Step 9~ Rainbow Bread Rolls

    Step 10

    Heat oil in a deep pan over medium heat. Fry bread rolls on each side for 2-3 minutes or until golden.

    Step 10 ~ Rainbow Bread Rolls Recipe
    Step 10 ~ Rainbow Bread Rolls

    Step 11

    Remove from the oil and drain on an absorbent paper. Rainbow Bread Rolls are ready to serve. ENJOY!!

    Step 11 ~ Rainbow Bread Rolls Recipe
    Step 11 ~ Rainbow Bread Rolls
    • Serve with your favorite dipping sauce.

    Rainbow Bread Rolls Recipe

    Author Bushra Waheed

    Ingredients

    For Rainbow Bread Rolls

    • 6 bread slices
    • 2 eggs lightly beaten
    • 3 tbsp tomato ketchup
    • 3 tsp butter
    • 3 tsp green chutney
    • 1/2 cup bread crumbs
    • oil for deep frying

    For Chicken Filling

    • 1 cup boiled shredded chicken
    • 2 tbsp mayonnaise
    • 1 tbsp chili garlic sauce
    • 1 tbsp soy sauce
    • 1/2 tsp black pepper
    • salt to taste

    Instructions

    To Make Chicken Filling: 

    • In a large bowl, combine together the chicken, mayonnaise, soy sauce, chili garlic, salt and pepper. Set aside.

    To Make Rainbow Bread Rolls:

    • Remove crust from the bread slices. Slightly roll bread slices with a rolling pin.
    • Put 1/2 teaspoon green chutney over it. Spread half teaspoon butter on the each bread slices. Place 1 tbsp chicken mixture at the one corner of bread slices.
    • Apply tomato ketchup on the second corner as shown in the picture.
    • Roll Like Swiss rolls. Carefully seal edges with wet hands. Dip bread rolls in egg. Then coat with breadcrumbs.
    • Repeat this method with remaining ingredients.
    • Heat oil in a deep pan over medium heat. Fry bread rolls on each side for 2-3 minutes or until golden.
    • Remove from the oil and drain on an absorbent paper. Rainbow Bread Rolls are ready to serve. ENJOY!!


    If you like Rainbow Bread Rolls Recipe and make it then let me know your feedback by commenting below.

  • Baked Fish Sticks Recipe: A Healthy & Delicious Alternative!

    Fish Sticks

    Very easy to make, nutritious, and delicious _ Moist inside and crunchy outside, these are great with oven fries or roasted veggies and low-fat homemade tartar sauce. You can make these fish sticks in about the same amount of time it takes to bake a box of the frozen kind. DO try it!!

    Fish Sticks Recipe
    Photo: Fish Sticks Recipe

    Baked Fish Sticks Recipe

    Course Appetizer, Comfort Food, Main Course
    Cuisine American
    Keyword 30 minutes meals, baked fish, Baking, fish, Quick and Easy, seafood
    Prep Time 10 minutes
    Cook Time 12 minutes
    Total Time 22 minutes
    Servings 2
    Author Bushra Waheed

    Ingredients

    • 1 pound cod fish fillets cut into strips
    • 2 eggs lightly beaten
    • 1/2 cup all-purpose flour
    • 1/3 cup dry bread crumbs
    • 1/2 teaspoon paprika
    • 1/2 teaspoon lemon-pepper seasoning
    • 1/2 teaspoon salt

    Instructions

    • Preheat oven to 180 degree C°.
    • Place bread crumbs and seasoning in a shallow bowl. Mix well.
    • Place flour in a separate shallow bowl.
    • Beat eggs in another bowl.
    • Coat fish in flour; shake off excess.
    • Dip in egg.Then roll in crumb mixture.
    • Place on a baking sheet coated with cooking spray.
    • Bake, in the preheated oven, for 12 minutes or until fish flake easily with a fork, turning once.
    • Transfer into a serving platter. Fish Sticks are ready to serve. ENJOY!

    Notes

    Serve with your favorite dipping sauce.
  • The Secret to Bakery-Style Jam Filled Butter Cookies (This Recipe is a Gem!)

    Jam Filled Butter Cookies

    This Jam Filled Butter Cookies Recipe is an easy thumbprint cookie with a fruit jam center. Whip up these simple jam drops in just a few minutes, they make wonderful any-time treats.

    Jam Filled Butter Cookies Recipe
    Photo: Jam Filled Butter Cookies Recipe

    Check it out the  Jam Filled Butter Cookies Recipe here!!

    Jam Filled Butter Cookies Recipe

    Prep Time 10 minutes
    Cook Time 30 minutes
    Total Time 40 minutes
    Servings 36
    Author Bushrah @ Recipestable

    Ingredients

    • 2 egg yolks
    • 3/4 cup softened butter
    • 1/2 cup white sugar
    • 1-3/4 cups all-purpose flour
    • 1/2 cup fruit preserves any flavor

    Instructions

    Method

    • Preheat the oven to 190 degrees C.
    • Take a bowl, cream together the butter, white sugar and egg yolks.
    • Stir in the flour a little bit at a time until a soft dough forms.
    • Roll dough into 1 inch balls or cut with a cookie cutter.
    • If dough is too soft, refrigerate for 15 to 20 minutes.
    • Place balls 2 inches apart onto ungreased cookie tray.
    • Use your finger or an instrument of similar size to make a well in the center of each cookie.
    • Fill the hole with 1/2 teaspoon of preserves.
    • Bake in the preheated oven for 8-10 minutes or until golden brown on the bottom.
    • Remove from cookie sheets to cool on wire racks.
    • Store in an airtight jar or container. Jam Filled Butter Cookies are ready to serve. ENJOY!

    Notes

    Serving Suggestions:
    Serve with Tea.

    I have also posted Nankhatai recipe which are another easiest & tastiest version of making cookies at home. Do check it out as well.  It’s finger lickin’ good. You’ll be coming back for more. 


    Put your own spin on it. And lemme know how it turns out. Post a photo on Facebook (Recipestable) or  on Twitter so I can see how lovely yours turn out.


    Happy Cupcakes Making!!

  • Street Food Favorite: Crispy & Flavorful Besan Aloo Tikki Recipe!

    Besan Aloo Tikki 

    Besan Aloo Tikki with crisp outside soft inside is a real treat to taste buds at anytime. Serve this delicious Besan Aloo Tikki  as a starter or can be serve at tea-time with the sauce or chutney of your choice.

     Besan Aloo Tikki recipe (Crispy Potato Patty)
    Photo: Besan Aloo Tikki (Crispy Potato Patty)

    Check it out the Besan Aloo Tikki Recipe here!!

    Besan Aloo Tikki

    Author Bushra Waheed

    Ingredients

    • 500 gm boiled potatoes
    • 2 cups chickpea flour besan
    • 3 green chilies finely chopped
    • 1 green onion finely chopped
    • 1 teaspoon cumin powder
    • 1 teaspoon crushed red chili
    • salt to taste
    • oil for deep frying

    Instructions

    • Mash the potatoes in a large bowl
    • Add green chilies, green onion, cumin powder, red chili and salt. Mix until well combined.
    • Make thick batter with besan and lil water in a separate bowl.
    • Divide the potato mixture into equal portions.
    • Shape each portion into round thick cutlet (tikki).
    • Heat the oil in a deep pan over medium heat.
    • Dip each cutlet (tikki) in the batter then fry for 5-8 minutes or until it turns to golden brown in colour from both the side.
    • Remove from the oil and absorbent on kitchen paper. Besan Aloo Tikki is ready to serve. ENJOY!!

    Notes

    Serve with your favorite chutney.

    If you like Besan Aloo Tikki Recipe  and make it then let me know your feedback by commenting below.And if you know more innovative ways in which we can utilize this mouth watering Besan Aloo Tikki, do share with us and we would be glad to give it a try.

  • Spice Up Your Life: Easy Stuffed Mirch Pakora Recipe

    Stuffed Mirch Pakora

    Are you a Spicy snacks lover? Today I am sharing Stuffed Mirch Pakora Recipe, all time favorites and very easy to make. Start off your meal with this crunchy starter.

    Stuffed Mirch Pakora Recipe
    Photo: Stuffed Mirch Pakora 

    You can make these stuffed Mirch Pakoras as a Iftar time snacks in Ramadan, they hardly take around half an hour to prepare and serve .

    Stuffed Mirch Pakora Recipe
    Photo: Stuffed Mirch Pakora 

    It is also goes great with hot cup of tea on rainy days. Serve hot with tamarind chutney and green chilli chutney or tomato chutney , or tomato sauces .

    Check it out the Stuffed Mirch Pakora Recipe and printable version below!!

    Stuffed Mirch Pakora

    Today I am sharing Stuffed Mirch Pakora Recipe, all time favorites and very easy to make. Start off your meal with this crunchy starter.
    Prep Time 5 minutes
    Cook Time 10 minutes
    Total Time 15 minutes
    Servings 4
    Author Bushrah | Recipestable

    Ingredients

    • 8 large size green chilies slit vertically and deseeded.

    For Stuffing

    • 2 tablespoon mint chutney
    • 2 tablespoon tamarind pulp
    • 2 tablespoon pomegranate seeds Anardana, crushed
    • 1/2 teaspoon red chili
    • 1/2 teaspoon cumin powder
    • salt to taste

    For The Batter

    • 1/2 cup chickpea flour besan
    • 1/2 cup rice flour
    • 1/2 teaspoon red pepper
    • 1/4 teaspoon carom seeds ajwain, optional
    • salt to taste

    Other Ingredients

    • oil for frying

    Instructions

    Directions

      To Make Stuffing

      • In a bowl, mix together the mint chutney, tamaring pulp, pomegranate seeds, red chili, cumin powder and salt.
      • Set aside.

      To Make Batter

      • In another small bowl, combine the chickpea flour,rice flour, red pepper, carom seeds and salt.
      • Add enough water to make a thick batter and set aside.

      To Proceed

      • Divide stuffing into 8 equal portions.
      • Stuff each chilli with a portion of the stuffing.
      • Heat oil in a large pan over medium heat.
      • Dip the stuffed chillies in the flour batter.
      • Deep fry pakoras in hot oil for 4-5 minutes or until they turn golden brown in colour from all sides.
      • Drain on absorbent paper. Stuffed Mirch Pakora is ready to serve.

      Notes

      Serving Suggestions:
      I served them with mango Chutney to mild the taste.
      I have also posted Chips Pakora Recipe which is another easiest version of making tea time snack or lunch box item . Do check it out as well.

      [divider]

      If you like Stuffed Mirch Pakora Recipe , Please Subscribe to my blog. I have lots more recipes to share with you. And If you make it then let me know your feedback by commenting below.

    • Skip the Store-Bought: The Perfect Homemade Fruit Cake Recipe!!

      Fruit Cake

      An quick and easy fruit cake recipe for tea time. Best eaten fresh. Enjoy this yummy fruit cake flavored with orange zest, vanilla essence and black currant.

      Fruit Cake Recipe
      Photo: Fruit Cake Recipe

      Check it out the Fruit Cake Recipe here!!

      Everyone’s Favorite Fruit Cake Recipe

      Prep Time 15 minutes
      Cook Time 45 minutes
      Total Time 1 hour
      Servings 6
      Author Bushra Waheed

      Ingredients

      • 4 eggs beaten
      • 200 gm butter
      • 1 cup caster sugar
      • 1-1/2 teaspoon vanilla essence
      • 2 cups flour
      • 1-1/2 teaspoon baking powder
      • a pinch of salt
      • 1/4 cup asharfi
      • 1/4 cup raisin
      • 1/4 cup black currant
      • 1 teaspoon lemon juice
      • 1/2 teaspoon orange peel
      • a pinch of Yellow food color

      Instructions

      • Preheat oven on 180 degree C.
      • Grease a 8 inch cake pan or mold and set aside.
      • Take a large bowl, cream butter with sugar.
      • Stir in the vanilla essence.
      • Now add eggs.
      • In another bowl, sift together the flour, baking powder and salt.
      • Slightly add flour mixture into egg mixture.
      • Stir in the lemon juice, orange peel, black currant, raisin, ashrafi and food color.
      • Pour this mixture into the prepared baking pan.
      • Top with nuts (optional).
      • Bake in the preheated oven for 45-50 minutes or until a toothpick inserted near the center comes out clean.
      • Let it cool completely and cut into slices. Fruit Cake is ready to serve. ENJOY!!

      Notes

      Serve with Tea or Coffee.

      If you like Fruit Cake Recipe and make it then let me know your feedback by commenting below.

    • Smiley Face Fries Recipe

      Smiley Face Fries

      Making Smiley Face Fries at home is not a big deal. You can easily make smiley faces with a knife or a teaspoon or other sharp instrument on them.Do try this Smiley Face Fries Recipe and put a smile on your kid’s face with these fun-shaped potatoes that have a crispy crunchy flavor.

      Smiley Face Fries Recipe
      Photo: Smiley Face Fries Recipe

      Bismillah, let’s get started!

      Check it out the  Smiley Face Fries Recipe and printable version below!

      Smiley Face Fries Recipe

      Do try this smiley face fries recipe and put a smile on your kid’s face with these fun-shaped potatoes that have a crispy crunchy flavor.
      Prep Time 10 minutes
      Cook Time 15 minutes
      Total Time 25 minutes
      Servings 6
      Author Bushrah @ Recipestable

      Ingredients

      • 6 round potatoes
      • 1 teaspoon herb seasoning
      • 1 teaspoon salt
      • 1/4 teaspoon garlic powder
      • oil for frying
      • chaat masala for sprinkling optional

      Instructions

      Method

      • Wash and peel potatoes.
      • Cut the potatoes in circles, with each circle measuring about 1/4 cm thick.
      • Make smiles on the potatoes by using the edge of a teaspoon.
      • Using an ice-pick, bore two holes in the potatoes for the eyes.
      • Sprinkle the herb seasoning, garlic powder and salt over the potato slices.
      • Stir to coat evenly.
      • Leave it for few minutes to blend flavors.
      • Now heat oil in a pan over medium high heat.
      • Add potatoes and fry for 10-12 minutes or until crispy and golden brown.
      • Remove from the oil and drain on kitchen paper.
      • Sprinkle Chaat masala over it. Smiley Face Fries are ready to serve. ENJOY!!

      Notes

      Serving Suggestions:
      Serve with your favorite dipping sauce.

      I have also posted Curly Fries Recipe which is another easiest & tastiest version of making Crispy Fries at home. Do check it out as well.  It’s finger lickin’ good. You’ll be coming back for more. 


      Put your own spin on it. And lemme know how it turns out. Post a photo on Facebook (Recipestable) or  on Twitter so I can see how lovely yours turn out.


      Happy Cooking!!

    • Buffalo Chicken Cheese Balls Recipe

      Buffalo Chicken Cheese Balls

      This modern and Buffalo Chicken Cheese Balls Recipe is full of buffalo chicken, Hot Sauce, mozzarella, and cheddar cheese! Great as an appetizer or light lunch.

      Among all the chicken favorites Chicken Cheese Balls are not only very easy to cook but also flavorful, moist, cheesy and crunchy at the same time. Be it a casual lunch idea for family or a small home party; Buffalo Chicken Cheese Balls are sure to please your family and guests alike. It also makes a delicious lunch box item for the children. Buffalo chicken cheese balls tastes better if served with Garlic Sauce or Tomato ketchup. 

      Buffalo Chicken Cheese Balls Recipe
      Photo: Buffalo Chicken Cheese Balls Recipe

      These Buffalo Chicken Cheese Balls are one of the best foods ever created. They are incredibly easy to make and they taste out of this world delicious! Not to mention my picky eatin.

      I didn’t get a very good shot of the buffalo chicken cheese balls.. I was too eager to get on with it and eat them! Some day I’ll learn to be more patient. (InshaAllah) 🙂

      Buffalo Chicken Cheese Balls Recipe
      Photo: Buffalo Chicken Cheese Balls Recipe

      Here is a really simple, quick yet a better recipe to try this weekend.

      So let us start!! Ready ??

      Check it out the Buffalo Chicken Cheese Balls Recipe and printable version below!!

      Buffalo Chicken Cheese Balls

      This modern and Buffalo Chicken Cheese Balls Recipe is full of buffalo chicken, Hot Sauce, mozzarella, and cheddar cheese! Great as an appetizer or light lunch.
      Prep Time 15 minutes
      Cook Time 5 minutes
      Total Time 20 minutes
      Servings 9
      Author Bushrah | Recipestable

      Ingredients

      • 3 cups boiled & shredded chicken
      • 2 green onions finely chopped
      • 1/2 cup hot pepper sauce
      • 1 cup Cheddar cheese grated
      • 1 cup Mozzarella cheese
      • 1 cup all-purpose flour
      • 3 eggs lightly beaten
      • 1 cup plain bread crumbs
      • oil for frying

      Instructions

      Directions

      • In a large bowl, mix together the chicken, green onions, Cheddar cheese, Mozarella cheese and hot sauce.
      • Now shape the mixture into 1.5 inch balls.
      • Put the flour, eggs and bread crumbs in three separate dishes.
      • Dip and coat each ball in flour, then egg then bread crumbs.
      • Place the breaded chicken balls onto a plate while breading the rest; do not stack.
      • Heat oil in a deep pan over medium heat.
      • Fry the breaded balls in the hot oil for 1-2 minutes or until lightly browned.
      • Remove from the oil and drain on kitchen paper.Buffalo Chicken Cheese Balls are ready to serve. ENJOY!!

      Notes

      Serving Suggestions:
      Serve with Your Favorite Dipping Sauce.


      If you like this Buffalo Chicken Cheese Balls Recipe, Please Subscribe to my blog. I have lots more recipes to share with you. And If you make it then let me know your feedback by commenting below.

    • The BEST Chicken Finger Sandwich Recipe Ever!

      Chicken Finger Sandwiches

      This delicious Chicken Finger Sandwiches recipe is always a favorite sandwich. So easy to make and so delicious. With ketchup and [highlight]herbs seasoning[/highlight] for color and tang, this dressed-up chicken salad is wonderful on bread fingers or served on a lettuce leaf. 

      Finger sandwiches are the easiest and most requested party food. It’s a lovely way to serve sandwiches and a great way to use up leftover chicken, or great to take as lunch as a normal sandwich. Perfect for afternoon tea.

      Chicken Finger Sandwiches Recipe
      Photo: Chicken Finger Sandwiches Recipe

      The weekend was full of foodie experiences. A few days ago, I decided to do a tea party with a my childhood friend and her child’s and made these as one of the finger foods. They were a HUGE hit with her little girls. They are just so dainty and are perfect for little tea parties (or family gathering, birthdays, .. etc..) plus, they are SUPER easy to make.

      The secret of this recipe is fresh herbs. You can make a variety of sandwiches as well, using egg salad, chicken salad, or tuna as layers– just make sure you chop or process the ingredients up enough so it spreads easily.

      Chicken Finger Sandwiches Recipe
      Photo: Chicken Finger Sandwiches Recipe

      Note: These can be served immediately but in my opinion they taste best when refrigerated at least 2 hours– they will easily keep if made a day ahead of time.

      Check it out the Chicken Finger Sandwiches Recipe and printable version below!!

      Chicken Finger Sandwiches

      This delicious Chicken Finger Sandwiches recipe is always a favorite sandwich. It’s a lovely way to serve sandwiches and a great way to use up leftover chicken, or great to take as lunch as a normal sandwich.
      Prep Time 15 minutes
      Cook Time 5 minutes
      Total Time 20 minutes
      Servings 6
      Author Bushrah | Recipestable

      Ingredients

      • 2 cups boiled chicken shredded
      • 1/2 cup mayonnaise
      • 1 tablespoon cream cheese
      • 1 tablespoon tomato ketchup
      • 1 teaspoon fresh herbs chopped
      • 1/2 teaspoon freshly ground black pepper
      • salt according to taste
      • 12 slices white bread crusts removed
      • butter as required

      Instructions

      Directions

      • In a mixing bowl, Combine together the mayonnaise, and cream cheese.
      • Add shredded chicken and mix well.
      • Season with herbs, salt and pepper.
      • Toast bread slices with butter.
      • Spoon the mixture over half the bread slices and cover with the remaining slices.
      • Slice each sandwich into thirds to make three fingers.
      • Transfer into a serving platter. Garnish with lettuce leaves. Chicken Finger Sandwiches are ready to serve. ENJOY!!

      Notes

      Serving Suggestions:
      Serve with French Fries, Ketchup and Coleslaw.


      If you like this Chicken Finger Sandwiches Recipe, Please Subscribe to my blog. I have lots more recipes to share with you. And If you make it then let me know your feedback by commenting below.

    • Crispy Homemade Jalebi Recipe

      Crispy Homemade Jalebi Recipe

      Jalebi

      It’s fun to prepare traditional methai at home. Jalebi needs little practice for a perfect thin shaped. It must be thin if you like crispy jalebi. Try out this Jalebi Recipe and amaze your family and yourself.

      Jalebi Recipe
      Photo: Jalebi Recipe

      Check it out the Jalebi Recipe here!!

      Crispy Homemade Jalebi Recipe

      Course Dessert, Snack
      Cuisine Indian, Pakistani
      Keyword jalebi, Riwayati Mithaiyan, sweet
      Prep Time 20 minutes
      Cook Time 20 minutes
      Rising Time 8 hours
      Total Time 8 hours 40 minutes
      Servings 12
      Author Bushra Waheed

      Ingredients

      For Jalebi:

      • 1 cup Plain Flour
      • 2 teaspoon cornflour
      • 1 teaspoon instant yeast
      • 1 teaspoon oil
      • 1/8 teaspoon cardamom Powder
      • 1 tablespoon plain yogurt
      • a pinch of orange food color
      • 3/4 cup Warm Water

      For Sugar Syrup:

      • 1-1/4 cups Sugar
      • 1 cup Water
      • 1 teaspoon lemon juice
      • 1/4 teaspoon cardamom powder
      • few strand of saffron

      Instructions

      • In a bowl, mix together the plain flour, cardamom powder, instant yeast and cornflour.
      • Add yogurt, oil, and Water to the dry ingredients.
      • Mix well until there are no lumps.
      • When done, cover the jalebi batter.
      • Place it in a warm place for 24 hours or overnight, till it is fermented (the batter will rise on fermentation).
      • Once the batter is fermented stir the batter in a cut and fold motion to combine it once again.

      To Make Sugar Syrup:

      • Take a saucepan, add Water, sugar and saffron. Cook for 15 minutes on medium heat.
      • Reduce flame to a low simmer and add Cardamom Powder and Lemon Juice.
      • Stir well.
      • When the sugar becomes thick and stringy of one string consistency.Turn off the heat and keep aside.

      To Make The Jalebi:

      • Preheat oil for frying the jalebi’s.
      • Mix the fermented jalebi batter well and put it in a ketchup or mustard bottle with a spout (zipper bag or piping bag can be used).
      • Squeeze out the batter into the hot oil in approximately 8 small circular motions.
      • Jalebi should about 2-3 inches in diameter.
      • Fry until the bottom side looks golden and flip once to cook the other side.
      • With tongs, remove jalebi, shake off excess oil and place directly into sugar syrup.
      • Allow jalebi to remain in the syrup for just a minute (flipping to coat both sides), shake off excess sugar syrup and place onto a plate. Jalebi is ready to serve. ENJOY!!

      Notes

      • The consistency of the batter should be thick and not watery, similar to the butter cream batter. You should be able to make a shape when piped in a piping bag.
      • Don’t over stir you want the air pockets in the batter to remain. This will help in the jalebi being crisp and also in turn help it absorb the sugar syrup.
      • The oil for frying should be medium hot. If it is too hot, the jalebis will end up burnt.
      • Also make sure you keep the heat on low when you pipe the jalebis into the oil, this will ensure you can see the circles you are piping and also the jalebis will rise up slowly.
      • You can store in an air-tight container. They will remain fresh for 4-5 days un refrigerated.
      • Serve as a dessert after any meal or as a tea time snack.


      If you like Jalebi Recipe and make it then let me know your feedback by commenting below.And if you know more innovative ways in which we can utilize this sweet and mouth watering Jalebi, do share with us and we would be glad to give it a try.

    • Chicken Cheese Sandwich Recipe

      Chicken Cheese Sandwich Recipe

      Chicken and Cheese Sandwich

      Chicken Cheese Sandwich is a light meal or snack in slight appetite. Leftover  chicken and cream cheese are turned into a hot and spicy chicken sandwich. When you pack lunch boxes or in game party these super fantastic sandwiches are a great solution of your huger.

      Chicken Cheese Sandwich Recipe
      Photo: Chicken Cheese Sandwich Recipe

      Check it out the Chicken Cheese Sandwich Recipe here!!

      Chicken Cheese Sandwich Recipe

      Course Appetizer, Comfort Food, Snack
      Cuisine American, Indian, Pakistani
      Keyword cheese, cheese sandwiches, Chicken, chicken sandwich, sandwich
      Prep Time 15 minutes
      Cook Time 5 minutes
      Total Time 20 minutes
      Servings 6
      Author Bushra Waheed

      Ingredients

      • 12 bread slices
      • 1 cup boiled & shredded chicken
      • 3 tablespoon Mayonnaise
      • 4 tablespoon shredded Cheese
      • 1 tablespoon cream cheese
      • salt and pepper to taste
      • shredded lettuce as required
      • tomato ketchup as required
      • butter as required

      Instructions

      • In a bowl, mix together the chicken, cheese, cream cheese and mayonnaise.
      • Season with salt and pepper.
      • Add shredded lettuce and mix well.
      • Remove the edges of bread slices.
      • Spread butter and toast on a hot griddle or pan.
      • Spread ketchup on one side of six bread slices.
      • Put some chicken cheese mixture over them. Cover with remaining bread slices and cut into triangles. Secure with wooden pick.
      • Transfer into a serving platter. Garnish with lettuce  leaves.
      • Delicious Chicken Cheese Sandwich is ready to serve. ENJOY!!

      Notes

      Serve with French Fries.

      If you like Chicken Cheese Sandwich Recipe and make it then let me know your feedback by commenting below.And if you know more innovative ways in which we can utilize this mouth watering Chicken Cheese Sandwich , do share with us and we would be glad to give it a try.

    • Chatpati Lobia Chaat Recipe (Black Eyed Peas Salad)

      Chatpati Lobia Chaat Recipe (Black Eyed Peas Salad)

      Lobia Chaat

      Beans and spices has a perfect mix in shape of chaat.A relatively different Lobia chaat recipe to enjoy. Give it a try and make something different and healthy for your family.

      Lobia Chaat Recipe
      Photo: Lobia Chaat Recipe

      Check it out the Lobia Chaat Recipe here!!

      Lobia Chaat Recipe

      Course Salad, Side Dish, Snack
      Cuisine Indian, Pakistani
      Keyword black eyed peas, lobia, lobia chaat, salad, spicy
      Prep Time 10 minutes
      Total Time 10 minutes
      Servings 4
      Author Bushra Waheed

      Ingredients

      • 2 cups boiled lobia blacked eye peas
      • 1 small onion finely copped
      • 1 to mato chopped
      • 1 cucumber chopped
      • 1/2 cup tamarind pulp without sugar
      • 1 tablespoon lemon juice
      • 1 teaspoon mint chutney optional
      • 1 teaspoon chaat masala powder
      • 1 teaspoon roasted cumin powder

      For Garnishing:

      • few coriander leaves
      • lemon wedges

      Instructions

      • Place lobia (black eyed peas) in a large mixing bowl.
      • Add onion, tomato, cucumber. Stir in the lemon juice, tamarind pulp and mint chutney.
      • Season with chaat masala and cumin seeds. Mix well.
      • Transfer into a serving platter.
      • Garnish with few coriander leaves and lemon wedges. Lobia Chaat is ready to serve.

      Notes

      Serve with imli ki chutney.

      If you like Lobia Chaat Recipe and make it then let me know your feedback by commenting below.And if you know more innovative ways in which we can utilize this mouth watering Lobia Chaat, do share with us and we would be glad to give it a try.