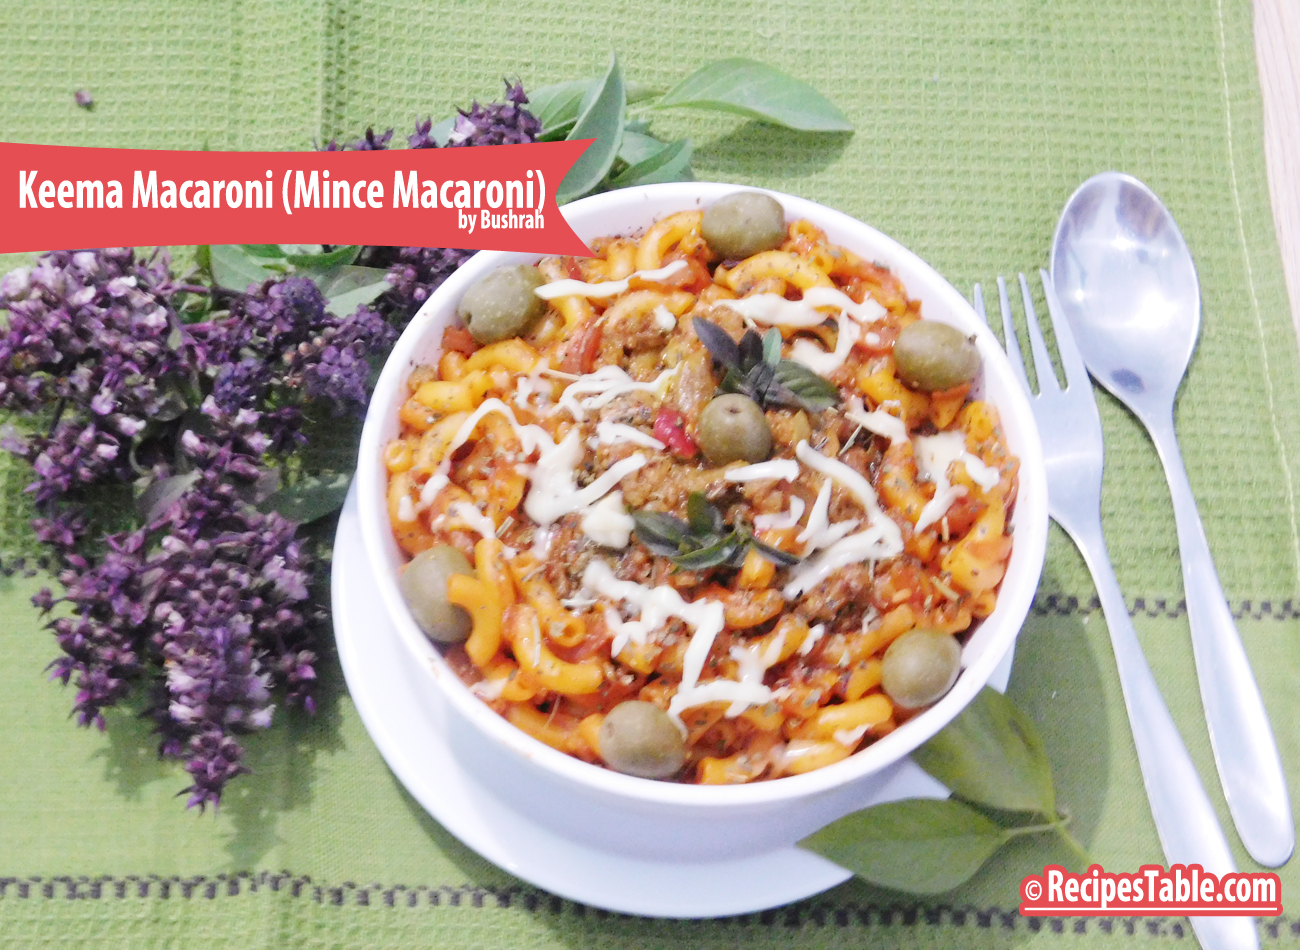
Pasta, for me, is the ultimate comfort food. I love anything to do with pasta or macaroni, as they are my go-to on my lazy days. Today i am sharing a super easy Keema Macaroni recipe for busy weeknight Meals. One dish I make quite frequently when I have some mince is this one. Nice and simple, full of flavors.
Photo: Keema Macaroni ( Mince Macaroni)
This ain’t your ordinary pasta. With flavors bursting out from every corner, this one is delicious! To make it more unique and give a distinct flavor, I have used my ever favorite Italian Pasta Sauce.
Photo: Keema Macaroni ( Mince Macaroni)
You can use any macaroni for this recipe, but I totally recommend trying elbow or something that can help hold all of those tiny pieces of mince. I used my favorite whole wheat pasta. Cook it al dente according to package instructions.
While the pasta is cooking, saute up an onion and mince until cooked. Then add in some garlic, herb seasoning and pasta sauce. And once the pasta is cooked, drain and add it to the saute pan. I would add a dollop cheese or mayonnaise to make it more moist and gulp it down!
Isn’t that to easy?? Easy enough even for a weekday night? Of Course Yes!!
Photo: Keema Macaroni ( Mince Macaroni)
This is a really delicious pasta dish and the taste of the basil really comes through beautifully. The minced meat balances out the starch of the macaroni really well. A perfect dance of herb and spice ensues in your mouth…That you have to experience!
As you can see, the recipe is just as good and vibrant and delicious as ever. 🙂
Photo: Keema Macaroni ( Mince Macaroni)
Some Tips for the Perfectly Cooked Keema Macaroni:
Never cook your macaroni in boiling hot water, it destroys the outer layer of the macaroni however you may not realize it. So, always throw in your macaroni or whatsoever in simmering water, a stage before boiling for best results.
Always add a reasonable amount of salt to water, in which you will be cooking your macaroni.
Once your macaroni has been boiled, strain it, take it out of the hot water and quickly rinse them in cold or regular tap water and the set aside. This stops the macaroni from further cooking, which results in soggy, dull and bland macaroni.
Once you throw macaroni into your dish, let it cook and absorb the wonderful flavours of the dish, by letting it sit in the pan for 2-3 minutes with the lid closed and on slowest flame. Macaroni is bland, has no particular flavour so this step is very critical as well as rewarding.
Check it out the Keema Macaroni (Mince Macaroni) recipe and printable version here!!
Recipe Note’s:
You can use any pasta of choice , i like the taste of brown rice pasta compared to others.
You can add veggies e.g. carrots, capsicum, green peas if you like. Everything in this recipe is optional. Go as you please. Play with flavours.
If you make this recipe, be sure to snap a photo and hashtag it #Recipestable. I’d love to see what you cook!
What are your holiday traditions guys? I would love to hear some from you all. Are there recipes passed down to you from your grand mom? Or the one from many generations? Share them all in comments below.
I’m back with another post on Light Meal On Thursday. Last Thursday happened to be my brother’s birthday so there was definitely no light eating on that day, hence did not post a light meal.
Quick & Light Neal – 25 Minute Chicken and Noodles
Today’s recipe is 25 Minute Chicken and Noodles. It’s an ideal meal on lazy days or when one wants a light meal. Just make this and one is sorted.
Photo: 25 Minute Chicken and Noodles
I really hesitated on adding this recipe to the blog. It’s really very simple and seems like something everyone already makes. Then I remembered that my blog is not just for my readers, but also a record of recipes I make frequently. This is one of family favorites(especially my nano _grandma)!
I’m not going to lie. But when I made this Chicken and Noodles for the family and grandma… they devoured it. I’m NOT KIDDING. I was SHOCKED. They were begging for me. I ended up with NO leftovers. HUH?
And the best part? The entire recipe took 25 minutes to make. Enough yapping…Hope you enjoy!
Photo: 25 Minute Chicken and Noodles
A quick and delicious one pot recipe with chicken broth, chicken, noodles and healthy vegetables. This quick and easy skillet dish features all your favorite ingredients from chicken noodle soup, but without the soup. It’s a hearty meal perfect for a busy day. You can make a delicious, family-friendly dinner in just 25 minutes.
Bismillah, Let’s get started!!
Check it out the 25 minute Chicken and Noodles recipe and printable version here!!
Put your own spin on it. And lemme know how it turns out by sharing a picture on Instagram, Facebook (Recipestable) or Twitter with this hashtag #Recipestable so I can see how lovely yours turn out.
Happy Baking!!
If you like this post, Please Subscribe to my blog and let me know your feedback by commenting below.. I have lots more recipes to share with you.
Everything’s better with cream…especially vegetables.Vibrant green peas simmer in a simple sauce of milk, flour, and butter in this quick side dish.
The Best Creamed Peas
In my search for a good creamed peas recipe, I found many, but none that quite matched what I wanted. So I took to my own creativity and came up with this absolutely fabulous and The Best Creamed Pea recipe. My family love it so much and we have this on the side quite often. And I double this every time, and not a single pea is left! Alhumdulillah 🙂
The Best Creamed Peas
Do try this recipe, these Creamed Peas can become your ultimate side dish.
Bismillah, Let’s get started!
Check it out the Creamed Peas recipe and printable version below.
Recipe Note’s:
Don’t over cook the peas. Soggy peas will ruin this dish. You want them tender but firm.
Put your own spin on it. And lemme know how it turns out. Post a photo on Facebook (Recipestable) or on Twitter so I can see how lovely yours turn out.
Happy Cooking!!
If you like this post, Please Subscribe to my blog and let me know your feedback by commenting below.. I have lots more recipes to share with you.
Bitter gourd, aka Karela In Urdu, is relished for its benefits and despised for its bitter taste – not many people like this veggie, but I die for it.
Benefits of Bitter Gourd (Karela)
Here are some Benefits of Mr. Bitter Gourd (Aka karela)
Bitter gourds have many nutritional and health benefits and one of them is they are good for diabetes. It is an excellent source of vitamins B1, B2, and B3, C, magnesium, folate, zinc, phosphorus, manganese, and has high dietary fiber. It is rich in iron, contains twice the beta-carotene of broccoli, twice the calcium of spinach, and twice the potassium of a banana.
As my Chronic illness forces me to transform eating habits, I’ m always on the hunt for natural antioxidants ingredients and Bitter Gourd (Karela) is one of them. I try to eat bitter gourd at least twice in a month because of its antioxidant benefits. It is very good for you, specially if you are diabetic. This reduces your blood sugar level a lot than you can imagine..So try to include it in your everyday diet.
Bitter Gourd aka ‘Karela’
The people who have never had bitter gourd, I still know what you all must be thinking.
Doesn’t it taste bitter??
How can one eat it??
Actually it is very much edible and likable. Truth is that there are numerous ways in which Bitter gourd is prepared in Pakistan. It can be stuffed with tasty spice mix, it tastes delicious when deep fried with mince stuffing( Bharwan Karela ), it can be used to make a dry curry and my mommy makes amazing curry of bitter gourd (Karela Gosht) which doesn’t taste bitter at all. It just depends how it is prepared. So at times it depends on which ingredients and technique you use and also on individual preferences.
Karela Gosht (Meat with Bitter Gourd)
Karela Gosht (Bitter gourd cooked with meat) is a traditional Pakistani dish.Yet, there are many Pakistani’s who flee from the very name of Karela. 😛
Today, I am presenting one of the tried recipes that gained appreciation among random people. Signature style of using minimum ingredients to make a mouth-watering dish is again used. I am using mutton meat in this recipe, but if you like you can use beef or chicken too.
Photo: ‘Karela Gosht'{Bitter Gourd Cooked with Meat and Saute Onion}
In my home, everyone loves bitter gourd and its diverse dishes. It tastes savory, tangy, wonderfully spicy and slightly bitter at the same time. Karela Gosht is my all time favourite. As I mention above, I make them quite often and each time they turn out great.(Alhumdulillah)!
Photo: Karela Gosht with Chapati
It tastes great with roti / hot chapati or with tandoori roti along with zeera raita.
Photo: Karela Gosht
How to make Karela Gosht
Learn how to make easy and simple Karela Gosht by following the step by step instructions as shown in pictures. The recipe is simple and very easy to follow. You would successfully cook it in first attempt. (InshaAllah)
Bismillah Let’s Begin!
Ingredients you will need:
1 kg bitter gourd/ karela (peeled, cleaned and sliced)
1 teaspoon salt, for sprinkling
750 gm mutton or lamb meat
1/2 cup cooking oil
4 medium onion, thinly sliced, (divided into two parts)
3 medium tomatoes, thinly sliced
1 inch piece of ginger, thinly sliced
1 garlic bulb, peeled & minced
4 green chilies
2 teaspoon red chili powder
1 teaspoon cumin powder
1 teaspoon coriander powder
1/2 teaspoon turmeric powder
1 teaspoon garam masala powder (all spice powder)
salt to taste
4 cups water for meat tenderness
Step 1:
First wash bitter gourds thoroughly in cold running water. Now Scrape the outer peel of the bitter melon with a sharp peeler or paring knife to remove a thin layer of peel.
Peel or Scrape skin of bitter gourd (Karela)
Step: 2
Cut the bitter gourd in half length-wise. Slit from one side to remove seeds and fibrous core using a teaspoon or a paring knife.
Cut the bitter gourd and remove the seeds.
Step 3:
Sprinkle 1 teaspoon salt over the peeled bitter gourds, toss together to mix evenly and keep it in sunlight for an hour, it will help to reduce its bitterness.
Sprinkle Salt and keep it in sunlight
Step 4:
After one hour, You would see salt and sunlight is doing its magic and bitter gourd has started perspirating. Now rinse thoroughly with tap water and keep aside for 10 minutes in a strainer to dry access water.
Rinse thoroughly with tap water
Step 5:
Now take the bitter gourd and squeeze it in your hands, the juices will come out and try to remove as much bitter juice out of it as possible. Squeeze and Squeeze…. don’t give up!!!
Squeeze and Squeeze…. don’t give up!!!
Step 6:
Cut the bitter gourd into cubes, thin slices, rings or lengthwise. (any desired shape or sizes).
Cut into your desired shape
Step 7:
Heat some oil and fry the bitter gourd (in batches) on medium heat for few minutes or until golden brown. Remove from the oil, drain and set aside.
Fry Bitter Gourd
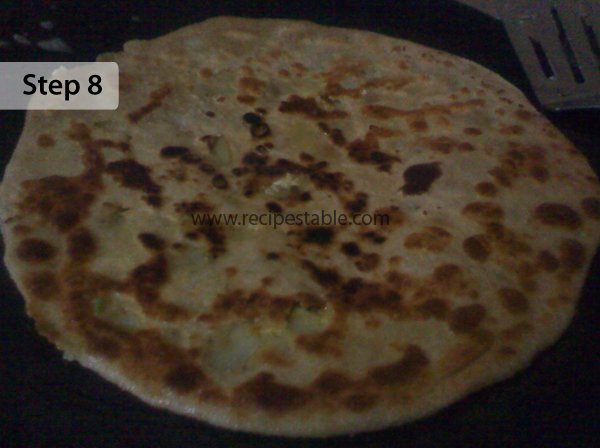
Step 8:
Heat 1/2 cup oil in a large pot over medium heat. Saute onion until transculant. Add garlic and ginger and cook for 30 seconds or the garlic aroma to hit its peak.
Saute Onions and Ginger & Garlic
Step 9:
When onion starts getting golden add meat and cook on high flame until meat change its color and turned brown, continuously stir.
Brown the meat
Step 10:
Now add chopped tomatoes and spices (turmeric, red chili, coriander, etc). Stir and cook on low flame until tomatoes soften.
Add Tomatoes and Seasoning
Step 11:
Add 4 cups of water. Heat to boiling, covered with a lid and simmer for 1 hour on low flame or until meat become tender and juicy.
Cook Covered on low flame
Step 12:
When meat gets cooked properly at this stage increase the flame and cook on high flame for 5 to 7 minutes or until oil comes on top and meat is tender fully. Now add leftover 2 onions and fried bitter gourd. Stir and cook on medium flame for 10-15 minutes or until onion turned caramelized and oil separates.
Add fried bitter gourd and onions
Step 13
Sprinkle garam masala and add green chillies and adjust seasoning to taste.. Its ready to serve. Take it out in a serving dish. Serve hot with Homemade Chapati or Roti.
Serve with garm garm (hot) chapati… ENJOY!
Tip to First timers: Tasting is important before the final dish is served so that you can adjust the flavour. ENJOY 🙂
Check it out the Karela Gosht (Meat with Bitter Gourd) recipe and printable version below.
Do try the recipe, and let me know how you find bitter gourd. Also there are many varieties and I will keep posting new recipes of bitter gourd in future. Till then see ya all!!!
Put your own spin on it. And lemme know how it turns out. Post a photo on Facebook (Recipestable) or on Twitter so I can see how lovely yours turn out.
Happy Cooking!!
If you like this post, Please Subscribe to my blog and let me know your feedback by commenting below.. I have lots more recipes to share with you.
Every day the same question pops up “What to make for Lunch today?” and when the same question is asked on a weekend the response has to be something that’s not the usual and really delicious.
What better way to spice up the weekend lunch than with a Kebab Paratha Rolls stuffed with flavorful hot and spicy sauces and bright colorful vegetables pickles.
Hot and Spicy Kebab Paratha Rolls recipe
It’s the age of one pot meal and who says one pot meal has to be a rice dish. It can be bread based dish as well. I believe wraps or rolls loaded with meat, kebabs and veggies also come in the genre of one pot meal and why not, bread gives us starch while veggies help bring a balance diet while meat gives us protein.
The best thing about it is, that its a wholesome meal and can be prepared with leftover kebab’s too. Its as simple as assembling it all together (if that makes sense).
Hot and Spicy Kebab Paratha Rolls
Ingredients in Hot and Spicy Kebab Paratha Rolls
The ingredients you need to make this Hot and Spicy Kebab Paratha Rolls are:
For Kebabs: meat, onion, ginger, green chilies, fresh coriander, red chili powder, cumin powder, coriander powder, all spices powder, salt, butter for busting For Parathas: whole wheat flour, white flour, Salt, clarified butter, water for kneading and black seeds (optional) For Topping & Stuffing: mayo garlic sauce, mint chutney, pickle cucumber, onion, carrot, green chili, few salad leaves, red chili flakes (optional)
Hot and Spicy Kebab Paratha Rolls recipe
How to make Hot and Spicy Kebab Paratha Rollso:
Hot and Spicy Kebab Paratha Rolls are straight forward to make. Prepared kebabs then make paratha’s and stuff with kebabs, sauce and topping. Pretty simple!!
For this recipe, I’ve prepared the homemade Paratha’s but you can use store bought frozen paratha in case you don’t feel like making your own and keeping it all quick and simple.
Hot and Spicy Kebab Paratha Rolls recipe
You can pack them and stuff your lunch box too making it a totally mess free meal for yourself. As with all wraps, you can use filling of your choice. For me it had to be this kebab paratha rolls, with some garlic sauce, minty yogurt chutney and colorful pickle that were wrapped in the paratha rolls and gave those hot, zingy and spicy flavors that were sure to tickle those taste buds!
Do try this recipe, these Hot and Spicy Kebab Paratha Rolls can become your ultimate comfort and nutritious food.
Bismillah, Let’s get started!
Check it out the Hot and Spicy Kebab Paratha Rolls recipe and printable version below.
Pin it For Later:
Pin it for Later ~ Hot and Spicy Kebab Paratha Rolls
I have also posted Shami Kabab Paratha Rolls and Chicken Paratha Rolls which are another easiest & tastiest version of making Paratha Rolls at home. Do check it out as well. It’s finger lickin’ good. You’ll be coming back for more.
Put your own spin on it. And lemme know how it turns out. Post a photo on Facebook (Recipestable) or on Twitter so I can see how lovely yours turn out.
Happy Lunch Making!!
If you like this post, Please Subscribe to my blog and let me know your feedback by commenting below.. I have lots more recipes to share with you.
A simple and nutritious snack, chapati (flatbread) stuffed with spicy mince filling, salad and chutney, perfect for busy morning breakfast and also lunch. Plain chapati’s can often come across as boring and many people turn up their noses at the mere mention of them! So Today, I come up with an innovative way to present chapati’s, that’s filling, nutritious and super yummy.
Photo: Chapati Rolls Stuffed with Mince
One of my favorite things to eat is a roll stuffed with goodies.I enjoy food that I can eat with my hands and this dish is no exception. It’s very easy to make and delicious to eat. These chapati rolls is excellent for suhoor meals that can be made quickly with the left over chapati’s.
Photo: Chapati Rolls Stuffed with Mince
Also Perfect to bring on a trip or a picnic as they are easy to wrap and taste just as great when eaten lukewarm or chilled. Give a try and enjoy.
Bismillah, let’s get started!
Check it out the Chapati Rolls Stuffed with Mince recipe and printable version below.
A simple and nutritious snack, chapati (flatbread) stuffed with spicy mince filling, salad and chutney, perfect for busy morning breakfast and also lunch.
Heat oil or butter in a large pan over medium high heat.
Saute onion for 2-3 minutes. When the onions have softened up but not yet golden in colour add ginger and garlic, and cook for 1 minute.
Then add mince and let it drain out most of the moisture for about 4-5 minutes.
Add green chilies, red pepper and salt.
Reduce the heat on low and cover the pan. Let it simmer for 25 minutes or until mince is cooked thorough and all water dries up.
Remove the lid and cook on high flame for 3-4 minutes then add chili garlic sauce and soy sauce.
Cook 2 minutes longer then turn the heat off.
Sprinkle mint and coriander leaves.
To Assemble Chapati Rolls
Reheat chapati’s.
Place chapati on a clean board, spread 1 tablespoon mayonnaise on it. Then add the mince stuffing across the center.
Drizzle some mint chutney.
Sprinkle veggie salad and roll up the chapati.
Secure with toothpick. Don’t worry if it gets a little messy eating that’s just a art of the fun of eating a roll. ENJOY 🙂
Notes
Serving Suggestions: Serve with salad, french fries and chutney. Or you can serve everything separate and let your guests or family prepare their own stuffed chapati rolls.
Recipe Note’s:
You can also stuff these chapati rolls with chicken or beef mince, or colorful veggies.
If you prepare the chapatis ahead make sure to store them in an airtight container. If not they will become very hard and dry.
I have also posted Shami Kabab Paratha Rolls Recipewhich is another easiest & tastiest version of making Paratha Rolls. Do check it out as well. It’s finger lickin’ good. You’ll be coming back for more.
Put your own spin on it. And lemme know how it turns out. Post a photo on Facebook (Recipestable) or on Twitter so I can see how lovely yours turn out.
If you like this post, Please Subscribe to my blog and let me know your feedback by commenting below.. I have lots more recipes to share with you.
In the Name of Allah, Most Gracious, Most Merciful
When you’re home alone and nobody has made dinner, what do you usually make for yourself to eat? To me dining alone, at home means you can really break all the rules. You Make Fish and Chips And go a bit overboard and make pasta salad. Cooking is my therapy and my cure all. Whipping up ingredients, the aroma of food, that first bite, the feeling that it has all come together just right is a balm like no other.
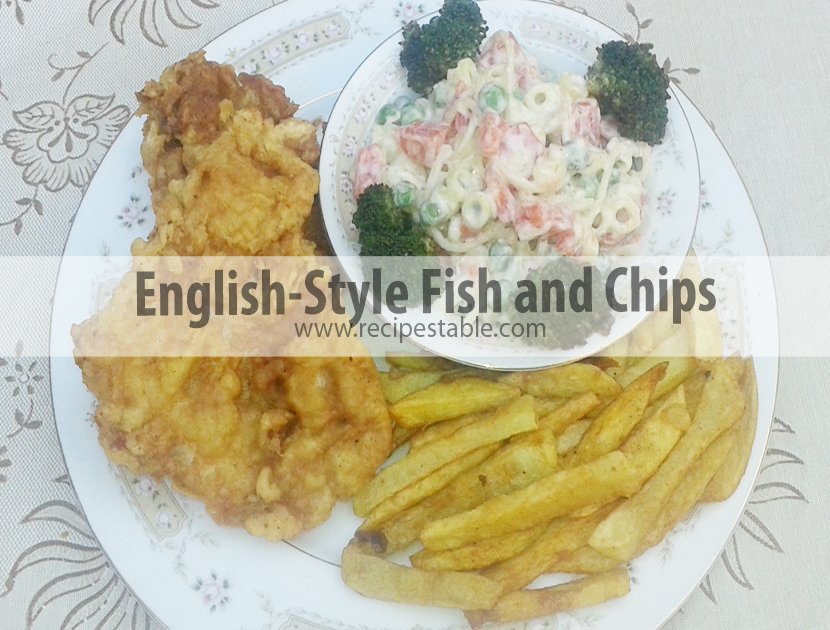
Photo: English-Style Fish and Chips
English-Style Fish and Chips
Fish n chips is the most popular English fast food. Traditionally battered fried fish is served with delicious potato chips, tartar sauce, mushy peas and lemon quarter to spice up the meal.
Photo: English-Style Fish and Chips
That fateful day, I craved some kind of fast foodwith all my being. I opened my freezer and was looking around for inspiration when some fish fillets caught my eye and I knew what was coming next. So, I decided to make Fish and Chips, and they turned out awesome! This English-Style Fish and Chips is gloriously indulgent. It is so good on it’s own, but I suspect it would be even better paired with some kind of salad. Super filling; a complete balanced meal all in one platter. Save yourself some time and money, and try this English-Style Fish and Chips, and quell those cravings!
Photo: English-Style Fish and Chips
The condiments are all up to you. You can serve it with any sort of sauce, however much you like.But I enjoyed it with veggie pasta salad.
If you want, I can put up a detailed post on this Veggie Pasta Salad next. Just let me know in the comments box below.
Super filling; a complete balanced meal all in one platter.
Bismillah, let’s begin!
Check it out the English-Style Fish and Chips recipe and printable version below.
I have also posted Crumb Fried Fish Recipewhich is another easiest & tastiest version of making Fried Fish. Do check it out as well.
Put your own spin on it. And lemme know how it turns out. Post a photo on Facebook (Recipestable) or on Twitter so I can see how lovely yours turn out.
Happy Cooking!!
If you like this post, Please Subscribe to my blog and let me know your feedback by commenting below.. I have lots more recipes to share with you.
In the Name of Allah, Most Gracious, Most Merciful
Need a great recipe for just the ingredients you have on hand? Then try this one. Your kids will love opening their lunch boxes to enjoy these “Mince Stuffed Cutlets”.
Photo: Mince Stuffed Cutlets Recipe
Mince Stuffed Cutlets
When I was in college, these “Mince Stuffed Cutlets” was one of the first recipes I ever added to my regular rotation.
Mince Stuffed Cutlets is a great appetizer that involves soft delicate potato patties stuffed with seasoned cooked mince. Delicious and crispy patties that can be made in just 35 minutes. These make a great snack or appetizer or even a starter for parties or perfect for weekend meals.
Photo: Mince Stuffed Cutlets
I used to fill my cutlets with spinach, broccoli, cheese, or whatever ingredients I have in my hand. It’s so fun to experiment with different ingredients, home cooking should be easy and fun! Although I enjoyed a lot of combinations, mince stuffed cutlets was always my favorite (and cheese, too).
I know it seems quite far apart but when you take a bite it taste very close to the potato chops.
Photo: Mince Stuffed Cutlets Recipe
There are many variations I have seen online. Some use a little flour mixed with the potato mash, an egg wash, bread crumbs and cornflour. You can make it vegetarian by using cooked peas and carrots in garam masala with some onions and fresh coriander then mixed with the mashed potato and shallow fried. You can replace the lamb mince with cooked ground chicken or beef, or fish. Try getting more creative: This is great fun – keep adding different ingredients to taste the different flavors.
Photo: Mince Stuffed Cutlets
Bismillah, let’s begin!
Check it out the Mince Stuffed Cutlets recipe and printable version below.
Recipe Note’s:
You can use Chicken /Mutton /Beef mince as on your choice.
These freeze quite well so you can pop them in the freezer before frying them and then completely defrost and then coat and fry.
I have also posted Sesame Potato Cutlets Recipe which is another easiest & tastiest version of making Cutlets. Do check it out as well.
Put your own spin on it. And lemme know how it turns out. Post a photo on Facebook (Recipestable) or on Twitter so I can see how lovely yours turn out.
Happy Cooking!!
Keep remember me in your Dua’s and Stay tuned for new content on the blog 🙂
If you like this post, Please Subscribe to my blog and let me know your feedback by commenting below.. I have lots more recipes to share with you.
In the Name of Allah, Most Gracious, Most Merciful
Happy Spring Season!
Spring seems to be here, which is just amazing – I honestly just want to run around outside all day everyday and enjoy the beautiful sunshine! I love how the world changes when the sun comes out, everyone is so much happier and life just seems brighter and more awesome. It’s one of my favorite season of the year because of it’s colors, flowers, birds cheering. What a great blessing of Allah (SWT). Alhumdulillah.
One of the most important things about this season is the positive impact you can make for your health and well being! So, Today I am sharing a SUPER yummy healthy, nutritious pasta recipe that has become a new family favorite around here (jus 237 calories)!!
Chicken Tikka Masala Macaroni (Clean Eating Version)
Chicken tikka Masala works well with macaroni. Who knew?
Photo: Chicken Tikka Masala Macaroni (Clean Eating Version)
Normally I’m not a huge pasta lover. But this Chicken Tikka Masala Macaroni is exactly how I like to eat macaroni when I want to follow my clean eating diet and don’t wish to work with many ingredients and want to cook dinner easily! This macaroni is in Pakistani Style, tossed with chicken, tikka marinade, and fresh veggies.
Pretty nutritious isn’t it? Honestly, it’s a dish which will satisfy your taste buds and same time will give you a proper nutritious lunch or dinner.
Photo: Chicken Tikka Masala Macaroni (Clean Eating Version)
Yeah, I know you will say’hey, Macaroni is surely not so Asian’, not in clean eating and will give me a doubtful look. But trust me that you will never be disappointed if you will give that Asian twist to any of your dishes.
This Chicken Tikka Masala Macaroni is so easy and will be made with such ingredients, which you can find at your kitchen any time. So surely, it will be a time save too. For clean eating purpose, please make sure you are using whole grain pasta and Organic chicken.
This may not be the more traditional version you’re thinking of, but it’s close enough to get the job done and it definitely qualifies as comfort food.
Photo: Chicken Tikka Masala Macaroni (Clean Eating Version)
Serve this decadent dish with a fresh green salad or some lightly steamed broccoli with a squeeze of lemon. By the way, this dish could just as easily be vegetable tikka mac and cheese if you substitute the chicken with some veggies such as cauliflower, zucchini or eggplant instead. Give this unusual recipe a try and let me know what you think! This is sure to be a winner with all the family.
Check it out the Chicken Tikka Masala Macaroni (Clean Eating Version) recipe and printable version below!!
Put your own spin on it. And lemme know how it turns out. Post a photo on Facebook (Recipestable) or on Twitter so I can see how lovely yours turn out.
Happy Clean Eating!!
If you like this Chicken Tikka Masala Macaroni (Clean Eating Version), Please Subscribe to my blog. I have lots more recipes to share with you. And If you make it then let me know your feedback by commenting below.
In the Name of Allah, Most Gracious, Most Merciful
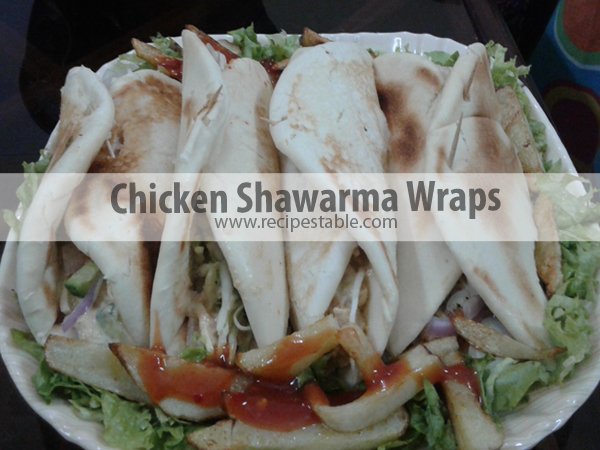
Shawarma is eaten in Arab countries, Pakistan, South Africa and the United Kingdom, and the meats, toppings and sauce vary depending on the country. Traditionally, Shawarma is made with chicken, lamb, beef, or goat that has been marinated, and is wrapped and cooked on a vertical rotisserie (similar to Greek gyro meat). When an order is placed, meat is shaved off and served as a wrapped sandwich (using pita bread) with fresh pickles and sauce.
Photo: Chicken Shawarma Wraps Recipe
Chicken Shawarma Wraps
So today, I’m going to share this awesome Chicken Shawarma Wraps recipe with my fans. This dish is not hard to make, it just requires a little bit of planning ahead. Well worth the effort!
Photo: Chicken Shawarma Wraps Recipe
This Chicken Shawarma Wraps recipe is bursting with middle eastern flavors. Simple to make. Think of your favorite gyro place where they are slicing meats from a spit, and placing it inside of warm pita or flat-bread, along with sauces and vegetables. That’s shawarma, and this is my take on it. Did I mention my entire family was totally in love with this??
Photo: Chicken Shawarma Wraps Recipe
It is really difficult to recreate the taste of shawarma at home, but this recipe I think, does it justice. The key is to leave the chicken marinading overnight for maximum flavour, and to have the grill smoking hot when cooking. And I made the Shawarma Pickles two days before and made a batch of sour cream as well as hummus sauce.
Photo: Chicken Shawarma Wraps Recipe
Sorry I din’t get step by step picture as I was in a bit hurry to assemble the wraps. But I will try to upload step by step pictures later. InshaAllah !!
Let’s get started !
Check it out the Chicken Shawarma Wraps Recipe and printable version below!!
Important Tips:
Try not to pile the pitas on top of each other until after they have cooled. This keeps them nice and plump for filling.
To store pita breads, you can wrap them in cling film and freeze for up to 3 weeks.
For the filling you can use any mixture of your choice with salad, just slit the pitas and stuff them with your favorite ingredients.
You can also make pita breads on a frying pan or hot griddle or even it a bread-maker.
If you like this Chicken Shawarma Wraps Recipe, Please Subscribe to my blog. I have lots more recipes to share with you. And If you make it then let me know your feedback by commenting below.
Looking for a simple meal? Then try this Chicken Shorba Recipe, you will like the taste of Chicken Shorba._ perfect for week days. It’s a good change in your lunch or dinner. This lip smacking Chicken Shorba Recipeis one of my favorite. It’s prepared in chicken stock with addition of traditional Pakistani ingredients, texture and consistency of an Pakistani Stew and the aroma of Oriental spices.
After a weekend of delicious excesses, I’m ready for a healthy alternative. This weekend I’ve eaten like a queen –fried food, buttery paratha’s, creamy curries, biryani’s, naan, and more units of chocolates than I really care to count. So today I’decide to make light and nutritious meal. Weather is quite rainy so relaxing with this warming and nutritiousChicken Shorba –Chicken Curry– will be something to look forward to when I get home back from Uni. I made this Chicken Shorba last night and it only took 1 hour to prepare and cook. It’s in the fridge now and can be warmed up in few minutes. Normally I would serve this tangy and satisfying Chicken Shorba (chicken soup) with steamed rice but to make it easy, I served it with tandoori roti.
Photo: Chicken Shorba Recipe
Almost every country has their own version of chicken soup. I hope you like and enjoy this version as much as I do! If you like this Chicken Shorba Recipe, Please Subscribe to my blog. I have lots more recipes to share with you.
Check it out the Chicken Shorba Recipe and printable version below!!
Put your own spin on it. And lemme know how it turns out. Post a photo on Facebook (Recipestable) or on Twitter so I can see how lovely yours turn out.
Happy Cooking!!
If you like this post, Please Subscribe to my blog and let me know your feedback by commenting below.. I have lots more recipes to share with you.
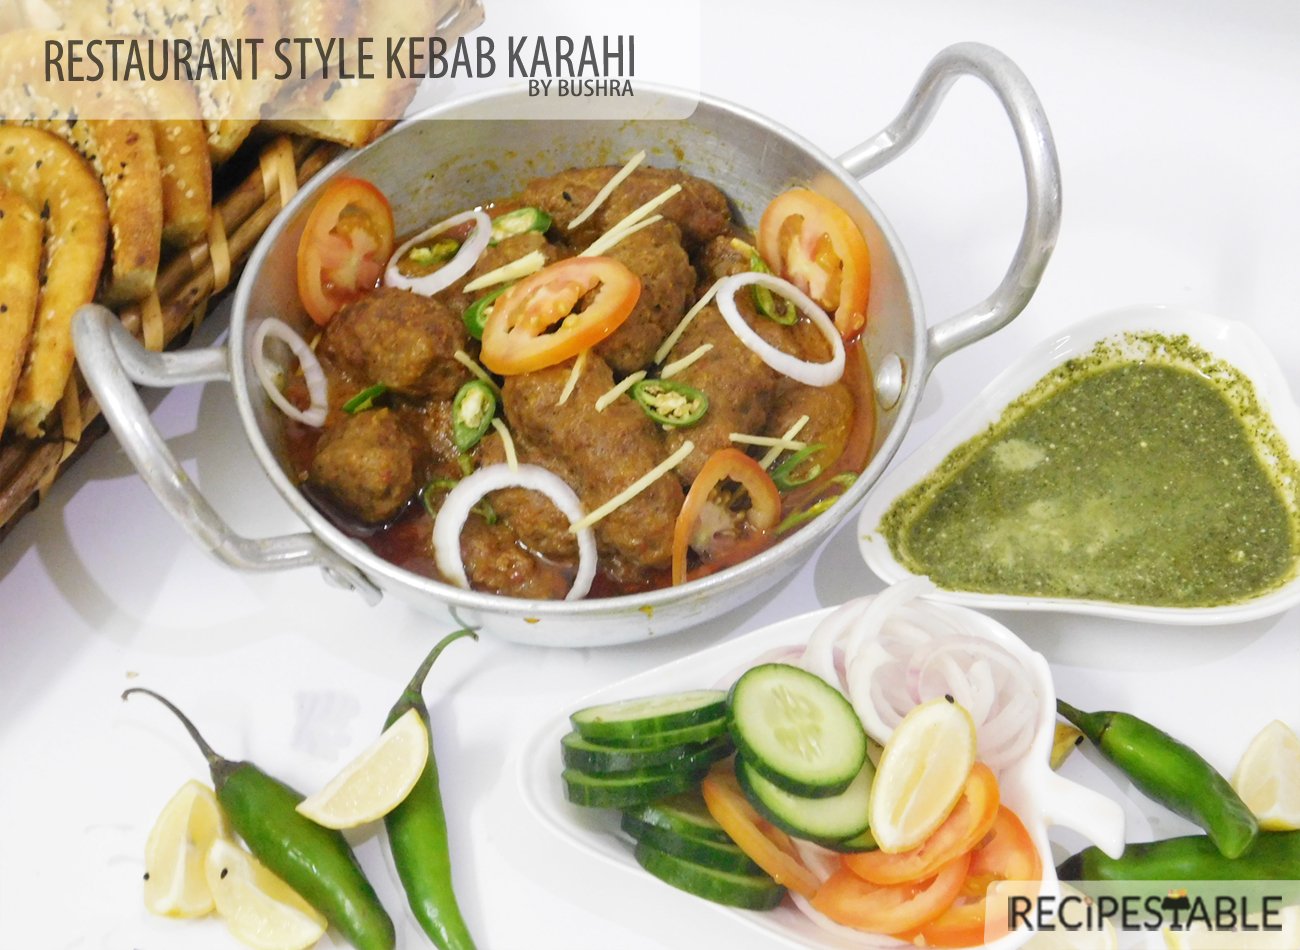
Who said you can’t make restaurant style Kebab Karahi at home ?? and Who said, you need ready made brand karahi Masala to get the authentic flavor ?? They are wrong !! Try this Kebab Karahi recipe and find on your own.
Restaurant Style Kebab Karahi Recipe
Kebab Karahi
Restaurant Style Kebab Karahi Recipe
This Kebab Karahi recipe is so easy to make but so tasty to eat. I have made quite a few Kebab recipes you can check them all here.This Kebab karahi has a creamy gravy (curry) which makes it more tasty and flavourful. I made this for a family get together, this dish tastes divine and it is always a big hit among my guests.So hope you will try this out and let me know how it turned out for you.
This is a simplest kebab curry you can imagine. It can be made in a jiffy and taste great with either rice or roti. So good.
Don’t skip the papaya paste . That’s the one of two ingredients that make the kabab so melt in mouth . The other ingredient is lamb fat . In authentic recipe kebab is used for this kabab , but beef would do too . If you can’t find the mutton or beef fat , don’t worry substitute it with ghee .
Check it out the Kebab Karahi Recipe and printable version below!!
I have also posted Namak Mandi Karahi Goshtwhich is another easiest & tastiest version of making Karahi. Do check it out as well.
Put your own spin on it. And lemme know how it turns out. Post a photo on Facebook (Recipestable) or on Twitter so I can see how lovely yours turn out.
Happy Cooking!!
If you like this post, Please Subscribe to my blog and let me know your feedback by commenting below.. I have lots more recipes to share with you.
There is no limit to stuffed paratha. You can stuff the parathas with almost anything, but I’m sure you have never tried boiled eggs stuffed parathas before.Great recipe for Suhoor!They taste simply superb.
Photo: How to make Egg Paratha
This Egg Paratha recipe is easy, simple and takes less time, especially if you have leftover wheat dough.It’s protein rich, healthy and tasty. You can make it for your kids as a after school snack.
Photo: Egg Paratha Recipe
How to make Egg Paratha
Learn how to make egg Paratha by following the step by step instructions as shown in pictures. The recipe is simple and very easy to follow. You would successfully cook it in first attempt. (InshaAllah)
Bismillah Let’s Begin!
Step 1 : Mix the wheat flour with salt, water and knead to a smooth dough. Keep it aside for 30 minutes.
Step 2: Then make small balls from the dough and keep it aside.
Step 3: Take a mixing bowl, add mashed eggs add salt, pepper, chili powder, coriander and little bit of oil. Mix thoroughly.
Step 3 ~ Egg Paratha
Step 4:Take the dough balls and roll out each ball into a thin disc or a chapati.
Step 4 ~ Egg Paratha
Step 5:In the middle, place the filling mixture on one round chapati and cover with a another round chapati and seal the edges.
Step 5 ~ Egg Paratha
Step 6:Now sprinkle a little dry flour on top, then roll the paratha to a thin round shape chapati. Take care it should not break while rolling it out.
Step 6 ~ Egg Paratha
Step 7:Grease your tava OR griddle with Ghee (clarified butter) and place the paratha over it and when the base turns slightly golden color, apply Ghee (clarified butter) on the top and turn the paratha on the other side.
Step 7 ~ Egg Paratha
Step 8:Fry these parathas on both sides, pressing gently and keep turning the paratha until it turns golden brown.
Step 8 ~ Egg Paratha
Check it out the Egg Paratha recipe and printable version below:
If you like this Egg Paratha Recipe, Please Subscribe to my blog. I have lots more recipes to share with you. And If you make it then let me know your feedback by commenting below.
A simple fish tikka sandwich that can be made with any white fish fillets. Served on toasted bread slices with boiled egg, lettuce leaves and cabbage coleslaw. YUM YUM YUMMY Treat!!
Photo: Fish Tikka Sandwich Recipe
It was a lazy weekend and I was making plan to go out for Lunch….Italian, Mexican, Chinese were the options that came up…..Ehhh Not really!! Nothing fared in front of the idea of having a Spicy Fish Tikka sandwich…made to perfection at HOME!!
Today, I am so excited to share this Fish Tikka Sandwich Recipe with you guys. I love to eat fish because it’s a key component of a healthy diet and a best source of protein and minerals. And I can get lot of energy with eating fish.
Photo: Fish Tikka Sandwich Recipe
The juicy tender fish marinated in yogurt, lemon juice and tikka spices and the cabbage coleslaw on a crusty bread….a sandwich at its best!!Not only is Fish Tikka delicious the day you make it, if you’re lucky to have some left over the next day, make it into a sandwich.
Photo: Fish Tikka Sandwich Recipe
I love fish sandwiches, but you can always broil or grill the fish if you prefer.A must try recipe!
Check it out the Fish Tikka Sandwich Recipe and printable version below!!
A simple fish tikka sandwich that can be made with any white fish fillets. Served on toasted bread slices with boiled egg, lettuce leaves and cabbage coleslaw. YUM YUM YUMMY!!
Prep Time 20 minutesminutes
Cook Time 15 minutesminutes
Total Time 35 minutesminutes
Servings 6
Author Bushrah | Recipestable
Ingredients
Ingredients
For Fish Tikka
500gm boneless fish fillets
2tablespoonplain yogurt
2tablespoonlemon juice
1teaspoonginger garlic paste
1teaspooncrushed red chili
1/4teaspoongaram masala powder
salt to taste
a pinch of chat masala
few drops of oil
For Fish Tikka Sandwich
fish tikka
12bread slices
1cupcabbage coleslaw
3lettuce leaves
3boiled eggssliced
3teaspoonchili sauce
butter as required
few wooden picks
Instructions
Directions
Wash and clean the fish.
Cut into cubes.Apply salt, red pepper and lemon juice and keep aside.
Now add remaining fish tikka ingredients.
Cover and marinate for at least 20 minutes to blend flavors.
Heat little oil in a grill pan.
Grill fish for 5-8 minutes or until fish flakes easily with a fork.
Toast bread slices with butter.
Divide cabbage coleslaw into three slices.
Cover the second slice of bread and put fish tikka on it.
Cover again and put lettuce leaves and egg slices.
Cover with the 4th slice of bread.
Cut into four triangular pieces.
Secure with wooden picks. Delicious Fish Tikka Sandwich is ready to serve. ENJOY!!
Notes
Serving Suggestions: Serve with creamy veggie salad.
I have also posted Chicken Finger Sandwiches Recipewhich is another easiest & tastiest version of making sandwiches. Do check it out as well.
Put your own spin on it. And lemme know how it turns out. Post a photo on Facebook (Recipestable) or on Twitter so I can see how lovely yours turn out.
Happy Cooking!!
If you like this post, Please Subscribe to my blog and let me know your feedback by commenting below.. I have lots more recipes to share with you.
Start your Suhoor meal with my Shami Kabab Paratha Rolls Recipe with freshly made raita or a cup of Chai.
Photo: Shami Kabab Paratha Rolls
This Shami Kabab Paratha Rolls Recipe is one of those meals of which most of the components can be prepared in advance and then put together quickly to serve as and when needed. It is always a hit with people of all ages, and perfect for those lazy afternoons when you cannot be bothered to cook something from scratch but want a warm and filling snack to comfort you. I always have a batch of parathas and shami kababs in my freezer specifically for such instances.
Photo: Shami Kabab Paratha Rolls
Its an economical fast food meal that goes well as an appetizer or side dish. Here’s a perfect Shami Kabab Paratha Rolls that you can make these easily at home, no doubt that in half an hour, you can serve your family these delicious paratha rolls in a unique and imaginative way. Do try it!!
Photo: Shami Kabab Paratha Rolls
Check it out the Shami Kabab Paratha Rolls Recipe and printable version below!!
This Shami Kabab Paratha Rolls Recipe is one of those meals of which most of the components can be prepared in advance and then put together quickly to serve as and when needed. It is always a hit with people of all ages, and perfect for those lazy afternoons when you cannot be bothered to cook something from scratch but want a warm and filling snack to comfort you.
Prep Time 10 minutesminutes
Cook Time 15 minutesminutes
Total Time 25 minutesminutes
Servings 2
Author Bushrah | Recipestable
Ingredients
2Whole Wheat Parathayou can use ready made Frozen Paratha
I have also posted Hot and Spicy Kebab Paratha Rollwhich is another easiest & tastiest version of making dinner. Do check it out as well.
Put your own spin on it. And lemme know how it turns out. Post a photo on Facebook (Recipestable) or on Twitter so I can see how lovely yours turn out.
Happy Cooking!!
If you like this post, Please Subscribe to my blog and let me know your feedback by commenting below.. I have lots more recipes to share with you.
So Ramadan is coming up and we are all gearing up for it. Not only spiritually but also deliciously!! After a couple of random posts I will be posting over all the dishes that are very popular during Ramadan in our household and will share the recipes and other stories with you all.. so look forward to this space!!!
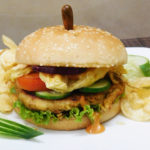
My Mom made some Shami Kababs for a dinner party few weeks ago and had some left, so during one of the weekdays, I made these shami kabab burgers which weren’t just filing but very delicious as well. My Brother kept asking for more but I only had a few shami kababs left. This is a very simple and filling snack that is worth trying!
Shami Kabab Burger Recipe
Shami Kabab Burger Recipe
Shami Kabab Burger Recipe
If you want something astonishing but healthy for your your family then this do try this Shami Kabab Burger Recipe. It contains lentil and meat which is high in vitamins, protein and minerals.
Check it out the Shami Kabab Burger Recipe and printable version below!!
If you want something astonishing but healthy for your your family then this do try this Shami Kabab Burger Recipe. It contains lentil and meat which is high in vitamins, protein and minerals.
Toast burger buns and spread mayonnaise over them.
Place shami kababs, lettuce and onion over the buns.
Drizzle with ketchup and green chutney.
Place some cheese on one side of the bun and toast till cheese melts away.
Place the cheesed bun on the top.
Cut into halves. Shami Kabab Burger is ready to serve. ENJOY!!
Notes
Serving Suggestions: Serve with chips and ketchup.
Pin It For Later
If you like this Shami Kabab Burger Recipe, Please Subscribe to my blog. I have lots more recipes to share with you. And If you make it then let me know your feedback by commenting below.